Create and Manage Unsubscribe Groups
Info
This page is describing the functionality of the new Marketing Campaigns experience. If you're using legacy Marketing Campaigns, your workflow and screens may be a little different. For more information on the new Marketing Campaigns experience click here.
Adding Unsubscribe Groups to your emails makes it easy to honor your recipients' email preferences and protect your sender reputation by complying with anti-spam legislation.
To create an Unsubscribe Group:
- Select Marketing and then click Unsubscribe Groups.
- Click Create New Group.
- Add a Group Name and Group Description.
Info
Make sure your Group Names and Group Descriptions are customer-friendly. This is what your recipients will see.
- Select the checkbox if you want the Unsubscribe Group to display on the unsubscribe preferences page.
- Click Save Unsubscribe Group.
Info
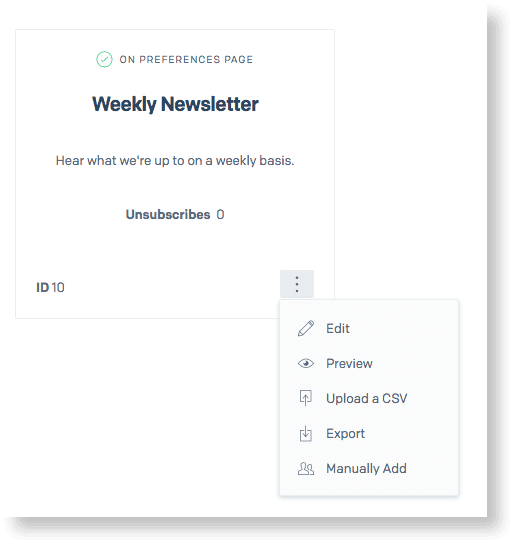
To view the unsubscribe preferences page, select the action menu next to an Unsubscribe Group and then click Preview. Toggle to the Unsubscribe Preferences tab to view all of the options listed.
Using the Design Editor:
- Select your preferred Unsubscribe Group by clicking Settings and selecting the group from Recipients.
- From the Build tab, drag the Unsubscribe module to insert Sender Information and a link to the
{{{unsubscribe}}}tag. - To manually hyperlink to the
{{{unsubscribe}}}tag, enter the text you would like to link. - Highlight the text then select the link icon from the top toolbar.
- In the URL field enter
{{{unsubscribe}}}, then click Save.
Using the Code Editor:
- Select your preferred Unsubscribe Group by navigating to Settings and then selecting Recipients.
- Enter the following code styling to the HTML window where you would like your unsubscribe content placed:
<a href="{{{unsubscribe}}}">Click here to unsubscribe.</a>
While Twilio SendGrid Unsubscribe Groups are a powerful way to manage unsubscribes and email preferences, we realize some senders may have their own subscription management tools. For these senders, Marketing Campaigns supports custom unsubscribe links as well.
If you would like to use a custom URL for your unsubscribe link, from the Editor, navigate to Settings in the left-hand sidebar and select the Recipients dropdown menu. Under Unsubscribe Group, select Use Custom Link...
This will expand a new field where you can insert a URL for one of your own pages where recipients can manage their subscription preferences.
To place your Custom Unsubscribe link into your email, highlight any text within the body of your email and click the small link icon to specify a hyperlink. In the URL field that appears, enter the tag {{{unsubscribe}}}. Since you've specified your Custom Unsubscribe Link in the Settings panel, SendGrid will replace the Unsubscribe Tag with your custom URL.
You can add recipients to an unsubscribe group by uploading a CSV or adding them manually using the UI. To programmatically add recipients to an unsubscribe group, see our API documentation
To upload a CSV:
- Find the group you want to add recipients to and click the action menu.

- Select Upload a CSV.
- Drag the CSV you want to upload into the field, or click select a CSV file to upload and locate the file you want to upload from your files.
- Click Upload CSV.
To manually add recipients to an Unsubscribe Group:
- Find the group you want to add recipients to and click the action menu.
- Select Manually Add.
- Enter a recipient email address and then click Save.
From the UI, you can edit Unsubscribe Groups or download a list of recipients that have unsubscribed from your emails. For more information on managing unsubscribes, see the SendGrid Suppressions Overview
To export an Unsubscribe Group List:
- Navigate to the Unsubscribe Group you want to export.
- Click the action menu.
- Select Export. Once the export is completed, a download link will be sent to the email(s) you either signed up with, or have set to receive notifications.
To edit an Unsubscribe Group:
- Navigate to the Unsubscribe Group you want to edit.
- Click the action menu.
- Select Edit.
From the Edit Group page, you can change the Group Name, Group Description, and display preferences.
To delete an Unsubscribe Group:
- Navigate to the Unsubscribe Group you want to delete.
- Click the action menu.
- Select Edit. The Edit Group page opens.
- Click Delete Group.
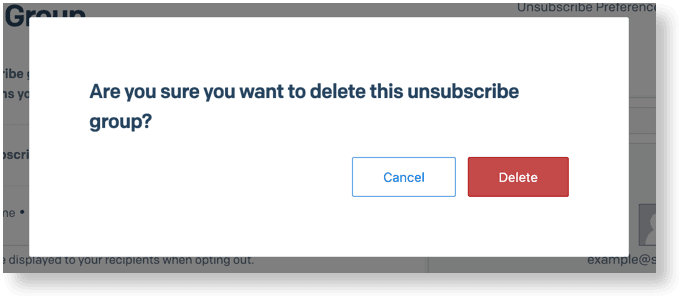
- Confirm that you want to delete the selected group and then click Delete.
