Using CloudFlare as your Content Delivery Network (CDN)
The following instructions assume you already have a CloudFlare account made, using either a Full DNS setup or a CNAME setup. You can compare the 2 different setups here. Note that a CNAME setup is only available to Business or Enterprise level CloudFlare plans.
The instructions also assume that you have set up a valid branded link on your account. This step is essential for the following instructions to work.
Begin by logging into your CloudFlare account, and navigating to the DNS settings for your domain.

Add a new CNAME entry that points your configured branded link domain to sendgrid.net.

Once the record is created, click on the cloud icon under the Status column to turn it orange and enable HTTP proxy.

Next, navigate to the Page Rules settings for your domain. You will need to create a Page Rule for your branded link domain that sets SSL to Full. This is necessary due to how CloudFlare validates the certificate on the origin. You can find more information on the different SSL options here.
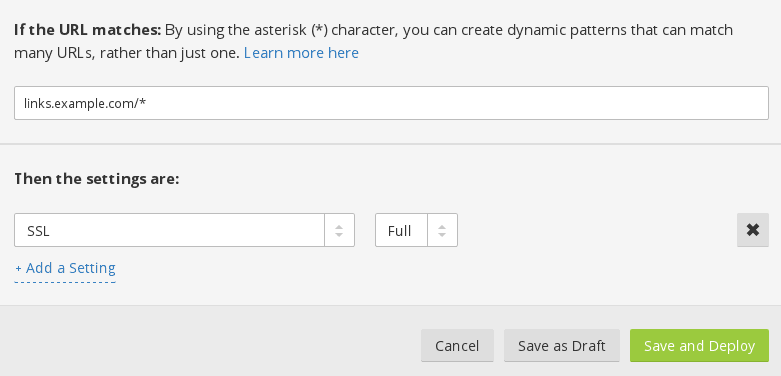
Ensure that the Page Rule is On.

If you are using a CNAME setup, you will also need to change DNS to point to the CloudFlare CNAME you created.
Once all of this is done, you will need to contact SendGrid support and request that SSL click and open tracking be enabled on your account. They will then verify the configuration and enable the setting on your account.