LaravelとTwilioによるSMSポータルの作成方法
Time to read:
March 22, 2019
執筆者

アプリケーションワークフローのある時点において、重要な情報をユーザーに渡すことが必要になる場合があります。Webテクノロジーが進歩したおかげで、この処理はプッシュ通知で簡単にできます。ただし、このようなサービスの多くは、ユーザーのインターネットに接続していることが必要ですが、残念なことに、常に当てはまるとは限りません。幸い、インターネットに依存しない通知システムを使用すると、この問題を解決できます。
このチュートリアルでは、TwilioのProgrammable SMSを使用し、Laravelを使用するSMS通知ポータルの作成方法について説明します。チュートリアルを終えると、カスタムのSMS通知ポータルを開発できます。このポータルでは、SMSにより、ダッシュボードを介してユーザーに通知できます。
必要条件
このチュートリアルを利用するには、以下の項目が必要です。
- Laravelの基礎知識
- ローカルマシンにインストールされたLaravel
- グローバルにインストールされたComposer
- ローカルマシンに設定されたMySQL
- Twilioアカウント
プロジェクトを設定する
始めに、LaravelインストーラーかComposerを使用し、新しいLaravelプロジェクトを作成する必要があります。このチュートリアルでは、Laravelインストーラーを利用します。Laravelがインストールされていない場合は、Laravelドキュメントでインストール方法を確認してください。新規にLaravelプロジェクトを生成するには、以下のコマンドをターミナルにて実行します。
作業ディレクトリをsms-portalに変更し、Composerを介してTwilio SDKをインストールします。
ComposerがPCにインストールされていない場合は、こちらの手順に従い、インストールしてください。
Twilio PHP SDKをインストール後、Twilio認証情報をTwilioダッシュボードから取得する必要があります。ダッシュボードに移動し、account_sidとauth_tokenを確認します。

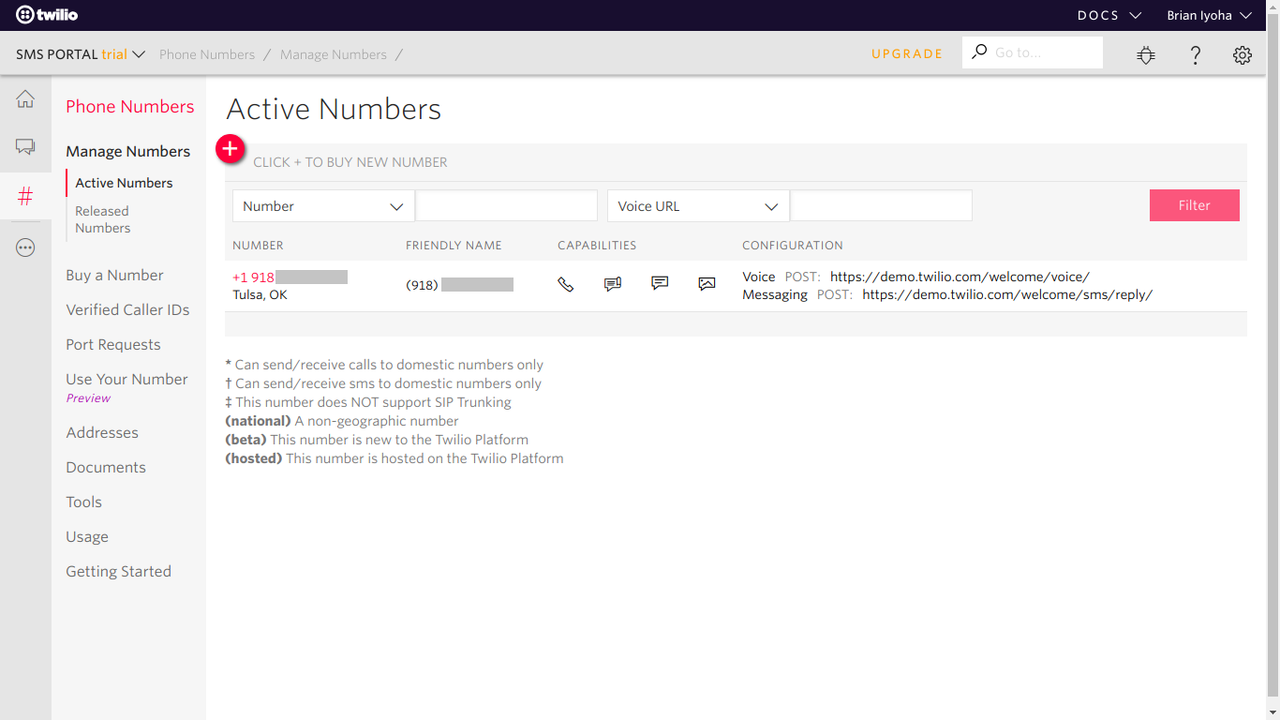
[Phone Number](電話番号)セクションに移動し、SMS対応の電話番号を確認します。
次のステップでは、Twilio認証情報を使用し、.envファイルを更新します。プロジェクトディレクトリのルートにある.envを開き、次の値を追加します。
データベースを設定する
Twilio SDKがインストールされた基本的なLaravelプロジェクトが生成されました。次に、データベースを作成しましょう。phpMyAdminなどのGUIアプリケーションを使用してデータベースを管理している場合は、それを使用してsms_portalという名前のデータベースを作成し、このセクションをスキップしてください。同等のアプリケーションやツールがなく、MySQLがインストールされていない場合は、プラットフォームの公式サイトからMySQLをインストールします。
ターミナルを起動し、以下のコマンドを実行し、MySQLにログインします。
注記: MySQLインスタンスのパスワードがある場合は、-pフラグを追加します。
ログイン後、次のコマンドを実行し、新しいデータベースを作成します。
次に進み、プロジェクトフォルダーのルートにある.envファイルのデータベース設定を適宜変更しましょう。
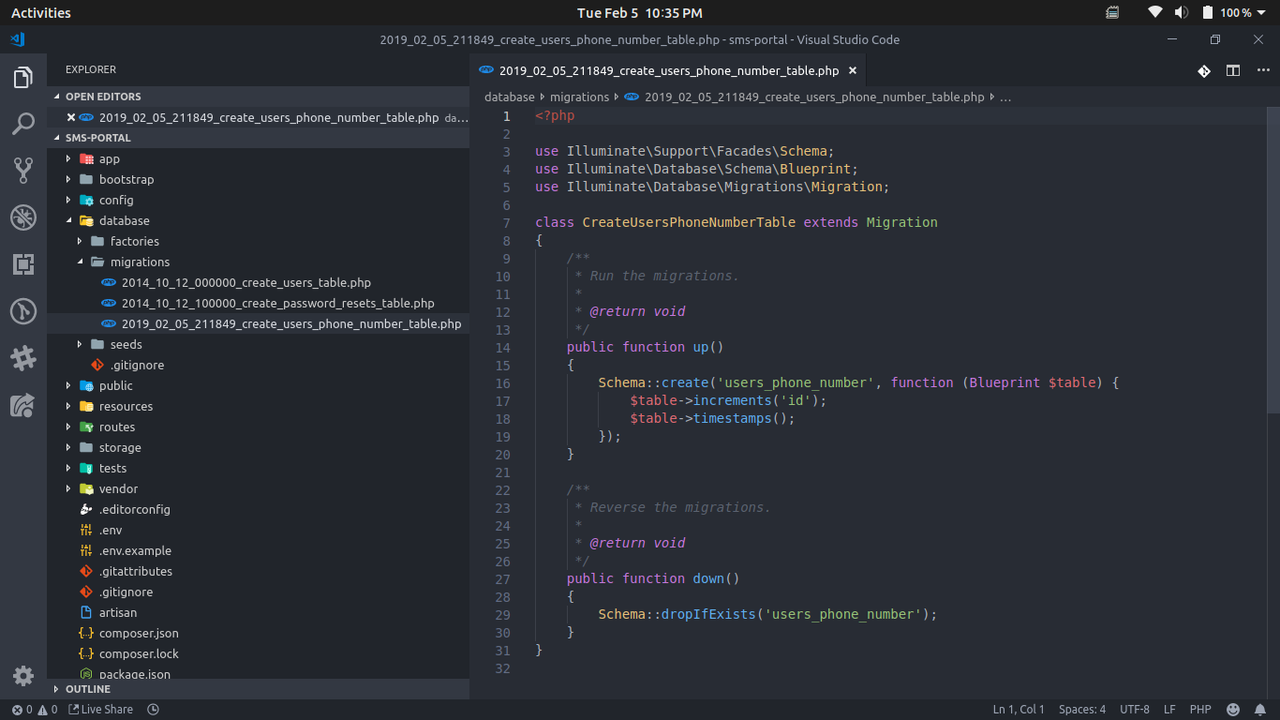
移行ファイル{current_time_stamp}_create_users_phone_number_tableが/database/migrationsディレクトリに生成されます。
プロジェクトフォルダーをIDEまたはテキストエディタで開くと、必要に応じて変更できるようになります。作成した移行ファイルを開きます。内容は次のようになります。
phone_number列をテーブルに追加する必要があります。これを行うには、up()メソッドを次のように編集します。
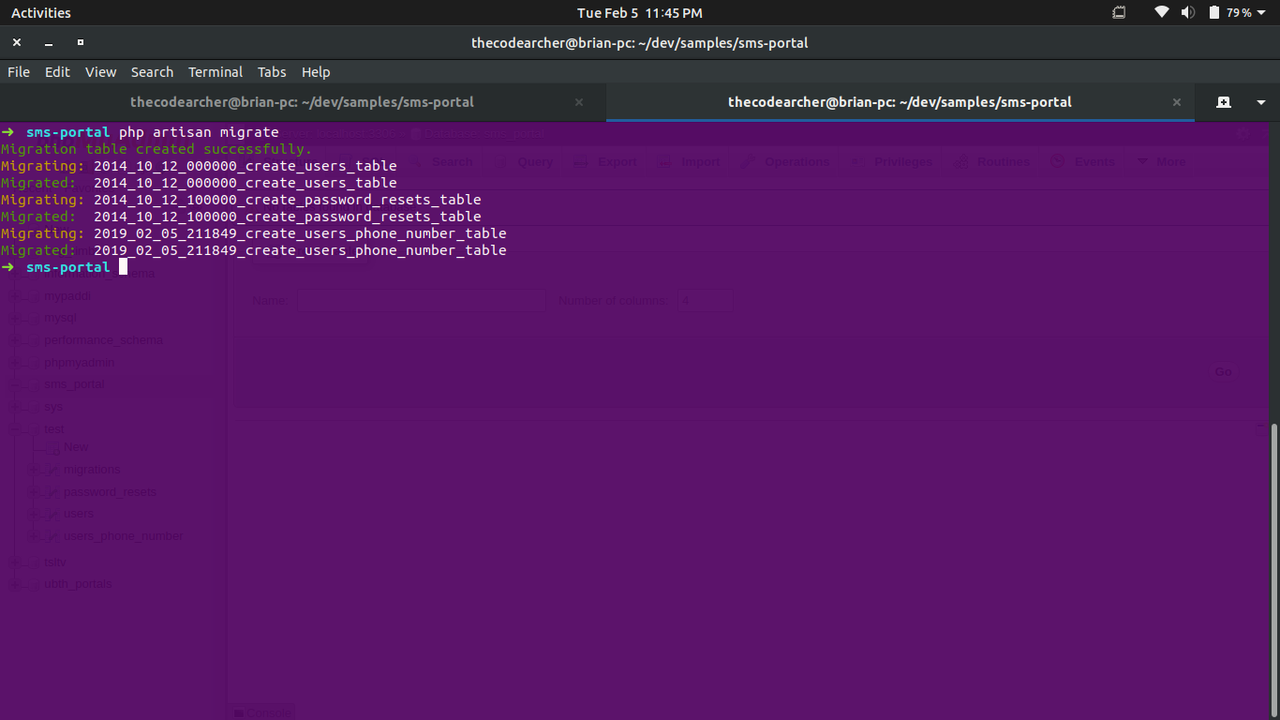
移行ファイルを移行できるようになりました。次のコマンドをターミナルで実行するだけで移行できます。
出力結果は次のようになります。
ユーザーインターフェイスを作成する
この時点において、プロジェクトのセットアップが完了しています。次に、データをデータベースに追加し、SMS通知を送信するためのシンプルなユーザーインターフェイスを構築します。
/resources/views/welcome.blade.phpを開き、<head>ブロックを次のように変更します。
ページの初期スタイルを削除し、簡単にスタイル設定できるようBootstrapCDNを使用し、ブートストラップを追加しました。次に、2つのフォームをページに作成します。フォームのうち、1つはユーザーの電話番号を登録するため、もう1つは選択したユーザーにカスタム通知メッセージを送信するためのものです。bodyブロックを次のように変更します。
上記のコードのうち、次の部分に注目します。
このスニペットは、このビューで返される利用可能なユーザーの電話番号を保存するオプションフィールドを生成するのに役立ちます。この機能は後ほど実装します。
ユーザーの電話番号を保存する
まず、クエリを実行し、レコードをデータベースに挿入するのに使用するモデルを作成しましょう。プロジェクトディレクトリにてターミナルを起動し、次のコマンドを実行します。
app/UsersPhoneNumber.phpにある作成したファイルを開き、次のコードを追加します。
注記: 次の点に注意してください。
protected $table= "users_phone_number";を追加するということは、Eloquentにテーブル名の使用を指示するということです。これを指定しない場合は、クラス名の複数形がテーブル名として使用されます。protected $fillableを追加すると、Eloquentにフィールドの一括割り当てを可能にするよう指示します(詳しくは、上記のリンク先を参照)。
次に、各リクエストルートに必要なロジックを実装するコントローラーを作成します。再度、ターミナルを起動し、次のコマンドを実行します。
その結果、次のような内容のコントローラーファイルがapp/Http/Controllers/HomeController.phpに生成されます。
電話番号の保存メソッドを作成する
リクエスト本文から渡されたデータを使い、新しいUsersPhoneNumberモデルをインスタンス化する関数を作成しましょう。
上記のコードでは、$request本文から渡されたデータで検証を実行してから、UsersPhoneNumberの新しいインスタンスを作成しています。ユーザーの電話番号を保存後、ウェルカムページに戻り、成功メッセージがセッションにフラッシュされます。
ユーザーの電話番号をビューに返す
次に、登録された電話番号のデータをビューに返す必要があります。HomeControllerにて、users_phone_numberテーブルのクエリを実行し、クエリ結果をビューに表示するシンプルな関数を記述しましょう。
注記: compact()は、変数名と値の配列を作成できるPHP関数です。
Twilio Programmable SMSによるメッセージの送信
次のステップでは、TwilioのProgrammable SMSライブラリーを使用したSMSの送信を実装します。HomeControllerにて、メッセージ送信のhelper関数として機能するprivate関数を作成します。
この関数は、$messageと$recipientsの2つのパラメータを受け取ります。次に、組み込みのPHP getenv()関数を使用し、保存されているTwilio認証情報を環境変数から取得します。その後、新しいTwilioクライアントを、認証情報を使いインスタンス化します。次の呼び出しにより、SMSを送信できるようになりました。
Twilioのmessages->create()関数は、2つのパラメータを受け取ります。1つはメッセージの受信者、もう1つはfromとbodyのプロパティによる配列です。fromは有効なTwilio電話番号です。
登録時にユーザー通知を送信する
sendMessage()関数が完成しました。この関数を使用し、メッセージをユーザーに送信します。次に、ユーザー登録が成功したことをユーザーに通知するためにstorePhoneNumber()関数を更新しましょう。これを行うには、storePhoneNumber()関数を次のように変更します。
いいですね!その結果、ユーザーの電話番号がデータベースに追加されるたびに、実行されたアクションについて注意喚起する通知メッセージをユーザーに送信できます。
カスタム通知を送信する
次に、選択したユーザーにカスタムメッセージを送信するための関数を記述しましょう。HomeControllerに次のコードを追加します。
フォームフィールドをルートで更新する
次に、resources/views/welcome.blade.phpに移動し、フォームフィールドを次のように変更します。
または
コードをテストする
これまでに作成したすべてのコードを1つにまとめましょう。この時点において、HomeController.phpは次のようになります。
ビューでは、welcome.blade.phpが次のようになります。
コードが同じの場合は、次に進むことができます。コードに違いがある場合は、コードを再確認し、不足している部分を見つけてください。
アプリケーションを実行する
ターミナルを開き、プロジェクトディレクトリに移動し、次のコマンドを実行します。
Laravelアプリケーションは、ローカルホストポート(通常、8000)にて実行されます。ブラウザーにおいてコマンドの実行後に表示されるローカルホストリンクを開きます。ページは次のように表示されます。
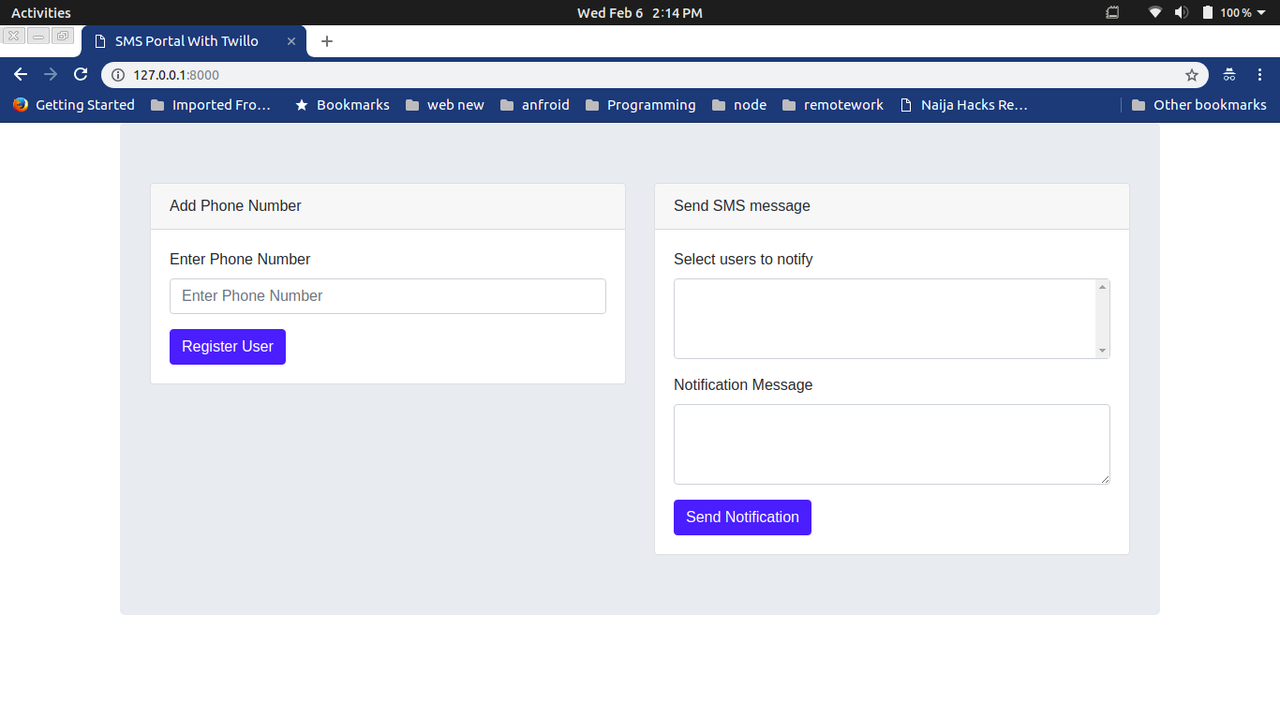
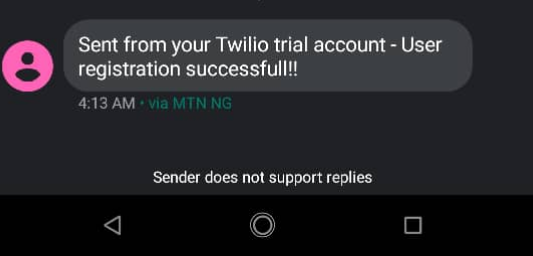
次に進み、新しい電話番号を登録します。すべての処理が正常に完了すると、まもなく登録について通知するSMSが届きます。
選択フィールドからユーザーを選択し、選択したユーザーに送信するテキストをテキスト領域に入力した場合、カスタム通知の送信もテストできます。完了後、[Send Notification]ボタンをクリックすると、カスタム通知メッセージがSMSにて届きます。
まとめ
チュートリアルが完了しました。Twilio Programmable SMSをLaravelアプリケーションに統合し、SMSを介して通知メッセージを送信できます。このチュートリアルの全ソースコードは、GitHubにて確認できます。
ユーザーが送られてきたSMS通知から行動を起こせるようにすることもできます。
このチュートリアルに関する質問はお気軽にお寄せください。連絡先は次のとおりです。
- メール: brian.iyoha@gmail.com
- Twitter: thecodearcher
- GitHub: thecodearcher