Build an Email Activation Flow with Django and SendGrid
Time to read:
Any web application that includes authentication processes should have some sort of email activation flow. If you don’t, you’re decreasing the possibility of contacting your users and opening a door for spammers to create fake accounts and affect your website.
This tutorial will teach you how to build confirmation emails to verify users’ registration using Django and SendGrid.
Django has a built-in mail sending interface, which we’ll be using to send emails with SendGrid through the tutorial.
After we finish, you’ll have an authentication system that requires users to verify their account with a confirmation email.
We’ll create a complete project from scratch but if you already have one, don’t hesitate in following along with this tutorial.
Whenever you want a quick reference to the code, you can visit this GitHub repository.
Prerequisites
To complete this tutorial, you’ll need the following:
- A SendGrid account (Start for free).
- Python 3 installed on your machine.
Create a Python virtual environment
It’s considered a good practice to set up a Python virtual environment for every Django project you start. This allows you to manage the dependencies of each project you have.
If you’re following along with a Unix based OS like Linux or macOS, open a terminal and run the following commands to create and source a virtual environment named venv:
In case the activation command doesn’t work, review this activation script table.
If you’re a Windows user, run the commands below:
Now that our virtual environment is active, let’s install all the packages we need:
- Django (Web framework)
- Django Crispy Forms (Stylize Django form templates)
- django-environ (Lets you set up and configure environmental variables)
To install them all, run this pip command:
Create a Django project
Now, create a folder called email-verification which will be the directory your project will be placed in. After that, start a Django project named config (considered a best practice) in the new directory:
After doing this, you should have the following file structure:
Run the server with the following command:
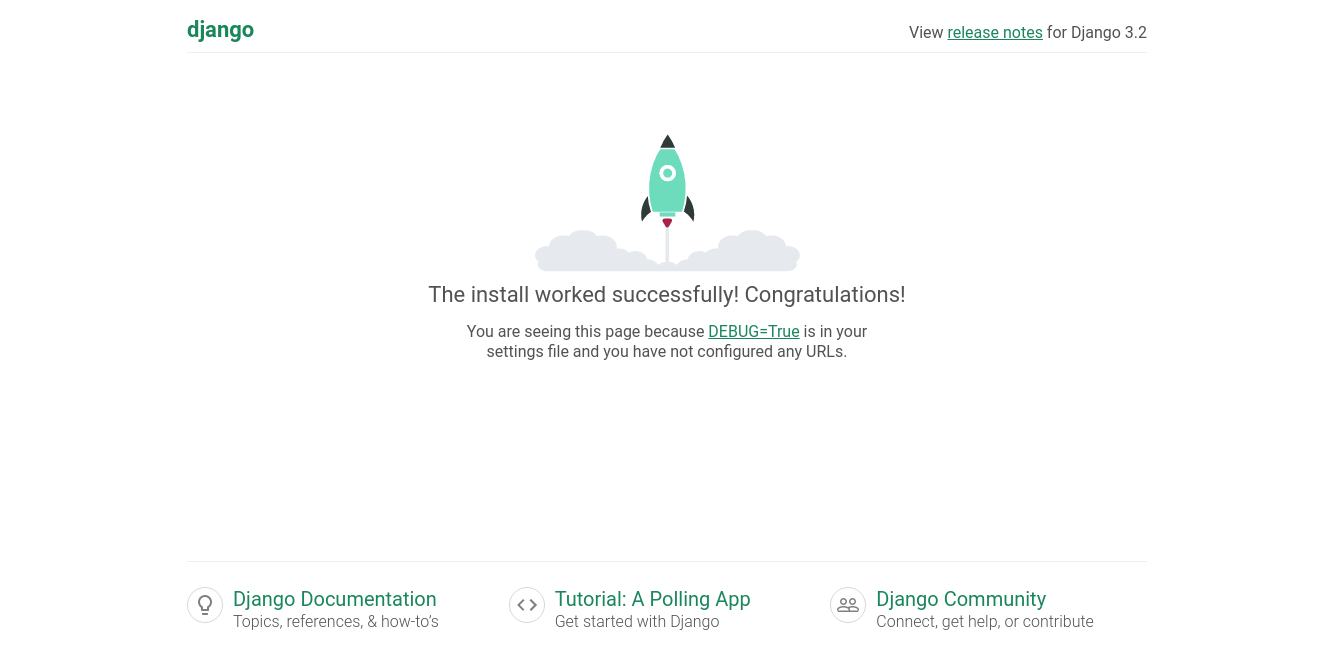
If you run the server and visit your localhost, you should see Django’s welcome page.
1. Get a SendGrid API key
Go to SendGrid’s API keys page, and get an API key for this project.

Click on the Create API Key button, which will open the following panel:
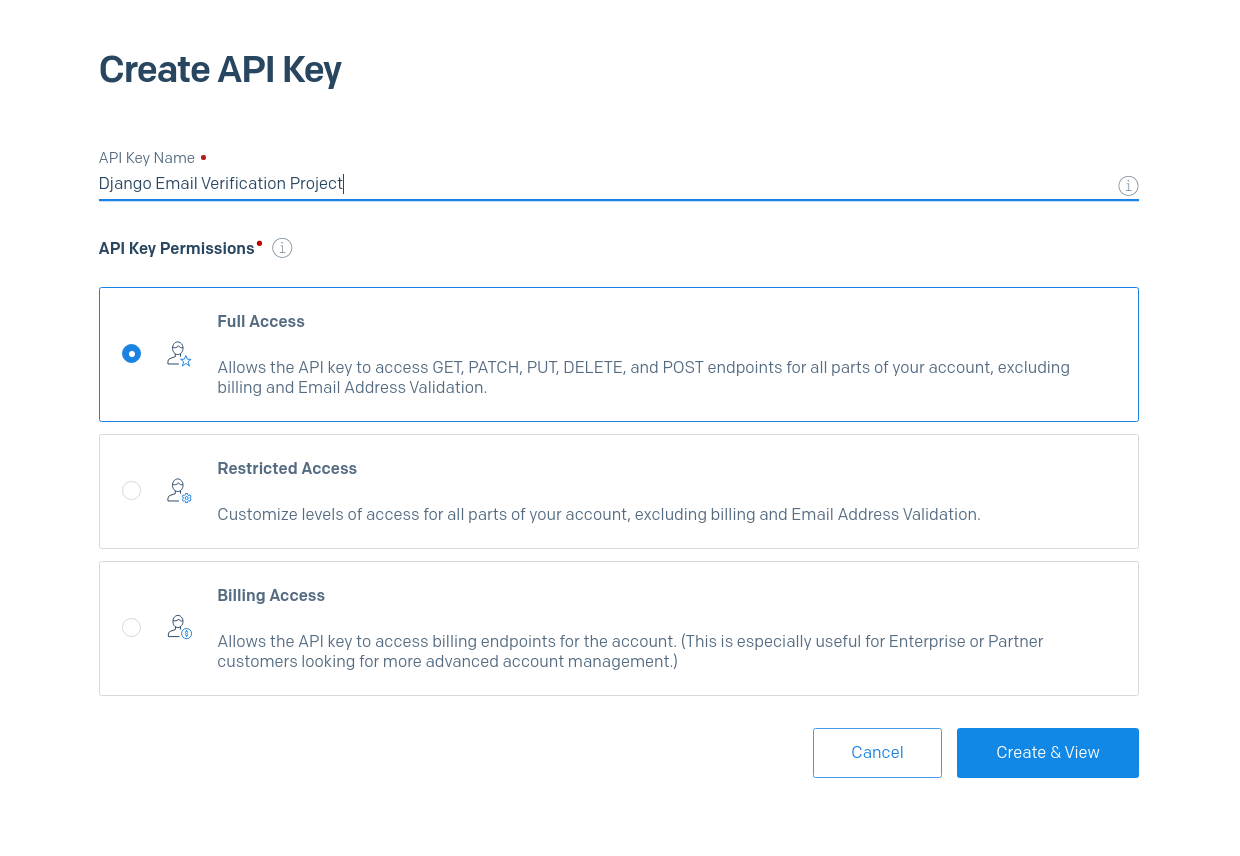
Enter a name for your API key, give it Full Access permissions, and then click the Create & View button.
After creating it, you’ll get a private API key. Copy it and save it somewhere safe, because we’ll need it later.
2. Create the .env file
You shouldn’t include sensitive information like API keys directly in the code. That’s why we’ll be using environmental variables.
Create an empty .env file inside the config folder, which will store your SendGrid API key. You can do it from the terminal with the commands below:
Open that .env file and set the following key-value pairs:
Replace <your-api-key> with your private SendGrid API key you got from the first step, and do the same for the <your-email-address> value.
We’ll be using these two environment variables in our settings file with the help of django-environ.
3. Configure config/settings.py to send emails with SendGrid
The settings file located at config/settings.py stores all the configurations of our project, which of course includes email sending configuration.
Open the settings.py file and import the django-environ package:
The code above imports django-environ and creates an env variable that contains the environmental variables stored in the .env file.
Now, head to the end of the settings file and write the following code:
Here, we’re using the env variable to return the values present in the .env file. Let’s see three crucial settings we’ll be using:
EMAIL_HOST_PASSWORD: The password which Django will try to use to connect to theEMAIL_HOST(SendGrid), in this case, your private API keyDEFAULT_FROM_EMAIL: The email address your recipients will receive mail fromLOGIN_REDIRECT_URL: The URL namespace the users will be redirected to once they activate their account with the verification email.
4. Send a testing email from the Django Shell
Finally, let’s test out whether we can send emails with Django and SendGrid. To do so, open a new terminal window, making sure your virtual environment is activated, and enter the Django shell.
Since we’re running the shell with manage.py, all of our settings will be imported. Now that you’re in the shell, send an email with the following code, replacing the placeholder "to@receiver.org" address with an email address you have access to:
We used the send_mail function to send this message, and we passed the subject, message, from_email, and recipient_list parameters to it.
As you can see, we used the settings object to get the DEFAULT_FROM_EMAIL and used it to send the email.
If you have access to the email address you sent the email to, you should see a message like this arrive in your inbox:

Create signup and email activation flow
Now that you can send emails with Django and SendGrid, it’s time to build the email activation process.
Start a users app
From the root of your project, start an app called users which will let us introduce custom features to Django’s built-in authentication system:
This app isn’t meant to replace Django’s built-in User model, so we’re going to use it to create custom tokens, forms, views, and urls files.
Proceed to install the app in your config/settings.py file:
Lastly, open config/urls.py and modify your project URL patterns to include the users app URL configuration.
Of course, the users.urls file doesn’t exist yet, so let’s create an empty urlpatterns list for the users app. Create a users/urls.py file inside the app, and add an empty list:
This will prevent Django from raising errors in the following steps.
Coding a token generator
We’ll need to use a token generator to create one-time-use tokens for our users to activate their accounts. You can see this exact process on sites like lyricstraining. Fortunately, Django already has some of this functionality, so the only thing we’ll do is customize it a little bit.
To build a one-time token generator, head into the users app you created in the previous step and create a file named token.py. Then add the code below:
This code might seem complex, so let’s see what each piece of code means.
First, we import the PasswordResetTokenGenerator class that generates and checks tokens for password resetting. We took advantage of its make_token() and check_token() methods to create the token generator.
The make_token() method generates a hash value with user-related data like their ID, password (hashed value, Django doesn’t store raw passwords), logging timestamp, and email. This information will change once the token has been used, which means the token won’t be valid.
The default _make_hash_value() of this class returns the following:
So, we’re only modifying the method and creating a variable token_generator to instantiate it.
To check out this new class in action, first, migrate your database (SQLite by default) by running the following command in a terminal window:
In the command above, we’re creating the database tables for the users, which we’ll be using next. Now, open the Django shell:
Create a new user called user1 and pass it to the token_generator.make_token()method:
If you run the code above, you should get a token like this:
Now that we have a way to generate one-time tokens for each user, it’s time to continue developing our Django project.
Signup form
We need to create a SignUpForm which inherits from the default UserCreationForm and adds an email field because we need that to send the activation link to our users.
We’ll also need a custom send_activation_email() method, which, as the name suggests, sends the activation link to the users.
Create a file users/forms.py inside the users app and paste the code below in it:
This is a rather huge form, but let’s focus on the send_activation_email(). This method accepts two arguments: the request, and a User object. We use the request to get the current site domain (localhost:8000 in our case), and the user to get its base64 encoded ID and a one-time token.
All of this information is passed as context to a template users/activate_account.html, which we’ll create later.
Finally, we send an email to the user with the respective subject, message, and html message.
We created this method inside the form because views should have the least amount of logic possible.
Views
We’re going to create multiple views, so if at any point you need a guide, check out the source code of the project.
These are the views we’re going to build:
SignUpView(Registration view)ActivateView(Activates the user’s account)CheckEmailView(Points users to check their email)SuccessView(Displays success template)CustomLoginView(Customized logging view)
Open the users/views.py file inside the users app and import the following:
We’re importing some Django generic views, some utilities, and of course the SignUpForm and token_generator we built previously.
Now, create a SignUpView inheriting from generic CreateView, customize the form_valid() method to set the user status to inactive, and send the activation email:
Taking into account that we’re using the default User model, we’re setting the is_active field to false, but if you have a custom user model or a one-to-one relationship to a profile model, you can modify the view above to set the corresponding field to false.
Then, write an activation view inheriting from the generic RedirectView, because if the get() method runs successfully, we’ll redirect to the success namespace, which we’ll create later:
Finally, write a simple CheckEmailView and SuccessView, which are nothing but TemplateViews:
Don’t worry about templates, since we’ll create them later.
URLs
Next, we’re going to configure the users app URLs. In users/urls.py, import all the views you created previously and write the respective URL patterns, replacing the empty list from the earlier step:
We’re almost done, but we need to write all the templates before testing the result of this project.
Building templates
After building all the backend functionality (what the user can’t see), it’s time to build the templates, which are plain HTML files that let us save time using template inheritance and display data dynamically.
For that purpose, we’re going to use the Django template language (DTL) and Bootstrap 5. Using Bootstrap 5 means we won’t be using static files.
We’ve already installed Django Crispy Forms, so the only thing that is left is to install it in the settings file.
Now, head into your terminal and create the typical Django template double structure for the users app:
We’re going to build the following templates:
activate_account.html(Template used to send emails)base.html(Base template for all other templates)signup.html(Sign up template form)check_email.html(Simple check email message)success.html(Displayed if the account activation went well)
All the following templates will be located under the users/templates/users directory.
Email activation template
Nowadays, which automated message is sent as plain text?
We’re going to send an HTML message with custom info to the user. In fact, we’ve already implemented that functionality in the SignUpForm so it’s time to create the corresponding template.
Create a file activate_account.html inside the templates folder and paste the following code:
It’s a simple HTML template, that uses DTL variables to get the information passed through the context dictionary (that we wrote in the SignUpForm), displays it as a heading two (h2), and creates a link similar to the following:
We’ll see how this looks when the email is sent just after we finish.
Base template
When working with Django templates, it’s recommended to create a base template that contains a basic HTML skeleton and CDN links. This lets you save code, and of course, time, since you don’t have to copy-paste the same HTML structure for all of your templates.
Let’s do so in this app. Create a base.html file and paste in the following template:
Yes, we’re including links to Bootstrap 5 and creating a block body which we’ll use later. Basically, all the templates that extend the base template will use this body block to “insert” HTML snippets while using the basic HTML skeleton.
Signup template
The user should be able to sign up with a form from our website, so let’s create the signup template, using the crispy filter.
Create a template signup.html inside the templates folder, and use the code below:
Note how we load the crispy form tags just after we extend from the base template. Also, it is important to remember that every time we set up a form in our templates, it should have a CSRF token inside of it.
Check email template
Create a check_email.html template and implement the following code:
Once again, we’re extending the base template and using the body block to display a rather minimalistic message.
Success template
Our final template will show the user a success message that confirms their account has been activated.
Create a success.html template and paste in the following code:
Testing the results
This is the user interaction when they try to register in this web app. You can follow along with these steps in order to test the application.
First, users go to the signup page (localhost:8000/signup/) and enter their information to create an account.
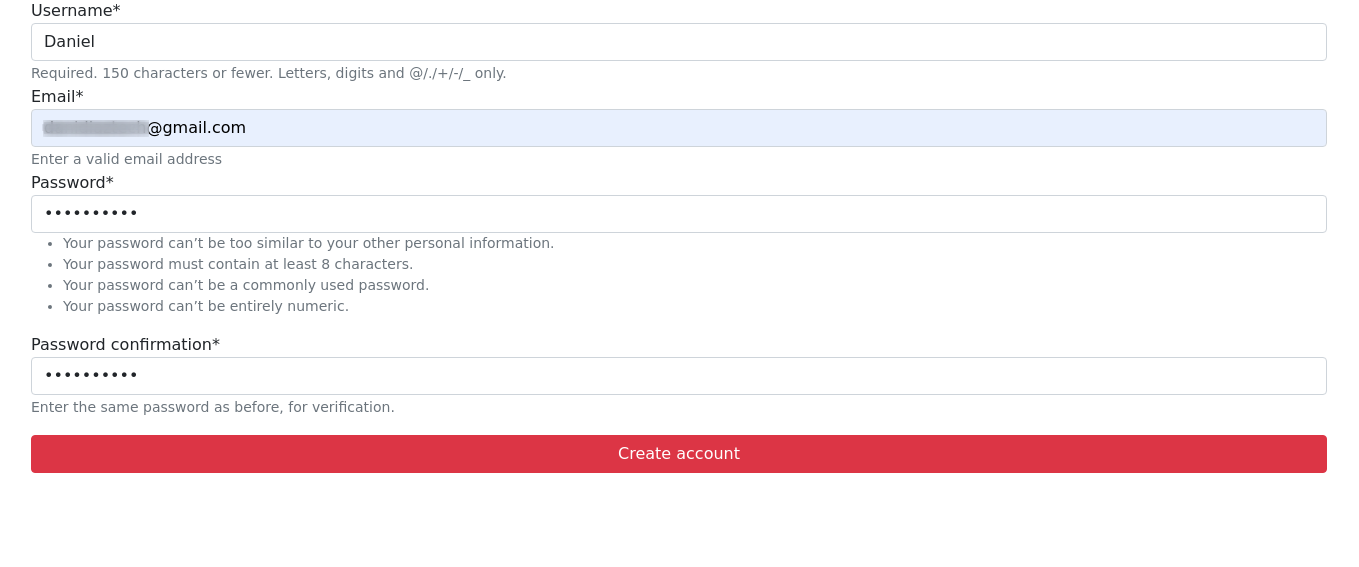
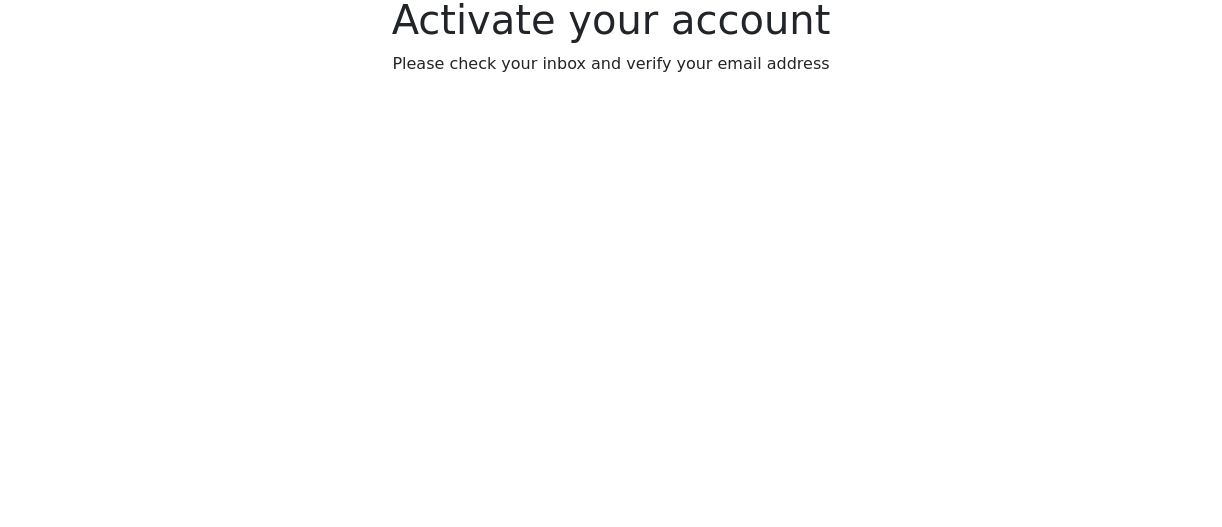
Then they’re redirected to the CheckEmailView, which displays this simple message:
If they check their inbox, a message similar to the one below should appear:
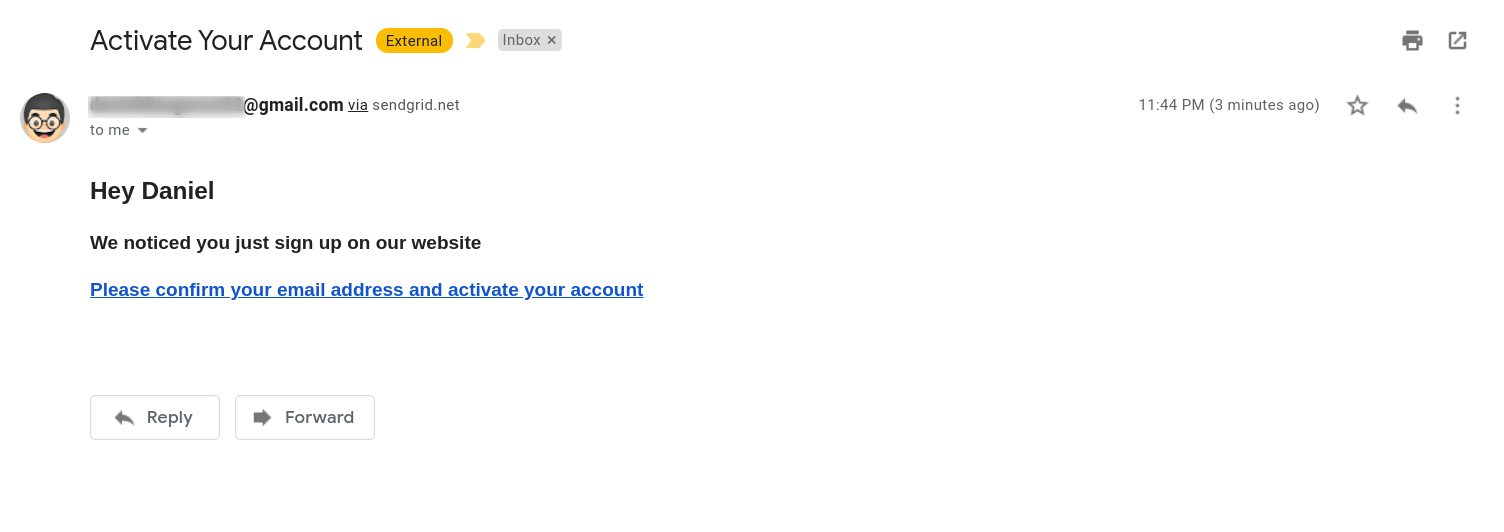
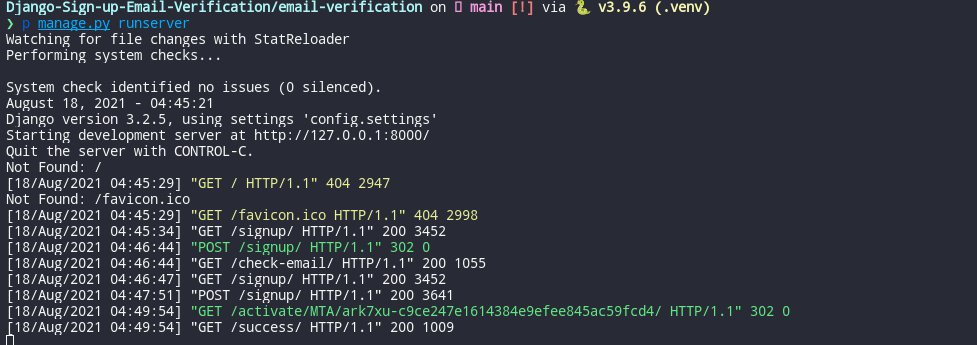
They click on the email verification link and are redirected to the ActivateView. If the token is correct, they’re immediately redirected to the success page.

You can see what’s happening behind the scenes in the local server logs:
Conclusion
Django is one of the most used web frameworks out there, and it has a vast amount of tools to solve everyday programmer tasks like email activation.
Also, you can integrate it with powerful services such as SendGrid, Twilio Programmable SMS, or nearly any existing web API.
Now that you have completed this tutorial, you know how to:
- Use SendGrid SMTP service to send emails with Django
- Create one-time links with Django
- Register users and activate their accounts via email with Django and SendGrid
Daniel is a self-taught Python Developer, Technical Writer, and lifelong learner. He enjoys creating software from scratch and explaining this process through stunning articles. Feel free to reach him at linkedin.com/in/danidiaztech/, or on Twitter at @DaniDiazTech.
Related Posts
Related Resources
Twilio Docs
From APIs to SDKs to sample apps
API reference documentation, SDKs, helper libraries, quickstarts, and tutorials for your language and platform.
Resource Center
The latest ebooks, industry reports, and webinars
Learn from customer engagement experts to improve your own communication.
Ahoy
Twilio's developer community hub
Best practices, code samples, and inspiration to build communications and digital engagement experiences.


