Develop a GraphQL-Powered API With Symfony
Time to read:
For years, REST (Representational State Transfer) has been the de facto standard when designing APIs. That's quite understandable, as it's a very straight-forward structure: After sending a request to an endpoint, a JSON (or XML) response is returned to the client.
However, as applications became more complicated a recurrent theme started to emerge - multiple REST calls are required to populate a view. Enter GraphQL. With GraphQL, the sender of the request determines the structure of the response, thus providing more flexibility and efficiency to the frontend.
In this article, I will show you how to develop a GraphQL-powered API for an online book store with Symfony.
Prerequisites
To get the most out of this tutorial, you need the following:
- A basic understanding of GraphQL
- Basic experience with PHP and Symfony
- PHP 8.0
- Composer
- The Symfony CLI
Getting Started
Create a new Symfony application, and switch into the newly generated directory, by running the following commands.
Next, install the project dependencies. The project will use the following:
- Doctrine: The Doctrine ORM help manages the application database.
- DoctrineFixturesBundle: This helps load authors and books into the database.
- Faker: Generates fake data for the application.
- Maker: Simplifies creating controllers, entities, and the like.
- OverblogGraphQLBundle: This bundle provides integration with GraphQL.
- OverblogGraphiQLBundle: This bundle provides an integration of the GraphiQL interface.
To install them, run the two commands below.
Accept the contrib recipes installation from Symfony Flex by pressing a. Then, create a .env.local file from the .env file, which Symfony generated during the creation of the project, by running the command below.
Next, update the DATABASE_URL parameter in .env.local so that the app uses an SQLite database instead of the PostgreSQL default. To do that, comment out the existing DATABASE_URL entry and uncomment the SQLite option, so that it matches the example below.
Create entities
The application will have two entities, Author and Book. Create the Author entity first using the following command.
The CLI will ask some questions and add fields for the entity based on the provided answers. Answer the questions as shown below.
Press the "Enter" key to complete the creation process for the Author entity.
Next, create the Book entity using the following command.
Respond to the CLI prompt as shown below.
Press the "Enter" key to complete the creation process for the Book entity.
Update the entities
Open the Author entity in the src/Entity/Author.php file and update its content to match the following.
In addition to adding types for the fields of the Author entity, the revised code adds a constructor function that requires the author’s name, date of birth, and bio. It also modifies the getDateOfBirth() function to return a string corresponding to the date of birth, but in a human-readable format. Finally, it modifies the setter functions so that they return nothing, as they will not be used.
Lastly, open src/Entity/Book.php and update its content to match the following.
The modifications to the Book entity are similar to the ones made for the Author entity. Types for the fields were added, a constructor function was declared, and the setter functions were modified to have void as their return type. In addition, a magic setter for the Book entity was also added, to support updating multiple fields in one request.
Next, update the database schema by running the following command.
Create fixtures
To give us interesting data when we’re developing the API, let’s create some fixtures which will load fake data into the database. Start by creating a fixture to load authors by running the following command.
Then, open the newly created src/DataFixtures/AuthorFixtures.php file and update its content to match the following.
The fixture adds 10 authors to the database using details generated by Faker. Before saving the changes to the database the addReference() function is called, passing to it the REFERENCE constant and an author. This provides access to the author in the fixture for loading books.
Create a new fixture for the Book entity using the following command.
Open the newly created src/DataFixtures/BookFixtures.php file and update its content to match the following.
The first thing to note is that this fixture implements what is called a DependentFixtureInterface. Because a book requires an author in its constructor, the AuthorsFixture must run before the BooksFixture. This dependency is specified in the getDependencies() function. By doing so, the fixtures run in the expected order.
The books are created using details from Faker. But notice that for the author parameter, the getReference() function is called. This retrieves the reference author in the AuthorFixture.
Run the fixtures using the following command.
Once the command finishes running, confirm that the database contains authors by running the following command.
Implement GraphQL functionality
Define the schema
The next thing we will do is define the schema for our API. In the config/graphql/types folder, you’ll create a schema for the author and book entities. In addition, you’ll declare schemas for the mutations and queries.
The API will handle the following queries:
- Query for an author based on id
- Query for all authors
- Query for an author via the author’s name
- Query for all books
- Query for books based on genre
- Query for books based on id
For mutations, it will have the following mutations:
- Create a new author
- Update the details of a book
So, start with the Author entity. In the config/graphql/types folder, create a new file called Author.graphql and add the following to it.
Next, create another file in the config/graphql/types folder named Book.graphql and add the following to it.
With the types and inputs for the Author and Book entities in place, define the schemas for the queries and mutations. To do this, in the config/graphql/types folder, create a new file called query.graphql and add the following code to it.
This defines the permitted queries for the API, specifying the parameters (where required) and expected types. It also declares the return types for each query.
Next, create another file in the config/graphql/types folder named mutations.graphql and add the following to it.
Similar to the query schema, it specifies the required parameters for each mutation. It also use the inputs declared for creating an author as well as updating a book in the Author.graphql and Book.graphql schemas respectively.
Create the services
To separate concerns, next create services to handle the query and mutation requests. In the src folder at the root of the project, create a new folder called Service.
Create a query service
In the src/Service folder, create a new file called QueryService.php and add the following to it.
In this service, we declare a function to handle all the requests specified in config/graphql/types/query.graphql. Using the AuthorRepository and BookRepository which were injected as constructor dependencies, we are able to retrieve books and authors based on the parameters provided in the request.
Create a mutation service
In the src/Service folder, create a new file called MutationService.php and add the following to it.
The service receives an EntityManagerInterface for persisting and flushing changes to the database.
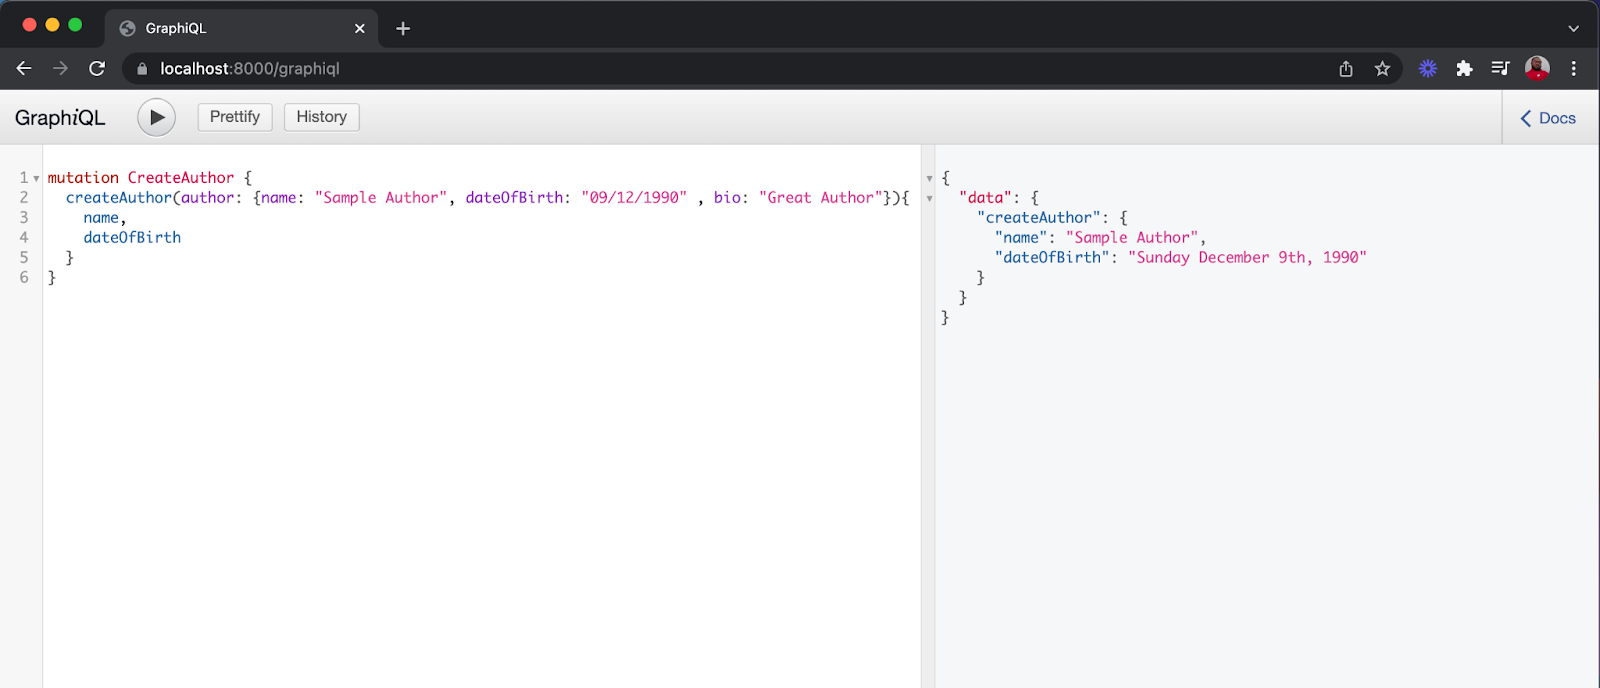
In the createAuthor() function, we create a new author from the information provided in the authorDetails array. One key thing to note is the date format which the API is expecting for the author’s date of birth (dd/mm/yyyy).
In the updateBook() function, we retrieve the book based on the provided id. If the book doesn’t exist, we throw an Error with an appropriate message. If we find a book with the specified id, we then update the properties based on the information provided in the update request. Finally, we save the changes and return the updated book.
The QueryService and MutationService will be used by the ResolverMap which will be created next.
Create a resolver
Our API now has a schema, but we still need a way to resolve the queries/mutations and provide the required response. We do this via a ResolverMap. In the src folder at the root of the project, create a new folder called Resolver. In it, create a new file called CustomResolverMap.php and add the following code to it.
Here, we inject the QueryService and MutationService as constructor dependencies. Next, we override the map() function which expects an array as the return type. At the root of the array, we declare the resolvers for our RootQuery and RootMutation.
Using the information passed in the ResolveInfo object, we match the fieldName provided against the expected names which were declared in our query and mutation schemas. Based on the value of fieldName, we return the response from the associated service call, passing the provided arguments where required. As a default, we return null for unknown field names.
With our resolver in place, we can add our service configuration and run our API.
Configure the Overblog bundle
Open config/packages/graphql.yaml and update its content to match the following.
Here, we change the mapping type from YAML to GraphQL which is the format used in declaring the API schema in config/graphql/types.
Next, we need to tag the resolver with the overblog_graphql.resolver_map tag. To do this, open config/services.yaml and update it to match the following.
With this in place, we can run our API using the following command.
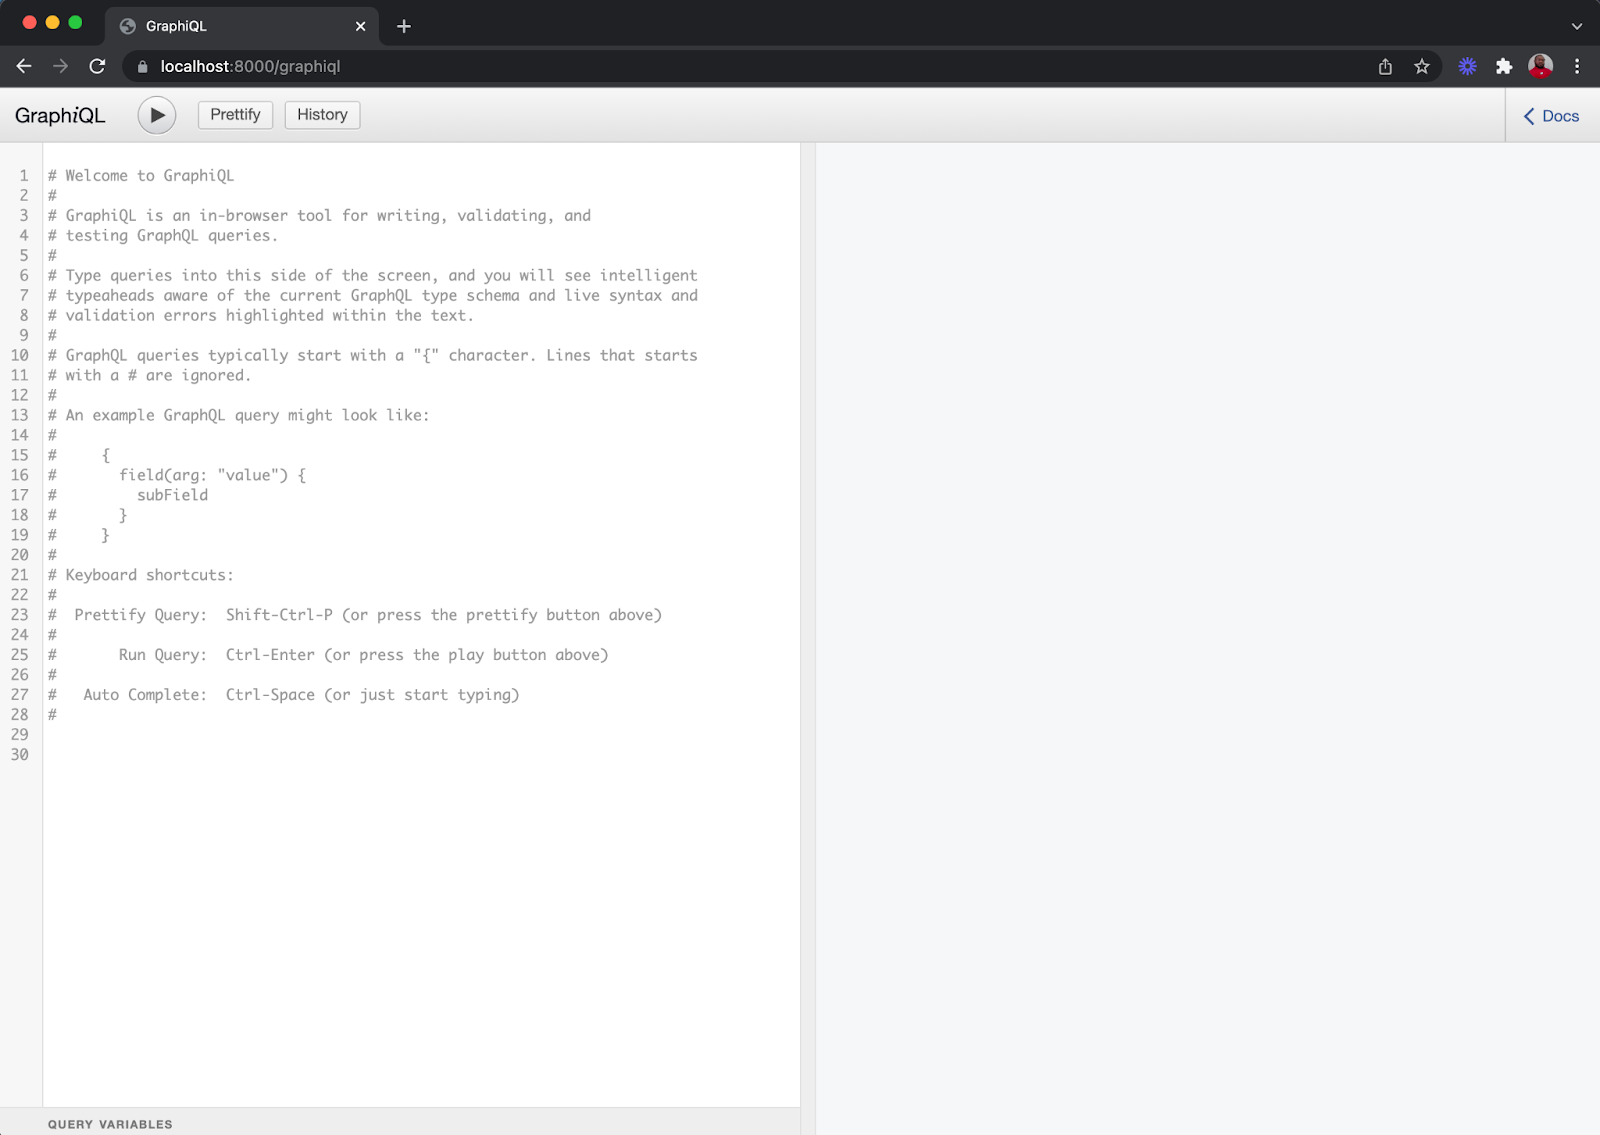
By default, the application will run on port 8000. To access the GraphiQL interface and test your database, navigate to https://localhost:8000/graphiql.
Test the endpoints
Return all books
Retrieve a list of books by running the following query in the query window:
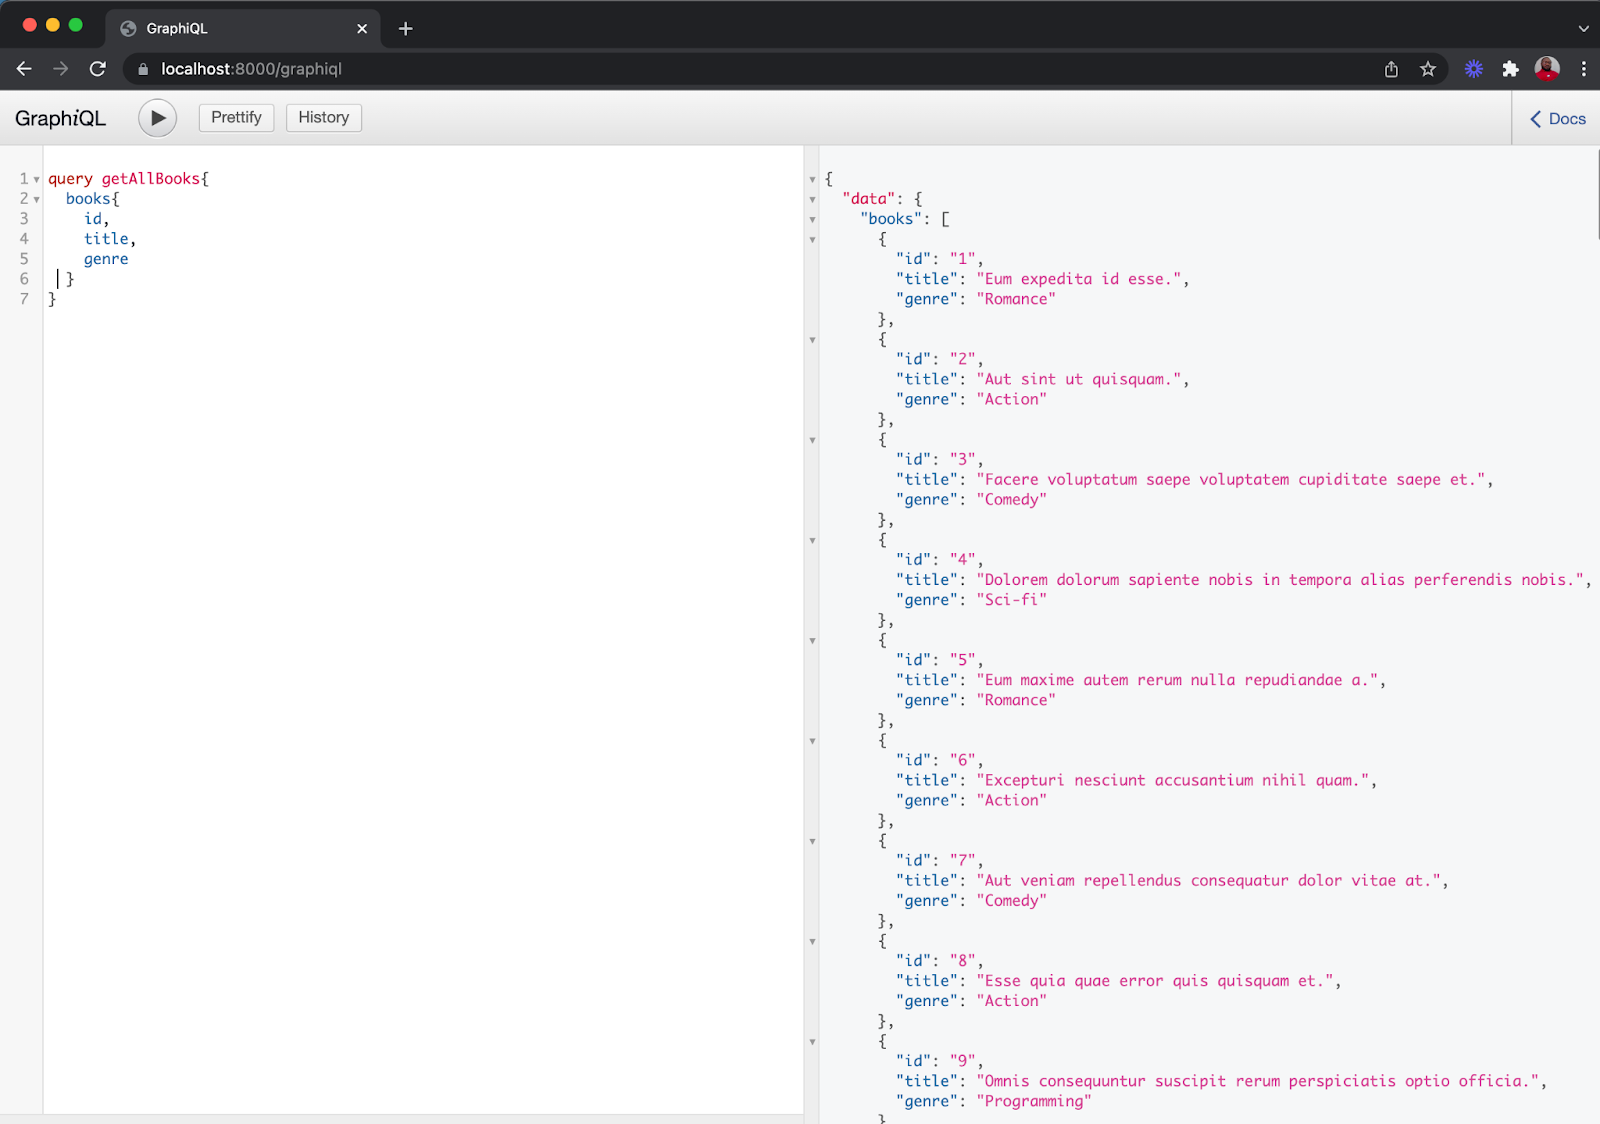
This returns the collection of books seeded in the database.
Find all authors
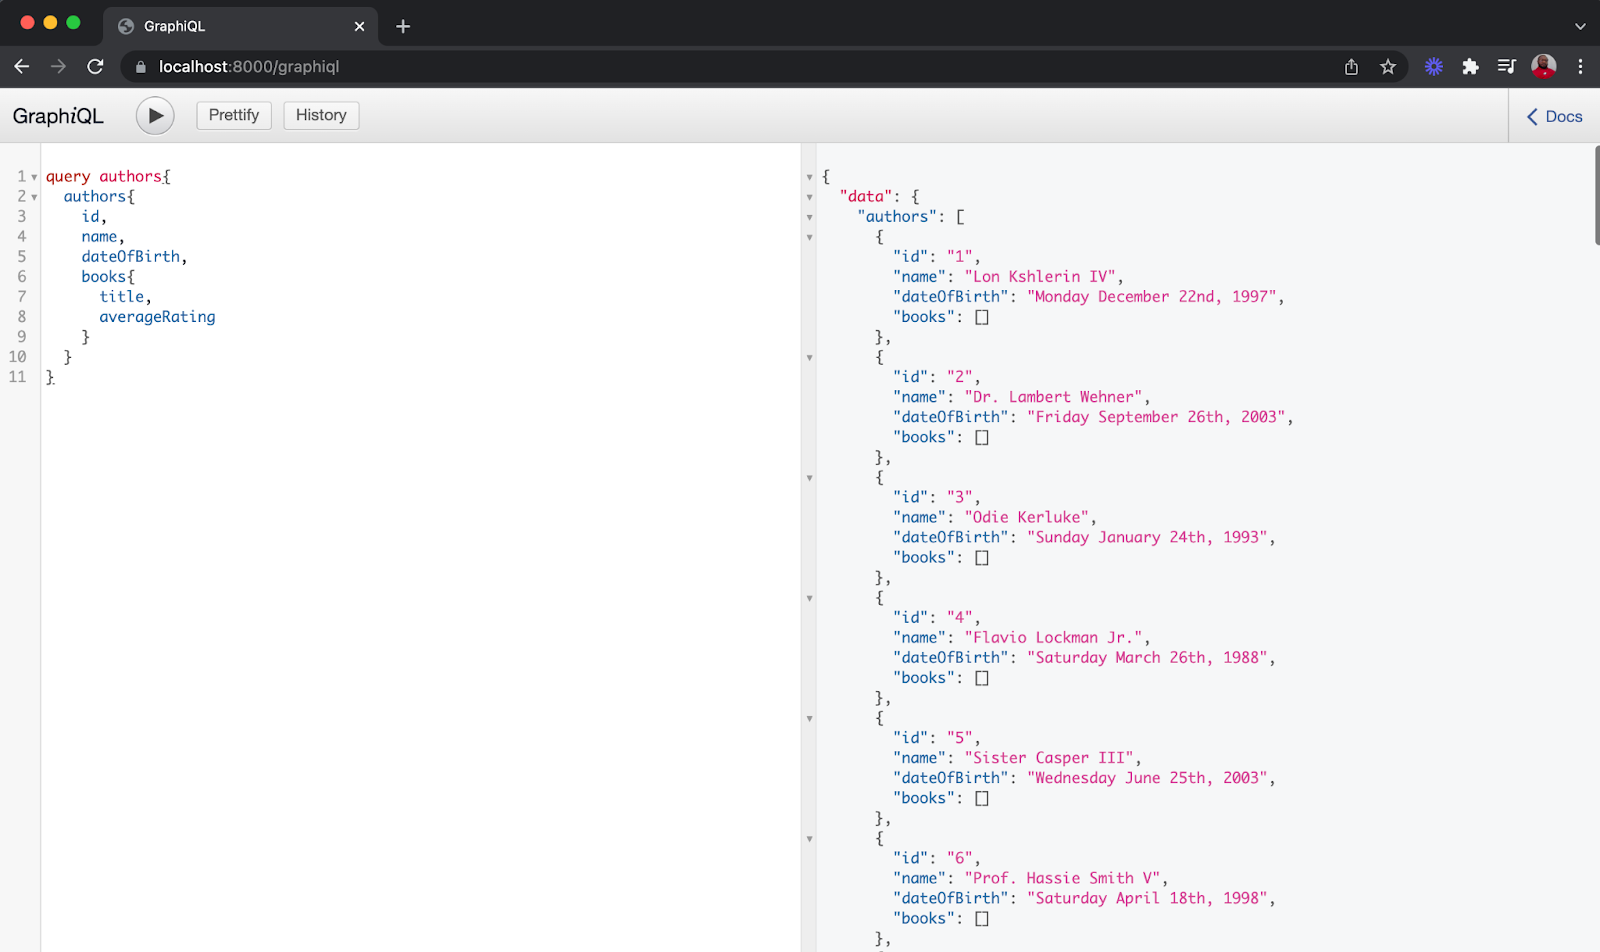
Run the following query to retrieve the list of authors
This will return the id, name, dateOfBirth and books for the authors, as shown here:
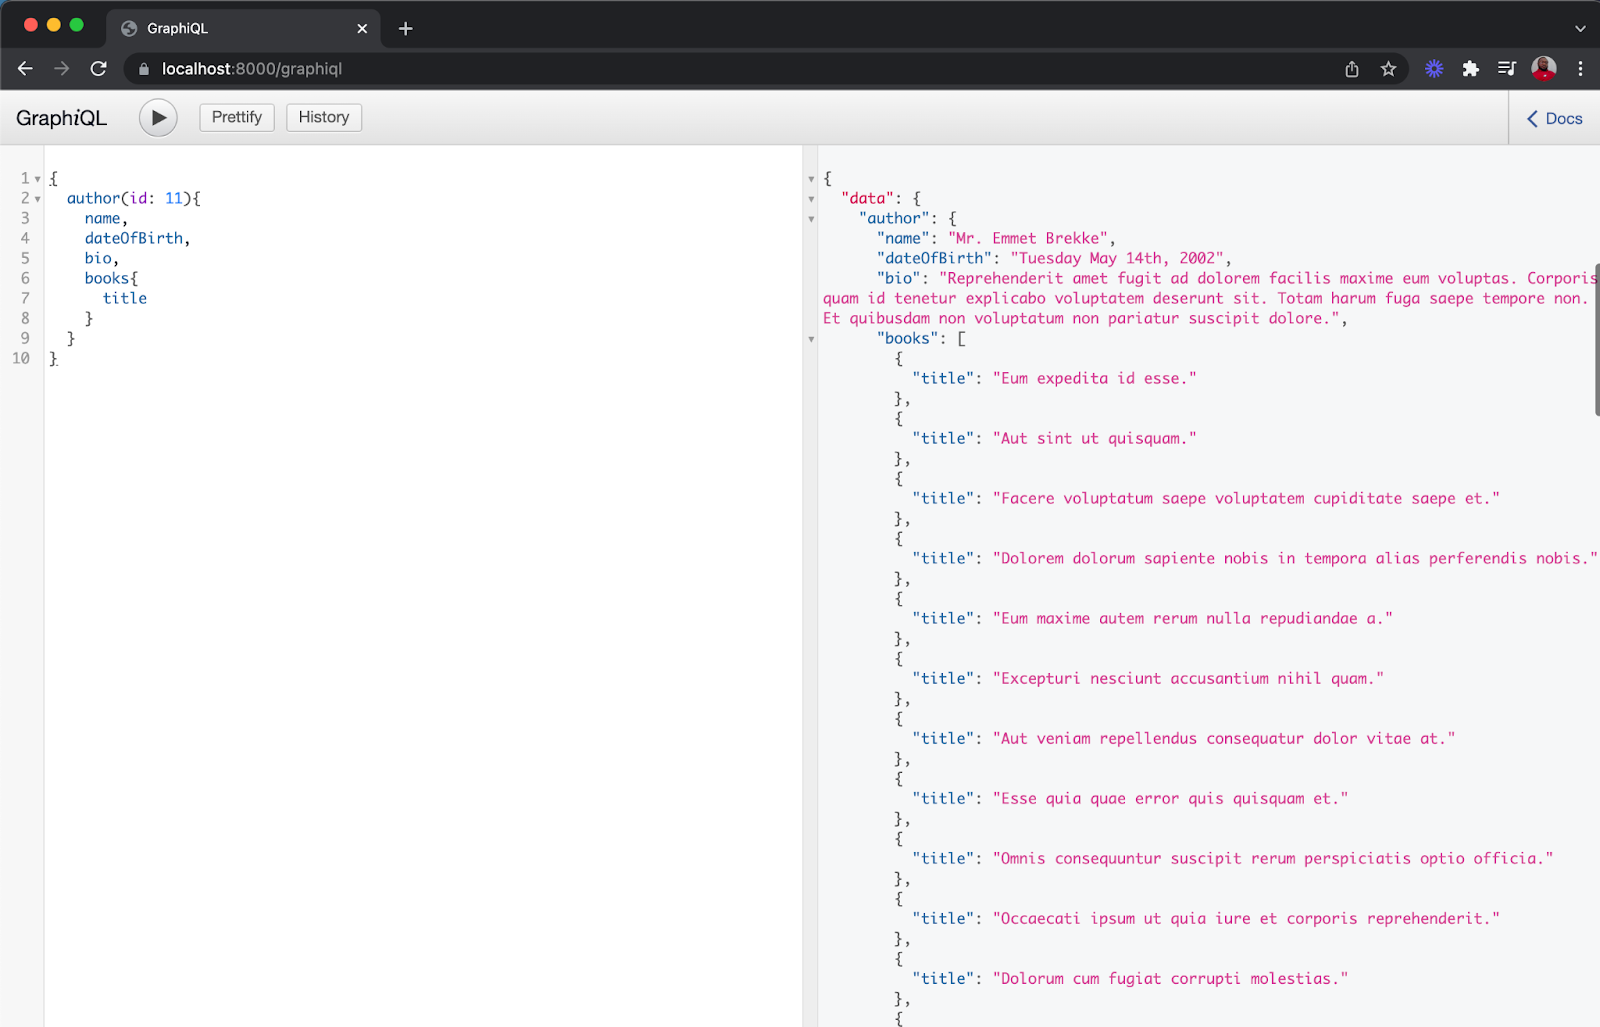
Find an author with an id
Next, use the query below to fetch the details of a particular author using the author's id as a unique identifier:
You will see the same query as shown in the image below:
Find books with a specific author
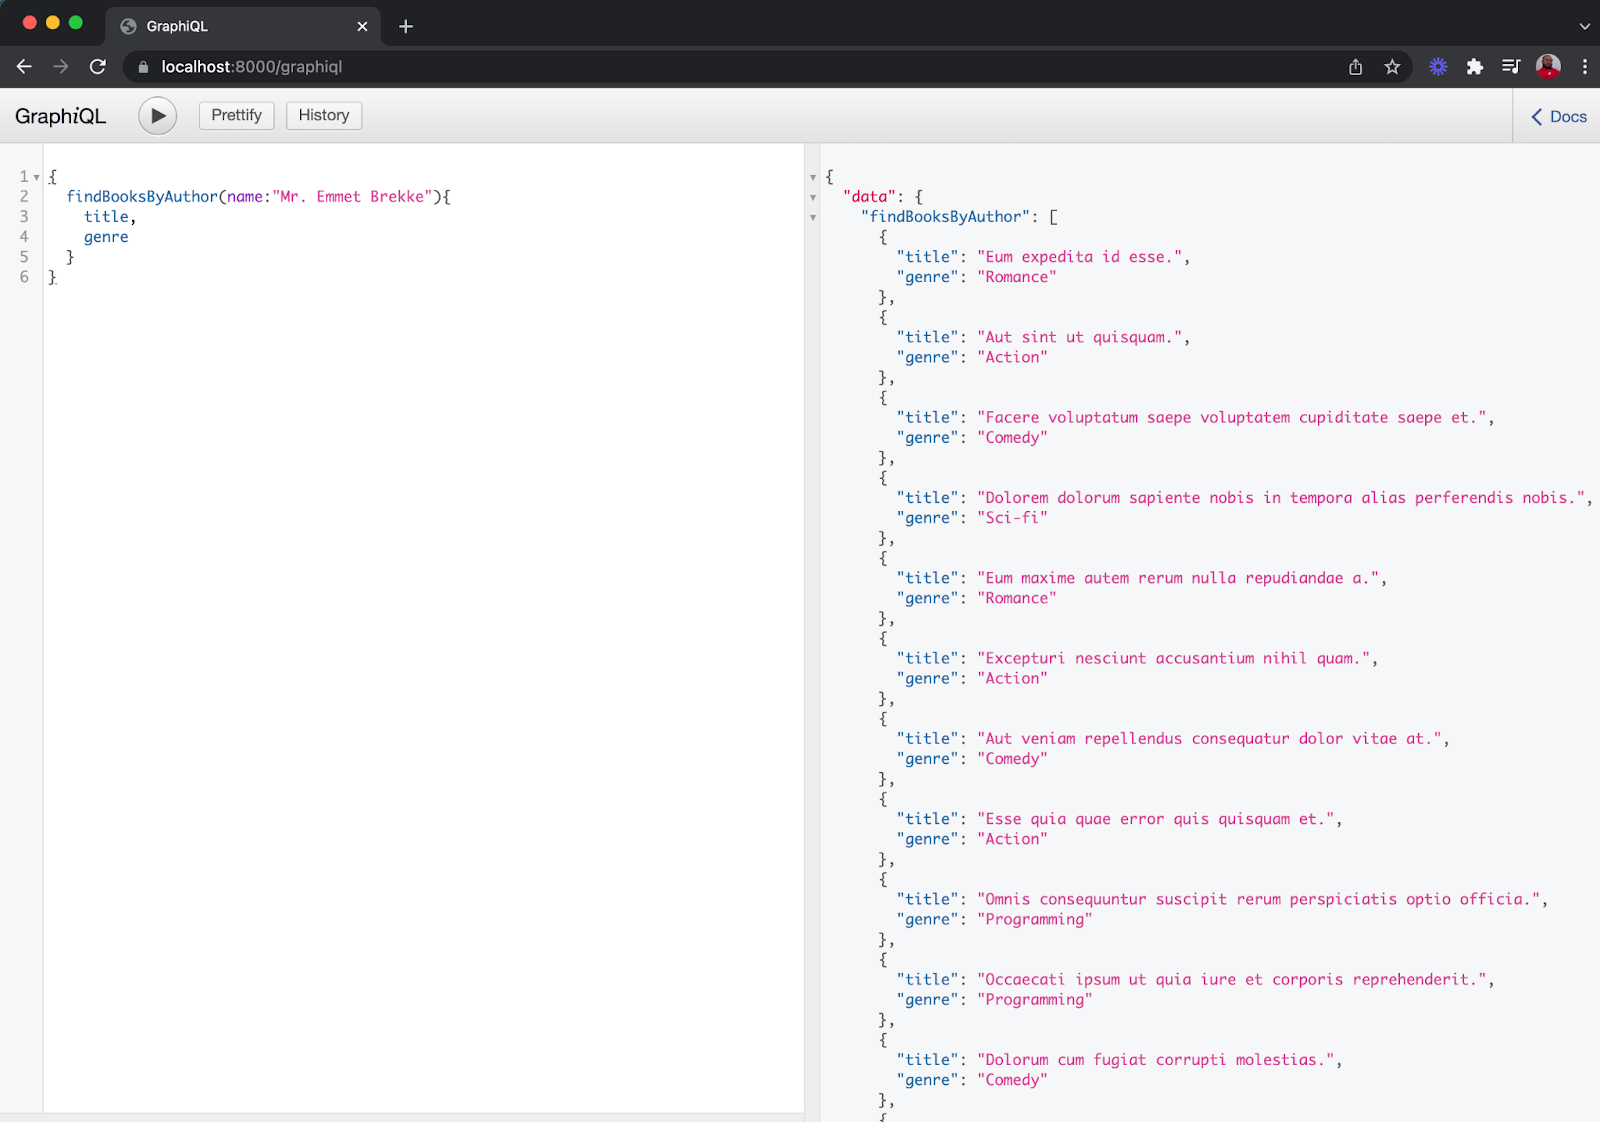
Next, to retrieve the list of books for a specific author using the author's name as the identifier, by using the following query:
Create an author
Here, we will start with mutations by using the following query to create a new author:
That's how to develop a GraphQL-Powered API with Symfony
In this article, you built a GraphQL powered API using Symfony. Using GraphQL, the client is able to specify the structure of the response (based on a previously agreed schema) thereby dealing with the issue of over or under-fetching. Additionally, we are able to leverage the type-checking provided out of the box to prevent unwanted bugs.
The code for this article is available here on GitHub. Happy coding!
Oluyemi is a tech enthusiast with a background in Telecommunication Engineering. With a keen interest to solve day-to-day problems encountered by users, he ventured into programming and has since directed his problem-solving skills at building software for both web and mobile.
A full-stack software engineer with a passion for sharing knowledge, Oluyemi has published a good number of technical articles and content on several blogs on the internet. Being tech-savvy, his hobbies include trying out new programming languages and frameworks.
- Twitter: https://twitter.com/yemiwebby
- GitHub: https://github.com/yemiwebby
- Website: https://yemiwebby.com.ng/
Related Posts
Related Resources
Twilio Docs
From APIs to SDKs to sample apps
API reference documentation, SDKs, helper libraries, quickstarts, and tutorials for your language and platform.
Resource Center
The latest ebooks, industry reports, and webinars
Learn from customer engagement experts to improve your own communication.
Ahoy
Twilio's developer community hub
Best practices, code samples, and inspiration to build communications and digital engagement experiences.


