Building A Cloud Native ASP.NET Core Application and Deploying it to Azure Kubernetes Service with Docker
Time to read:
This post is part of Twilio’s archive and may contain outdated information. We’re always building something new, so be sure to check out our latest posts for the most up-to-date insights.
As developers, we mostly focus on building applications. However, building the app is only half the story. To consider things “done,” we need to get that app deployed into the wild where people can use it. In the .NET world, there’s no shortage of ways we can host our apps, but today, I’d like to focus on building cloud native .NET applications.
In this post, you’ll learn about building cloud native applications in ASP.NET Core. You’ll learn how to design for the cloud, spin up an Azure Kubernetes Service instance, and deploy your application into the cloud. By the end of this post, you’ll have the tools to build and deploy your own cloud native ASP.NET applications.
What do you mean by “cloud native”?
“Cloud native” is one of those terms that sounds obvious, but there’s a more specific definition.
The Cloud Native Computing Foundation defines the term as follows:
“Cloud native technologies empower organizations to build and run scalable applications in modern, dynamic environments such as public, private, and hybrid clouds. Containers, service meshes, microservices, immutable infrastructure, and declarative APIs exemplify this approach.
These techniques enable loosely coupled systems that are resilient, manageable, and observable. Combined with robust automation, they allow engineers to make high-impact changes frequently and predictably with minimal toil.
The Cloud Native Computing Foundation seeks to drive adoption of this paradigm by fostering and sustaining an ecosystem of open source, vendor-neutral projects. We democratize state-of-the-art patterns to make these innovations accessible for everyone.“
From a more practical perspective, “cloud native” means running container-based applications, usually based on stateless microservices, in a Kubernetes cluster.
Why bother?
With all of the different ways we can deploy apps, why should you care about this one? Kubernetes has a steep learning curve and is part of a vast ecosystem of different cloud native tools. Kubernetes is so complex that there are children's books that attempt to explain it to newcomers.
There are a few advantages to living the cloud native lifestyle.
1. Cost
Kubernetes was created by Google to help them maximize the use of their servers. By containerizing applications, you can pack them more densely. By adding an orchestrator like Kubernetes to the mix, you can keep your nodes running at peak efficiency.
2. Power
Kubernetes is like having a data center in a box that you can configure with code. It’s also like having a brilliant systems admin to go with it. Complex deployment patterns like rolling deployments are built into Kubernetes.
3. Flexibility
When you build your infrastructure with code and leverage free cloud native tools, you can deploy applications rapidly and change your infrastructure as needed with minimal downtime. You will no longer have to wait around for humans to configure servers or plug in cables.
Design principles for cloud-friendly apps
There are several design principles to make your applications more cloud friendly. One list you can follow is the 12 Factor App framework. Many of the things on this list are already baked into ASP.NET or standard practice (the first item is “use source control”), but overall it’s a good list of best practices. When building applications for the cloud, here are a few things you should keep in mind.
Build / Release automation
Make sure both your builds and your releases are automated. Getting the code from your code base to an environment shouldn’t be more than a few button pushes (ideally zero). Also, make sure you separate your build automation from your release automation. You should be able to build and release independently.
Dependencies
Most applications are dependent on some form of infrastructure. Common infrastructure dependencies include databases, caching mechanisms, and file systems. When building applications, make sure you abstract these dependencies and use dependency injection to set them at run time. This will make it easier to swap out those mechanisms when moving to the cloud. You should be doing this for testing, so it shouldn’t require a ton of extra effort.
Services in your application should be accessed using URLs. Even if your services are on the same server, you should still use URLs. This keeps your architecture flexible and is useful when you start to deploy onto multiple containers.
Storing state
Do not store state information in your application. When you’re running in a cloud environment, servers and processes are considered disposable. If you’re storing state in your app process, there’s no guarantee that a user is going to hit the same server each request. There’s not even a guarantee that the server will be there at all.
Local state storing mechanisms include session state, in-memory cache, storing state in local files, and configuration files. Instead, use external mechanisms like databases and external cache providers like REDIS. For configuration, inject your configuration using environment variables.
Disposability
Ideally, cloud native apps are crafted as a series of stateless lightweight services. You should be able to start and stop them quickly and cleanly. When running in Kubernetes, your processes will be refreshed often, so make sure you can gracefully shut down your apps. Also, make sure your processes start quickly.
Azure’s container ecosystem
Once you've built an application you'll need to get it running in Azure. For containerized apps, this happens in two phases. The first phase involves building your application image and pushing it to a container registry. A container registry stores compiled Docker images. Think of it as being like a NuGet repository or npm repository. Container registries hold code that you can run. In Azure, you store your container images in the Azure Container Registry.
The second phase involves hosting a compiled image. You can run containers directly on Docker, but most people use a program called an orchestrator. Orchestrators manage fleets of containers and coordinate how many are running, how many resources they can use, and how they interact with each other. There are several open source orchestrators, but most people use Kubernetes. Kubernetes is widely supported, well documentented, and has broad support across cloud platforms.
Azure has broad container hosting support. You can host individual containers using Azure Container Instances. While this approach is fine for simple apps, it’s not robust enough for larger scale applications. You can also run them in Service Fabric. Service Fabric is an older offering geared towards hosting microservices. There’s nothing wrong with Service Fabric, but Azure has released newer hosting solutions that are easier to use. You can also host containers in an App Service Plan, a Platform as an Application (PaaS) service for hosting web and API applications, but that feature is meant to provide compatibility for technologies that aren’t supported in an App Service Plan.
While these all have their place, you’re going to use Azure Kubernetes Service (AKS) to host the application you'll build in this post. AKS is not the easiest hosting platform in Azure, but it’s one of the most powerful. With AKS, you have access to a huge toolbag of open source cloud native tools. You can replicate complex data centers as source code. Deployment patterns that are difficult to do in a normal data center are done by default in Kubernetes.
Prerequisites
You'll need the following to successfully build and execute the project in the tutorial section of this post:
Azure Account – Microsoft provides first-time Azure subscribers with a free 12-month subscription. If you've used up your 12-month trial period the project in this tutorial will incur costs determined by your subscription type and the length of time you maintain the resources created in the project. For a typical US-based Pay-As-You-Go subscription charges are usually less than $50 if you remove the resources promptly. The project includes an Azure CLI command for this purpose.)
Azure CLI – The CLI scripts in this tutorial were written with version 2.0.68.
Docker Desktop for Windows (541 MB) – Docker is used by Visual Studio to package your applications for deployment to Azure. If you are new to Docker, check out the What to know before you install section on the linked page for important information on system requirements and other considerations.
Git – Cloning the project from GitHub or managing will require a Git client.
Visual Studio 2019 – The Community Edition of Visual Studio 2019 is free.
To get the most out of this post you should be familiar with creating ASP.NET Core Web Applications in C# with Visual Studio 2019 or VS Code.
There is a companion repository available on GitHub for the case study project described in this post. You can get the code there if you'd prefer to check it out rather than build it.
Create the project structure
To begin, create a WiscoIpsum directory in your preferred location for projects. In the WiscoIpsum directory, create an infrastructure subdirectory and a src subdirectory. The infrastructure subdirectory will hold the scripts to create the Azure environment and deployment files. The src directory is for the .NET project you will create in a later step.
Build your environment
One of the advantages of using the cloud is that you can create repeatable environments. Instead of clicking buttons in the Azure Portal, you’re going to create a PowerShell script to build your Container Registry and AKS cluster.
Inside the infrastructure directory, create a new file called generate-azure-environment.ps1.
Open it and add the variable declarations in the following code block. Make particular note of the following required modifications:
- Change the value for
$locationto the most appropriate Azure region for your location after checking to ensure the region supports Azure Kubernetes Services. - Substitute your own value for the
$acrNamevariable in place ofwiscoipsumacr. The name of the Azure Container Registry (ACR) is public-facing and must be unique across Azure, so make it something distinctive. - Wherever you see the ACR name literal
wiscoipsumacrused in the subsequent command-line instructions you’ll need to replace it with the value you created for your ACR.
Once you've set up your PowerShell variables you can add the commands that use them. Each of the following az commands should be added to the bottom of the code already in the file.
Add a command to create a resource group to house your application. This will create a resource group at the location specified in the $location variable:
Add a command to create an Azure Container Registry:
Add a command to create a service principal and assign the app ID and password to variables:
A service principal is like a user account. When you build your AKS cluster, you will it assign it a service principal. Your Kubernetes cluster will run under this account.
This command uses the | ConvertFrom-Json command to turn the JSON sent back by Azure CLI into a PowerShell object you can use later.
If you’re using a corporate subscription which includes Azure, like your company’s MSDN account, you might not be able to create a service principal. If you lack the permissions, ask your local administrator to create one for you and give you the app ID and app password.
Add a command to wait 120 seconds before continuing to execute commands:
When you create a Service Principal, it takes a few seconds to propagate the changes. Since you are running these commands in a script, you’ll need to give Azure some time to propagate the service principal. Increase the sleep interval if you see an error like the following when you run the script:
Add a command to get the ACR ID from your container registry and save it to a variable:
This command highlights two handy things you can do in the Azure CLI. The --query “id” is a query parameter. It will select the id field of the object returned by the Azure CLI. You can use query parameters to filter down the result of any Azure command. This is useful if you need to grab fields to use in scripts. Also, note the --output tsv parameter. By default, the Azure CLI returns JSON, which is not always readable. By using --output tsv, you return tab separated values instead. Another useful output parameter is --output table, which returns a table.
Now that you have a service principal and an ACR ID, add a command to assign pull permissions to the service principal. This will let your AKS cluster pull images from the container registry:
Create your AKS cluster:
Here’s the final script you’ll use to create your environment:
To run your script, open a PowerShell window and execute the following command-line instruction to login to Azure:
The command will open a browser window to a page that will enable you to sign into Azure.
If you experience the dreaded "This site can't provide a secure connection" error in Chrome after signing into Azure, and none of the recommended methods of resolution work (or you just don't want to bother trying to fix it), press Ctrl+C in the PowerShell window to exit the current process and restart it with the following command:
After you authenticate, run the script you created in the infrastructure directory:
After a few minutes, you should have a Container Registry and an AKS cluster ready to receive an application deployment. You can confirm that the script executed successfully in the Azure portal by looking for wisco-ipsum in the Resource groups section.
Keep this PowerShell window open: you’ll be using it later.
Build a cloud-native app
While this post focuses on deployment, you’ll need something to deploy. You’re going to build a custom lorem ipsum generator. Lorem ipsum is random text, loosely based on a Latin work by Cicero, that's used as a placeholder in graphic design. Folks have made funny versions to amuse themselves. If you want to see an example, check out Bacon Ipsum or Corporate Ipsum. I’m from Wisconsin, so this generator will be Wisco-Ipsum.
Create a new Visual Studio project
Open Visual Studio and select File > Create a new project.
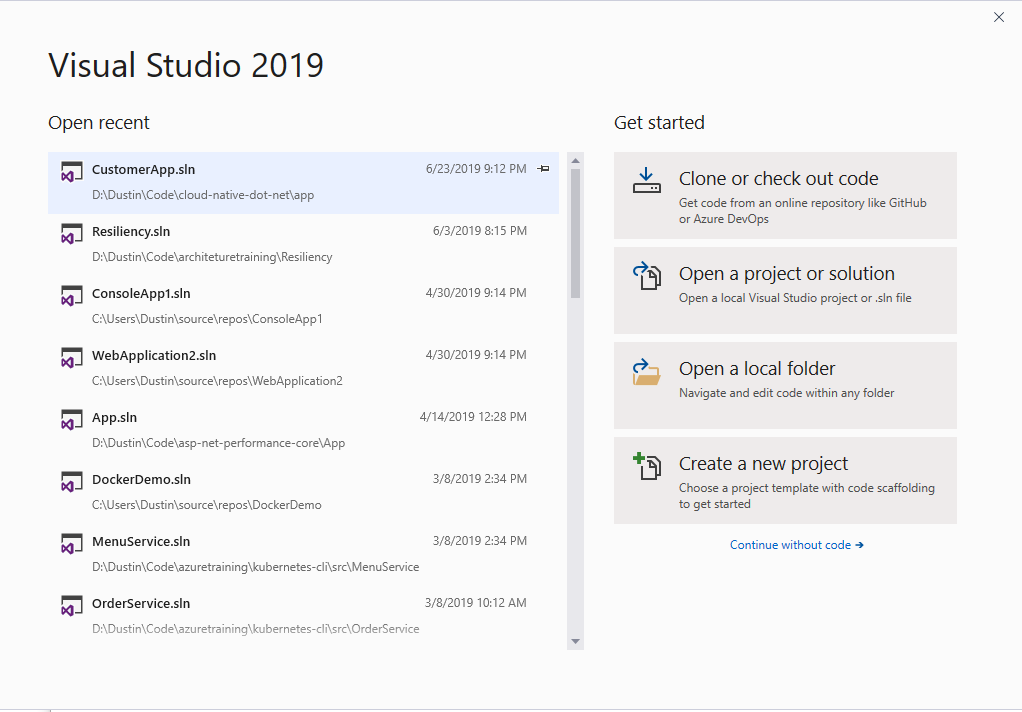
Select ASP.NET Core Web Application project template and click Next.
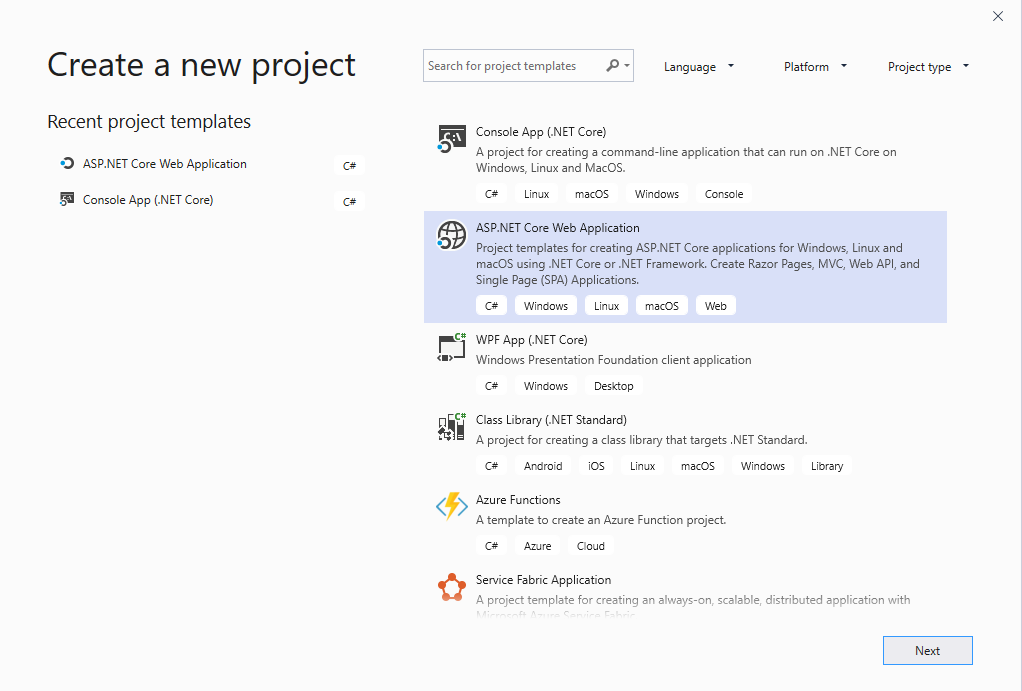
In the Configure your new project window, enter "WiscoIpsum" for the Project Name and Solution Name. For Location, use the src directory you created when you set up the environment for the project. Click Create.
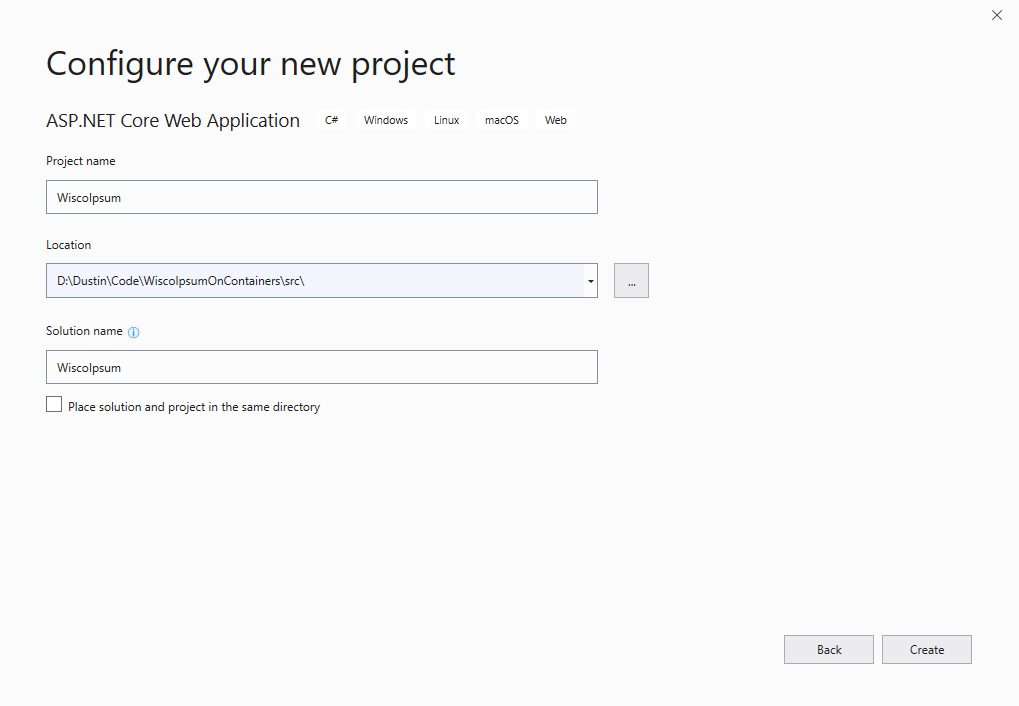
In the Create a new ASP.NET Core Web Application window, ensure .NET Core and ASP.NET Core 2.2 are selected in the two list boxes at the top. Select the “Web Application (Model-View-Controller)” template. Also, make sure the Enable Docker Support checkbox is checked and select the Linux option in the list below it.
When building .NET Core apps with Docker, you can either run on Windows-based containers or Linux-based ones. While your first instinct may be to go to Windows containers, Linux containers have a wider support base and .NET Core runs great on Linux.
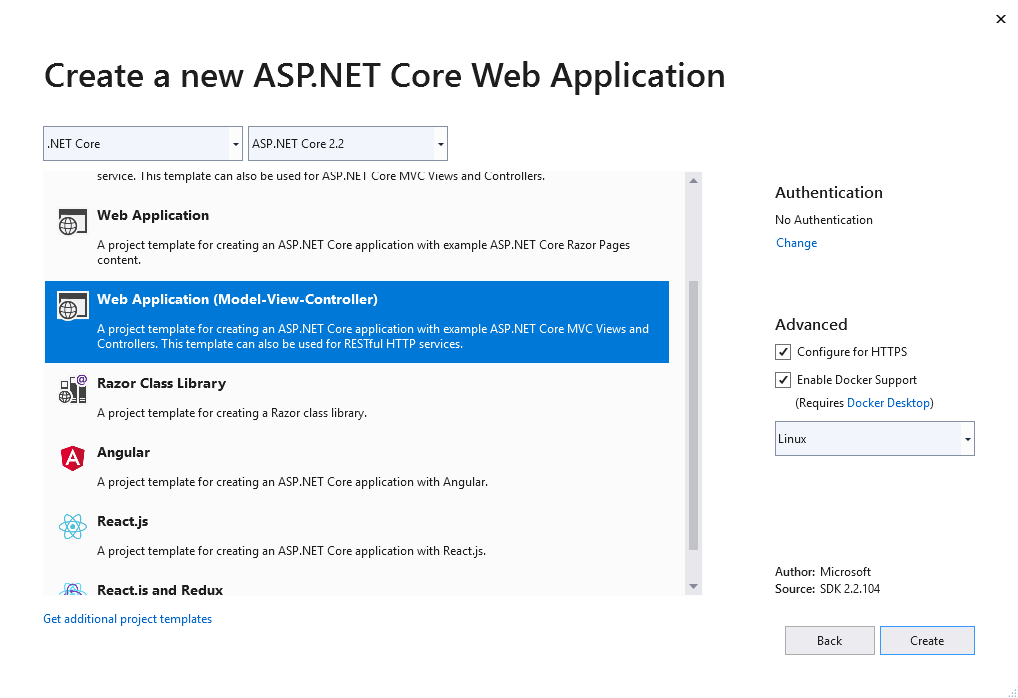
After you hit Create, you should get a working .NET Core project.
If this is the first time you've created a Docker project in Visual Studio, or the first with the selected template, Visual Studio may need to download Docker images; it will open a console window to do so. Docker will also request that you share the drive on which the images will be stored. You'll need to supply a username and password for Docker to use in accessing this share.
The progress of the setup process will be logged to an Output window for Container Tools. If everything executed correctly, you should see the following output:
Build an ipsum lorem generator
Now that you have the boilerplate in place, you can create a service that generates placeholder text.
In the Solution Explorer, create a folder called Services under the WiscoIpsum project. Add a class file called IpsumGenerator.cs. Open the file and add the following code.
This code creates an interface for the GenerateIpsum method, so you can use dependency injection with this class. The class generates random paragraphs based on a series of random phrases. It pulls those phrases from the GetPhrases private member function at the bottom of the class. If you want, swap out those phrases to something that makes you laugh.
Now that you have a service, setup dependency injection so you can use it in your controller. Open Startup.cs and the following using statement to the top of the file:
Add the services.AddTransient<IIpsumGenerator, IpsumGenerator>(); in the ConfigureServices method so it looks like the following code:
Build the controller
Before you build your controller, you’re going to need a view model. Go to the Models directory and add a class file called IpsumViewModel.cs. Add the following code:
Because this is a simple demo app, you’re going to use the Home controller. Open Controllers/HomeController.cs, Add a constructor, a reference to IIpsumGenerator, and an action to handle your form's HTTP POST event. It should look like this:
Build a Razor form
Open up Index.cshtml and replace the contents with the following code:
Now that you have all the pieces in place, run your application.
If you’re having trouble debugging your application from Docker, you can use IIS Express or Kestrel. You can switch your build target by clicking the down arrow next to the run button.
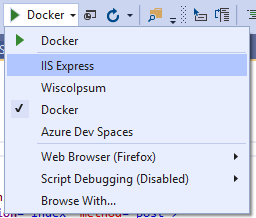
Docker debugging is great when it works, but it doesn’t always work.
If everything is working correctly you should be able to generate paragraphs of cheezy lorem ipsum from the application's home page.
Upload your application to Azure
To deploy your application, you need to get an image of your app into your Container Registry. You could use Docker to build an image and push it to the registry, but the Azure Container Registry can do it for you in one step. Execute the following command from the directory containing your solution (*.sln) file.
Note that the dot (".") at the end of the command-line instruction is significant and essential, as explained below.
The value for the --registry parameter should correspond to the unique name you gave your ACR in the variable declarations above (ex. $acrName='wiscoipsumacr'). Remember that ACR names need to be unique across all of Azure.
The --image wiscoipsum:v1.0.0 parameter determines the tag for your image. This is how you reference that image when you run it later. If you’re using a build tool, then you’ll replace the “v1.0.0” with the version number of your build.
If you see an error like the following, you probably didn’t set your Docker context correctly:
When building Docker images, Docker copies files from your computer. The relative location of those files is based on the Docker context. You set the context when you run your build command. When Visual Studio generates a Docker file for you, it assumes that you’re going to be using the directory containing your solution (*.sln) file as your context. When you run a docker build or az acr build, ensure the context is set to the solution root directory.
To set the context correctly, use the --file parameter to point to your Dockerfile and then set the context. In the command above, the context is “.”, which is the current directory.
There are 17 steps in the process, so you’ll see quite a bit of output while the command is running. If the process completed successfully you should see a final line of output similar to the following:
Your application image is now in your container registry.
Deploy your application to your Azure Kubernetes Services cluster
The final step is to deploy your application on your AKS cluster. Kubernetes has an internal database that describes what should be running in the cluster. This includes what applications, how many instances, and any associated networking. Kubernetes will spin up resources so what’s running looks like its internal database.
To modify that internal database, you run deployment files that change its internal state.
In Kubernetes, you use deployment files to describe your application components. Once you apply those files, Kubernetes will spin up the appropriate resources.
In your infrastructure directory, create a file called app-deployment.yaml and add the following code to the file:
Change the value of wiscoipsumacr in the spec node to the unique name you created for your ACR.
This file describes a deployment and a service, which are two common Kubernetes resources. A deployment in Kubernetes describes an application to be deployed. Deployments usually include one or more containers. Services provide a path to your deployed applications. (Note that the service name is different than the ACR name.)
Kubernetes files begin with a description of the type of resource they are describing. In this case, we’re describing a deployment:
The containers section is where you define the applications you’re going to run. In this case, we’re grabbing the application we pushed into the container registry:
As noted above, instead of the value wiscoipsumacr.azurecr.io your file will reflect the unique name you created for your ACR. (For example, cheezywiscoipsumacr1337.azurecr.io).
The resource limits will ensure that your application doesn’t take up too many resources. If your application exceeds its limits, Kubernetes will either throttle it or shut it down and spin up a new one. CPU in Kubernetes is measured in “miliCPUs”. 1000 miliCPUs = 1 core.
The port node identifies the HTTP port the application is going to run on:
The last part of the file describes a service. You can have many resources in a deployment, separating them with three dashes (“---”). In this case, you’re going to use a load balancer service to serve your app. This load balancer service takes your app and exposes it to the world on port 80.
You can interact with your Kubernetes cluster by using the kubectl command-line tool. Install this tool from Azure by running the following command:
Download your Kubernetes credentials from Azure by running the following command:
This command should produce output similar to the following:
Apply the deployment file you just created by running the following PowerShell command in the directory containing your app-deployment.yaml file:
Successful execution produces the following output:
You have a deployed application running on your cluster. Congratulations!
Get your application’s public IP address
To figure out the IP your application uses, you can monitor your service using the kubectl get service command. The --watch parameter will continue to run the command until your application gets an IP:
The --watch parameter will continue to run the command until your application gets an IP. Eventually, you’ll get something like this:
Test your Kubernetes deployment
Once you have an external IP, you can point your web browser to it and see your deployed app.
If you have an external IP and you don’t see your app, check your local application. Make sure it runs correctly on your machine. If it runs well on your machine, try looking at the logs for your app in your cluster. The following command displays the log data from your application:
Remove your test deployment
To clean up—and save yourself some money on Azure fees—delete your resource group as soon as you’ve finished experimenting with the hosted app. Deleting your resource group will dispose of the AKS cluster and the container registry you created so you don’t get charged any additional money just for having the resources sitting there.
Summary
In this post, you learned about building cloud native applications in ASP.NET Core. You learned how to design applications that run well in the cloud. You built and deployed your own cloud native ASP.NET Core app. You now have the skills you need to get started building cloud native apps.
Additional resources
Azure Kubernetes Service Documentation – The official Microsoft Azure documentation for AKS includes resources for C#, Python, Node.js and other languages.
Installing the Azure CLI – Keeping the Azure CLI up-to-date is important, and you do that by running the installer or the PowerShell command shown on this page. The CLI is updated fairly frequently: the current version changed at least 3 times during the creation of this post.
The Twelve-Factor App – The Twelve-Factor App, by Adam Wiggins, describes an approach to building web apps (software-as-a-service) that conform to some general design principles.
12-Factor Apps in Plain English – This gloss on the methodology is a useful companion to the original document, expanding, explaining, and contextualizing the source material.
Dustin Ewers is a software developer hailing from Southern Wisconsin. He helps people build better software. Dustin has been building software for over 10 years, specializing in Microsoft technologies. He is an active member of the technical community, speaking at user groups and conferences in and around Wisconsin. He writes about technology at https://www.dustinewers.com. Follow him on Twitter at @DustinJEwers.
Related Posts
Related Resources
Twilio Docs
From APIs to SDKs to sample apps
API reference documentation, SDKs, helper libraries, quickstarts, and tutorials for your language and platform.
Resource Center
The latest ebooks, industry reports, and webinars
Learn from customer engagement experts to improve your own communication.
Ahoy
Twilio's developer community hub
Best practices, code samples, and inspiration to build communications and digital engagement experiences.


