Building Serverless Functions with Kotlin
Time to read:
This post is part of Twilio’s archive and may contain outdated information. We’re always building something new, so be sure to check out our latest posts for the most up-to-date insights.

Serverless functions are great especially when used as backend for mobile apps. A while ago I wrote a blog post showing you how to Send an SMS message from Android and always wanted to change its backend application to not only use Kotlin, but also be a serverless function.
Having a backend is important because we’re using an API and while Twilio is a REST API and you could make an HTTP request to it directly, you would need to store your Twilio credentials inside your app. This is not secure because an attacker can extract your account credentials very easily from it.
Let’s look at how to change our backend to be a serverless function that is hosted on IBM’s Cloud Function.
Our tools
- I will be using IntelliJ IDEA with the Gradle Plugin for the code but feel free to use your preferred IDE as long as it works well with Gradle.
- A Twilio Account and a Twilio Phone Number – Sign up for free!
- An IBM Bluemix Account – Sign up free. Also, make sure you follow their instructions for getting the CLI installed and working.
If you just want to skip to the code, feel free to clone this repository and just follow the deployment procedure.
Create the project
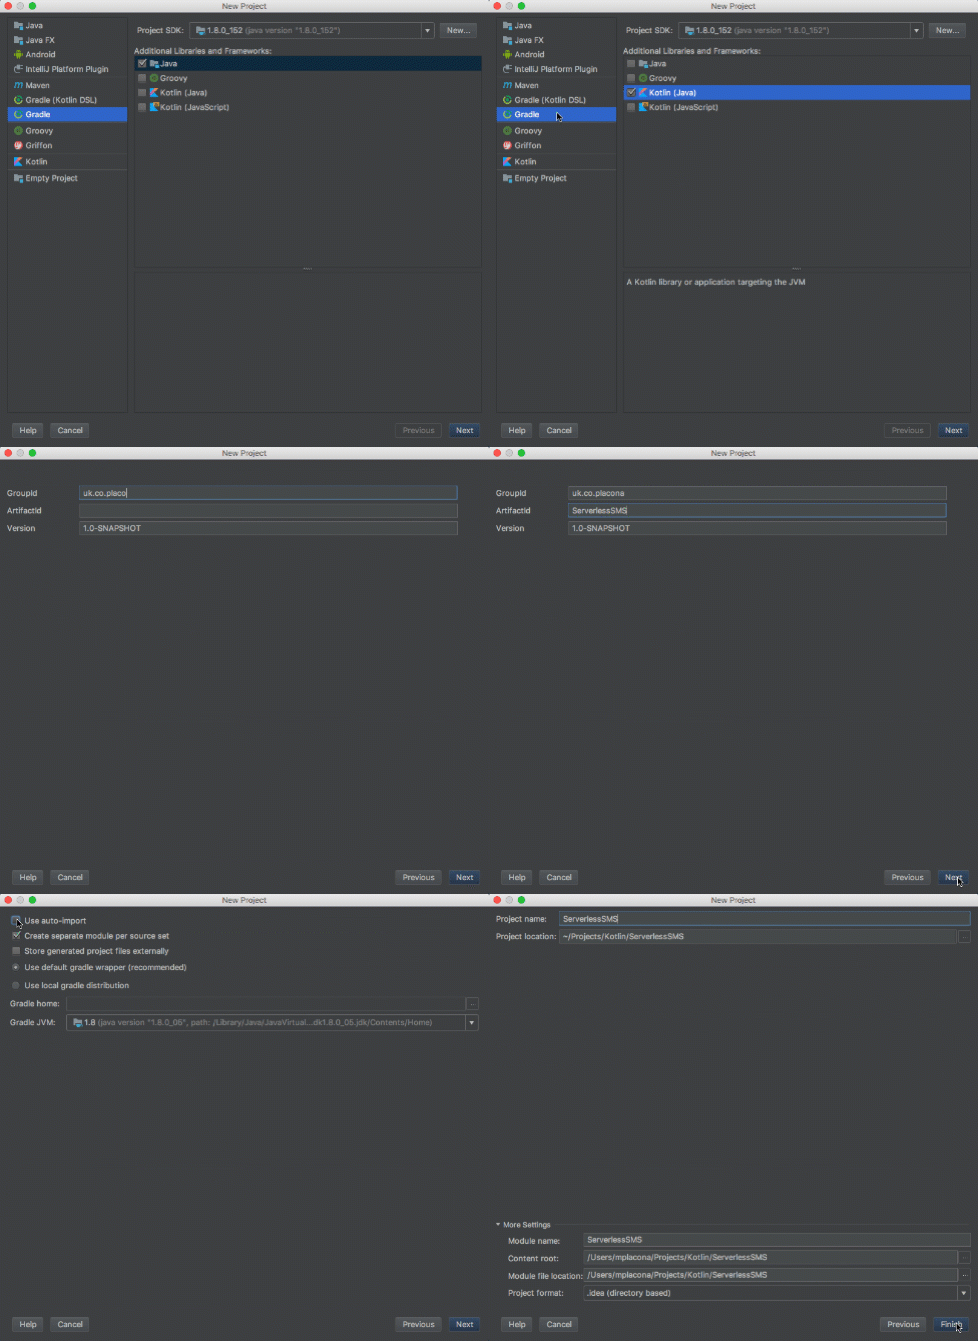
Open up IntelliJ IDEA and click File → New.. → Project → Gradle → Kotlin (Java). Click “Next” and give it a Group ID and an Artifact ID. The group ID is usually a reverse domain such as com.twilio but you can use whatever you want here. The artifact ID is the the project name, which we will call ServerlessSMS.
In the next screen, make sure you check the “use auto-import” option, click “Next” again and choose the location for your project. I stored mine in ~/Projects/Kotlin/ServerlessSMS and clicked “Finish”.
When the project finishes its first build open up build.gradle and add the following extra dependencies:
Next, below the dependencies task create a new task called jar as follows:
The task above zips all our code into a fat jar after compilation that contains all of our dependencies. This way we can just conveniently upload that jar file into the IBM Cloud and it will take care of the entire deployment for us.
Under src/main/kotlin create a new Kotlin file called Main.kt and paste the following into it:
The code above takes an argument and responds with a greeting in JSON format. We will use this to check that our setup is alright before changing it to use the Twilio API.
Open a new terminal window and run gradle jar. If you’re just installing Gradle now, have a look at this link to see how to add it to your path. This will invoke the fat jar task we created earlier and zip our code so we can deploy.
To deploy it run the following in your terminal, and you should get a confirmation that the action was created:
The command above will create a web-enabled function called serverlessSMS that it will upload from the build/libs/ folder from inside your project. We’re also using our Main file as the entry point for this function.
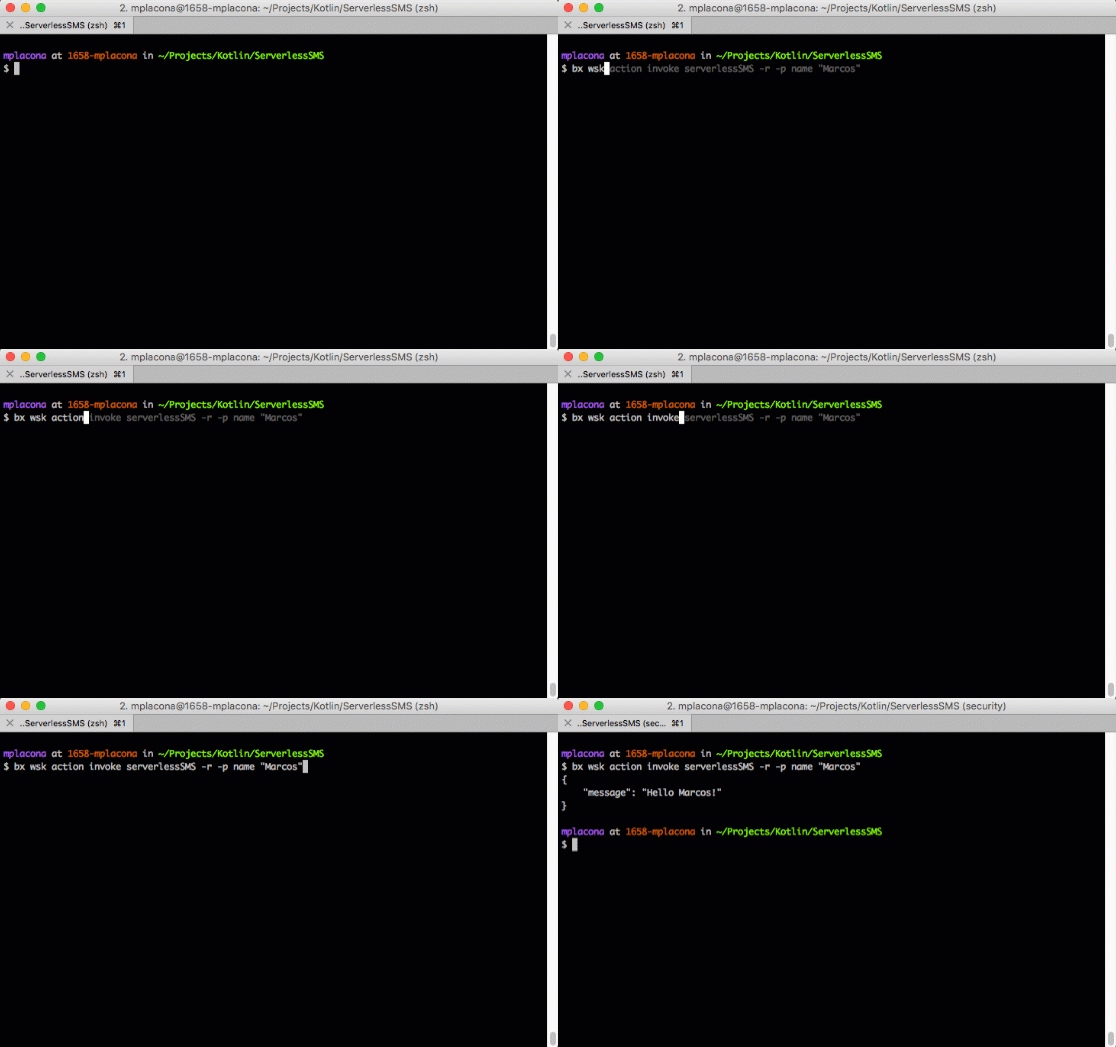
Once that’s completed you can invoke that function by running the following from terminal:
And you should get a JSON response that looks like the following:
Adding Twilio
We’ve already added a dependency to the Twilio SDK to our project earlier so we can just start coding using the library. Open up the Main.kt file again and change it so instead of returning with a greeting message, it now returns with a Twilio Message SID for the SMS message we’ve just sent.
The code above takes a few extra arguments so we can now pass a to, from and a message body to our function. It then initialises Twilio with an Account SID and an Authentication Token that you can get from here.
Next, it creates a new message and upon completion returns a JSON package with the Message SID.
Back in your terminal application run the following two commands to get the jar file re-created and uploaded:
You can now invoke that function via the same terminal as follows:
Replace the values YOUR_PHONE_NUMBER with your mobile number and YOUR_TWILIO_PHONE_NUMBER with a Twilio number you own that you can get from here. And we’re done!

Almost…
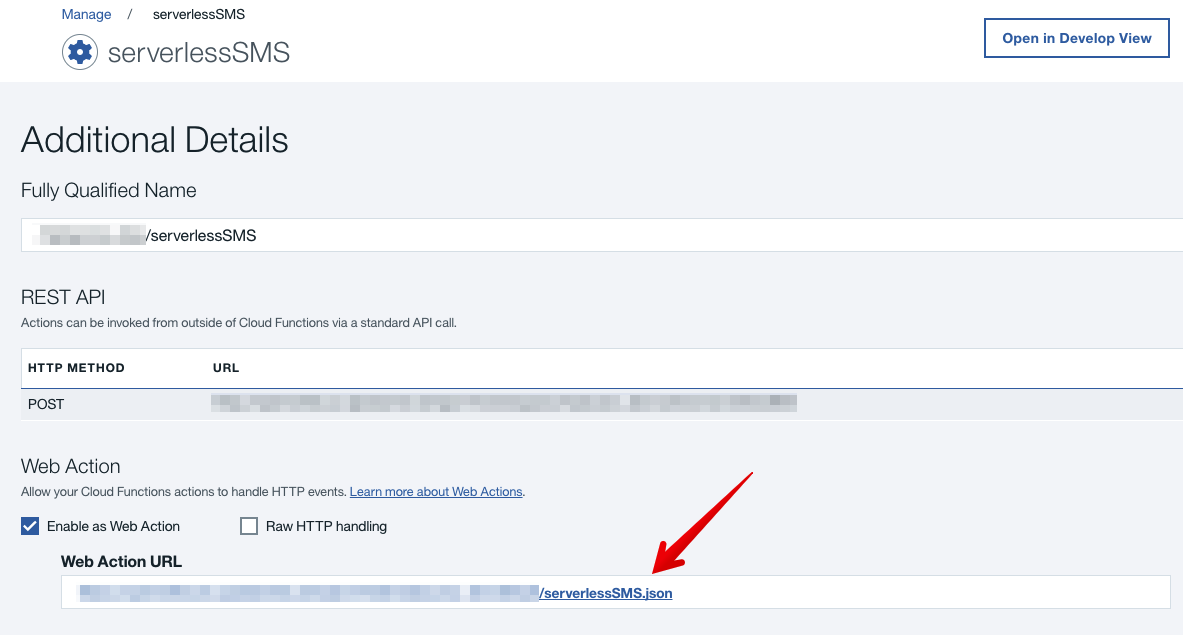
Because I said we were going to be able to use this function from our application and so far we’ve only invoked it from the CLI. Head to the IBM Cloud Management Console and click on the function you just created.
Copy the Web Action URL and use it within your application instead of the URL we used before. You can a sample Android application using a serverless function here.
You can run it right now using cURL if you want to make sure you’ve got everything right.
Don’t worry about scaling…
Now that our function is deployed, we can sit back and be sure that we won’t have to think about scaling it any time soon. Without making a lot of changes in our app, we were able to move from having an entire application running to just having a Serverless Function that handles the same requirements, but at scale and most of all, safely.
You can have multiple functions under the same namespace to make it easier to deploy and maintain and most of it is FREE.
I would love to hear about how you create Serverless Functions to remove logic from your apps. Hit me up on twitter @marcos_placona or send me an email on marcos@twilio.com to tell me more about it.
Related Posts
Related Resources
Twilio Docs
From APIs to SDKs to sample apps
API reference documentation, SDKs, helper libraries, quickstarts, and tutorials for your language and platform.
Resource Center
The latest ebooks, industry reports, and webinars
Learn from customer engagement experts to improve your own communication.
Ahoy
Twilio's developer community hub
Best practices, code samples, and inspiration to build communications and digital engagement experiences.
