Building a Food Ordering App in PHP with Laravel and Twilio SMS
Time to read:
In this tutorial, I will teach you how to use Twilio’s Programmable SMS to create an SMS based food ordering service using Laravel. After we’re finished, your users will be able to place orders for food items via SMS.
Prerequisites
In order to follow this tutorial, you will need:
- Basic knowledge of Laravel
- Laravel installed on your local machine
- Composer globally installed
- A Twilio Account
Getting Started
Start off by creating a new Laravel project. This can be done using either the Laravel installer or Composer. We will be making use of the Laravel installer in this tutorial. If you don’t have it installed, you can check out how to do so from the Laravel documentation.
To generate a fresh Laravel project, run the following command on your terminal:
Next, proceed to install the Twilio SDK for PHP. Change your working directory to the new project generated twilio-food-ordering and install the Twilio SDK via Composer:
If you don’t have Composer installed on your local machine you can do so by following the instructions in their documentation.
Setting up the Twilio SDK
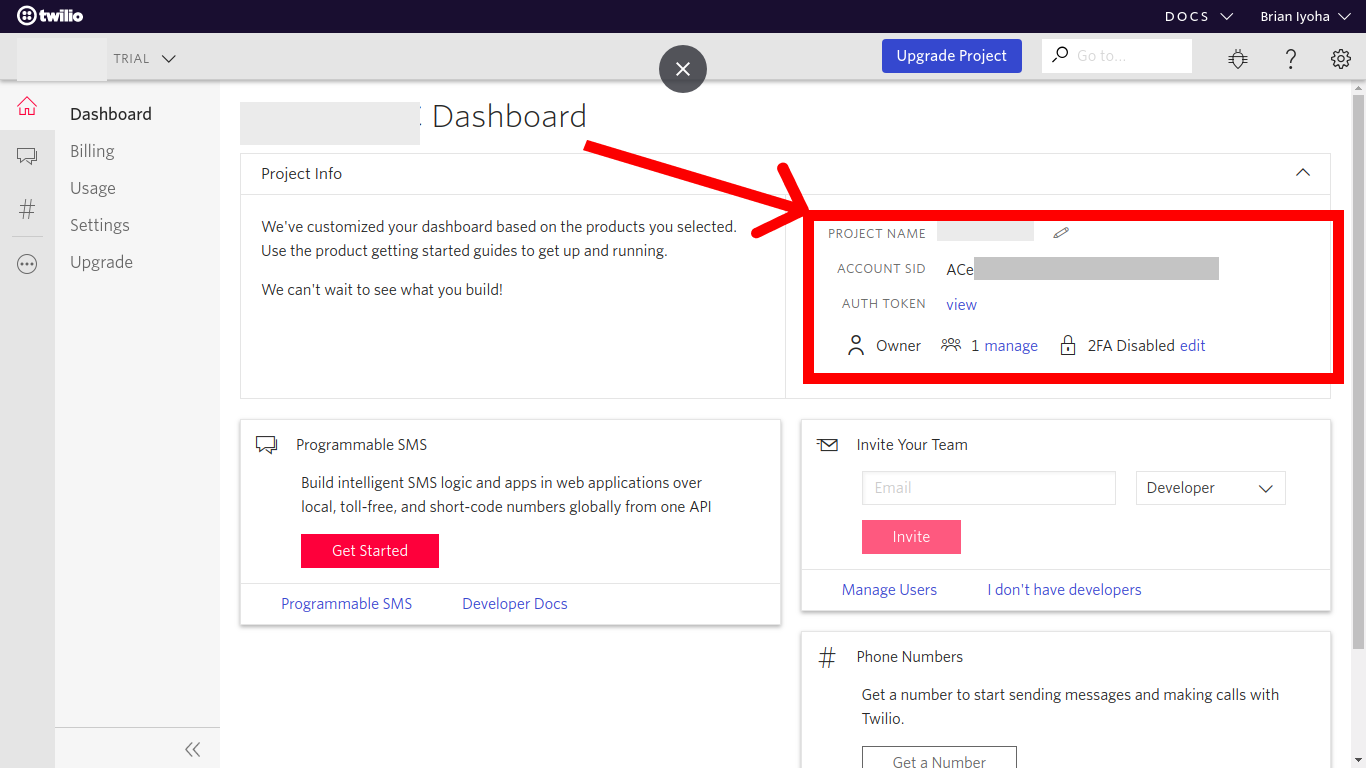
The Twilio SDK requires your Twilio credentials to authenticate each request. You can retrieve these credentials from the Twilio dashboard. Head over to your dashboard and grab your account_sid and auth_token.
Now navigate to the Phone Number section to get your SMS enabled phone number.
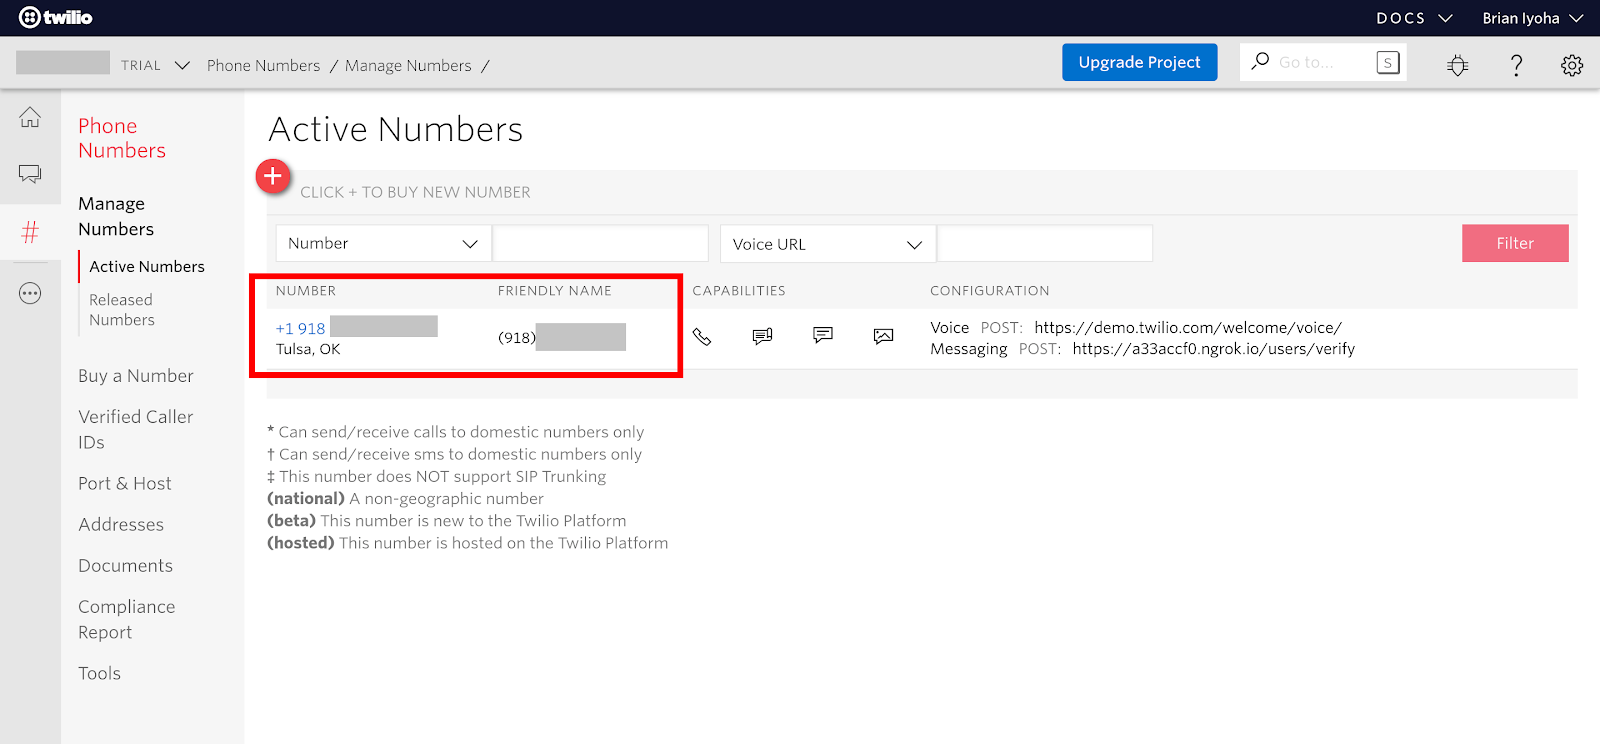
If you don’t have an active number, you can easily create one here. This is the phone number we will use for sending and receiving SMS via Twilio.
Next update your .env file with your Twilio credentials. Open .env located at the root of the project directory and add these values:
Setup the Database
At this point, you have successfully setup your Laravel project with the Twilio SDK installed. Now proceed to setting up your database for the application. We will make use of the MySQL database in this tutorial. If you use a MySQL client like phpMyAdmin to manage your database, then go ahead and create a database named food_ordering and skip this section. If not, install MySQL from the official site for your platform of choice. After successful installation fire up your terminal and run this command to log in to MySQL:
NOTE: Add the -p flag if you have a password for your MySQL instance.
Once you are logged in, run the following command to create a new database:
Next, update your .env file with your database credentials. Open up .env and make the following adjustments:
Create Migration
Now that you have successfully created your application database, proceed to create the needed migration and its respective model for the application. To do this, run the following command at the root directory of the project:
This will generate an eloquent model named Menu and a migration file {current_time_stamp}_create_menus_table at the /database/migrations directory.
Open up the project folder in your favorite IDE/text editor so that you can begin making the needed adjustments. Open up your menu migration file (database/migrations/2019_11_24_031320_create_menus_table.php) and make the following changes to the up() method:
Run the following command to generate your migration:
After successful migration the menus table will be created in your database with the listed columns.
Seeding the Database
Next you will need some sample data in your database which will serve as the available menu items when a user requests a menu. You can proceed to do this manually or you could setup seeders for your database. Seeders will help auto-fill the database with dummy menu items. To do this, first generate a seeder class using the artisan command:
Now, open up the newly created file (database/seeds/MenuTableSeeder.php) and make the following changes:
This will create four dummy menu items in your database to serve as the available menu items for this application. Now run the following command to seed your database:
Placing Order
At this point, you should have your Laravel project set up and your database seeded with dummy data. This next section will cover implementing the needed functionalities for placing an order. Open up your terminal and run the following command to generate a controller to house the logic for placing orders and also sending out responses to your users:
Open the newly created file app/Http/Controllers/MenuController.php and make the following changes:
That’s a lot of code! Let’s break it down. First take a look at the sendMessage() function:
The function takes in two parameters, $message (the response to be sent to the user) and $recipients (the user’s phone number which the message is to be sent to). After creating a new instance of the Twilio SDK client with the Twilio credentials stored in your .env file, an SMS with the $message as the body is sent to the $recipients using the messages→create() from the Twilio client. The messages→create() function takes in two parameters of either a receiver or array of receivers of the message and an array with the properties of from and body where from is your active Twilio phone number and body is the message that’s to be sent to the recipient(s).
Next let’s look at the commandHandler() method:
This function handles the next interaction after an SMS has been received from the user. After receiving a text message from the user, Twilio makes a POST request to your application via the webhook URL set in your console with the From and Body of the SMS. You can then return an appropriate response to the user depending on what was gotten from the Body of the SMS. In this case, only two(2) format of texts are expected, either menu - which returns the available menu items with their corresponding ids - or a string containing the no: - followed by a comma-separated list of the ids of the menu item a user wants included in their order:
If the Body of the text is equal to menu, then the database is queried to return all menu items in a more user-readable text using the formatItems() helper method. At this point, it is also a good idea to let the user know how to place an order, so a tip on how to place an order is also appended to the $response before it is sent to the user. In cases where the user actually places an order using the correct format, the ids of the items are extracted from the text body and then used to query the database. After successfully querying the database and formatting the query results, the total cost of the items is appended to the $response alongside the delivery address which was sent by the user.
After preparing the appropriate response, an SMS is sent back to the user whose number was supplied in the From input data using the sendMessage() method.
NOTE: A simple format (no: 1,2,3 \n address: I want my order to come here) is used for placing an order, as it is important to know how to extract the items ids and also the delivery address for the order. If this isn’t enforced you might encounter issues when trying to extract the needed data from the SMS body.
Creating the Application Route
Having successfully written the logic for placing an order, the next step is to create a route that will call the commandHandler() function in the controller. To do this, open routes/web.php and make the following changes:
Since you won’t be accessing this route from a form, it is important to include the route to the except array of VerifyCsrfToken middleware. This allows access to the route without providing a csrf token. Open up app/Http/Middleware/VerifyCsrfToken.php and add the /order route to the except array:
Setting up the Webhook For Sending Responses
To enable responding to messages sent to you via your Twilio phone number, you have to properly configure your Twilio phone number to handle incoming SMS messages. Fortunately, Twilio supports several channels for doing this, but for this application, webhooks will be used.
Exposing Your Application To Internet
To allow access to your Laravel project through a webhook, your application has to be accessible via the internet. This can easily be achieved using ngrok.
ngrok allows you to expose a web server running on your local machine to the internet
If you don’t have ngrok set up on your computer, head over to their official download page and follow the instructions to get it installed on your machine. If you already have it set up, then open up your terminal and run the following commands to start your Laravel application and expose it to the internet:
Take note of the port your application is currently running on (usually 8000) after running the above command. Now open another instance of your terminal and run this command:
After successful execution of the above command, you should see a screen like this:
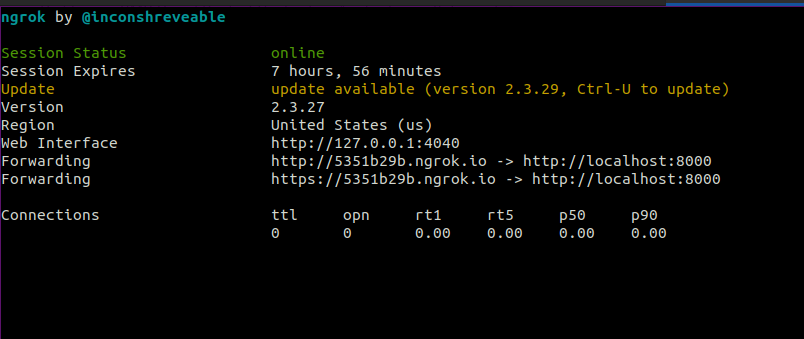
Take note of the forwarding URL as we will be making use of it next.
Updating Twilio phone number configuration
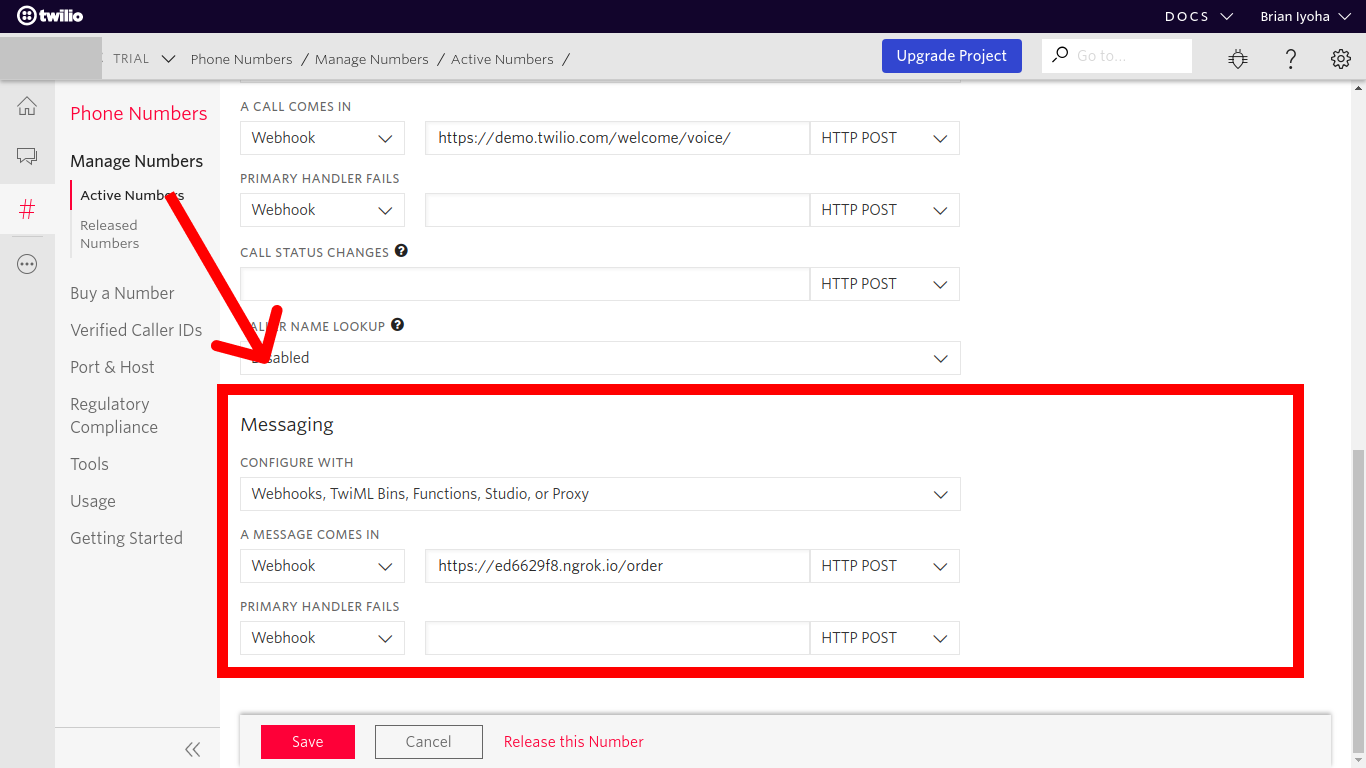
Head over to the active phone number section in your Twilio console and select the active phone number used for your application. Next, scroll down to the Messaging segment and update the webhook URL for the field labeled "A MESSAGE COMES IN" as shown below:
Testing
Great! At this stage you must have completed the logic for placing orders and also configured your phone number for receiving SMS. Now proceed to test your application.
Testing Application
To do this, simply send a text message with a body of menu to your active Twilio number. You should receive a response shortly after with the menu items and their respective prices. After this, you can select any number from the list and send back an SMS in this format "no: {comma separated item ids} address: {your delivery address}" to place an order. If all goes well you should receive a summary of your order back.
Conclusion
At this point, you should have a working food ordering system powered by Twilio SMS. By doing so you have learned how to integrate Twilio Programmable SMS in a Laravel application and also how to respond to text messages sent to your Twilio phone number(s), alongside exposing your Laravel application from your local machine to the internet. If you would like to take a look at the complete source code for this tutorial, you can find it on Github.
You can also take this further by confirming order(s) placed via automated voice call using the Twilio Voice API.
I’d love to answer any question(s) you might have concerning this tutorial. You can reach me via:
- Email: brian.iyoha@gmail.com
- Twitter: thecodearcher
- GitHub: thecodearcher
Related Posts
Related Resources
Twilio Docs
From APIs to SDKs to sample apps
API reference documentation, SDKs, helper libraries, quickstarts, and tutorials for your language and platform.
Resource Center
The latest ebooks, industry reports, and webinars
Learn from customer engagement experts to improve your own communication.
Ahoy
Twilio's developer community hub
Best practices, code samples, and inspiration to build communications and digital engagement experiences.


