Build a Single Page Application in PHP with Yii 2.0 and Vue.js
Time to read:

In the early days of the web, a series of static HTML files would be linked together to form a website. Clicking on page links would trigger requests to the server which would respond with a new HTML file.
The rise of JavaScript and the advent of AJAX, however, made it possible to send and receive data from the server without full page reloads. These technologies added dynamism to websites, opening the door for a massive advancement in how websites operate today. For example, by using JavaScript, it is possible to handle user interaction and update websites via asynchronous requests.
These types of websites became known as Single Page Applications (SPA). On the back of this, several JavaScript libraries and frameworks have risen to prominence - none more so than Vue.js.
In this article, you will learn how to build a Single Page Application using Vue.js and the Yii 2.0 PHP framework; a CRUD API for a library app, one which will handle one major resource: books.
Prerequisites
A basic understanding of Yii 2.0 and PHP will be of help in this tutorial. However, I will provide explanations, and links to official documentation throughout the tutorial. If you’re unclear on any concept, you can review the linked material before continuing with the tutorial.
You will also need a basic understanding of Vue.js and ES6 to help with building the SPA, along with the following installed on your system:
- PHP 7.4 with the PDO extension enabled.
- Composer installed globally.
- A local database server. While SQLite will be used in this tutorial, you are free to select your preferred database service.
- A JavaScript package manager such as NPM, or Yarn (which I'll be using).
Build the backend
Create a Yii 2.0 project
To get started, create a new application named vue_library_app, and switch to the project directory using the following commands.
Then, start the application using the following command.
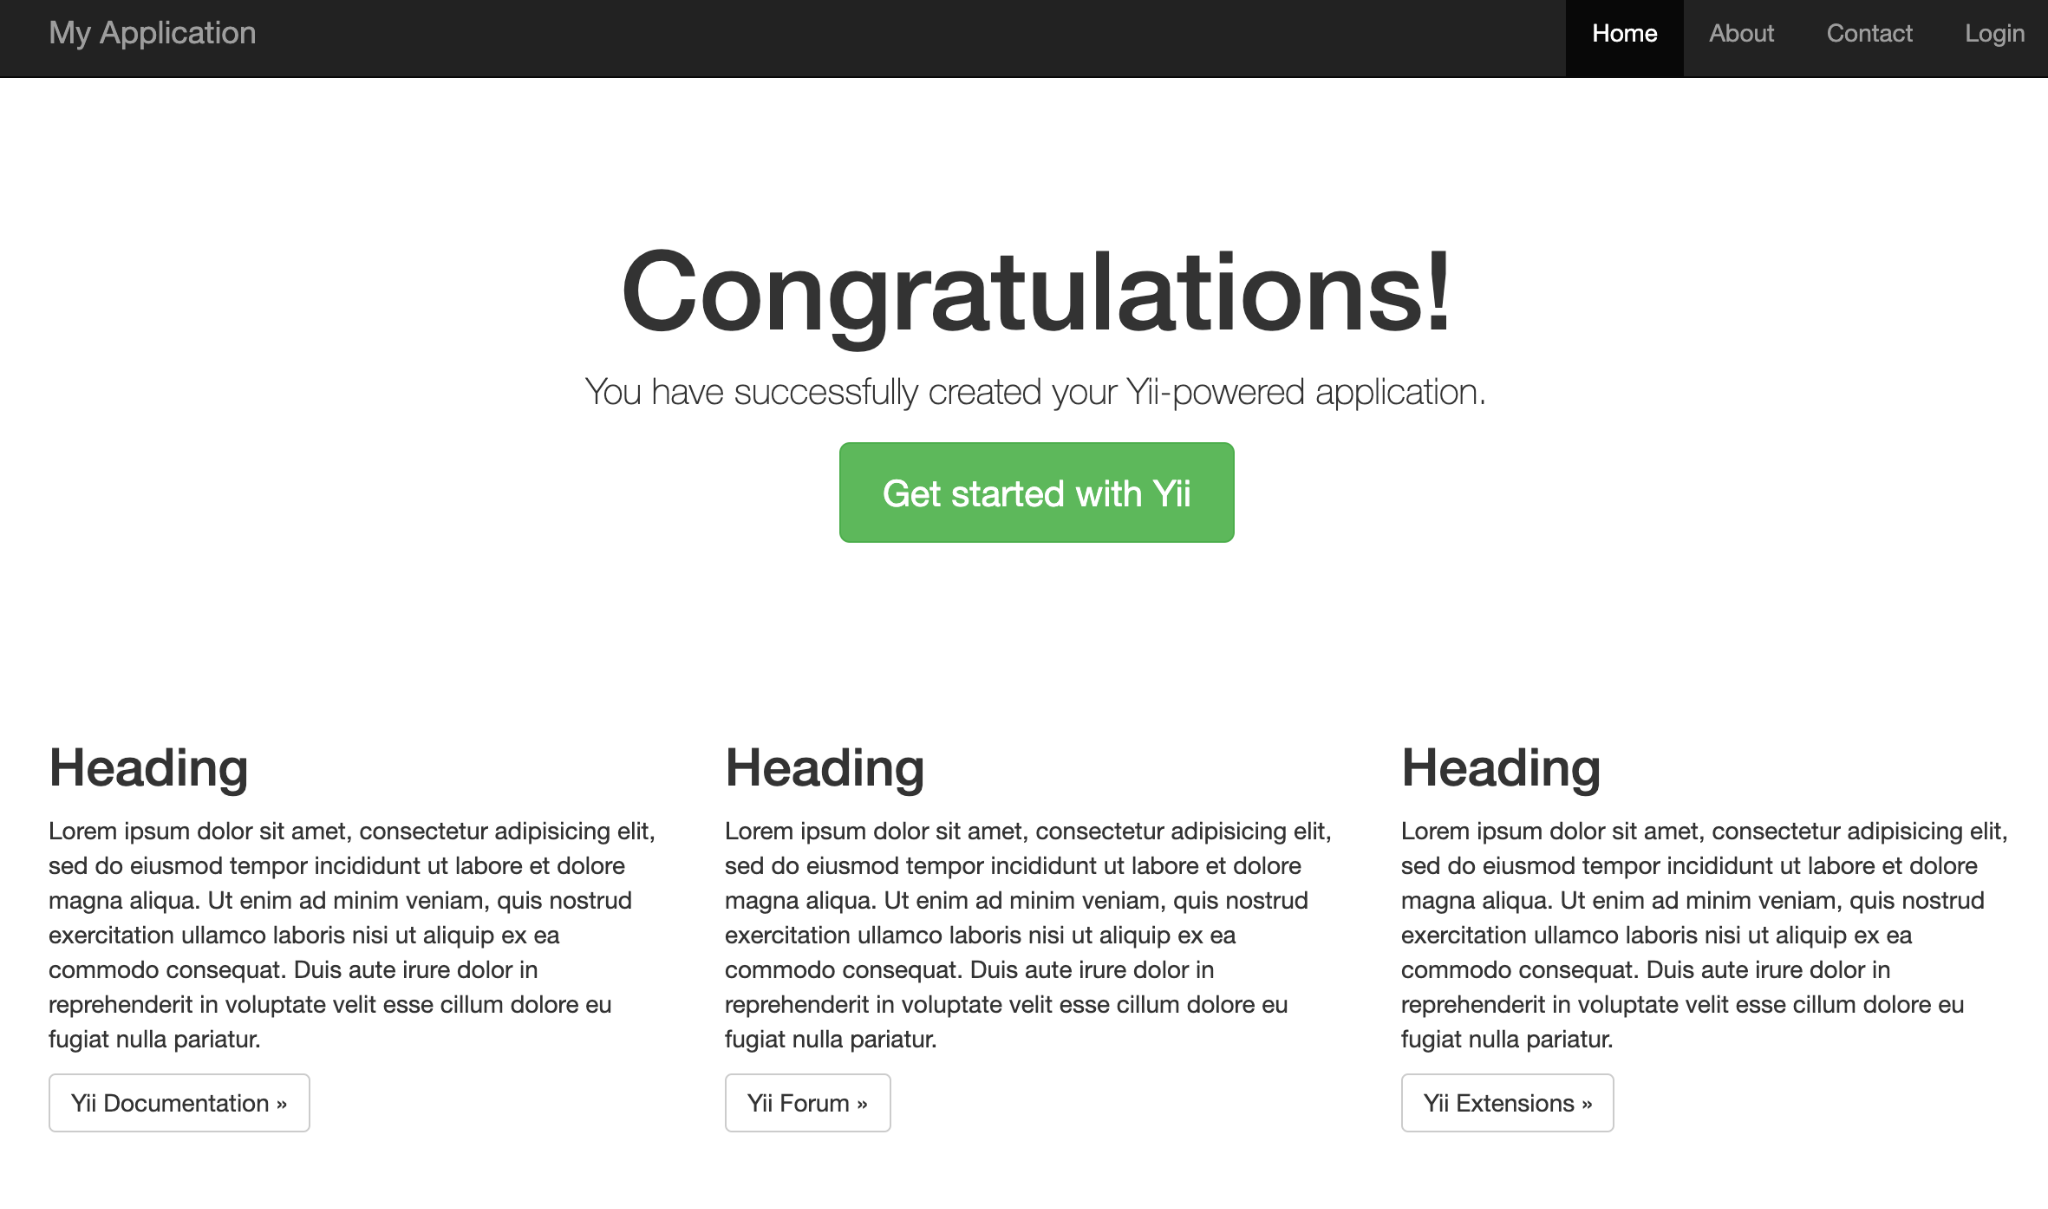
By default, the application will be served on http://localhost:8080/. Open the URL in your browser where you should see the welcome page, as shown below.
Return to the terminal and press Ctrl + C to quit the application.
Set up the database
Create a new directory at the root of the application called db, and in it a file named app.db. Next, update config/db.php to match the following code.
Create a book migration
Next, create a migration for the database table. The application will have one entity named Book, which will represent a book available in the library. For this article, the book table will contain the book's name, author, IBAN, and year of release.
To create the migration, use the yii migrate/create command below, providing the name of the migration to be created (create_book_table). When asked for confirmation, type "yes" for the migration to be created.
By default, migration files are located in the migrations directory. Their filenames are prefixed with the letter m and the UTC datetime of its creation, e.g., migrations/m<YYMMDD_HHMMSS>_create_book_table.php.
Edit the safeUp function for migrations/m<YYMMDD_HHMMSS>_create_book_table.php to match the following code.
Seed the database
To insert some fake data into the table, create a seed migration by running the following command, answering "yes" when prompted.
Open the migration file, migrations/m<YYMMDD_HHMMSS>_seed_book_table.php, and replace the safeUp function with the following two functions.
Then, run all of the migrations using the following command, typing "yes" and pressing Enter when prompted:
You can verify that the database has been created and seeded using the SQLite3 command-line tool, by running the following command.
The first 10 books in the database will be printed to the command line, in a nicely formatted table.
Create a book model
Instead of writing raw SQL queries to interact with the database, we will use an ActiveRecord for our model. Doing so will give us an object-oriented means of accessing and storing data in the database.
Create an ActiveRecord for the Book entity by running the command below.
Type "yes" and press Enter when prompted.
The model class is created in the models directory, and named Book.php. With the model in place, we can now create a controller to handle RESTful API calls.
Create the book controller
To start off, create a controller for the Book entity. Yii 2.0 provides an ActiveController class that provides common RESTful actions, allowing us to create endpoints to handle CRUD actions without the stress of writing boilerplate code ourselves.
To do so, run the command below.
Type "yes" and press Enter when prompted.
The controllerClass argument specifies the name of the controller to be created. You are expected to provide a Fully-Qualified Namespaced (FQN) class.
The controller class is stored in the controller directory, and named BookController.php. Open controllers/BookController.php and edit the content to match the following.
In the actions method, we override the data provider used for the index action and turn off pagination so that all the books will be be returned in one request.
Next, in the application's configuration, in config/web.php, modify the urlManager component. There, a $config array is declared, which contains a components array. In the components array, uncomment the urlManager component and update it to match the following code.
This code adds a URL rule for the book controllers so that associated data can be accessed and manipulated with pretty URLs and meaningful HTTP verbs.
The components array also contains a request array which holds the configuration for the request Application Component. To enable the API to parse JSON input, add the following to the request array.
At this stage, we have built an application that can handle the following requests:
- GET (/books): list all books page by page;
- POST (/books): create a new book;
- GET (/books/<id>): return the details of the book with id
<id>; - PATCH and PUT (/books/<id>): update the book with id
<id>; - DELETE (/books/<id>): delete the book with id
<id>;
Configure integration with Vue.js
For our API to work properly with the frontend, we need to make some additional changes. The idea is for the index page to be served by the Yii 2.0 application with the Vue application bundled and referenced in a <script> tag.
Once the JavaScript is loaded, the Vue application targets the specified <div> and loads the page, it then handles user interaction without refreshing the page while making network requests to the API, re-rendering the DOM as required.
The first thing to do is register the bundled app. To do this, open assets/AppAsset.php and edit the $js array to match the following code.
This makes our bundled Vue application available in the Yii 2.0 views.
Next, edit the urlManager component of the $config array in config/web.php to match the following code.
Here, we add a routing rule for the index page to load the default index page provided by Yii 2.0. This rule ensures that the index page is returned for any other request made to the Yii 2.0 API. Doing this prevents the API from returning a 404 error when we refresh our application. Instead, the index page is loaded and the Vue router loads the appropriate component.
Finally, update the content of views/layouts/main.php to match the following code.
Here, we remove the content of the layout body. This means that the Yii 2.0 views will not be rendered as we no longer make provision for them. We also declare a DIV with the id app. This DIV is where the Vue application will be mounted when the page is loaded.
With these in place, we're all set to build the frontend!
Build the frontend
Set up the project dependencies
Before we start building the Vue application, let's set up the dependencies for the project. Create a new file called package.json and add the following to it.
In addition to the base Vue dependency, we add vue-router for client-side routing and Axios for network requests to the API. Ant Design Vue will be used to create the application UI
We also add some dependencies only available in the development environment. Laravel Mix will be used to compile our Vue application into a single JavaScript file that can be imported into the index page served by the Yii 2.0 application. The vue-loader and compiler are used to handle the .vue files, which we will be creating.
Install the dependencies by running the following command.
Next, we need to configure Laravel Mix and provide some required information to help with bundling the Vue application. At the root of the project, create a new file called webpack.mix.js and add the following code to it.
The entry point for the Vue application is the index app.js file which is located in the app directory. We'll create this file later on, but for now we just want Laravel Mix to know where it is located.
We also specify the output path (and name) for the bundled JavaScript file. It will be named app.js and stored in the web directory. Then, we set the public path to the web directory.
Create the Vue application
At the root of the project, create a new directory called app. This directory will contain all the code related to the frontend. In the app directory create two files: app.js and App.vue.
Add the following to app/app.js.
Next, add the following code to App.vue.
To bundle the app with our new changes, run the following command.
When Webpack finishes compiling and displays a confirmation message, start the application using the following command.
Then, navigate to the index page (http://localhost:8080/ by default) where you should see your welcome message similar to the screenshot below.

Nothing exciting at the moment (except that we just got Vue and Yii 2.0 to play nicely!). In the following sections, we'll build the CRUD features of the application.
Create an API helper
In the app directory, create a new file called api.js and add the following code to it.
Here, we create an Axios instance with the baseUrl set to our Yii 2.0 application's URL. We then export four functions to help with the four request methods we intend to use (GET, POST, PATCH and DELETE). Apart from the helpDelete() method, the Promise returned by each helper method can be resolved to retrieve the data returned by the API.
Create a BooksList component
The BooksList component will display all the books in the library. To start off, create a new directory named components in the app directory and in this directory, a new file named BooksList.vue.
Add the following code to the newly created app/components/BooksList.vue file.
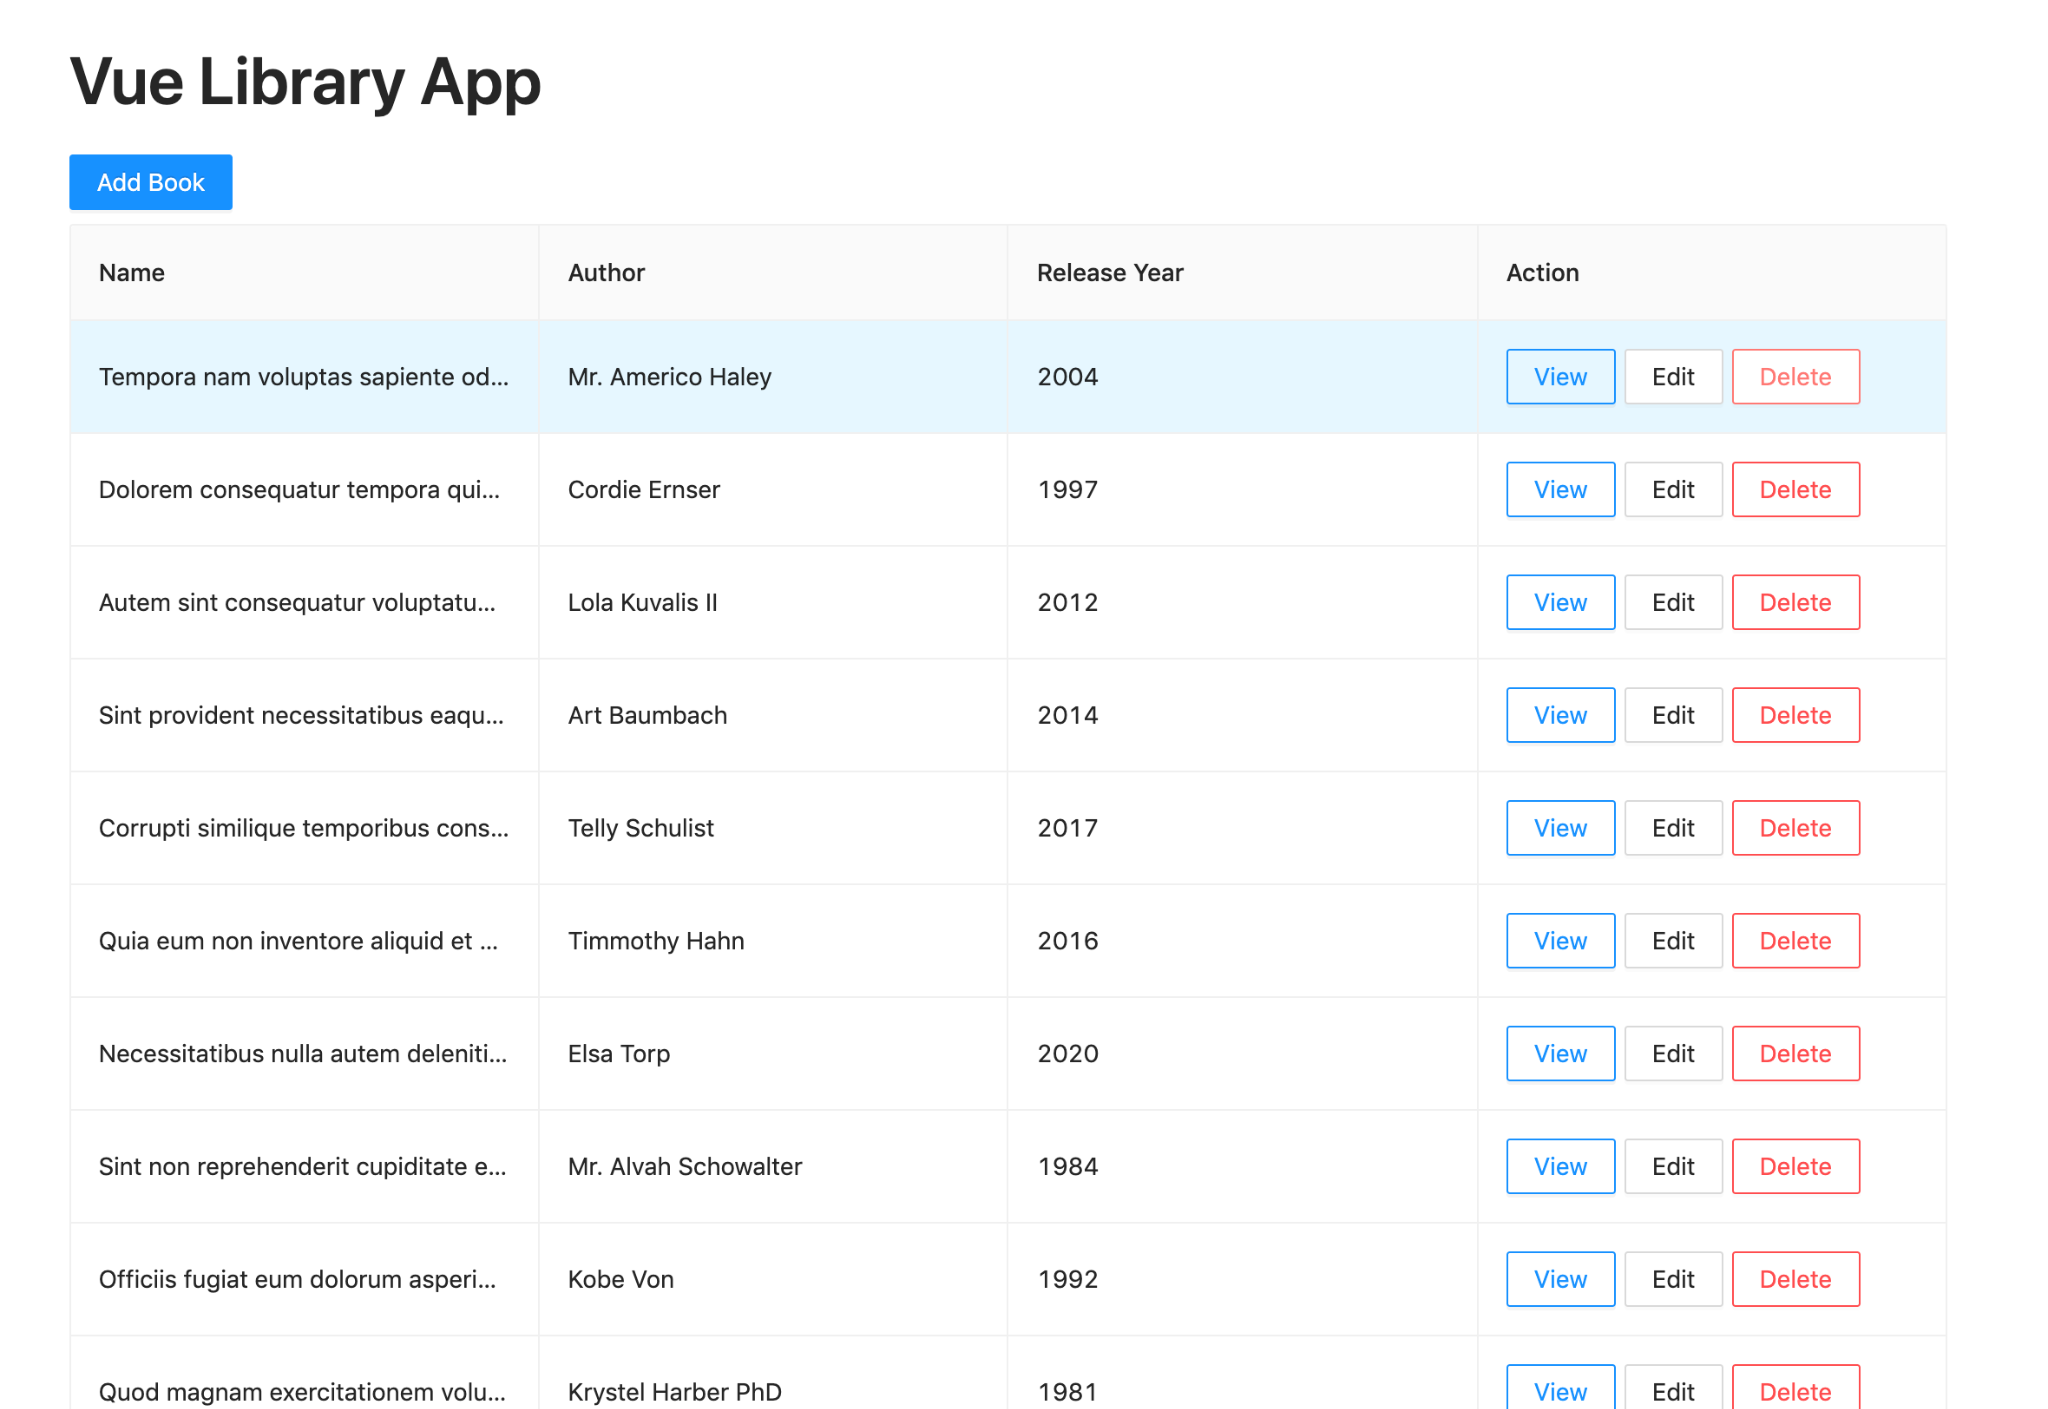
In this component, our template consists of a button to add a new book and a table showing the existing books. The table has three columns showing the name, author, and release year of each book. There is also an action column with three options to view, edit, and delete books.
The component also listens for the mounted lifecycle event, where it makes an API request to get all the books and set them to the books data component.
Create a BookForm component
Next, we will build the form to add a new book. In the app/components directory, create a new file called BookForm.vue and add the following code to it.
The template for this component is a form with fields for the title, author, IBAN, release year, and cover image URL of the book to be added. In addition, a submit button, reset button, and cancel button are added to the form.
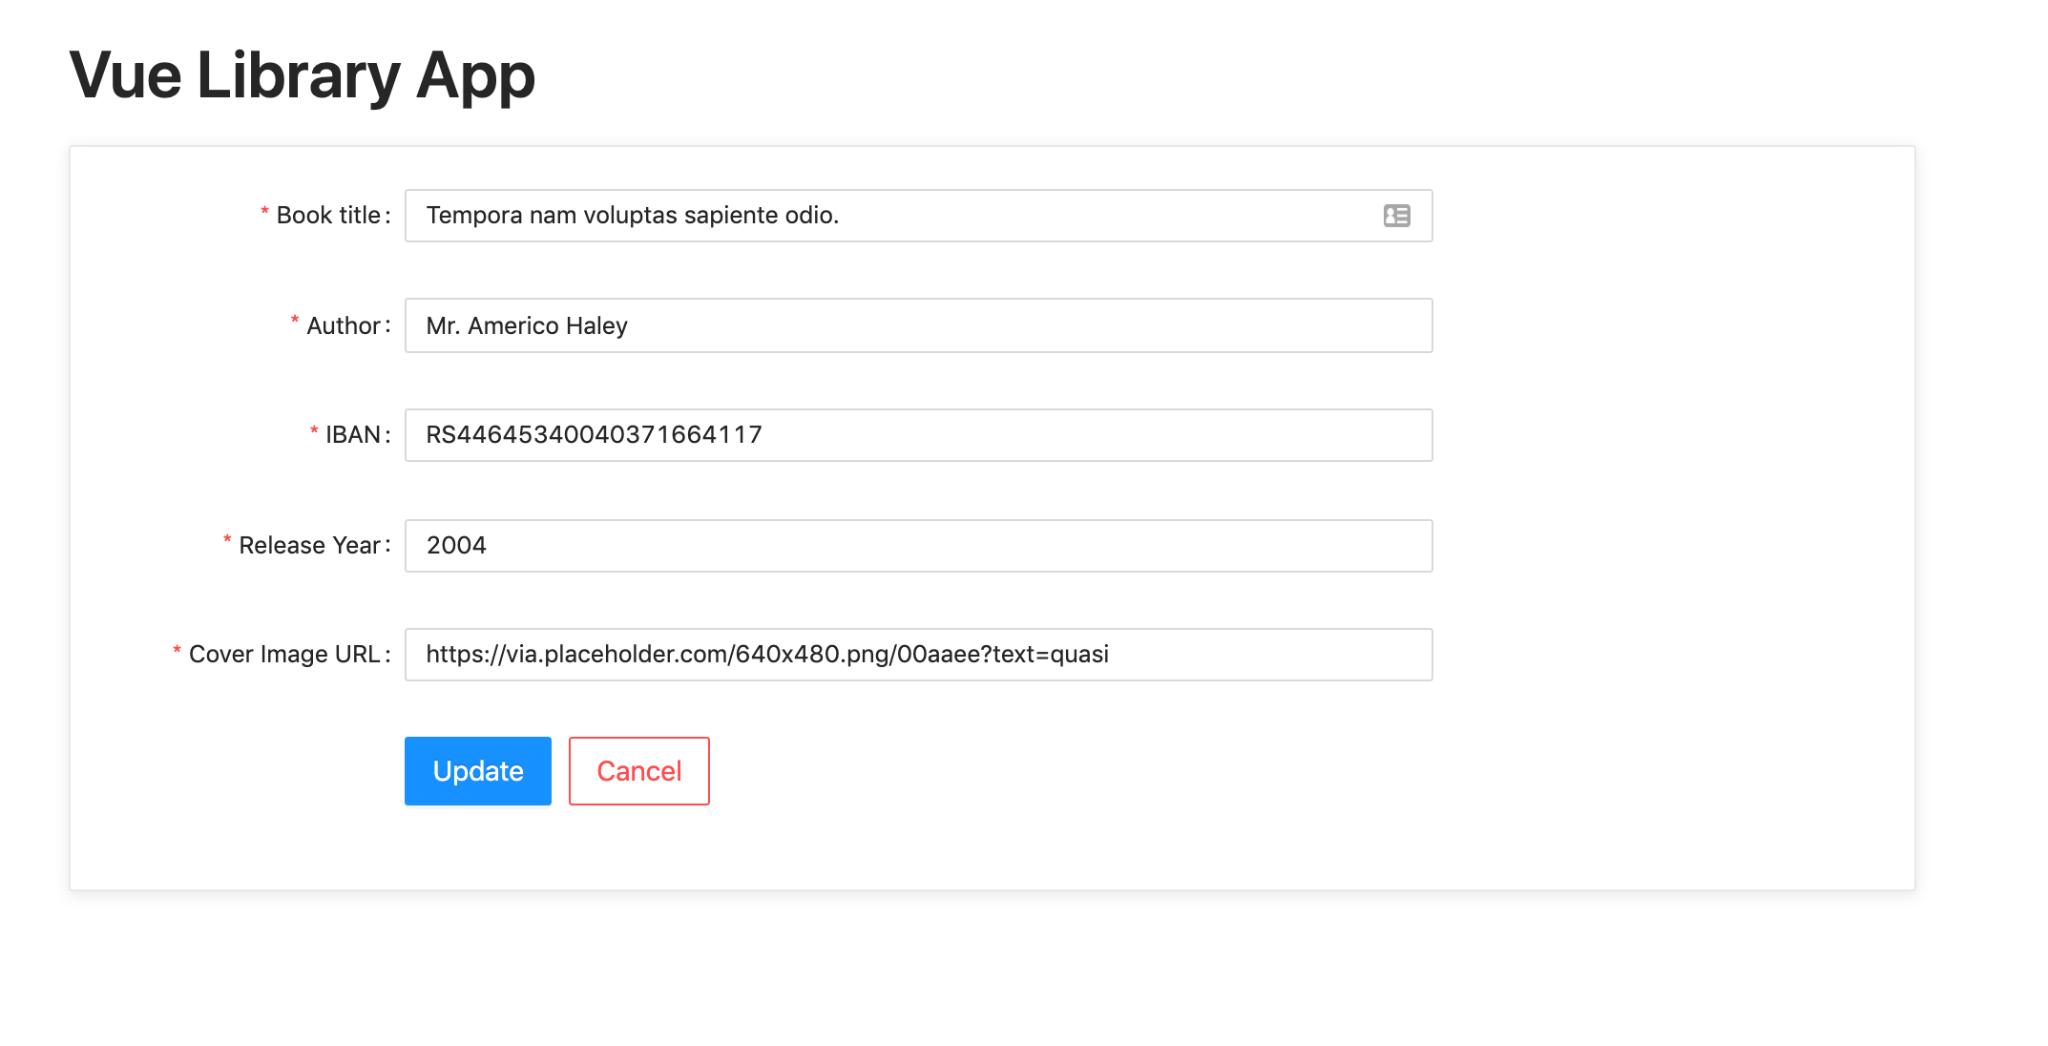
Because this form is going to be used for either creating a new book or editing an existing book, we check if the book id is passed as a Prop in the mounted lifecycle event. If the id is provided, an API request is made to get the book and populate the form's fields.
On submission, the handleSubmit() function is called, which validates the form before sending the relevant POST or PATCH request to create or update a book respectively. On success, the application redirects to the view displaying the book's details.
Create a BookItem component
In the app/components directory, create a new file called BookItem.vue and add the following code to it.
In this component, we display the book's details and add options to show all books, edit the book, and delete the book. When the component is mounted, the book is retrieved from the API using the book id passed as a Prop.
Create a router
In the app directory, create a new file called router.js and add the following code to it.
Update the App component
Update app/App.vue to match the following code.
Using the router view component, we will render the component assigned to the matched route.
Update app.js
FInally, update app/app.js to match the following code.
Build the frontend files
Then, bundle the app with all the new changes using the following command.
Test the application
Now test the application by running the application using the following command:
View the list of books
Open http://localhost:8080/ where you will see the list of all available books in the database.
Create a book
To create a new book, click on the Add Book button. You will be redirected to a page similar to the one shown below:
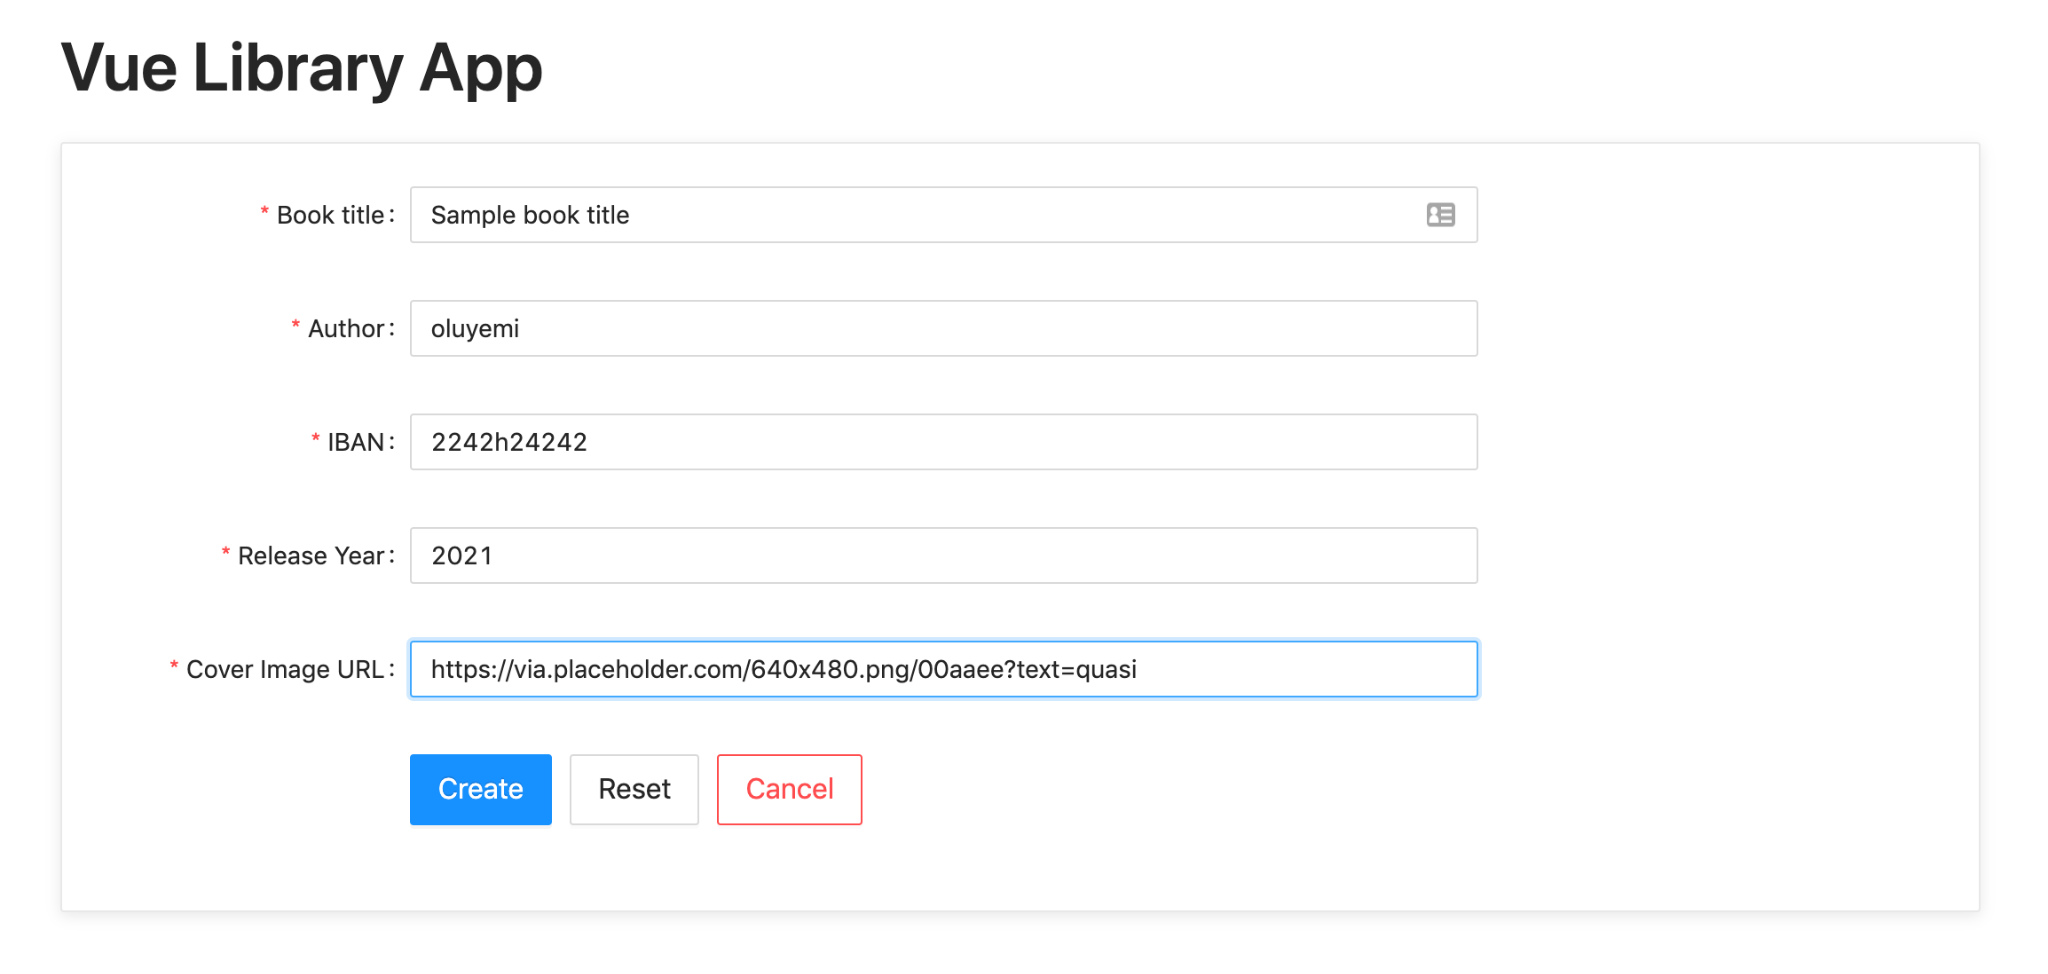
Fill the form appropriately and click on the Create button.
Update a book
From the list displayed on the index page, click on the Edit button to update the details of any book on the list. Update one or more of the available fields and click the Update button.
Delete a book
To delete a book, click on the Delete button in the Action column for the book and click Delete in the popup, to confirm that you want to delete the book.

Conclusion
In this article, you learned how to integrate a Vue application into a Yii 2.0 project. To help with this, you used Laravel Mix to bundle a Vue application into a single js file which is registered and injected into the index page. You also used a catch-all URL rule to ensure that only the index page is returned from the Yii 2.0 backend thus giving the Vue application full control over routing
Managing a project via this approach is particularly helpful for small teams where developers regularly maintain code across all layers of the application. Because all the code is in one project, code navigation is made easier.
The entire codebase for this tutorial is available on GitHub. Feel free to explore further.
Happy coding!
Oluyemi is a tech enthusiast with a background in Telecommunication Engineering. With a keen interest to solve day-to-day problems encountered by users, he ventured into programming and has since directed his problem-solving skills at building software for both web and mobile.
A full-stack software engineer with a passion for sharing knowledge, Oluyemi has published a good number of technical articles and content on several blogs on the internet. Being tech-savvy, his hobbies include trying out new programming languages and frameworks.
- Twitter: https://twitter.com/yemiwebby
- GitHub: https://github.com/yemiwebby
- Website: https://yemiwebby.com.ng/
Related Posts
Related Resources
Twilio Docs
From APIs to SDKs to sample apps
API reference documentation, SDKs, helper libraries, quickstarts, and tutorials for your language and platform.
Resource Center
The latest ebooks, industry reports, and webinars
Learn from customer engagement experts to improve your own communication.
Ahoy
Twilio's developer community hub
Best practices, code samples, and inspiration to build communications and digital engagement experiences.


