Build a Hobby Recommender with Twilio Functions and the WikiMedia API
Time to read:

In honor of National Anti-Boredom Month, I decided to build a bot that gives me suggestions for hobbies to pick up in the near future. Want to get hobby suggestions for yourself? Try texting any message to the number +1 (717) 942 - 9721, and see what you get!
In this tutorial, you’ll see how I built the bot (aptly named HobbyBot) and learn how to build it yourself with Twilio Runtime, specifically Twilio Functions, and the WikiMedia API.
Prerequisites
To follow along to this tutorial, you will need:
- A free or paid Twilio account. If you are new to Twilio, click here to sign up for a free Twilio account and get a $10 credit when you upgrade!
- A Twilio phone number
- A personal phone number
Setting up your developer environment
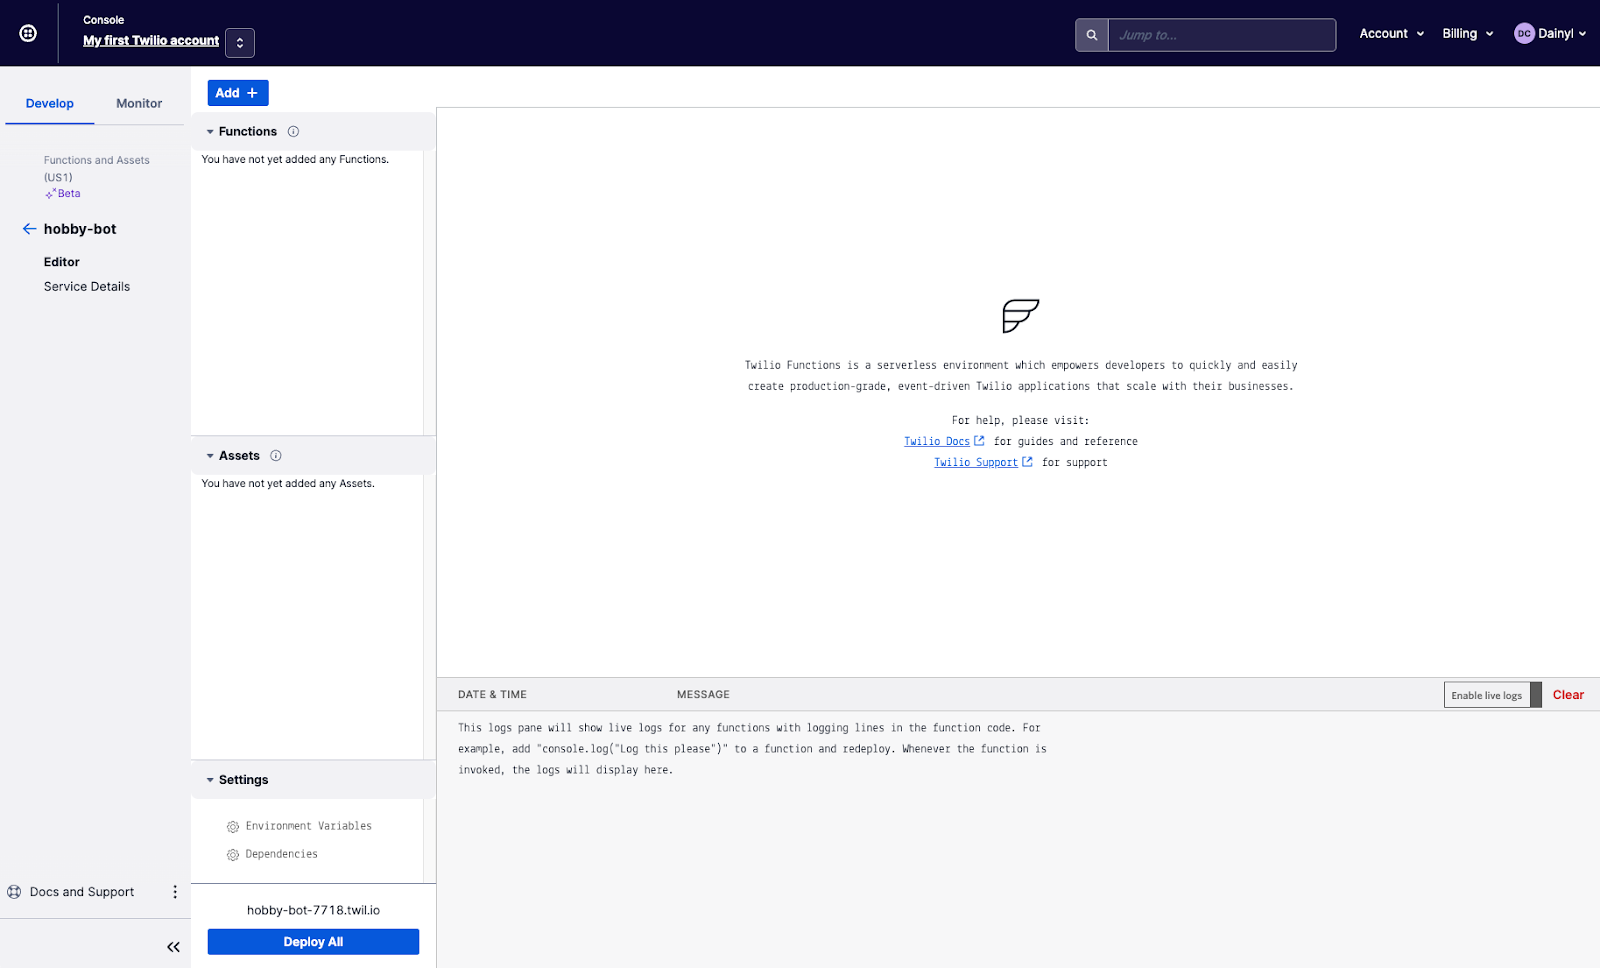
For this tutorial, you will only need to work with Twilio Functions. The first step in doing so is to head to the Services page located under the Functions and Assets tab on the left side of the screen in your Twilio Console. Next, click on the blue button in the top half of the screen labeled Create Service. Enter a name for your Service (for this tutorial, I named the Service hobby-bot), and click the blue button in the bottom left of the popup window labeled Next. You should be directed to a code editor, and it should look similar to this:

Click the blue button in the top left labeled Add +, click on Add Function in the dropdown menu, then rename the new function path if you wish (for this tutorial, I named the function path /main).
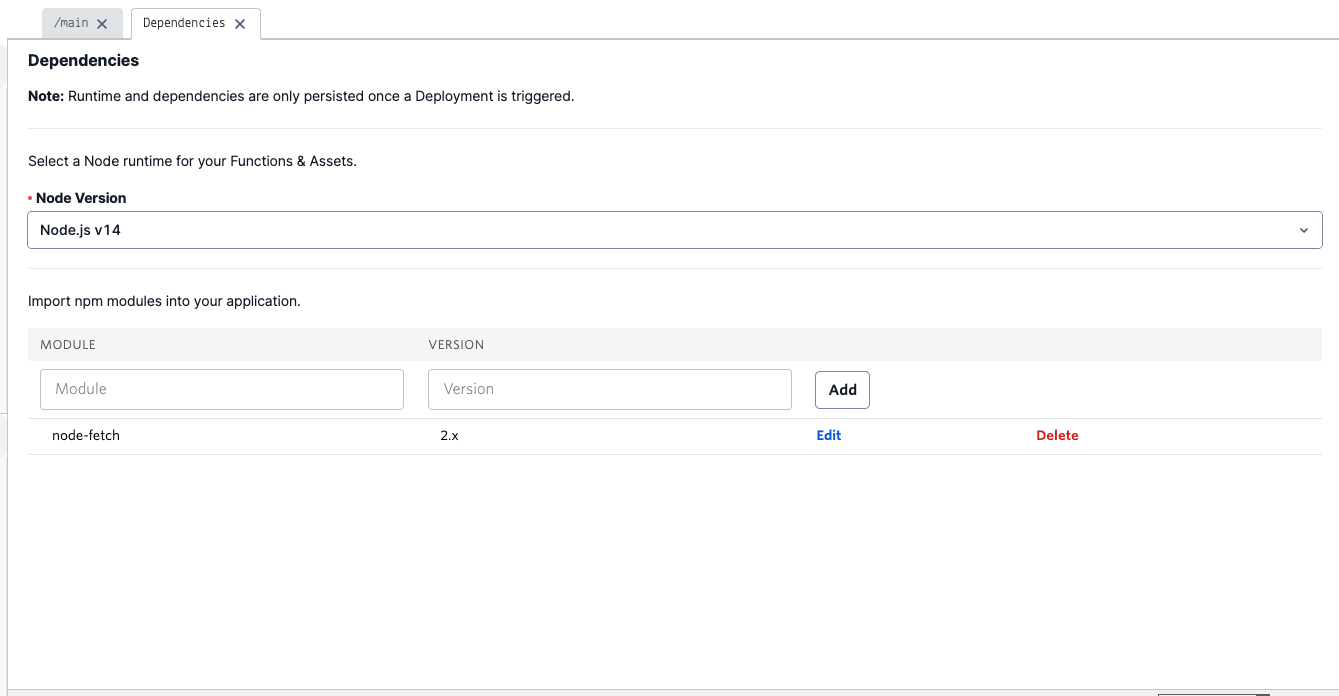
Next, click on Dependencies in the bottom left of the page, below the Settings header. Enter node-fetch in the Module text box and enter 2.x in the Version text box. Then, click the button to the right labeled Add. This imports the node-fetch npm module to use in your application and allows you to utilize the Fetch API to request and pull in data from the WikiMedia API.

With your environment fully set up, you can now start writing code!
Building your bot
Click on the /main tab near the top of your page to switch back to your code editor. Replace the default code with the following:
These lines of code initialize the node-fetch module that you imported earlier, as well as the twiml and message variables that you will be working with. These two variables are objects with parameters responsible for storing data used when sending text messages. The callback() function at the end of the function will be responsible for sending your message once the code is complete.
Next, insert the following code below line 6 where you initialized the message variable:
This code utilizes a try catch block to run the data fetching code and catch and parse any errors that occur. The API endpoint URL in fetch() utilizes the parse action to get all the text on the List of hobbies page, formatted in wikitext. If the data is successfully gathered, it is then parsed into JSON and stored in unformattedHobbies.
The data is then parsed using a regular expression and the .match() function, transforming it into an array. Invalid entries in the array are then removed and then a sanitized array filled with hobby names is stored in the hobbies variable.
Next, add the following code directly below the one you just added:
This code generates a random index inside the hobbies array then grabs the hobby name at that index, storing it within the hobby variable. The hobby string is then formatted using a regular expression that replaces all whitespaces with underscores, and stored in the formattedHobbyName variable. Similar to the previous code, another fetch() is performed that uses the parse action. This time, however, you will be pulling text from the Wikipedia page of the hobby you randomly selected and storing it within the unformattedHobby variable.
The code then checks if a redirect occurs when visiting the page—if the redirect is not handled properly, an improper description of the hobby will be sent to the reader. If there is a redirect, then a regular expression and the .match() function will be used to gather the name of the redirect destination page, then the new name is assigned to formattedHobbyName. If not, the code proceeds as normal.
Next, copy and paste the following lines of code below the last ones you added:
These lines of code perform the final fetch you will use for your bot. Instead of utilizing the parse action like you did in the previous fetches, the query action is used instead. With the query action, it’s easier to get the page thumbnail URL (if it exists) and the description of the Wikipedia page. Once you’ve successfully retrieved the data, you can extract the description (and trim it in case it goes above the 1600 character limit for messaging) and get the page thumbnail URL.
Finally, add the last bits of code below the try catch block:
This final code first initializes an array of greetings that the bot greets the texter with to add some personality in its responses. A random index inside the greetings array is generated then the greeting at that index is chosen and stored in the greeting variable. Finally, the message object’s body parameter is set to a string that uses the greeting, description, and formattedHobbyName variables. If thumbnailUrl is not an empty string (indicating a thumbnail URL was found), then the message object’s media parameter is set as well.
Your code is now complete! The code in its entirety should look like the following:
Finally, hit the blue button labeled Save below your code editor and then hit the blue button labeled Deploy All on the bottom left of the page. All that’s left to do is connect your Service to your Twilio phone number.
Adding the function to your Twilio phone number
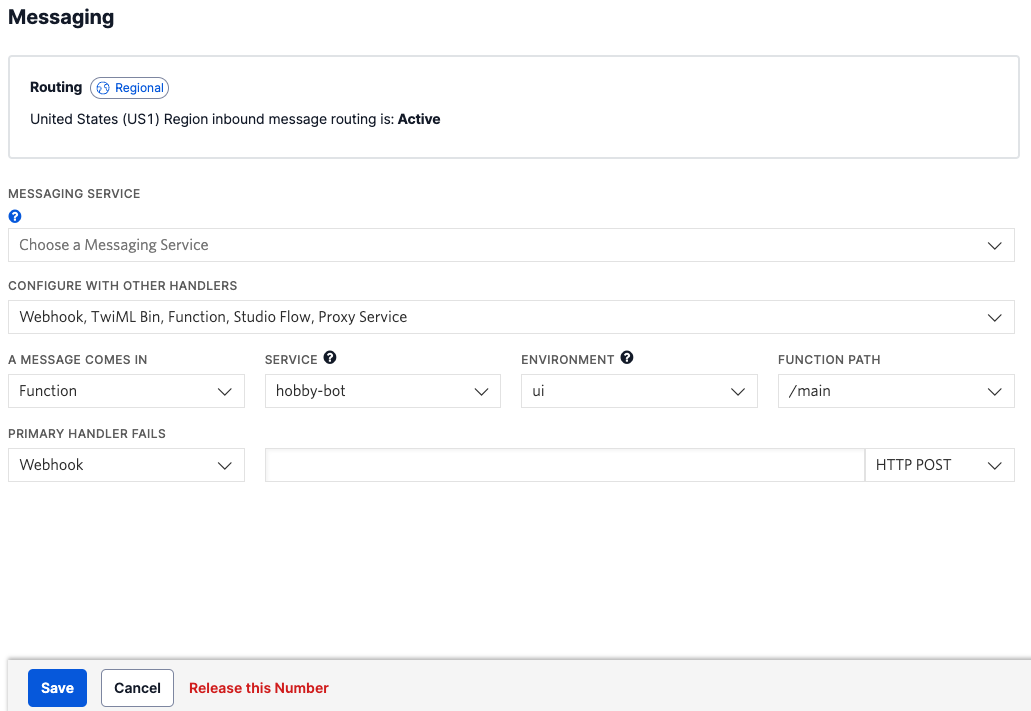
Navigate to the Active Numbers page located in the Manage dropdown menu under the Phone Numbers tab in the left side of your Twilio Console. Click on your active number, then scroll down to the Messaging section.
Under the heading that says A MESSAGE COMES IN, click the dropdown menu and select Function. Next, select your Service in the dropdown menu under the SERVICE header, then select ui in the dropdown menu under the ENVIRONMENT header, and finally the function path you named earlier under the FUNCTION PATH header.

After that, hit the blue button labeled Save at the bottom of the page. You should now be able to text your Twilio phone number and get a recommendation!

Conclusion
Hopefully this tutorial helped you understand how I built HobbyBot! With Twilio Runtime, you don’t have to worry about setting up a server that will host your application forever—you only need to build the code and let Twilio handle everything else. Maybe you could integrate it with your own products to kill some time during National Anti-Boredom Month?
I can’t wait to see what you build next!
Dainyl Cua is a Developer Voices Intern on Twilio’s Developer Network. They would love to talk at any time and help you out. They can be reached through email via dcua[at]twilio.com or through LinkedIn.
Related Posts
Related Resources
Twilio Docs
From APIs to SDKs to sample apps
API reference documentation, SDKs, helper libraries, quickstarts, and tutorials for your language and platform.
Resource Center
The latest ebooks, industry reports, and webinars
Learn from customer engagement experts to improve your own communication.
Ahoy
Twilio's developer community hub
Best practices, code samples, and inspiration to build communications and digital engagement experiences.


