An Introduction to CI/CD for Twilio Functions Using GitHub Actions
Time to read:

Hey, this is Steve at Dabble Lab. In this tutorial we’re going to explore using GitHub Actions to automate the deployment of Twilio Functions.
For most of my projects that use Twilio Functions, I use the Twilio Console to create and manage my code and assets. But as much as I love the ease of working in the web console, it’s not always the best option. For example, when working on mission-critical apps, complex or frequently updated apps, and when collaborating with other developers, I always want to have continuous integration and continuous delivery processes in place. But at the moment, continuous integration and continuous delivery functionality is not provided by the Twilio Console. The good news is setting up CI/CD workflows for your Twilio Functions is relatively simple using GitHub Actions.
GitHub Actions
GitHub Actions allow you to automate, customize, and execute software development workflows from within your GitHub repositories. You can use GitHub Actions to perform just about any job, including CI/CD workflows.
Actions are event-driven and are executed as part of a workflow. For example, you can trigger a workflow every time new code is pushed to a repository. Workflows can be set up to contain one or more jobs. Jobs are composed of steps that control the order in which actions are run.
Workflows are executed on a runner. A runner is a server that has the GitHub Actions runner software installed. However, you don’t have to set up your own server because GitHub provides runners for you. A runner listens for events, runs the jobs one at a time, updates progress logs, and returns the final results back to GitHub.
The Twilio CLI & Serverless Plugin
To automate the deployment of our function code, we’re going to use the Twilio CLI along with the Twilio Serverless Plugin.
The Twilio CLI is a developer tool for managing Twilio resources from your terminal or command prompt. In most cases, the Twilio CLI is installed and used on local development workstations. However, in our case, we’re going to install and use the CLI on a GitHub Actions runner.
In addition to using the Twilio CLI, we’re also going to use the Twilio Serverless Plugin for the Twilio CLI. Although everything we’ll be doing could be done without the plugin, the plugin will simplify the workflow.
Getting Started
To follow along, you’ll need a GitHub account and a Twilio account.
- Use this link to join GitHub
- Use this link to get a Free Twilio account
To keep things simple, we’ll be doing everything from the browser. I’m also assuming that you have some experience creating Twilio Functions from the Twilio Console or the Twilio CLI. If you’ve never worked with Twilio Functions before, you might want to check out Getting Started with Serverless and Twilio Functions and then come back to this tutorial.
Steps
This article will cover the following steps:
- Fork the example repository
- Gather the required Twilio credentials
- Create the required GitHub secrets
- Review the GitHub Workflow
- Test and verify the deployment
Fork the Example Repository
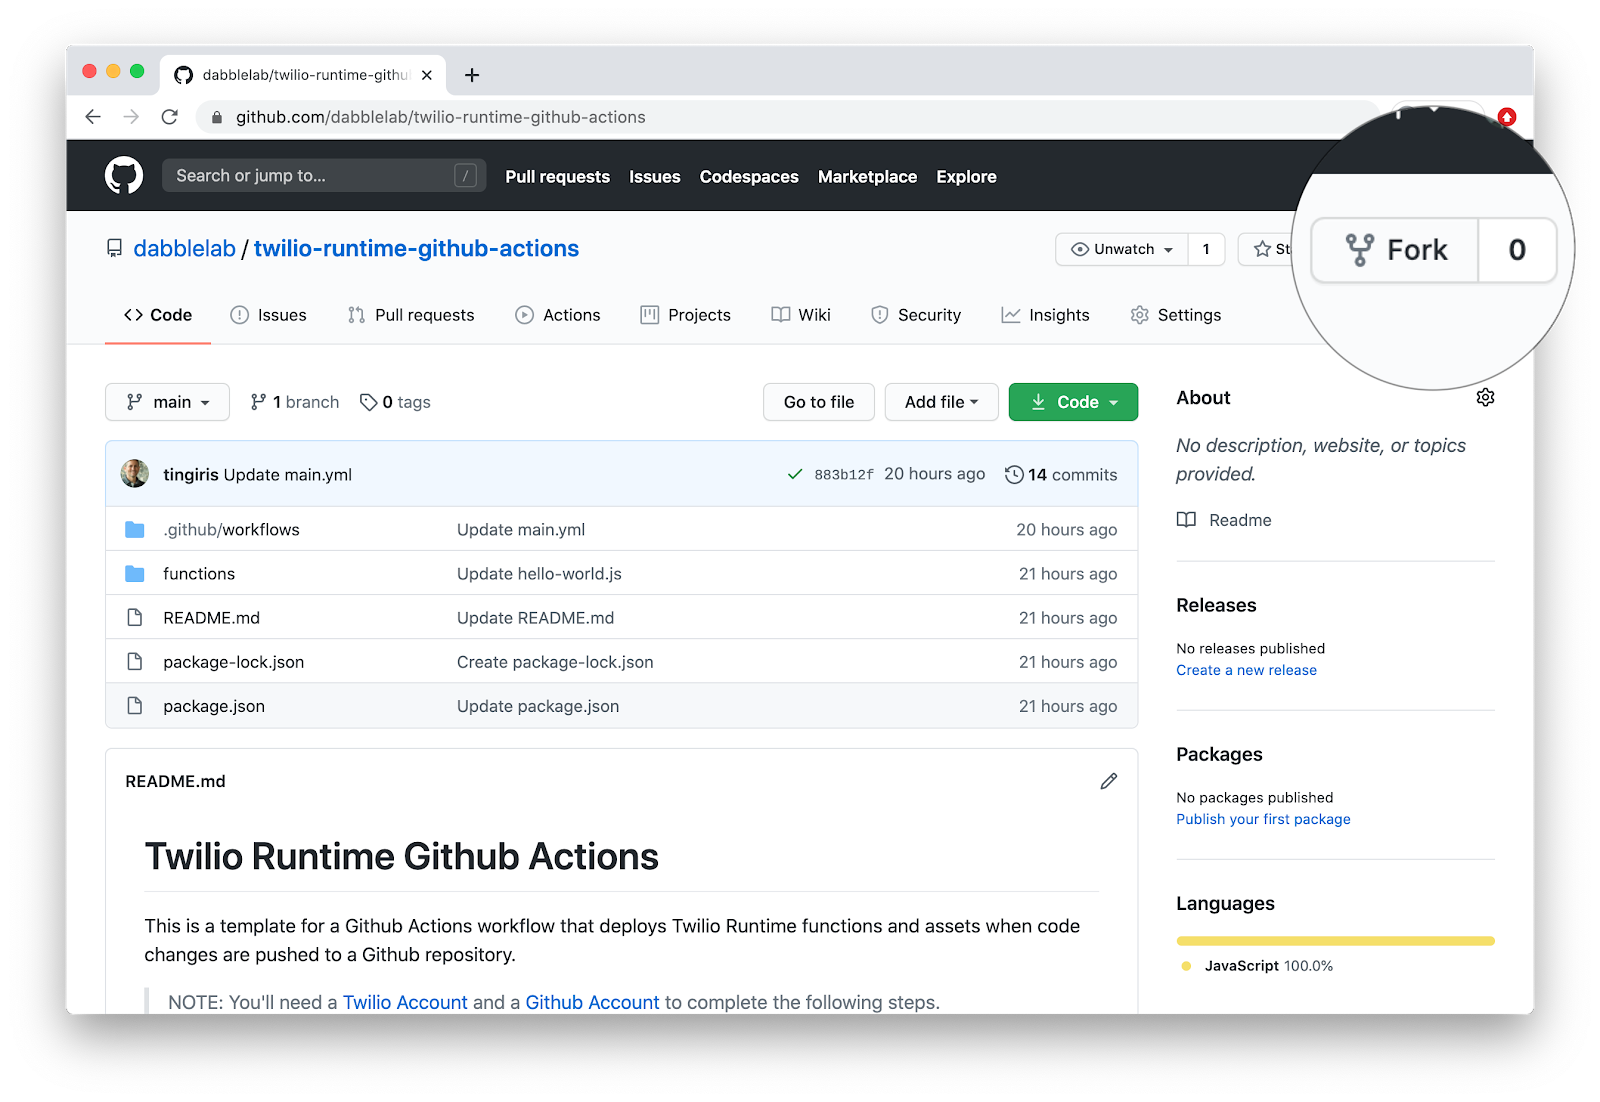
We’ll be deploying a super simple Twilio Function that simply returns a JSON response with a “Hello World!” message. There isn’t anything special about what’s going on in the function code. The “special” stuff is in the GitHub workflow. Rather than spending time writing example code, we’ll fork an existing repository and start from there.
- Go to https://github.com/dabblelab/twilio-runtime-github-actions
- Fork the repository to create a copy on your GitHub account
Gather the Required Twilio Credentials
To deploy our code, the Twilio CLI will need permission to access your Twilio account. Specifically, we’ll need three things:
- Twilio Account SID
- Twilio API SID
- Twilio API Secret
For now, we’re going to gather our Twilio credentials and save them to a text file on our local computer so that we have them for later.
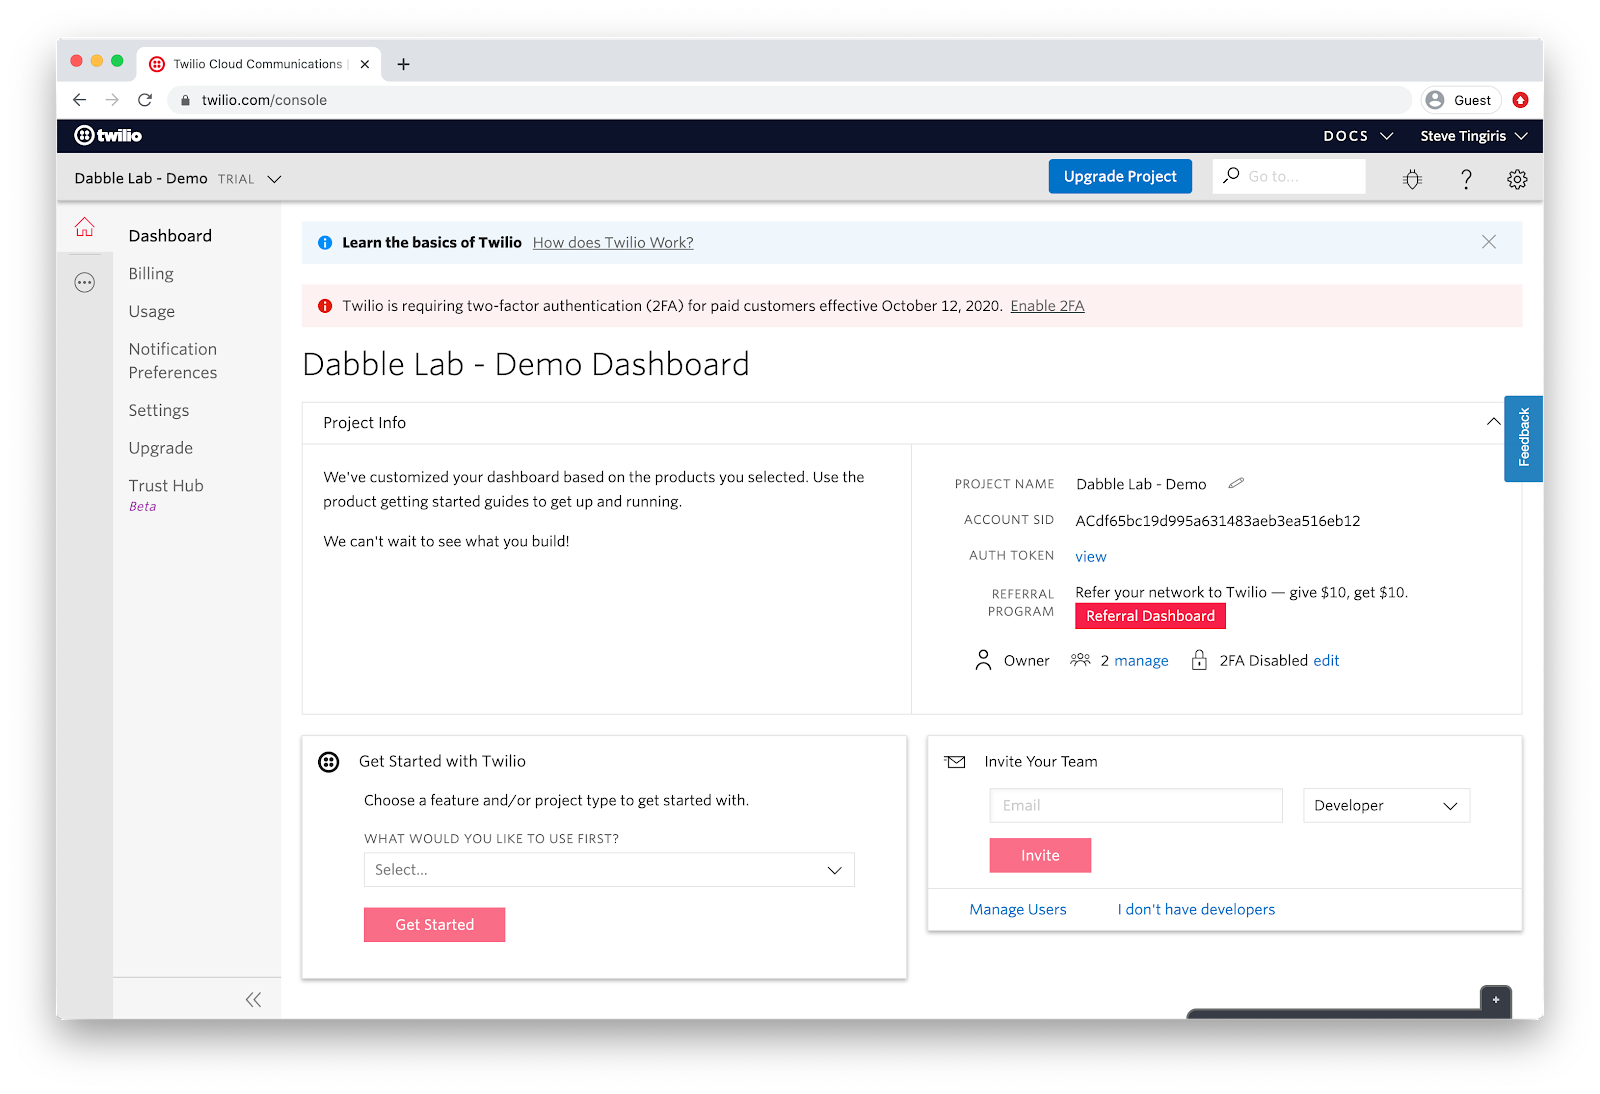
Get your Twilio Account SID
After logging into your Twilio Console, you’ll be able to find your Account SID on the dashboard.
Create a Twilio API Key
To get an API SID and API SECRET, we’ll need to create a new API key. To do that, click on the Settings option in the left-hand menu, followed by the API Keys option. From there, click the red plus sign to open the New API Key form.
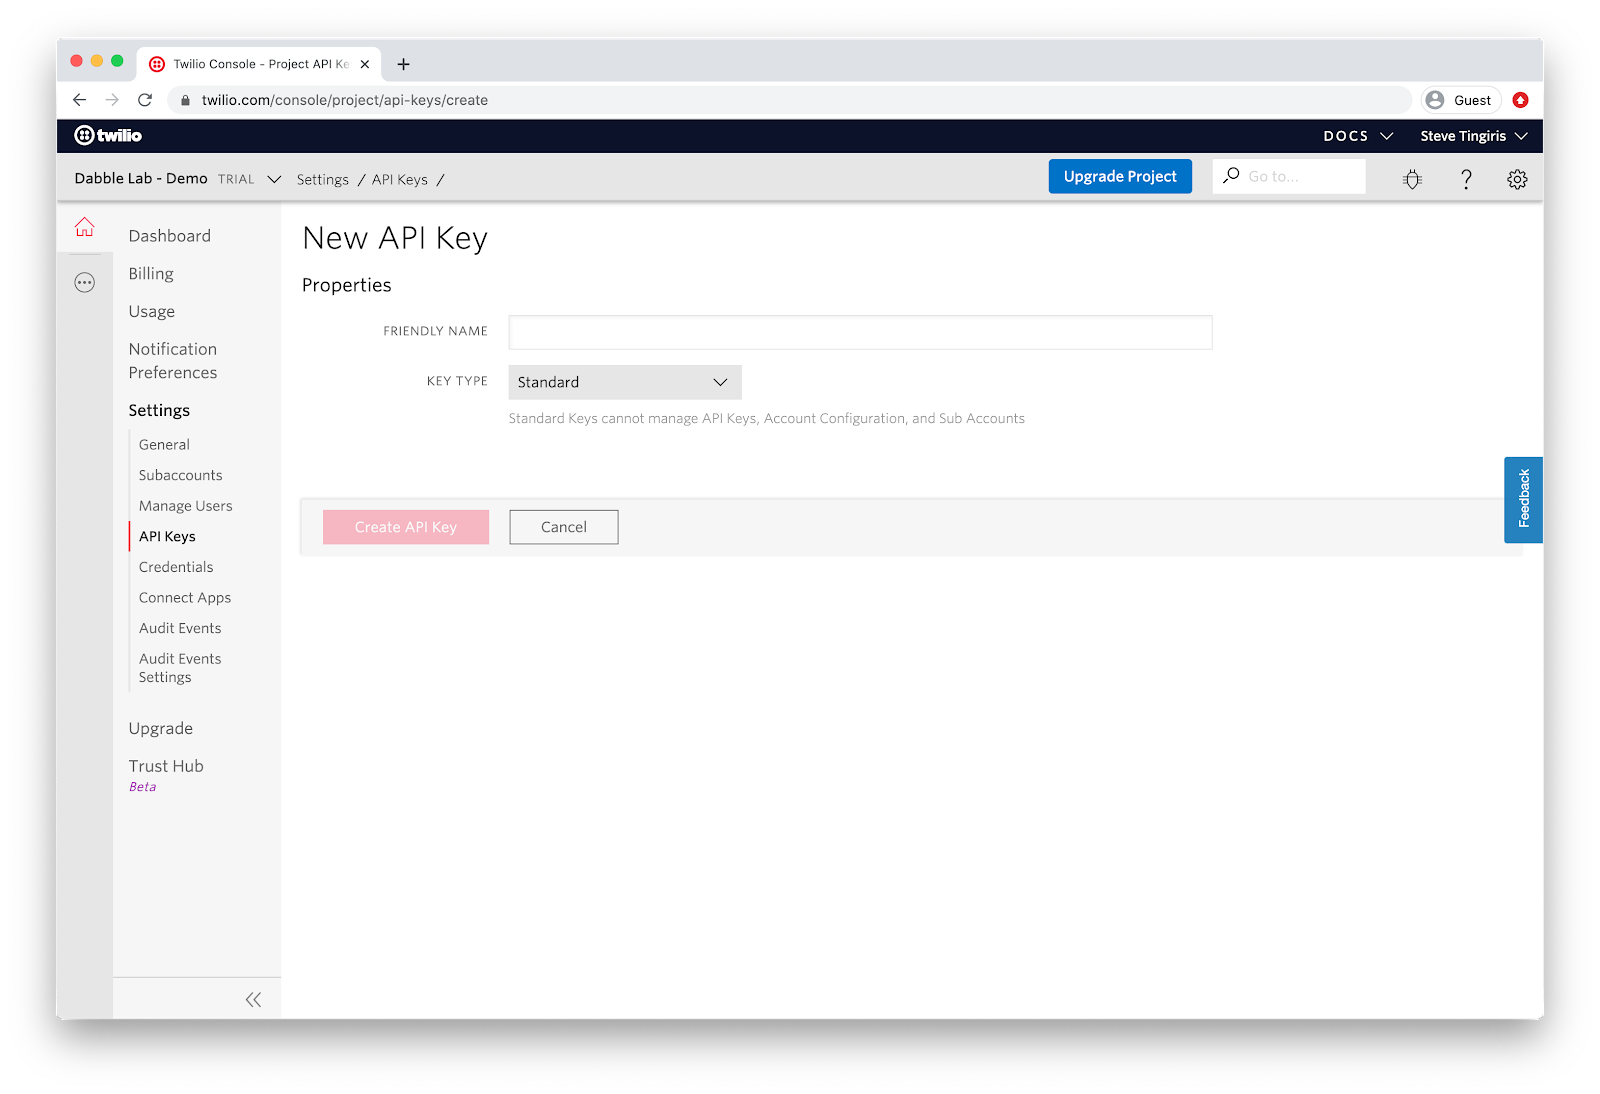
Provide a name for the API key and leave the key type as “Standard”, then click the “Create API Key” button.
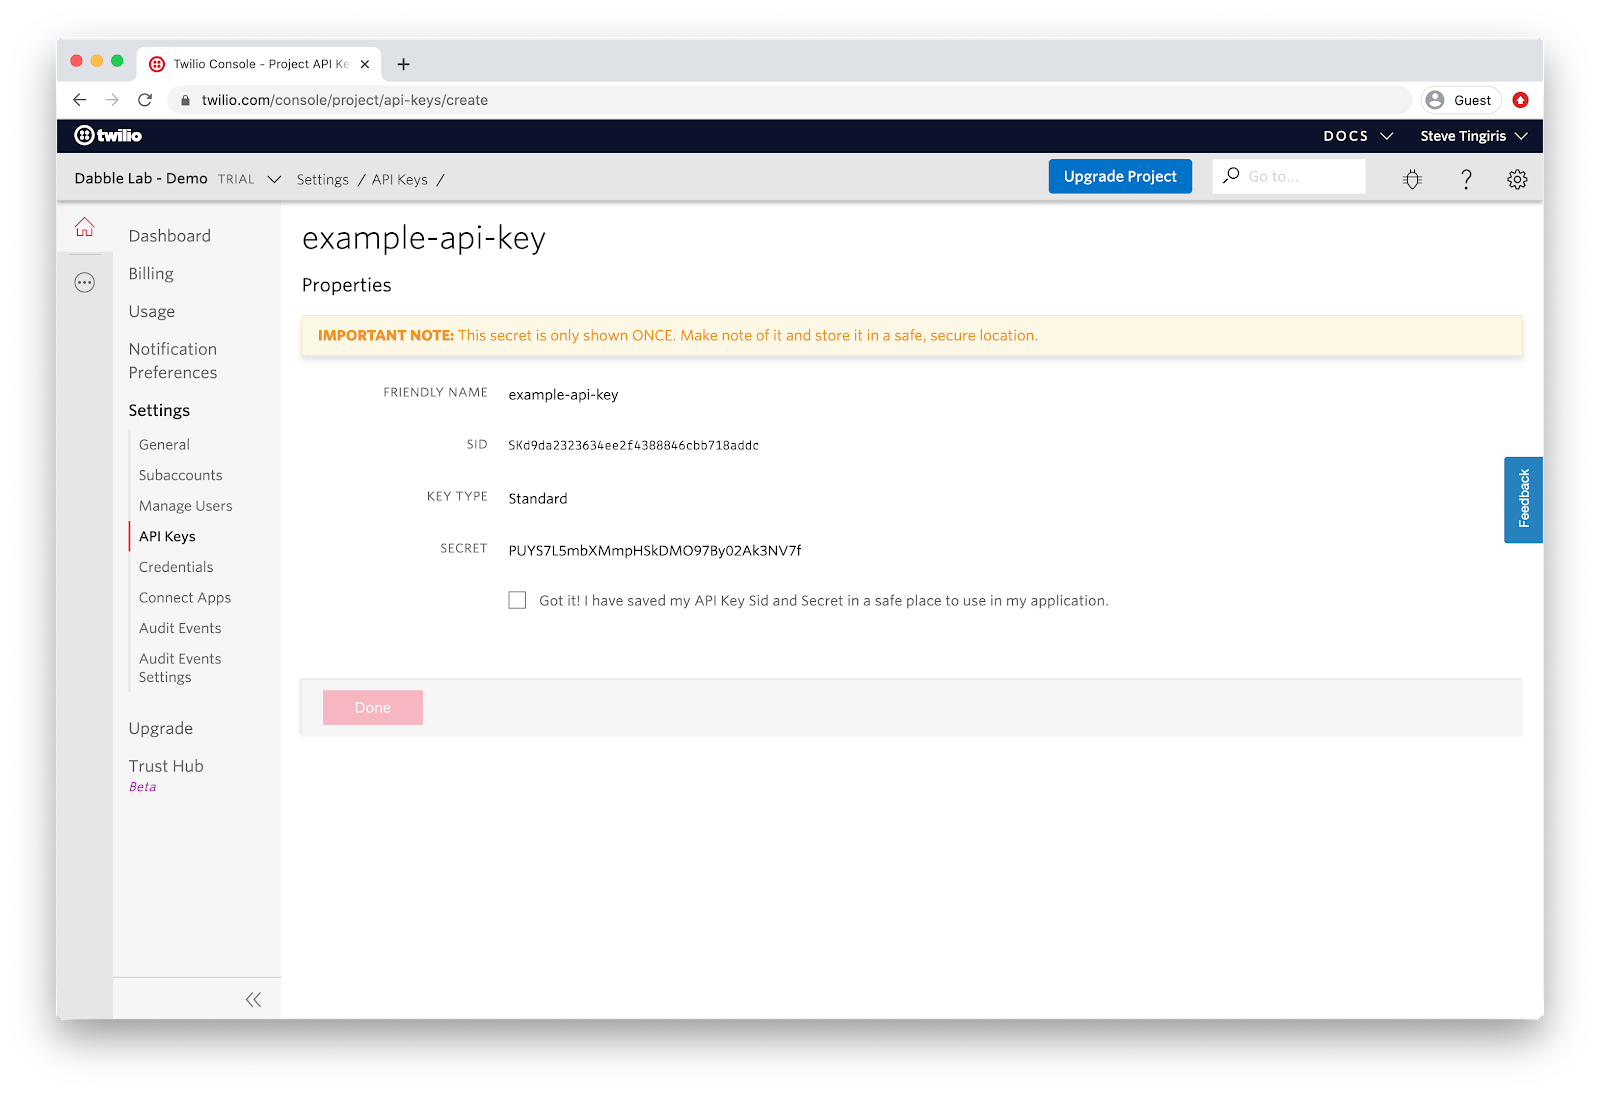
After creating the API key, copy and save the SID and SECRET to a text file on your local computer because you’ll need them for the next part of this tutorial. Be sure to copy them before moving on from this screen because you won’t be able to see the SECRET again.
Create the Required GitHub Secrets
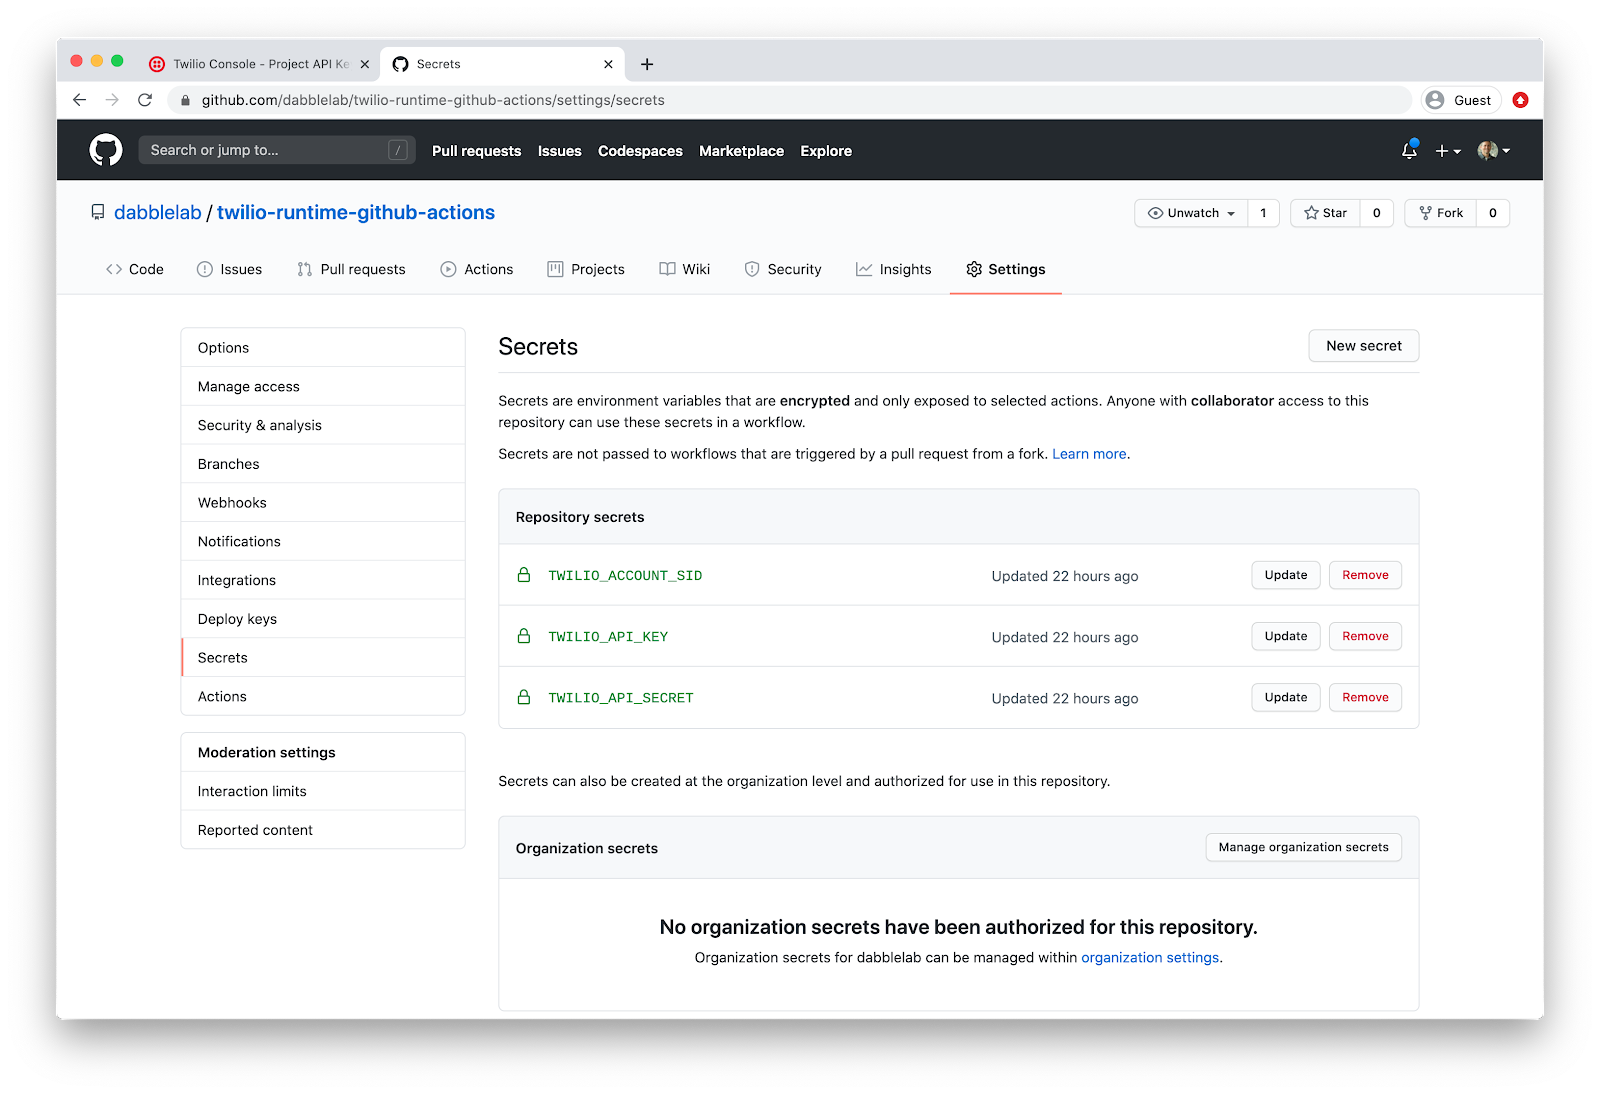
It’s dangerous to store hard coded credentials in a repository, so we’re going to set up GitHub Secrets to make the credentials available to our workflow as environment variables. We’ll need to create the following three secrets:
|
Name |
Value |
|
TWILIO_ACCOUNT_SID |
Your Twilio Account SID |
|
TWILIO_API_KEY |
Your Twilio API SID |
|
TWILIO_API_SECRET |
Your Twilio API Secret |
Open the repository settings and click the Secrets link in the menu on the left-hand side. For each of the required secrets, click the New secret button and enter the name and the corresponding value collected in the previous step.
Review the GitHub Workflow
The GitHub Actions Workflow that we’ll be using was included in the example repository that you forked. So, at this point, we’re all ready to deploy our example code. But before we do that, let’s take a minute to review what’s going on in the workflow file.
The workflow file is located in the repository at .github/workflows/main.yaml. It’s just a text file in YAML format. If you open the file and review it’s pretty easy to understand.
The workflow is triggered when code is pushed to the main branch.
This workflow contains a single job called "build" that runs using the ubuntu-latest job runner.
Within the job, there are three steps. The first step sets up Node.js. The second step installs npm dependencies, and the final step installs the Twilio CLI with the required CLI plugin, then deploys the code.
It’s also worth noting that we’re passing --environment=dev and --service-name=example-deployed-with-github-actions options with the serverless:deploy command. The environment option is used to set the environment name which adds a dev domain suffix. The service-name option sets the name of the server that will be created or used when making updates. For more information about the serverless:deploy command and available options see the @twilio-labs/plugin-serverless documentation.
Test and Verify the Deployment
Now it’s time to see if everything is working. First, you’ll need to enable Actions on your repository. Click on the Actions link on the top-menu. You should see a message that says:
Workflows aren’t being run on this forked repository because this repository contained workflow files when it was forked, we have disabled them from running on this fork. Make sure you understand the configured workflows and their expected usage before enabling Actions on this repository.
Click the Enable Actions button.
Now, all we need to do is make any change to the code and push the change to the main branch of our repository. Because the workflow is configured to trigger on pushes to the main branch, this is our only required step.
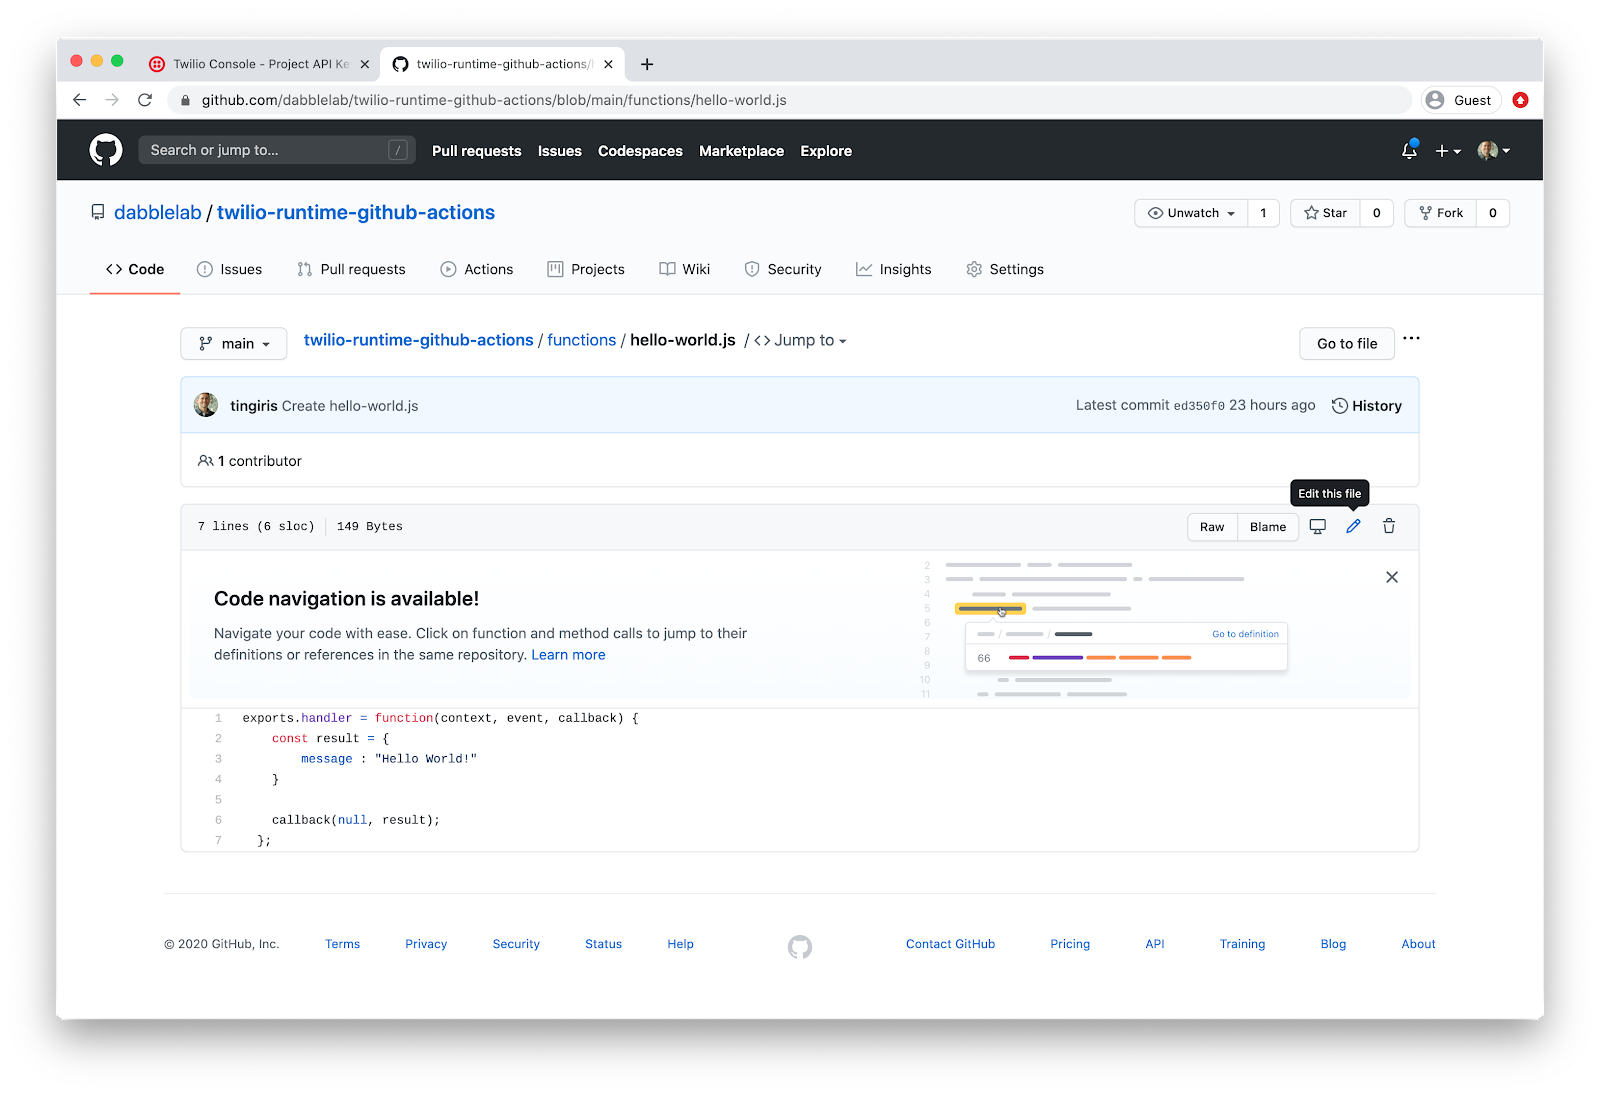
So, let’s edit the hello-world.js file in the functions directory. Open the file and then click the icon resembling a pencil to edit the file.
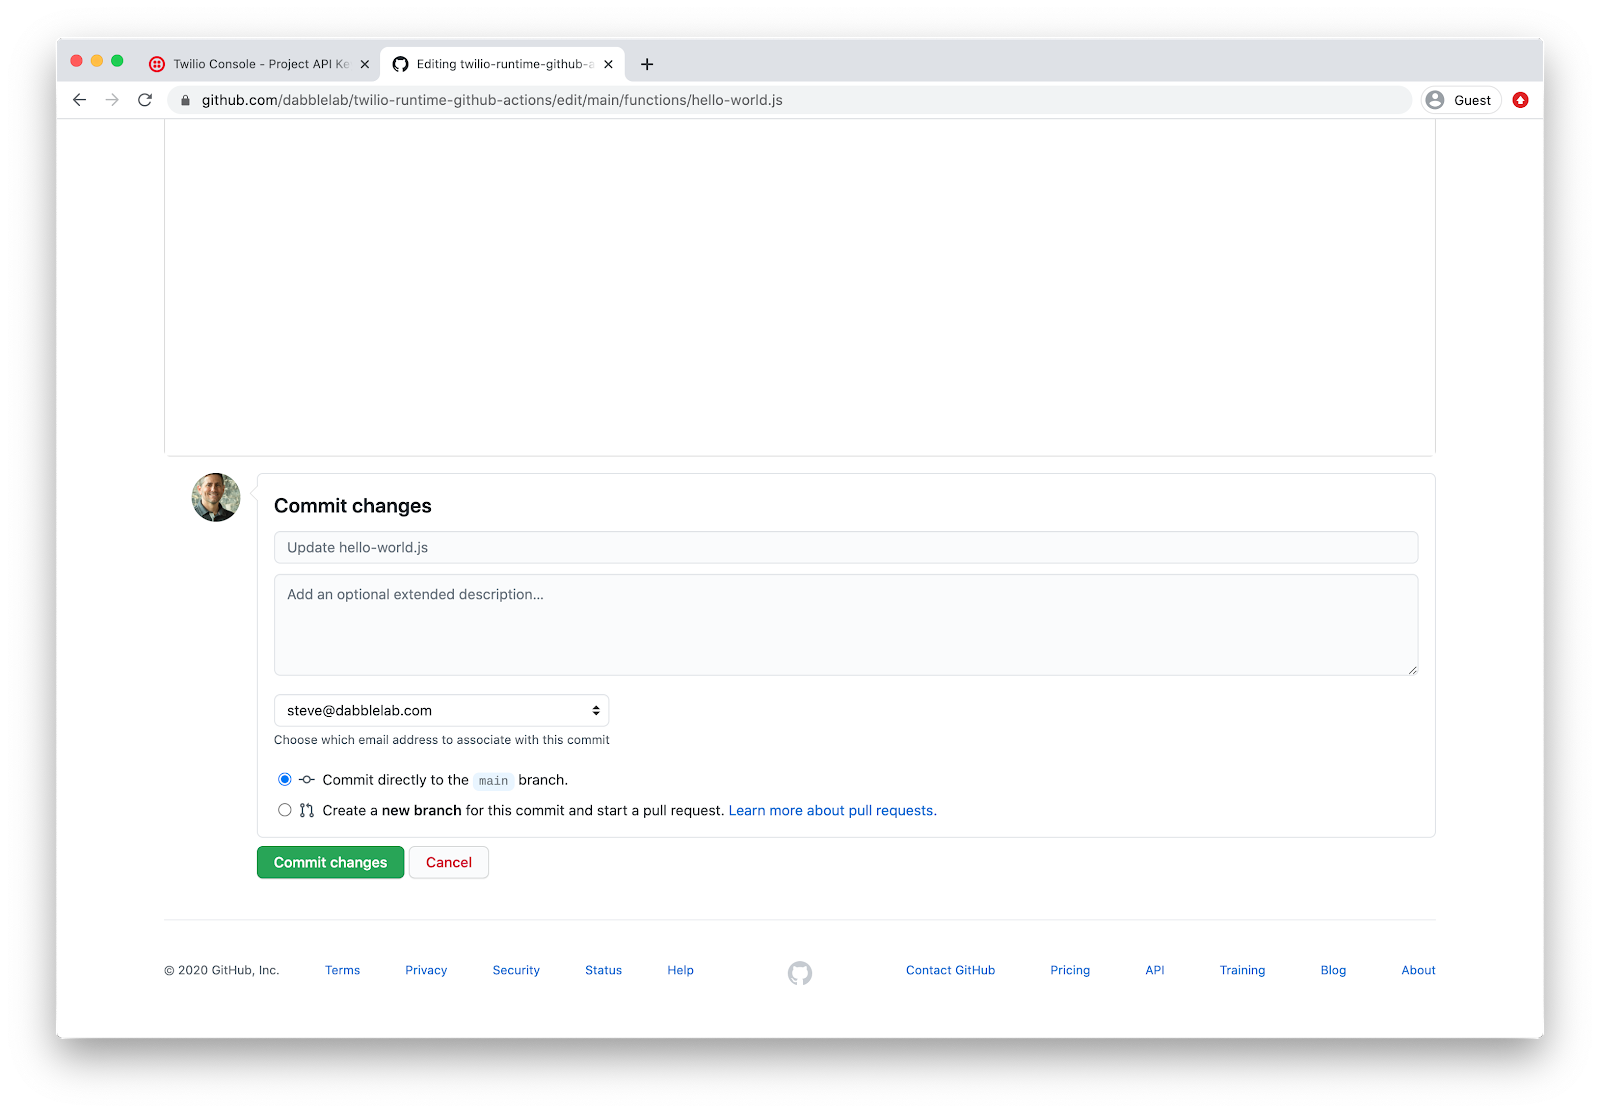
Change “Hello World!” to “Hello Universe!”, then scroll to the bottom of the page and click the Commit Changes button.
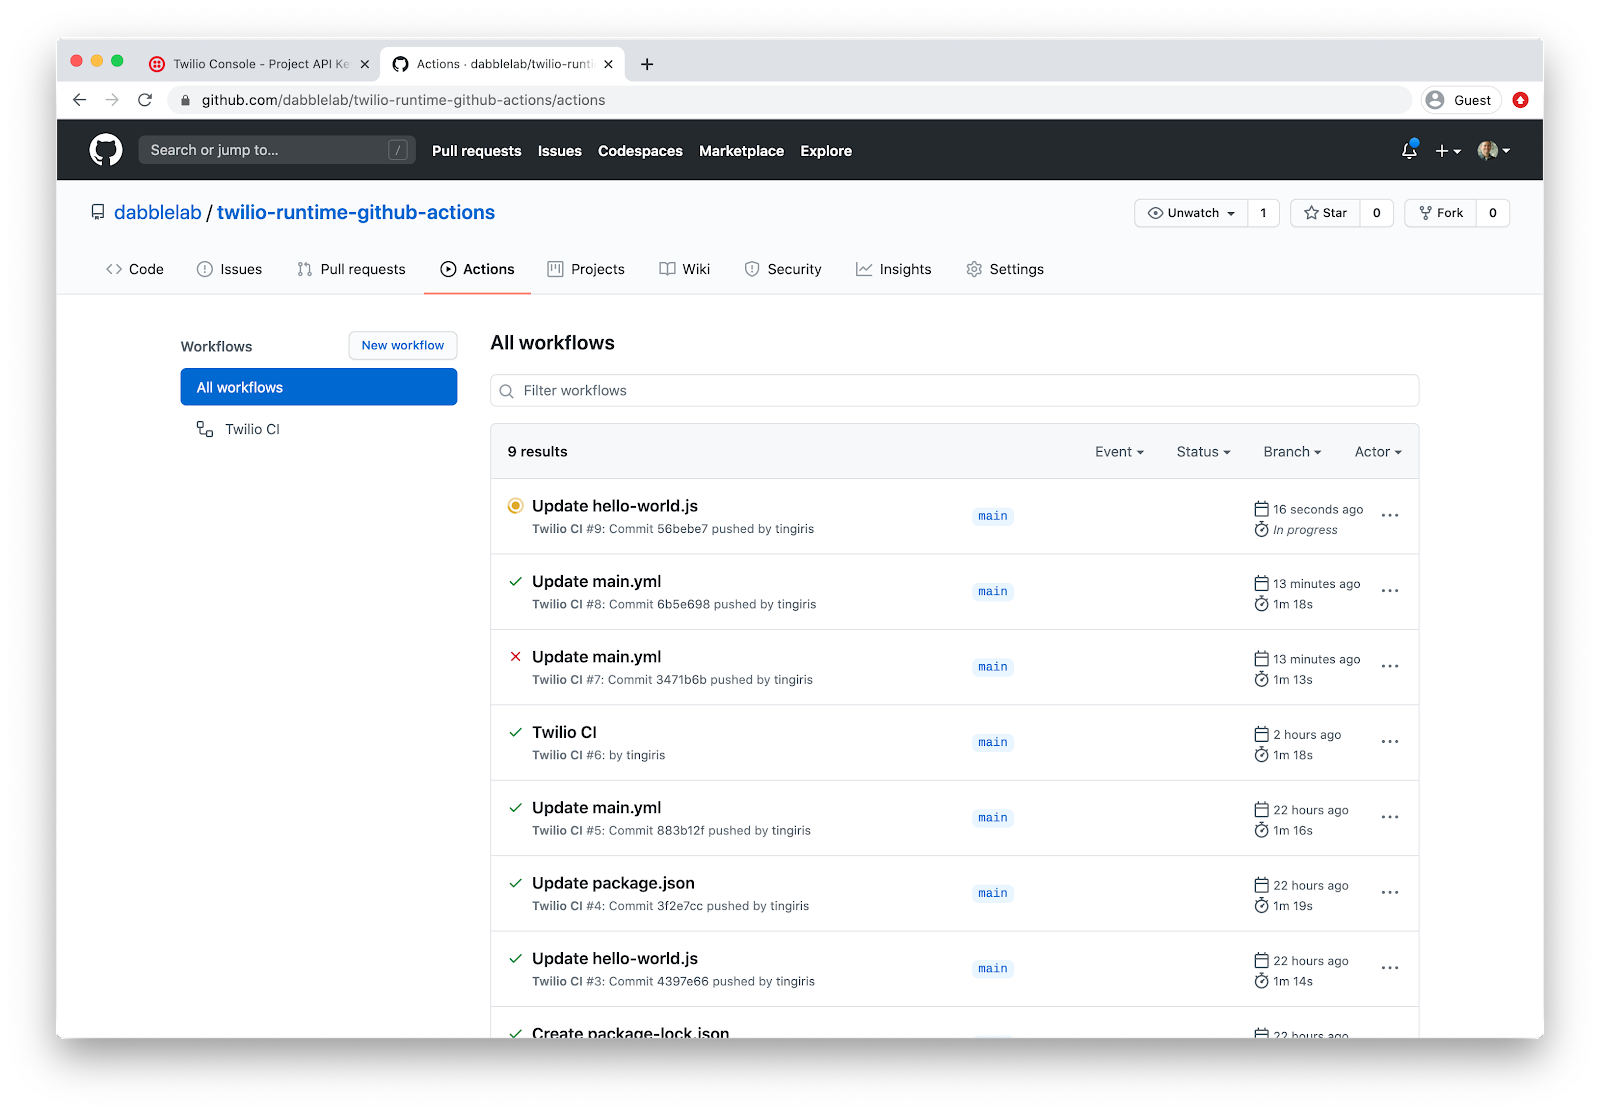
After committing your changes, navigate to Actions on the top-menu. From there you should see that your workflow shows “queued” and then, “in progress”. It could take 1-3 minutes to complete.
After the GitHub workflow completes, head over to the Functions section in your Twilio Console, and click on Services in the left-hand menu.
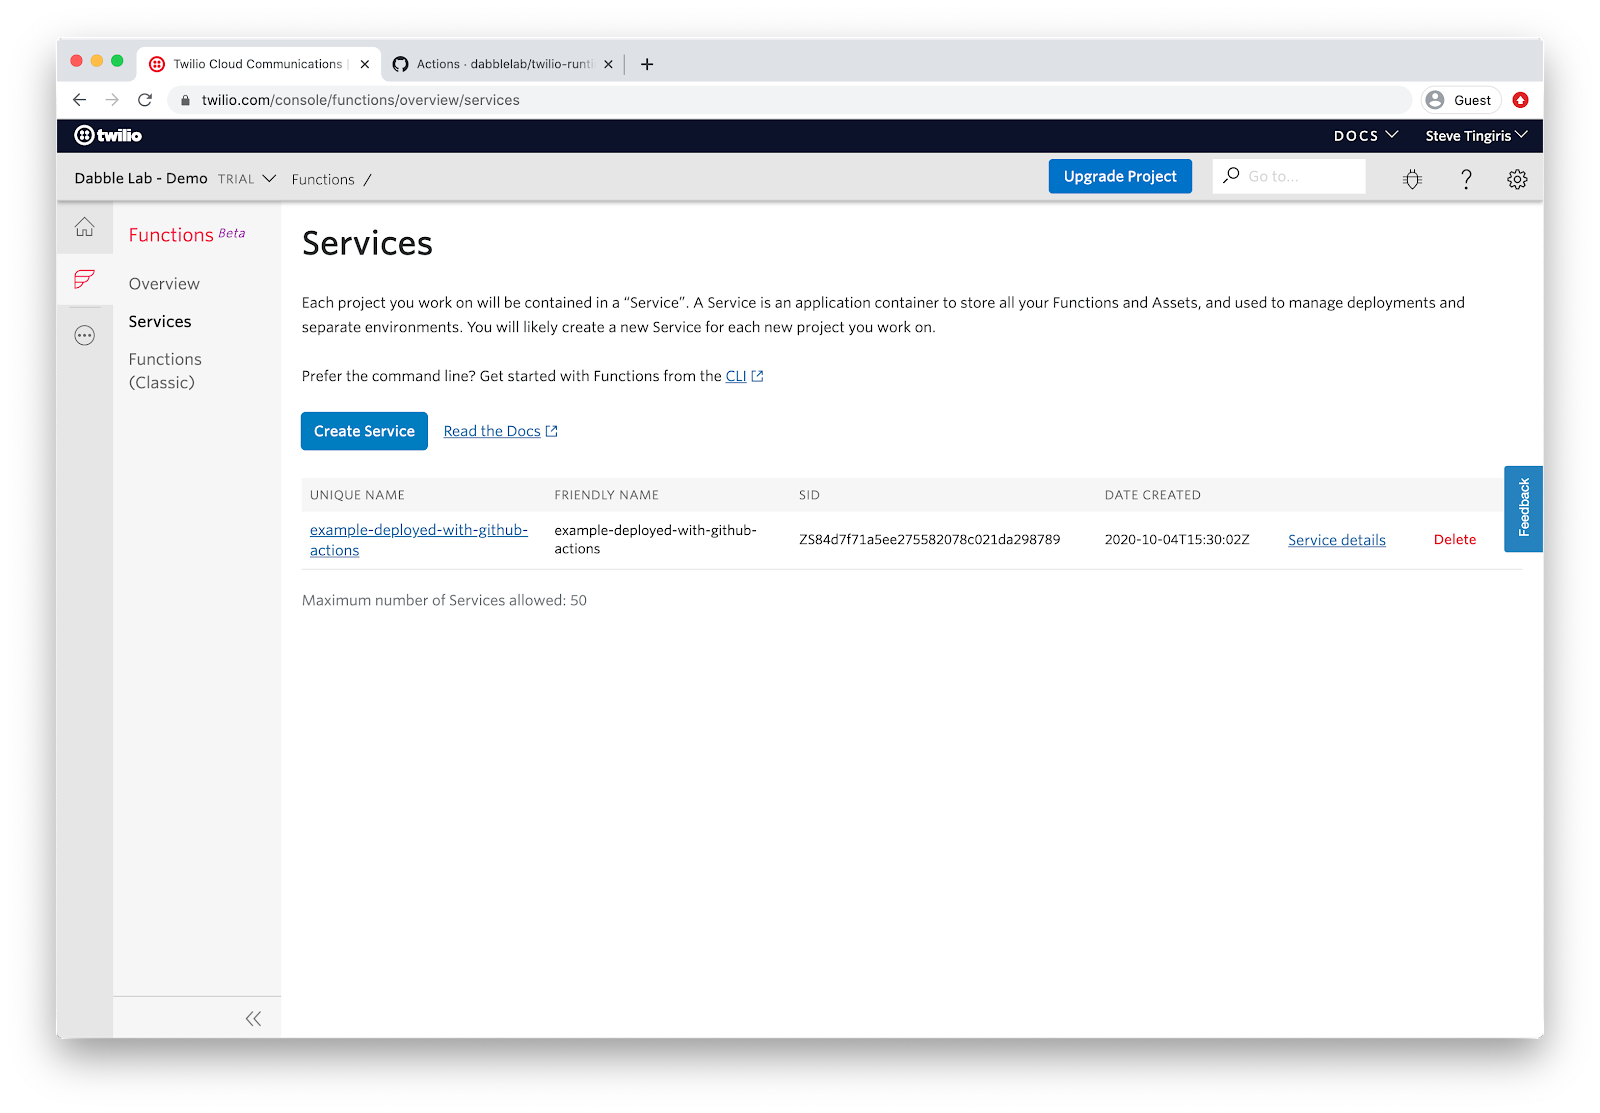
You should now see a new service named example-deployed-with-github-actions. From here, any new code updates that are pushed to the repository will be deployed to Twilio automatically. Pretty cool, right?
Conclusion and Next Steps
The goal of this tutorial was to provide a simple Twilio Functions CI/CD example using GitHub Actions - hopefully you found it helpful.
Of course, we could go way beyond this simple example. GitHub Actions are extremely powerful and along with the Twilio CLI, you can automate just about any Twilio development workflow and if you’re interested in diving deeper into CI/CD for Twilio apps, leave a comment and let me know. If there is interest we can follow-up on this basic tutorial a step further with more advanced CI/CD examples..
Thanks for reading or watching and keep dabbling!
Steve Tingiris is a Twilio Champion and the founder of Dabble Lab, a Twilio Partner that specializes in building natural language understanding and automation solutions for enterprise and contact center applications. Reach out to him at steve [at] dabblelab [dot] com.
Related Posts
Related Resources
Twilio Docs
From APIs to SDKs to sample apps
API reference documentation, SDKs, helper libraries, quickstarts, and tutorials for your language and platform.
Resource Center
The latest ebooks, industry reports, and webinars
Learn from customer engagement experts to improve your own communication.
Ahoy
Twilio's developer community hub
Best practices, code samples, and inspiration to build communications and digital engagement experiences.


