Build a Video Chat with React Hooks
Time to read:

We've seen a video chat built in React on this blog before but since then, in version 16.8, React released Hooks. Hooks let you use state or other React features inside functional components instead of writing a class component.
In this post we are going to build a video chat application using Twilio Video and React with only functional components, using the useState, useCallback, useEffect and useRef hooks.
What you'll need
To build this video chat application you will need the following:
- Node.js and npm installed
- A Twilio account (sign up for a free Twilio account here)
Once you've got all that, we can prepare our development environment.
Getting started
So we can get straight to the React application, we can start with the React and Express starter app I created. Download or clone the starter app's "twilio" branch, change into the new directory and install the dependencies:
Copy the .env.example file to .env
Run the application to make sure everything is working as expected:
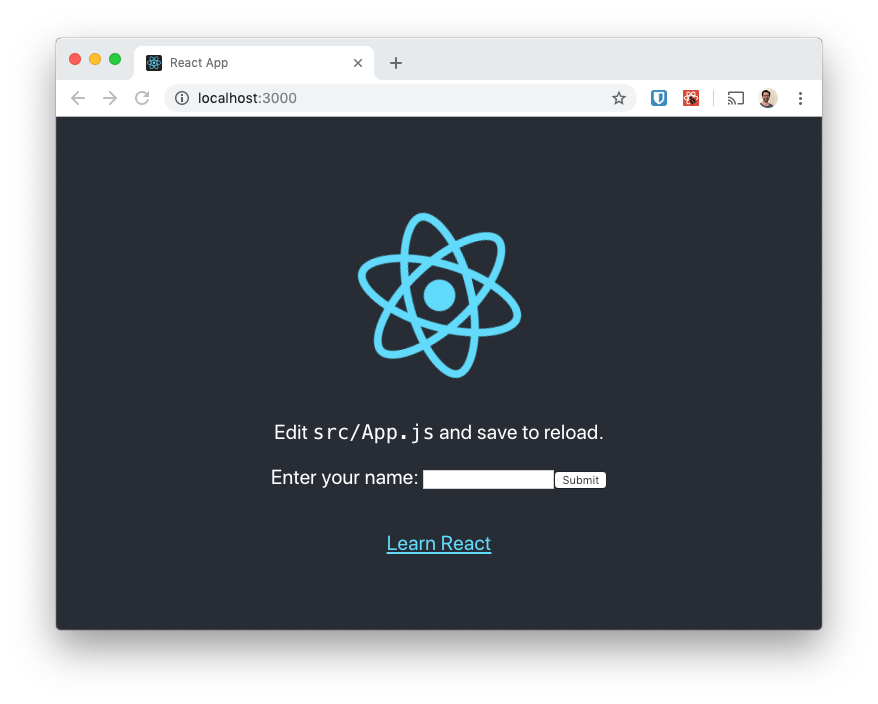
You should see this page load in the browser:
Preparing Twilio credentials
To connect to Twilio video we will need some credentials. From your Twilio console copy your Account SID and enter it in the .env file as the TWILIO_ACCOUNT_SID.
You will also need an API key and secret, you can create these under the Programmable Video Tools in your console. Create a key pair and add the SID and Secret as TWILIO_API_KEY and TWILIO_API_SECRET to the .env file.
Adding some style
We're not going to concern ourselves with CSS for this post, but let's add some so the result doesn't look awful! Grab the CSS from this URL and replace the contents of src/App.css with it.
Now we're ready to start building.
Planning our components
Everything will start in our App component where we can lay out a header and footer for the app as well as a VideoChat component. Within the VideoChat component we'll want to show a Lobby component where the user can enter their name and the room they want to join. Once they have entered those details we'll replace the Lobby with a Room component that will handle connecting to the room and displaying the participants in the video chat. Finally, for each participant in the room we will render a Participant component that will handle displaying their media.
Building the components
The App component
Open up src/App.js, there's a lot of code here from the initial example app that we can remove. Also, the App component is a class based component. We said we'd build the entire app with functional components, so we better change that.
From the imports, remove Component and the import of the logo.svg. Replace the entire App class with a function that renders our application skeleton. The whole file should look like this:
The VideoChat component
This component is going to show a lobby or a room based on whether the user has entered a username and room name. Create a new component file src/VideoChat.js and start it off with the following boilerplate:
The VideoChat component is going to be the top level component for handling the data about the chat. We're going to need to store a username for the user that is joining the chat, a room name for the room they are going to connect to, and their access token once it has been fetched from the server. We will be building up a form to input some of this data in the next component.
With React Hooks we use the useState hook to store this data.
useState
useState is a function that takes a single argument, the initial state, and returns an array containing the current state and a function to update that state. We'll destructure that array to give us two distinct variables like state and setState. We're going to use setState to track the username, room name and token within our component.
Start by importing useState from react and set up states for the username, room name and token:
Next we need two functions to handle updating the username and roomName when the user enters them in their respective input elements.
While this will work, we can optimise our component using another React hook here; useCallback
useCallback
Every time this function component is called the handleXXX functions are redefined. They need to be part of the component because they rely on the setUsername and setRoomName functions, but they will be the same every time. useCallback is a React hook that allows us to memoize the functions. That is, if they are the same between function invocations, they won't get redefined.
useCallback takes two arguments, the function to be memoized and an array of the function's dependencies. If any of the function's dependencies change, that implies the memoized function is out of date and the function is then redefined and memoized again.
In this case, there are no dependencies to these two functions, so an empty array will suffice (setState functions from the useState hook are deemed to be constant within the function). Rewriting this function we need to add useCallback to the import at the top of the file and then wrap each of these functions.
When the user submits the form we want to send the username and room name to the server to exchange for an access token we can use to enter the room. We'll create that function in this component too.
We'll use the fetch API to send the data as JSON to the endpoint, receive and parse the response, then use setToken to store the token in our state. We'll also wrap this function with useCallback too, but in this case the function will depend on the username and roomName, so we add those as the dependencies to useCallback.
For the final function in this component we'll add a logout functionality. This will eject the user from a room and return them to the lobby. To do so we will set the token to null. Once again, we wrap this up in useCallback with no dependencies.
This component is mostly orchestrating the components below it, so there's not much to render until we have created those components. Let's create the Lobby component that renders the form that asks for a username and room name next.
The Lobby component
Create a new file in src/Lobby.js. This component doesn't need to store any data as it will pass all events up to its parent, the VideoChat component. When the component is rendered it will be passed the username and roomName as well as the functions to handle changes to each and handle submitting the form. We can destructure those props to make it easier to use them later.
The main job of the Lobby component is to render the form using those props, like this:
Let's update the VideoChat component to render the Lobby unless we have a token, otherwise we'll render the username, roomName and token. We'll need to import the Lobby component at the top of the file and render some JSX at the bottom of the component function:
To get this to show on the page we also need to import the VideoChat component into the App component and render it. Open src/App.js again and make the following changes:
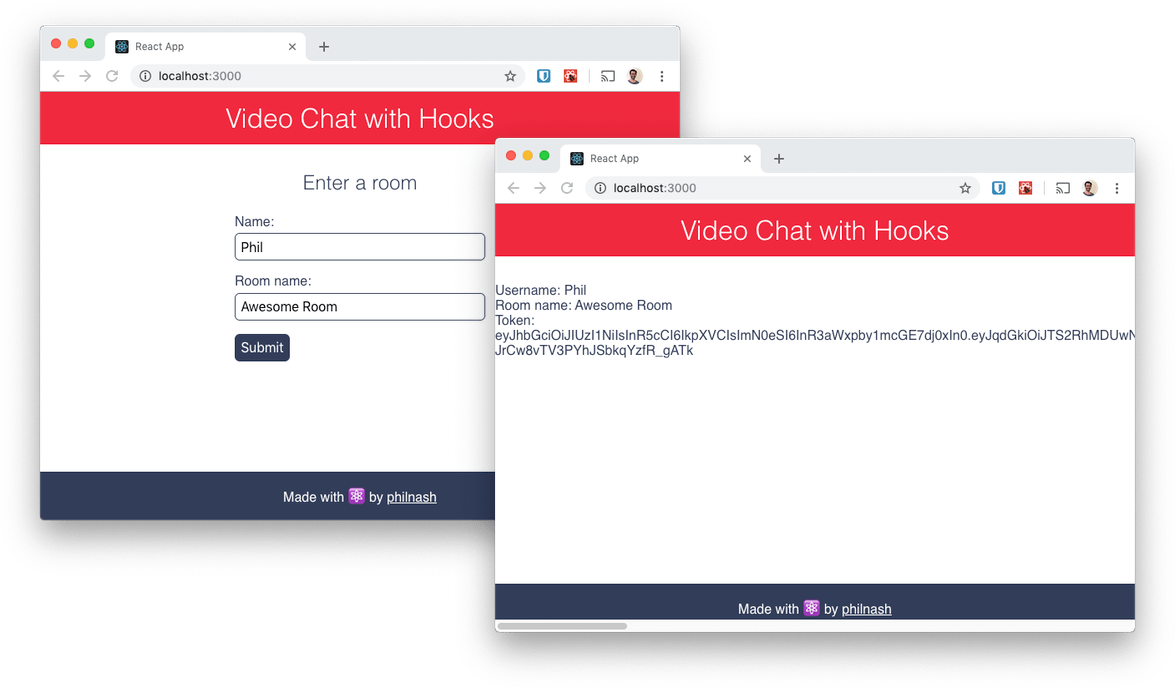
Make sure the app is still running (or restart it with npm run dev) and open it up in the browser and you will see a form. Fill in a username and room name and submit and the view will change to show you the names you chose plus the token retrieved from the server.
The Room component
Now that we've added a username and room name to the application we can use them to join a Twilio Video chat room. To work with the Twilio Video service, we'll need the JS SDK. We're going to work with twilio-video version 2.2.0 for this example, install it with:
Create a new file in the src directory called Room.js. Start it off with the following boilerplate. We're going to be using the Twilio Video SDK in this component as well as the useState and useEffect hooks. We're also going to get roomName, token and handleLogout as props from the parent VideoChat component:
The first thing that the component will do is connect to the Twilio Video service using the token and roomName. When we connect we will get a room object, which we will want to store. The room also includes a list of participants which will change over time, so we'll store them too. We'll use useState to store these, the initial values will be null for the room and an empty array for the participants:
Before we get to joining the room, let's render something for this component. We'll map over the participants array to show the identity of each participant and also show the identity of the local participant in the room:
Let's update the VideoChat component to render this Room component in place of the placeholder information we had earlier.
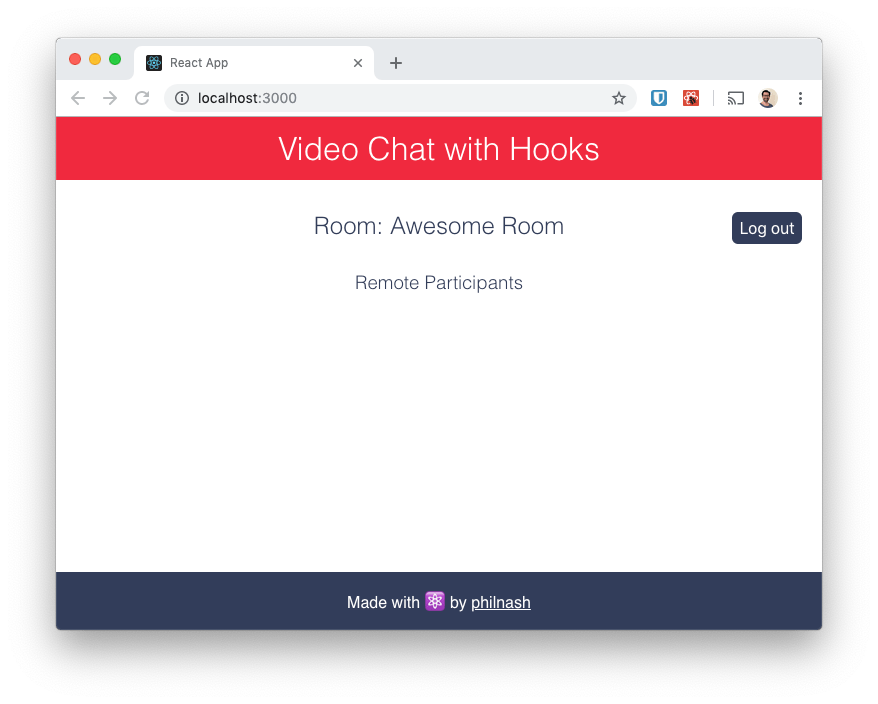
Running this in the browser will show the room name and the log out button, but no participant identities because we haven't connected and joined the room yet.
We have all the information we need to join a room, so we should trigger the action to connect on the first render of the component. We also want to exit the room once the component is destroyed (no point keeping a WebRTC connection around in the background). These are both side effects.
With class based components, this is where you would use the componentDidMount and componentWillUnmount lifecycle methods. With React hooks, we'll be using the useEffect hook.
useEffect
useEffect is a function that takes a method and runs it once the component has rendered. When our component loads we want to connect to the video service, we'll also need functions we can run whenever a participant joins or leaves the room to add and remove participants from the state respectively.
Let's start to build up our hook by adding this code before the JSX in Room.js:
This uses the token and roomName to connect to the Twilio Video service. When the connection is complete we set the room state, set up a listener for other participants connecting or disconnecting and loop through any existing participants adding them to the participants array state using the participantConnected function we wrote earlier.
This is a good start, but if we remove the component we'll still be connected to the room. So we need to clean up after ourselves as well.
If we return a function from the callback we pass to useEffect, it will be run when the component is unmounted. When a component that uses useEffect is rerendered, this function is also called to clean up the effect before it is run again.
Let's return a function that stops all the local partipant's tracks and then disconnects from the room, if the local participant is connected:
Note that here we use the callback version of the setRoom function that we got from useState earlier. If you pass a function to setRoom then it will be called with the previous value, in this case the existing room which we'll call currentRoom, and it will set the state to whatever you return.
We're not done yet though. In its current state this component will exit a joined room and reconnect to it every time it is re-rendered. This is not ideal, so we need to tell it when it should clean up and run the effect again. Much like useCallback we do this by passing an array of variables that the effect depends on. If the variables have changed, we want to clean up first, then run the effect again. If they haven't changed there's no need to run the effect again.
Looking at the function we can see that were the roomName or token to change we'd expect to connect to a different room or as a different user. Let's pass those variables as an array to useEffect as well:
Note that we have two callback functions defined within this effect. You might think these should be wrapped in useCallback as we did earlier, but that's not the case. Since they are part of the effect they will only be run when the dependencies update. You also can't use hooks within callback functions, they must be used directly within components or a custom hook.
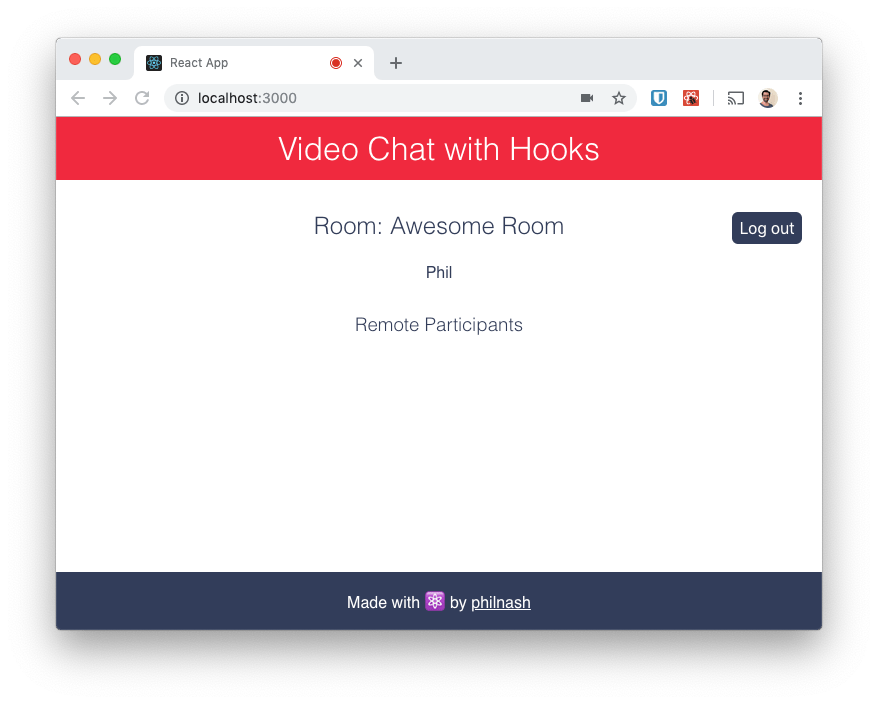
We're mostly done with this component. Let's check that it's working so far, reload the application and enter a username and room name. You should see your identity appear as you join the room. Clicking the logout button will take you back to the lobby.
The final piece of the puzzle is to render the participants in the video call, adding their video and audio to the page.
The Participant component
Create a new component in src called Participant.js. We'll start with the usual boilerplate, although in this component we're going to use three hooks, useState and useEffect, which we've seen, and useRef. We'll also be passing a participant object in the props and keeping track of the participant's video and audio tracks with useState:
When we get a video or audio stream from our participant, we're going to want to attach it to a <video> or <audio> element. As JSX is declarative, we don't get direct access to the DOM (Document Object Model), so we need to get a reference to the HTML element some other way.
React provides access to the DOM via refs and the useRef hook. To use refs we declare them up front then reference them within the JSX. We create our refs using the useRef hook, before we render anything:
For now, let's return our JSX that we want. To hook up the JSX element to the ref we use the ref attribute.
I've also set the attributes of the <video> and <audio> tags to autoplay (so that they play as soon as they have a media stream) and muted (so that I don't deafen myself with feedback during testing, you'll thank me for this if you ever make this mistake)
This component doesn't do much yet as we need to use some effects. We'll actually use the useEffect hook three times in this component, you'll see why soon.
The first useEffect hook will set the video and audio tracks in the state and set up listeners to the participant object for when tracks are added or removed. It will also need to clean up and remove those listeners and empty the state when the component is unmounted.
In our first useEffect hook, we'll add two functions that will run either when a track is added or removed from the participant. These functions both check whether the track is an audio or video track and then add or remove it from the state using the relevant state function.
Next we use the participant object to set the initial values for the audio and video tracks. Participant's have videoTracks and audioTracks properties that return a Map of TrackPublication objects. A TrackPublication doesn't have access to its track object until it is subscribed, so we need to filter out any tracks that don't exist. We'll do this with a function that maps from TrackPublications to Tracks and filters out any that are null.
Then we set up listeners to the trackSubscribed and trackUnsubscribed events using the functions we just wrote and then do the cleanup in the returned function:
Note that the hook only depends on the participant object and won't be cleaned up and re-run unless the participant changes.
We also need a useEffect hook to attach the video and audio tracks to the DOM, I'll show just one of them here, the video version, but the audio is the same if you substitute video for audio. The hook will get the first video track from the state and, if it exists, attach it to the DOM node we captured with a ref earlier. You can refer to the current DOM node in the ref using videoRef.current. If we attach the video track we'll also need to return a function to detach it during cleanup.
Repeat that hook for audioTracks and we're ready to render our Participant component from the Room component. Import the Participant component at the top of the file and then replace the paragraphs which displayed the identity with the component itself.
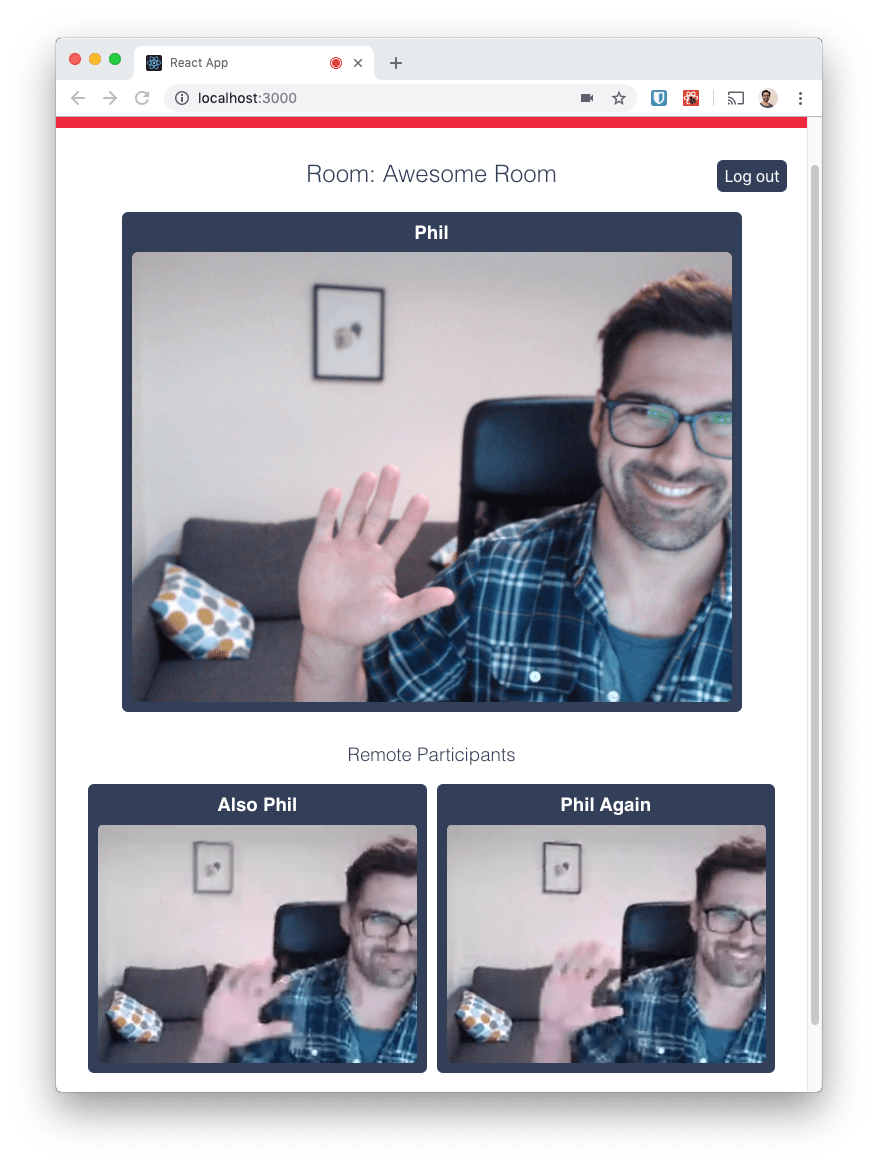
Now reload the app, join a room and you'll see yourself on screen. Open another browser and join the same room and you'll see yourself twice. Hit the logout button and you'll be back in the lobby.
Conclusion
Building with Twilio Video in React takes a bit more work because there are all sorts of side effects to deal with. From making a request to get the token, connecting to the Video service and manipulating the DOM to connect <video> and <audio> elements, there's quite a bit to get your head around. In this post we've seen how to use useState, useCallback, useEffect and useRef to control these side effects and build our app using just functional components.
Hopefully this helps your understanding of both Twilio Video and React Hooks. All the source code of this application is available on GitHub for you to take apart and put back together.
For further reading on React Hooks take a look at the official documentation, which is very thorough, this visualisation on thinking in hooks and check out Dan Abramov's deep dive into useEffect (it's a long post, but worth it, I promise).
If you want to learn more about building with Twilio Video, check out these posts on switching cameras during a Video chat or adding screen-sharing to your Video chat.
If you build these, or any other cool video chat features, out in React let me know in the comments, on Twitter or over email at philnash@twilio.com.
Related Posts
Related Resources
Twilio Docs
From APIs to SDKs to sample apps
API reference documentation, SDKs, helper libraries, quickstarts, and tutorials for your language and platform.
Resource Center
The latest ebooks, industry reports, and webinars
Learn from customer engagement experts to improve your own communication.
Ahoy
Twilio's developer community hub
Best practices, code samples, and inspiration to build communications and digital engagement experiences.


