How to Verify Phone Numbers in a Laravel PHP Application with Twilio Verify
Time to read:
In this tutorial, we will look at how to verify phone numbers using Twilio Verify by building a simple authentication system in Laravel.
Twilio Verify makes it easier and safer than custom verification systems to verify a user’s phone number. It ensures that the phone number is valid by sending a short code via SMS to the number during registration. This can help reduce the number of fake accounts created and failure rates when sending SMS notifications to users.
Prerequisites
In order to follow this tutorial, you will need:
- Basic knowledge of Laravel
- Laravel Installed on your local machine
- Composer globally installed
- Twilio Account
Getting started
Create a new Laravel project using the Laravel Installer. If you don’t have it installed or prefer to use Composer, you can check how to do so from the Laravel documentation. Run this command in your console window to generate a fresh Laravel project:
Now change your working directory to twilio-phone-verify and install the Twilio PHP SDK via composer:

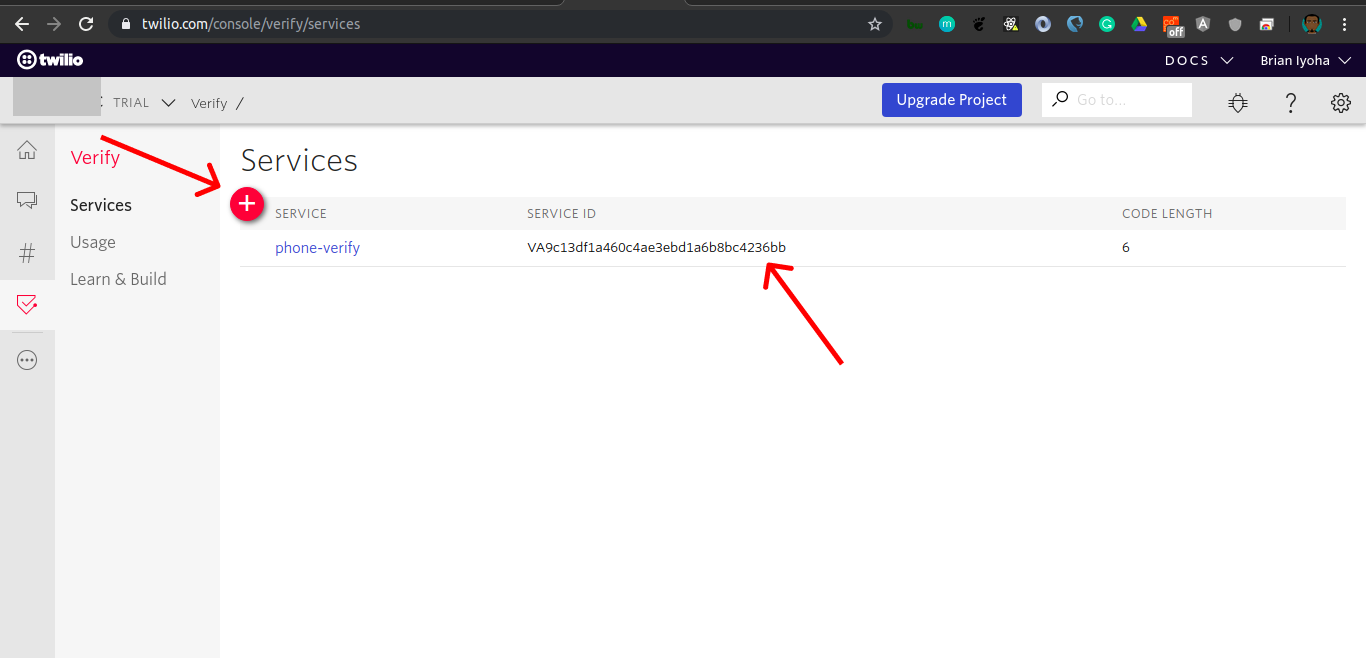
Navigate to the Verify section to create a new Twilio Verify Service. Take note of the sid generated for you after creating the Verify service as this will be used for authenticating the instance of the Verify SDK.

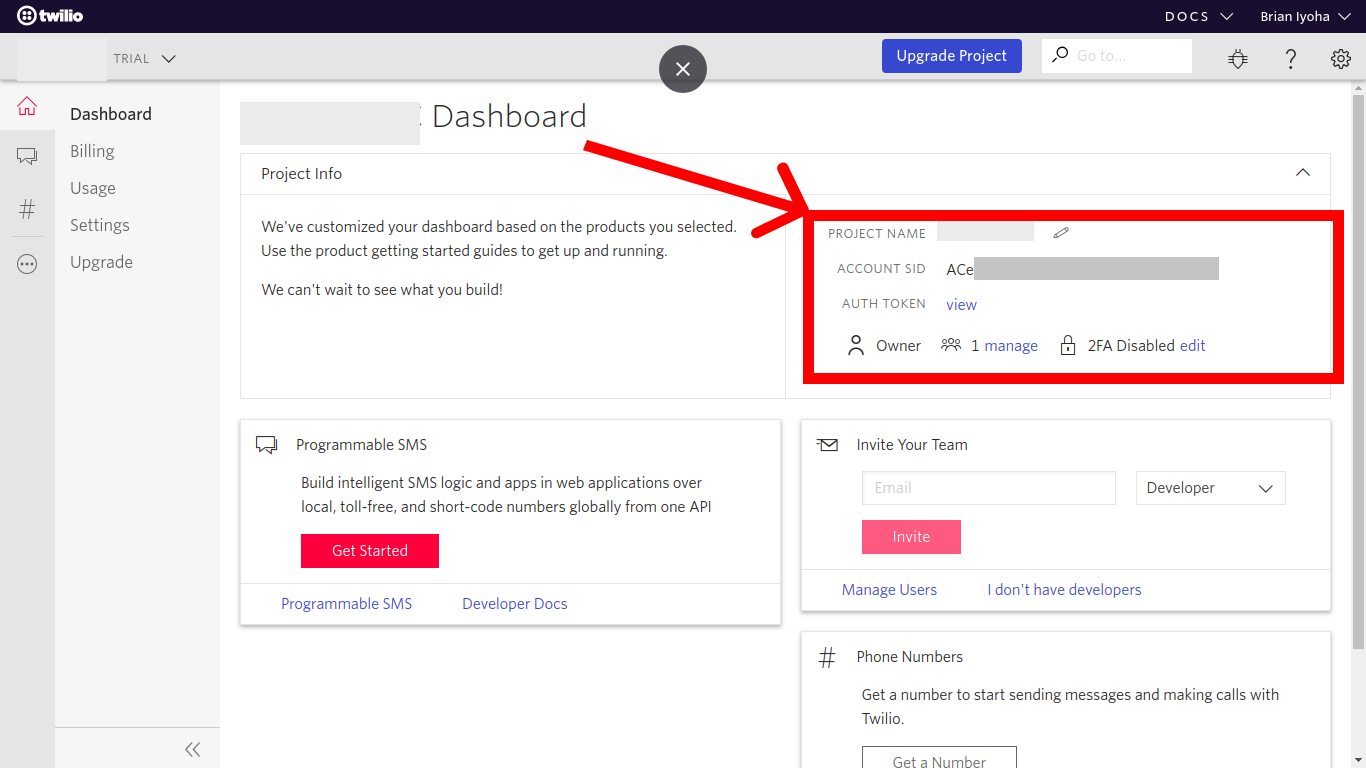
Update the .env file with your Twilio credentials. Open up .env located at the root of the project directory and add these values:
Setting up the Database
This tutorial will require a MySQL database for your application. If you use a MySQL client like phpMyAdmin to manage your databases, then go ahead and create a database named phone-verify and skip this section. If not, install MySQL from the official site for your platform of choice. After successful installation, fire up your terminal and run this command to log in to MySQL:
Once you are logged in, run the following command to create a new database:
Update your environmental variables with your database credentials. Open up .env and make the following adjustments:
Updating User Migration and Model
Now that your database is successfully set up, update your user migrations to create the necessary columns for your users. By default Laravel creates a user migration and Model when a new project is generated. Only a few adjustments will be needed to fit the needs of this tutorial.
Open up the project folder in your favorite IDE/text editor to start updating the needed fields in the users table. Open up the users migration file (database/migrations/2014_10_12_000000_create_users_table.php) and make the following adjustments to the up() method:
The phone_number and isVerified fields were added for storing a user’s phone number and checking whether the phone number has been verified respectively.
Run the following command in the project directory root to add this table to your database:
If the file get migrated successfully, you will see the file name ({time_stamp}_create_users_table) printed out in the console window.
Now update the fillable properties of the User model to include the phone_number and isVerified fields. Open up app/User.php and make the following changes to the $fillable array:
Implementing Authentication Logic
At this point, you have successfully set up your Laravel project with the Twilio PHP SDK and created your database. Next, you'll write out our logic for authenticating a user. First, generate an AuthController which will house all needed logic for each authentication step. Open up a new console window in the project root directory and run the following command to generate a Controller:
The above command will generate a controller class file in app/Http/Controllers/AuthController.php.
Registering Users
It's now time to implement your authentication logic. You will implement the registration logic first. Let’s assume that you are going to be sending out SMS notifications to registered users from your application. You will need to ensure that the phone numbers stored in your database are correct. There’s no better place to enforce this validation than at the point of registration. To accomplish this, you will make use of Twilio Verify to check if the phone number entered by your user is a valid phone number.
Open up app/Http/Controllers/AuthController.php and add the following method:
Take a closer look at the code above. After validating the data coming in via the $request property, your Twilio credentials stored in the .env file are retrieved using the built-in PHP getenv() function. They are then passed into the Twilio Client to create a new instance. After which, your verify service is accessed from the instance the Twilio client using:
The Twilio Verify service sid was also passed to the service which allows access to the Twilio Verify service you created earlier in this tutorial. Next you called the ->verifications->create() method by passing in the phone number to be verified and a channel for delivery. The OTP can be either mail, sms or call. You are currently making use of the sms channel which means your OTP code will be sent to the user via SMS. Next, the user’s data is stored in the database using the Eloquent create method:
After that the user is redirected to a verify page sending their phone_number as data for the view.
Verifying Phone number OTP
After successful registration of the user, you will need to create a way for verifying the OTP sent to them via your channel of choice. Create a verify method to be used to verify the user’s phone number against the OTP code entered in your form. Open app/Http/Controllers/AuthController.php and add the following method:
Just like in the register() method, the data above is retrieved from the request and instantiates the Twilio SDK with your credentials before accessing the verify service. Let’s take a look at how this is structured:
From the above you can tell that you are accessing the Twilio Verify service as earlier, but this time you are making use of another method made available via the service:
The create() function takes in two parameters, a string of the OTP code sent to the user and an array with a to property whose value is the user’s phone number which the OTP was sent to. The verificationChecks->create() method returns an object which contains several properties including a boolean property valid, which is either true or false depending on whether the OTP entered is valid or not:
Next the code checks to see if the valid property is true and then proceeds to update the isVerified field of the user to true. The application then proceeds to manually authenticate the user using Laravel’s Auth::login method which will login and remember the given User model instance.
Note: The User model must implement the Authenticatable interface before it can be used with the Laravel Auth::login method.
After successful verification of the user, they are redirected to the application dashboard.
Building The Views
All logic for registering and verifying a user has been written. Now let’s build the view that the user will use to interact with your application. A layout serving as the main interface of your application will be needed. Create a folder named layouts in resources/views/. Next, create a file named app.blade.php in the layouts folder. Now open up the newly created file (resources/views/layouts/app.blade.php) and add the following:
Note: To expedite the creation of this application, Bootstrap is being utilized for styling your application and forms.
Next create a folder called auth in resources/views/. Now create the following files and paste in their respective content. In resources/views/auth/register.blade.php:
and now in resources/views/auth/verify.blade.php:
Lastly, create a page where verified users will be taken to by creating a file called home.blade.php in resources/views/. Add the following content (resources/views/home.blade.php):
Updating Our Routes
Awesome! Now that you have completed creating the view, let’s update your routes/web.php file with the needed routes for your application. Open up routes/web.php and make the following changes:
Testing Our Application
Now that you are done with building the application, let’s test it out. Open up your console window and navigate to the project directory and run the following command:
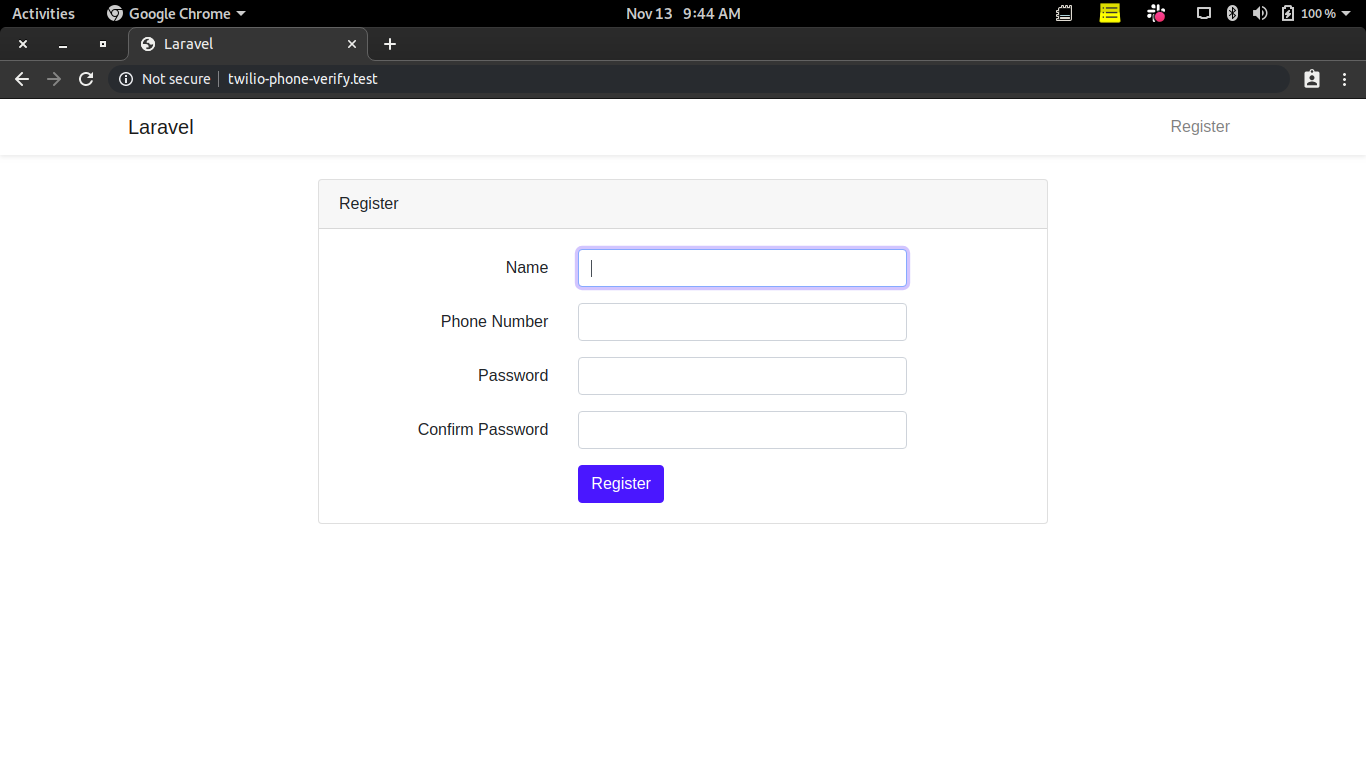
This will serve your Laravel application on a localhost port, normally 8000. Open up the localhost link printed out after running the command on your browser and you should be greeted with registration page similar to this:

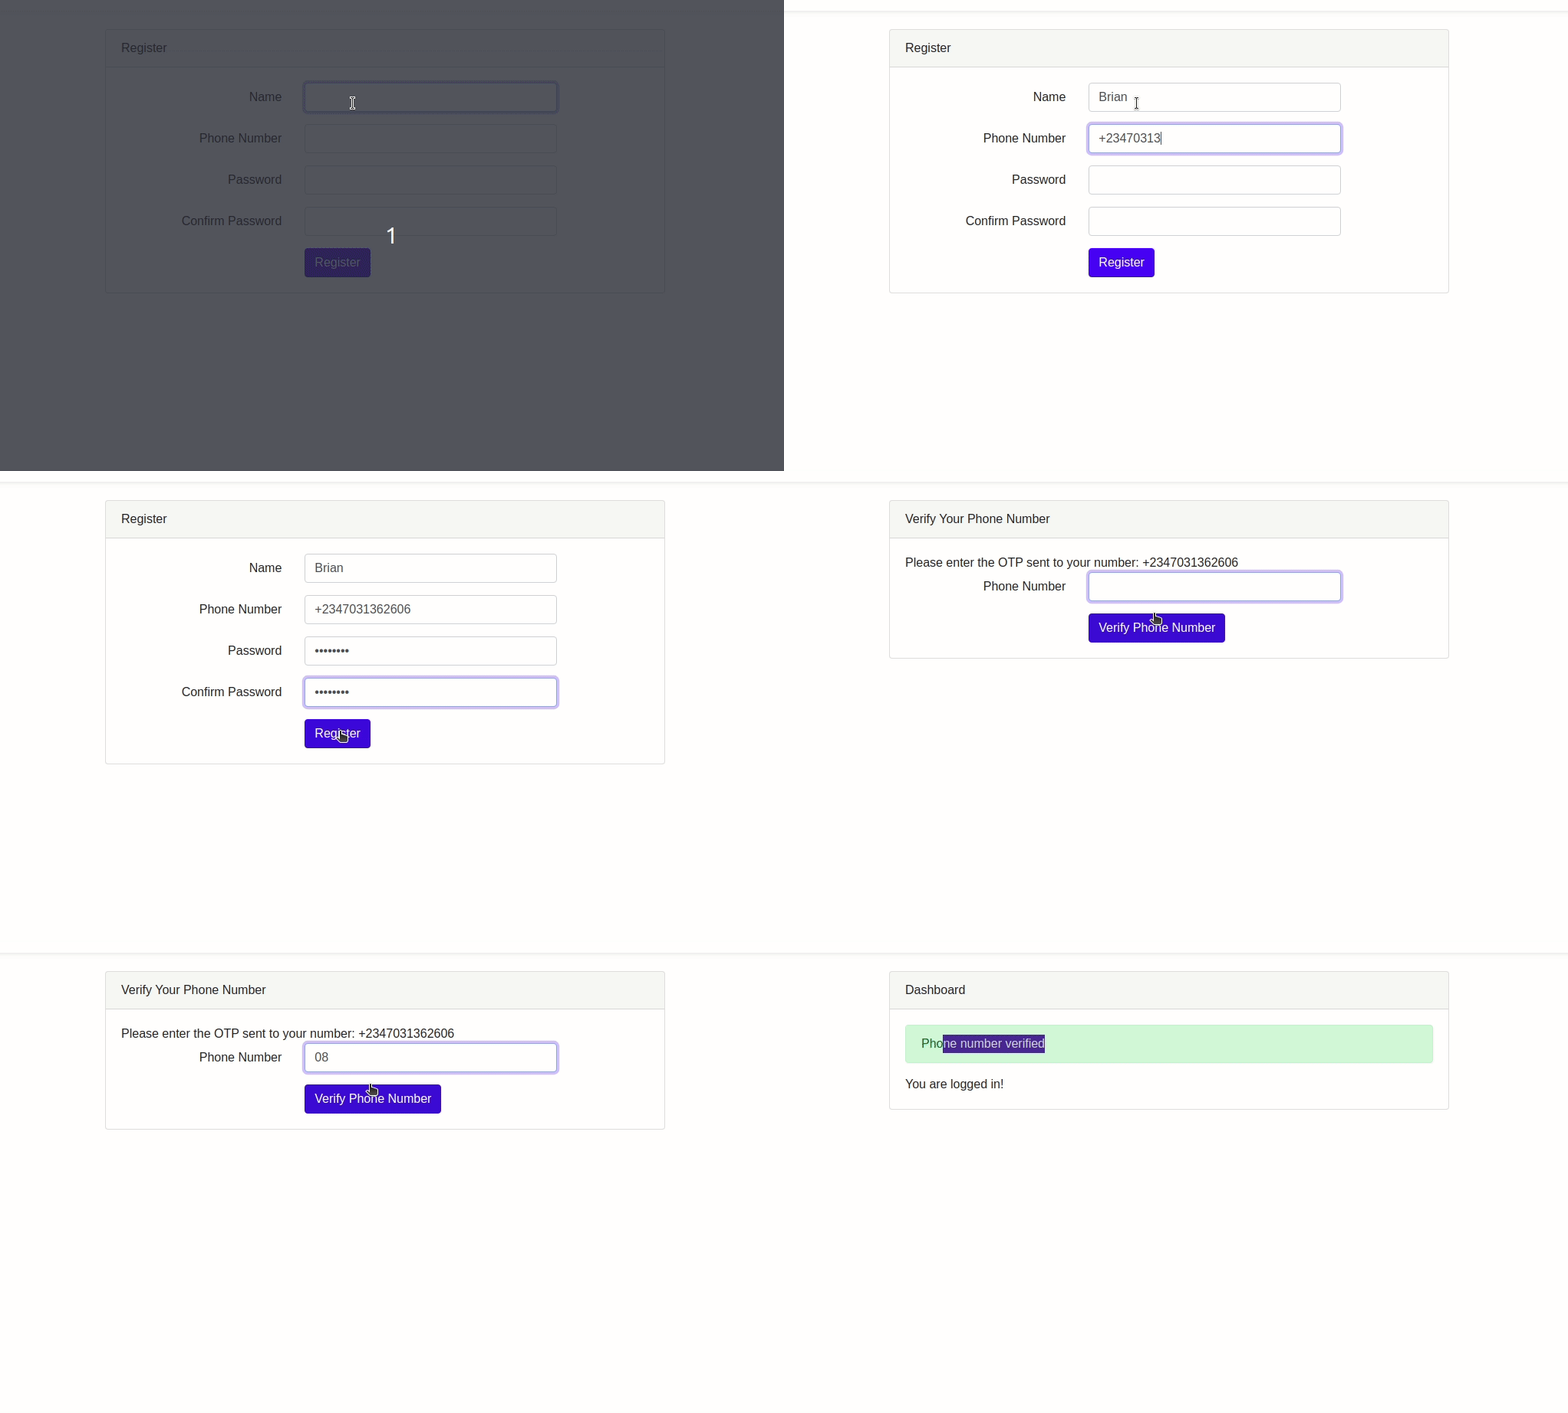
Fill out the registration form to trigger a OTP code to be sent. You will use this code in filling out the form on the page you were redirected to.

Conclusion
Great! By completing this tutorial, you have learned how to make use of Twilio's Verify Service for validating phone number(s) in a Laravel application. Also, we learned how to manually authenticate a user in a Laravel application. If you would like to take a look at the complete source code for this tutorial, you can find it on Github.
I’d love to answer any question(s) you might have concerning this tutorial. You can reach me via:
- Email: brian.iyoha@gmail.com
- Twitter: thecodearcher
- GitHub: thecodearcher
Related Posts
Related Resources
Twilio Docs
From APIs to SDKs to sample apps
API reference documentation, SDKs, helper libraries, quickstarts, and tutorials for your language and platform.
Resource Center
The latest ebooks, industry reports, and webinars
Learn from customer engagement experts to improve your own communication.
Ahoy
Twilio's developer community hub
Best practices, code samples, and inspiration to build communications and digital engagement experiences.


