Build Two-factor Authentication in Angular with Twilio Authy
Time to read:
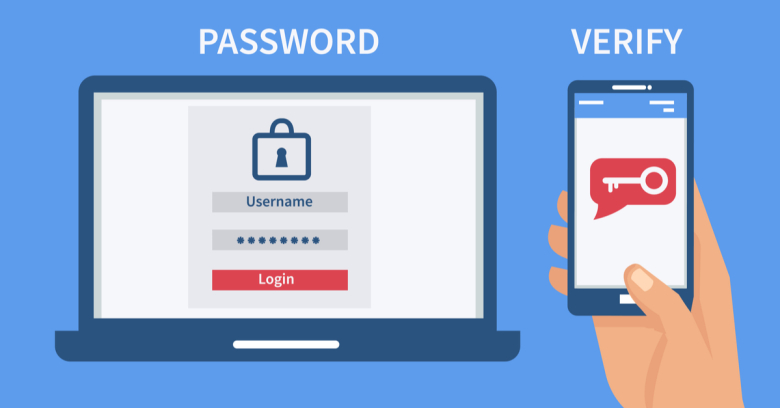
User authentication is a crucial requirement for many Angular applications and simply logging in with user ID and password is increasingly inadequate security. Two-Factor Authentication (2FA) provides device-based security that is substantially more difficult to hack, but building your own 2FA system is a daunting challenge. Twilio Authy makes it easy to add 2FA to Angular apps.
This post will show you how to add Authy to your Angular project. You’ll also learn how to improve the user’s experience and your app’s security by using Angular Universal to implement the login process.
In this post we will:
- Create a basic Angular application with a login page
- Set up an authorization guard service and an authorization service
- Add server-side rendering with Angular Universal
- Set up server-side authentication
- Implement two-factor authentication with Twilio Authy
Prerequisites to build with Angular and Authy
To accomplish the tasks in this post you will need the following:
- Node.js and npm (The Node.js installation will also install npm.)
- Angular CLI
- A Twilio account (Sign up for a free account.)
These tools are referred to in the instructions but not required:
To learn most effectively from this post you should have the following:
- Working knowledge of TypeScript and the Angular framework
- Familiarity with Angular observables, dependency injection, and pipes
There is a companion project for this post available on GitHub. Each major step in this post has its own branch in the repository.
Create an Angular project and generate components
Every Angular project starts with initialization and installation of the necessary packages.
Go to the directory under which you’d like to create the project and enter the following command line instructions:
The preceding commands created the application and generated two components:
LoginPageComponenta form for collecting the user ID and password andProtectedPageComponenta page which will be the target of thehomepath.
The app will use a service to determine if the user is authorized to access specific pages in the app, such as the page ProtectedPageComponent.
Generate the AuthService by entering the following at the command line:
Implement the service by replacing the contents of src/app/auth.service.ts with the following code:
In the auth method the values for the user ID, login, and the password have been hard-coded for the sake of simplicity. In a production application the values collected on the /login page and passed to the method would be validated against data retrieved from a persistent data store, like a database.
If the credentials are validated the boolean flag authenticated is set to true and the user is redirected to the URL passed by the AuthGuardService.
Another service, known as a route guard will redirect users away from protected components to the /login route if the value supplied by the AuthService is not true. Create the AuthGuardComponent with this command:
Implement the service by replacing the existing code in src/app/auth-guard.service.ts with the following:
The AuthGuardService class implements the CanActivate interface, which specifies the public canActivate(): boolean method. The method uses the AuthService to determine if the user is authenticated. If not, the method passes the route URL that invoked the AuthGuardService to the AuthService and returns false. When the user logs in successfully the AuthService will automatically route them to the page they had intended to reach before logging in. If the user is authenticated the method returns true, enabling the user to navigate to the component.
LoginPageComponent, ProtectedPageComponent, and AuthGuardService need to be added to the application routing. Replace the contents of src/app/app-routing.module.ts with the following:
The application’s routing now includes a /login path and a /home path that use the components created earlier. There is also a route for redirecting the root URL to the /home path.
The /home path uses the ProtectedPageComponent, which is protected by the AuthGuardService service, as follows:
When the user navigates to the application’s base URL (www.example.com) or to the /home path, Angular fires the canActivate method, which determines if the user is allowed to open given resource.
To simplify the HTML rendered by the application, remove all the HTML elements from src/app/app.component.html except for the following:
Also, replace the login page template in src/app/login-page/login-page.component.html with the following:
The logic for the login page needs to reflect the design of the page and implement the AuthService. Replace the contents of src/app/login-page/login-page.component.ts with the following:
Because the login component uses the Reactive Form concept, the ReactiveFormsModule needs to be included in the app entry point. This requires two changes to the src/app/app.module.ts file.
1. Add the following line to the top of the file:
2. Update the imports section by adding ReactiveFormsModule so it looks like the following:
Verify the application is working by entering the following at the command line:
Open your browser’s developer tools (F12) and navigate to [http://localhost:4200](http://localhost:4200). You should see something similar to the following:
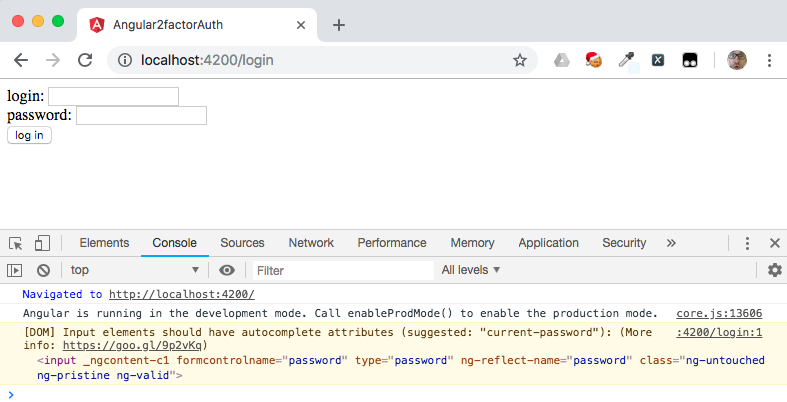
What just happened? You navigated to the root route of the app, which redirected you to the /home path, which is protected by AuthGuardService. Because you have not yet been authorized you were redirected to the /login path.
Enter the login credentials (login: foo and password: bar) and submit the form: you should see that you have been redirected to the /home path and the HTML from protected-page.component.html is displayed.
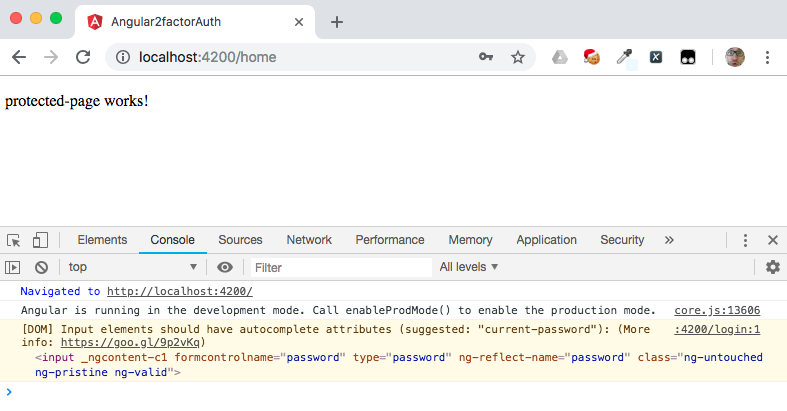
Recall that the ProtectedPageComponent is supplied as the target of the /home route in app-routing.module.ts and that the login credentials are hard-coded in server.ts.
If you want to catch up to this step you can clone this branch of the companion GitHub repository and run the application by executing the commands below in the directory where you’d like to build the project. (You'll need to have Git installed on your machine to clone the repository.)
Move user authentication to the server
Keeping authentication logic in the browser is not a great idea. In this step we are going to “cook two roasts on one fire” by adding Angular Universal support. Using Angular Universal (AU) will:
- Improve the user experience and enhance search engine optimization (SEO) by decreasing the time until the first meaningful paint and
- Move the authorization and authentication logic to the server side of the application for greater security.
Install Angular Universal support using @ng-toolkit by entering the following command:
The /login path that has been running in the browser on the application’s front end needs to be replaced with an /auth/login endpoint on the server back end. Replace the code in the /angular-twilio-authy/server.ts file with the following:
These changes create an HttpPost endpoint, /auth/login, that validates the credentials supplied by the user against the values known by the application, as shown below. Although the login credentials are hard-coded here, in a production application they’d typically be validated against a persistent data store using a query.
The AuthService in the application will consume the server’s /auth/login end point. To change implementation of the AuthService, replace the code in the src/app/auth.service.ts file with the following:
Because the auth method no longer returns void and now returns an Observable the LoginComponent needs to subscribe to it. Change the implementation of the onSubmit() method in the src/app/login-page/login-page.component.ts file as follows:
(Note: ellipsis (“...”) in a code block represents a section of code redacted for brevity.)
Now would be a good time to check to see if the application works as expected. Compile and run server with the following commands:
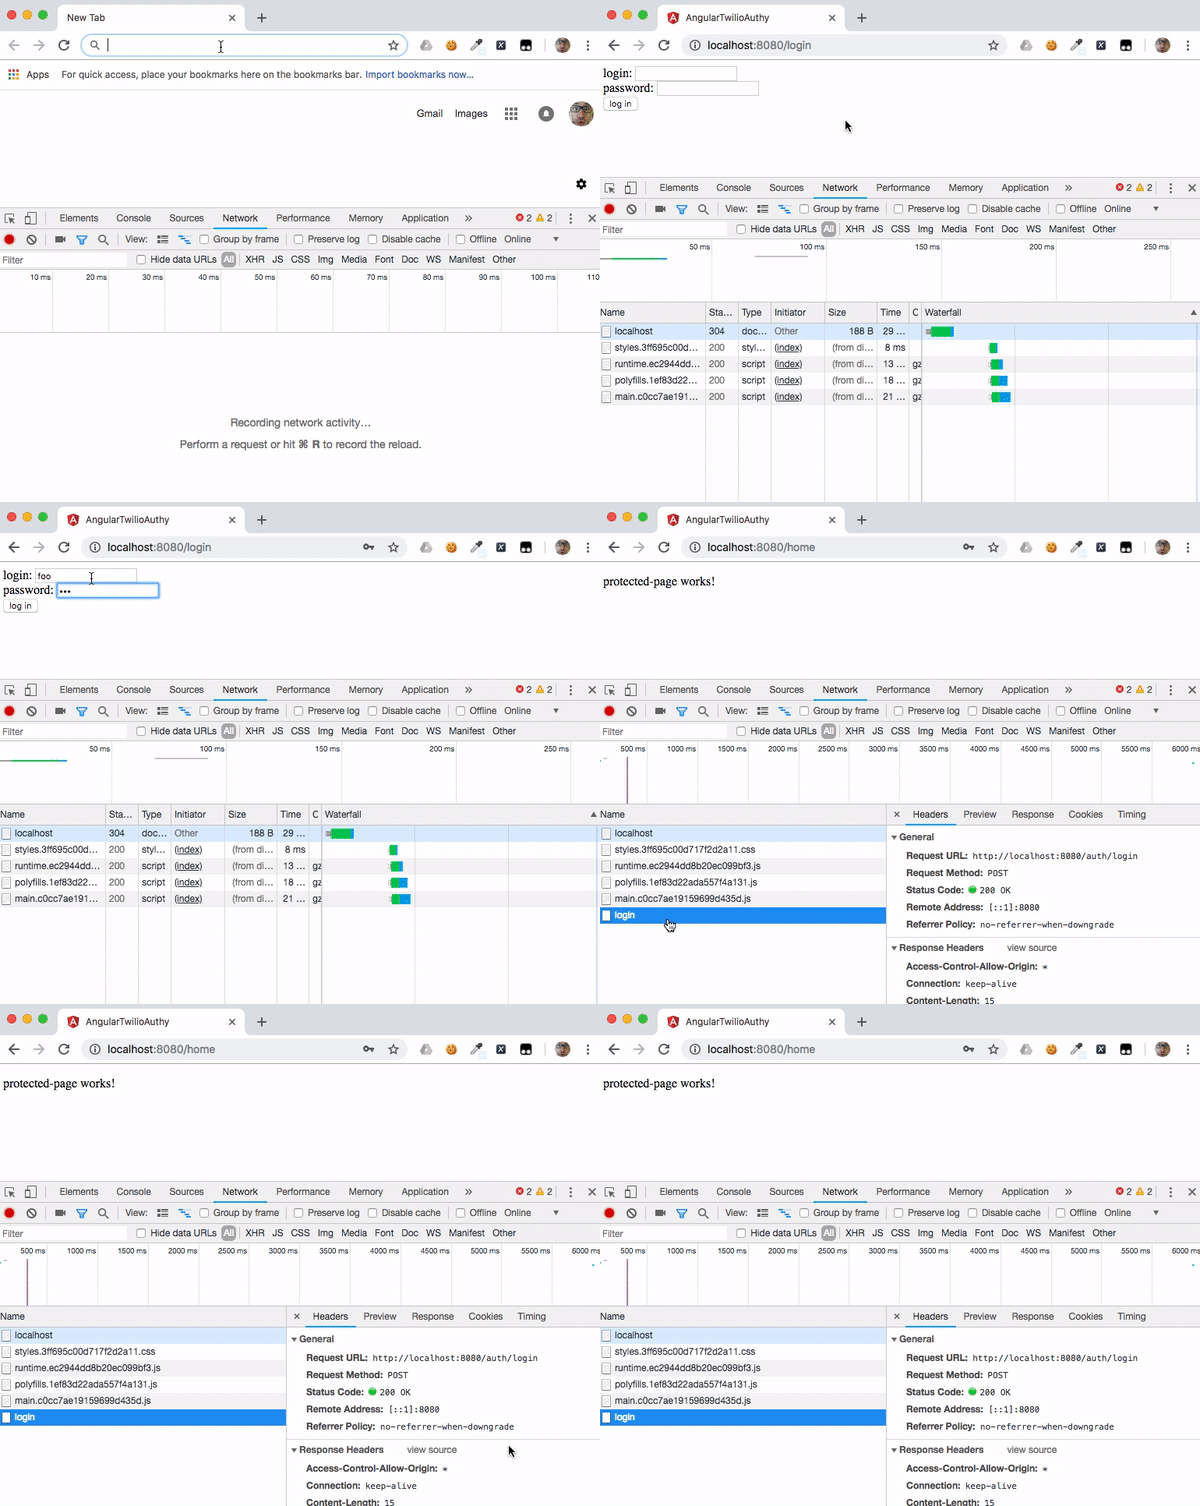
Open the developer tools (F12) in your browser and select the Network tab so you can see the communication between your browser and the server. Navigate to http://localhost:8080. The single page application (SPA) will be served from the back-end. Make note of the resources loaded when the page is initially served, as shown in the illustration below.
Enter the login credentials and observe the changes in the Network tab of the developer’s tools. You should see the SPA running in your browser has performed a REST call to the /auth/login end point and returned a status code of 200 (OK).
If you want to catch up to this step, run the following commands:
(Note that the command for running the application is different than the last time you ran.)
Implement two-factor authentication in Angular
The application now has a secure, server-side authentication system. But it relies on a single factor, the user ID and password in possession of a user. This is a factor that the user knows. It’s widely acknowledged these credentials are vulnerable to being compromised and misused in a variety of ways, so how can the application be more secure?
One of the best ways is to implement a second authentication factor.
In addition to something the user knows, two-factor authentication also requires something the user has (possession) or is (inheritance).
Biometric authentication implements inheritance by requiring a user’s unique physical characteristics, such as a fingerprint or retina pattern, to establish their identity. This method is very secure, but can require expensive, special-purpose hardware.
Twilio Authy for two-factor authentication
Twilio Authy provides a second factor through possession, through something nearly every user has: a mobile phone (or other device).
If the phone uses facial recognition or a fingerprint to unlock it, aspects of inheritance-based authentication are implemented as well: the user needs to know their user ID and password, possess their phone, and (optionally) be the user with the face or finger required to unlock the phone or computer. A bad actor may be able to compromise a user’s login ID and password, but it’s much more difficult for them to obtain the credentials, device, and biometric data associated with a user—at least for a significant amount of time.
Authy has a number of features that simultaneously enhance the user experience and provide flexible authentication options:
- Push notifications
- Soft tokens (one-time codes)
- SMS and voice security codes
- Authy apps for iOS, Android, Windows and macOS
This portion of the project will show how quickly you can add 2FA to an Angular app with the Authy app. You’ll need a Twilio account to complete these steps. You can sign up for a free trial account in a few minutes.
Once you have a Twilio account, sign in and navigate to the Authy section of the Twilio Console and complete the following steps. You’ll be done in a few minutes.
- In the Authy section of the Twilio console, create a new application.
- Copy the Production API Key for the application to a safe place. (You can find the key in the Settings for the application if you misplace it.)
- In the application you created, register yourself as a new user using your preferred email address and mobile phone number.
- Copy the Authy ID for the user you just created to a safe place.
- Install the Authy app on your mobile phone. You should have received a text notification with a link to get the codes to complete the installation.
When you’ve successfully completed the preceding steps you can implement two-factor authentication. The following diagram illustrates the flow of communication between the browser, the server, and Twilio:

- Client makes GET / request
- Server generates login page
- Client sends POST of /auth/login
- Server requests 2nd factor authentication from Authy
- Authy respond with request_id
- Server passes request_id to browser
- Browser ask server (repeatedly) if user has authorized with 2nd factor
- Server asks Twilio for status
- Twilio respond with authorization status
- Server passes status to the browser
Return to the command line in the project directory and install necessary dependencies in the project by executing the following commands:
Implementing two-factor authentication on the server will require two new endpoints and modification of the existing /auth/login endpoint:
- /auth/status will provide the status of a user’s response to the given Authy request (approved, rejected, no response).
- /auth/isLogged will provide the browser with an encrypted cookie to indicate the user is logged in.
- /auth/login will get the result of the Authy process in addition to verifying the login credentials.
Replace the code in server.ts with the following:
Now replace the placeholders with the values you copied from the Twilio Console when you set up Authy. Place the Production API Key in the declarations section:
To make this demonstration simpler, we hard-coded the values for login (user ID) and password. In a production application you would typically check the supplied values against a persistent data store.
If the user has provided valid credentials, the next step in 2FA is to trigger a Twilio Authy message to the user’s device using the user’s Authy ID. Just as we’ve skipped over the process of registering a user in our application, we’re also skipping over the process of programmatically registering a user with Authy. To make this demonstration simpler, we’re hard-coding the Authy ID created when you registered yourself as a user directly in Authy.
In the code for the /auth/login endpoint, replace the placeholder with the value of the Authy ID you saved when you created a user:
When a user approves authorization with the app the server sends the cookie containing the super-encrypted value. The client will be able to determine if user is logged in or not by calling the /auth/isLogged endpoint.
Take a look at the code for the /auth/isLogged endpoint, shown below. Although the value for the cookie is hard-coded, in a production application you should generate a unique, encrypted value.
Because the cookie has an httpOnly attribute it’s inaccessible in the browser. The cookie is a great place to use a JSON Web Token (JWT) containing the user’s authorization scope or other sensitive data. The encrypted cookie also provides protection against the token data being stolen in a cross-site scripting (XSS) attack.
Now that the new endpoints are in place on the server they can be consumed in the AuthService. Replace the existing code in src/app/auth.service.ts with the following:
That’s a lot of code. What’s changed?
First, the ‘auth’ method uses two-factor authentication with Authy. When the observable calling the /auth/login endpoint responds with a positive message the secondFactor() method is called using the token from the Authy API as an argument:
The secondFactor function uses the timer method from the rxjs library to emit a number every second while it waits for a response from the /auth/status endpoint on the server. If the response is approved, the user is redirected to the URL provided to the auth function. This URL is the path to which the user originally tried to navigate before being required to sign in.
If the response from /auth/status is denied, or there is no response after 60 seconds, the observable returns false and closes.
The canActivate method of AuthGuardService needs to consume the AuthService through an observable and return the redirect URL instead of a boolean. Make these changes by copying the following code into the src/app/auth-guard.service.ts file:
The LoginPageComponent should keep the user informed about the status of the login process. This can be done with a rxjs BehaviorSubject, which is a type of observable that enables the LoginPageComponent to send the values of login and password to the auth method and receive the status of the authentication attempt.
Replace the contents of the src/app/login-page/login-page.component.ts file with the following:
The value of the BehaviorSubject message can then be displayed on the login page. Add the following code at the bottom of the existing code in the src/app/login-page/login-page.component.html file:
Run and test two-factor authentication with Authy
Recompile and run the application by entering the following commands:
Open the developer tools (F12) in your browser and select the Network tab so you can watch the communication between the server and your brower. Navigate to http://localhost:8080 and enter the sign-in credentials (login: foo, password: bar) and click Submit.
Two things should happen in quick succession:
- The Network tab will display a series of “status” events as a result of the
LoginPageComponentreceiving the once-per-second push notification from the observablesecondFactorin theAuthService. These events will continue to occur until Authy receives a response from the app on your phone or 60 seconds have elapsed. - You should receive a push request like the one shown below on your mobile device.
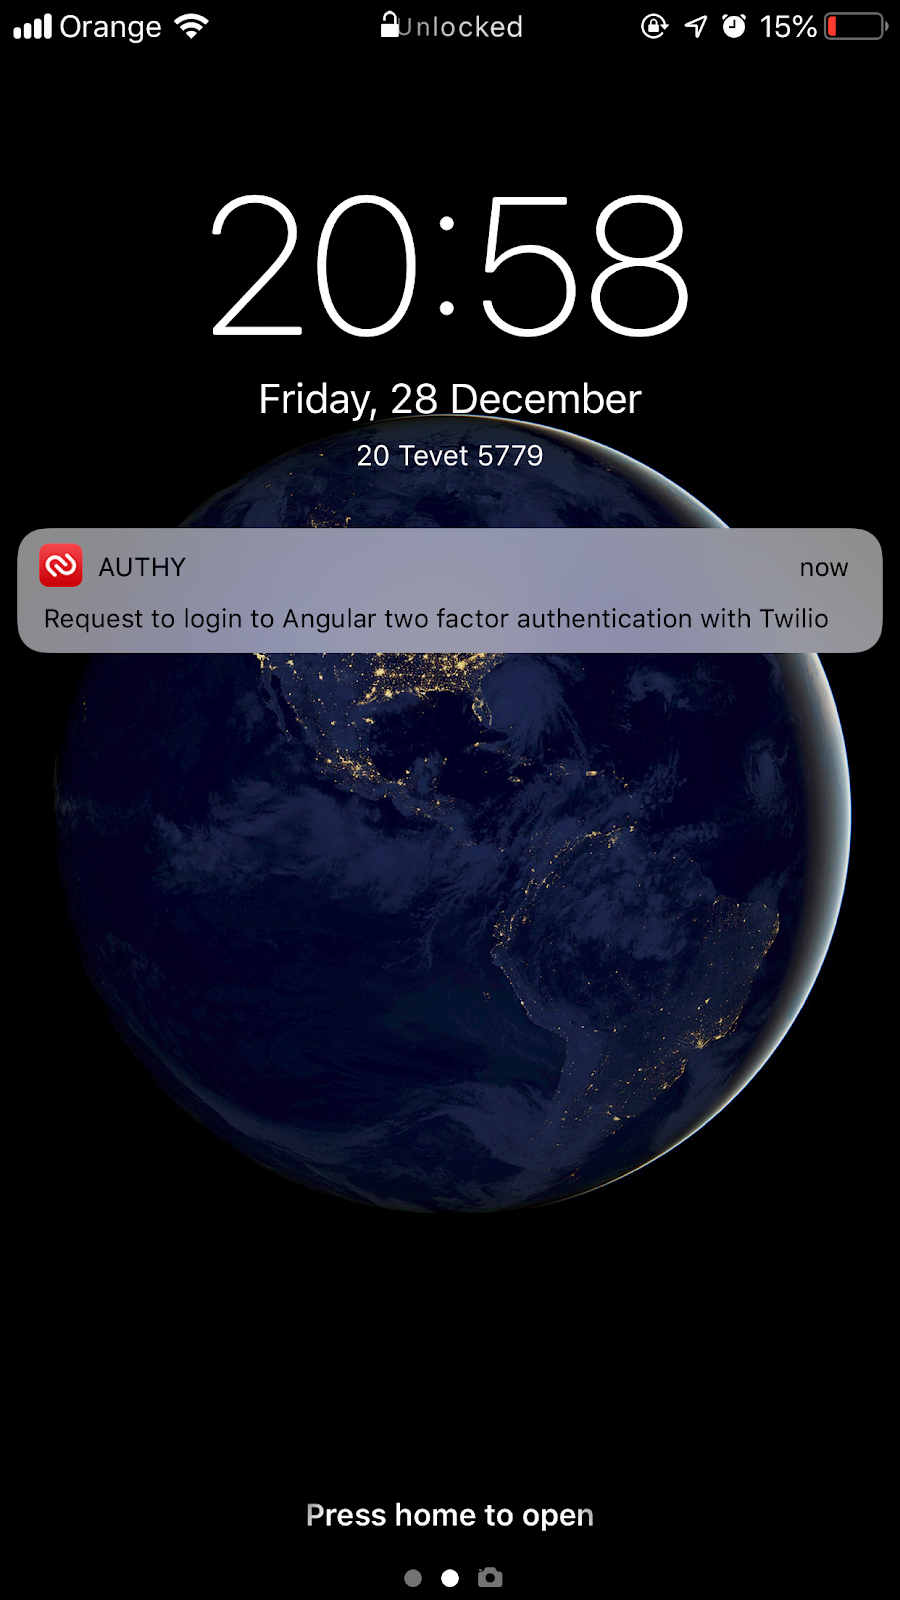
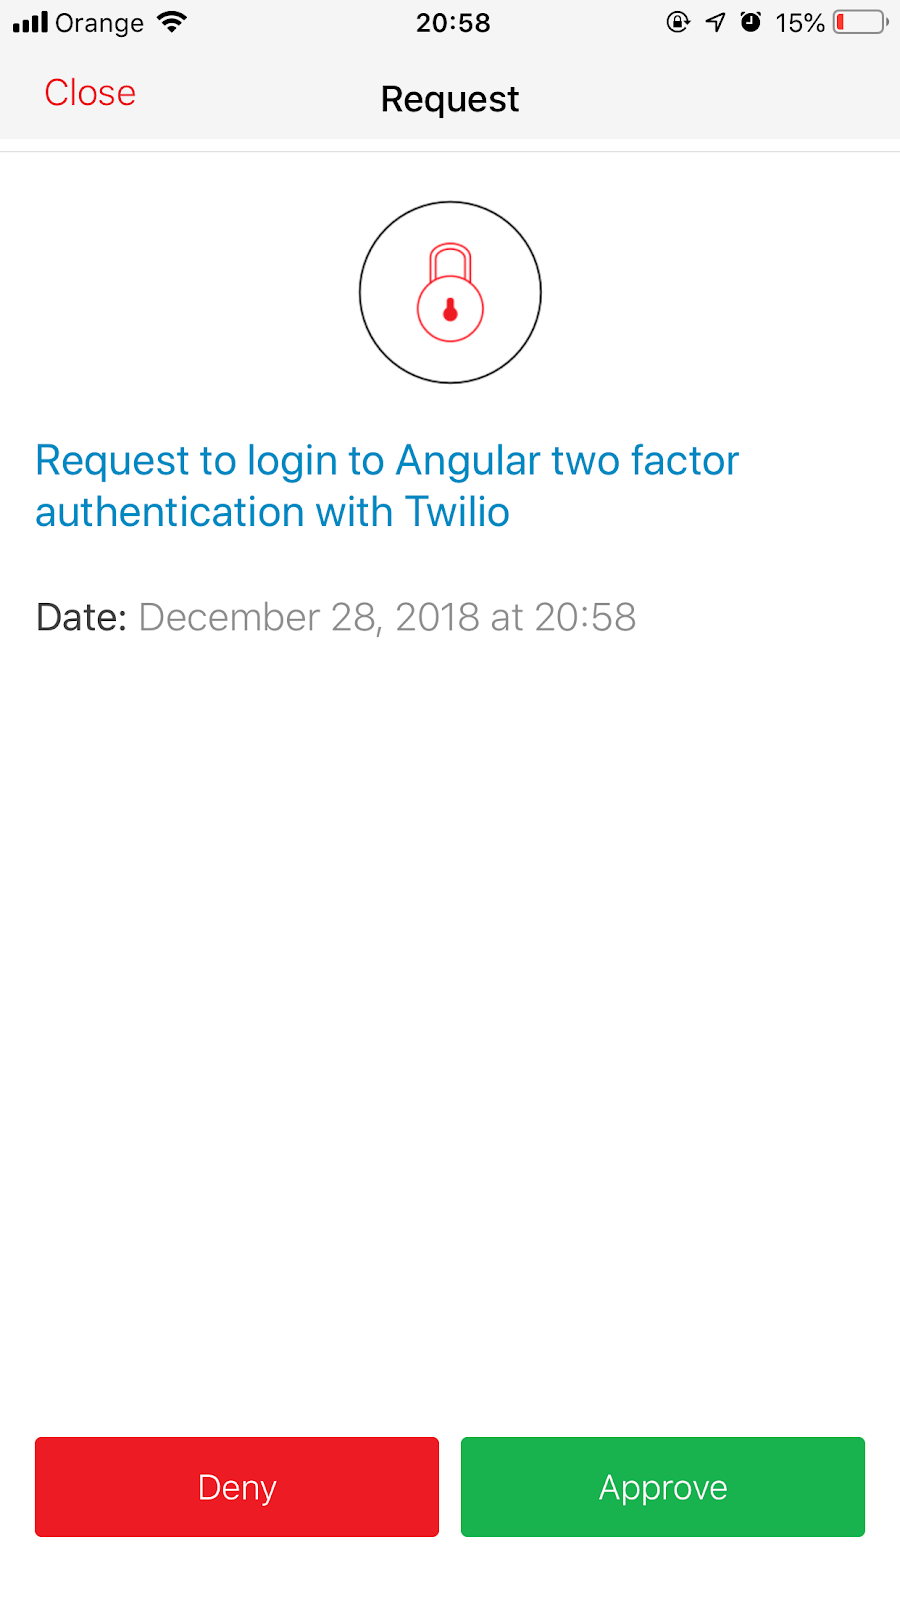
Approve the authentication request. The mobile app will securely transmit the approval to Twilio’s Authy infrastructure, which will send a push notification to the server process.
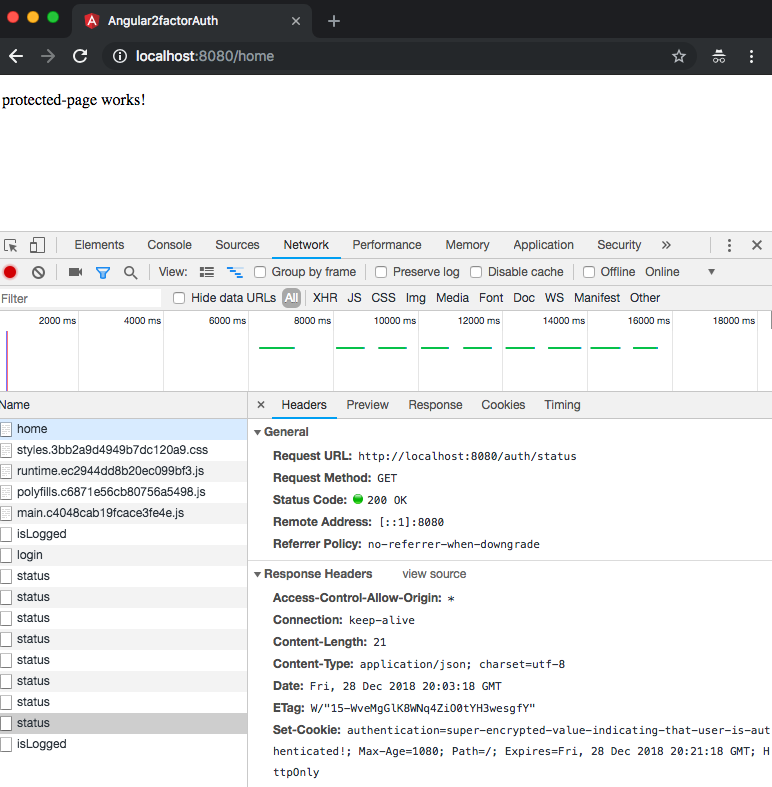
The Angular SPA running in your browser will receive the positive response from the /auth/status endpoint on the server along with the authentication cookie. In the illustration below you can see the isLogged response and the cookie:
If you want to catch up to this step, execute the following commands:
Preparing Angular and Authy for production
As this case study has shown, you can easily implement full-featured and performant two-factor authentication in an Angular application using Twilio Authy and Angular Universal. But there are other considerations before your application is ready for production.
The most important of these is implementation of TLS/SSL for encrypted communication between the browser and server. The complete process for implementing TLS/SSL is beyond the scope of this tutorial, and will depend on your operating system and other factors, but you can easily configure the code shown above to consume a self-signed OpenSSL certificate installed on your development machine.
Replace the contents of the local.js file with the following code and modify the paths to localhost.key and localhost.cert as needed for your configuration:
This code can be found in the step4 branch of the companion repository.
Other production considerations include:
- Storing user credentials (user ID and password) in encrypted form in a persistent data store (such as a database)
- Validating and securely storing phone numbers associated with user accounts
- Creating new users in Authy and storing their Authy ID securely in the data store
- Encrypting the cookie used to validate authentication between the browser and the server with JSON Web Tokens (JWT) or another technique
- Setting user ID requirements and validating email addresses
- Setting password requirements and handling password resets
Look for posts on these topics here on the Twilio blog.
Summary: Building two-factor authentication with Angular and Authy
We covered an important challenge for all mature applications: security with two-factor authentication (2FA). We saw how to implement authentication on the server using Angular Universal, which makes the process fast and secure. And we implemented 2FA with Twilio Authy, a comprehensive suite of tools for authentication including an API, web-based console, and mobile apps.
Additional Angular Universal Resources
If you want to learn more about Angular Universal techniques, check out these other posts on the Twilio blog:
- Getting Started with Serverless Angular Universal on AWS Lambda
- How to Create Search Engine-friendly Internationalized Web Apps with Angular Universal and ngx-translate
- Build fast and efficient Angular apps with Angular Universal, a TransferState service, and an API watchdog
The repository for the code used in this post can be found on GitHub.
Maciej Treder is a Senior Software Development Engineer at Akamai Technologies, conference speaker, and the author of @ng-toolkit, an open source toolkit for building Angular progressive web apps (PWAs), serverless apps, and Angular Universal apps. Check out the repo to learn more about the toolkit, contribute, and support the project. You can learn more about the author at https://www.maciejtreder.com. You can also contact him at: contact@maciejtreder.com or @maciejtreder (GitHub, Twitter, StackOverflow, LinkedIn).
Related Posts
Related Resources
Twilio Docs
From APIs to SDKs to sample apps
API reference documentation, SDKs, helper libraries, quickstarts, and tutorials for your language and platform.
Resource Center
The latest ebooks, industry reports, and webinars
Learn from customer engagement experts to improve your own communication.
Ahoy
Twilio's developer community hub
Best practices, code samples, and inspiration to build communications and digital engagement experiences.


