How to build a CLI with Node.js
Time to read:
This post is part of Twilio’s archive and may contain outdated information. We’re always building something new, so be sure to check out our latest posts for the most up-to-date insights.
Command-line interfaces (CLIs) built in Node.js allow you to automate repetitive tasks while leveraging the vast Node.js ecosystem. And thanks to package managers like npm and yarn, these can be easily distributed and consumed across multiple platforms. In this post we'll look at why you might want to write a CLI, how to use Node.js for it, some useful packages and how you can distribute your new CLI.
Why create CLIs with Node.js
One of the reasons why Node.js got so popular is the rich package ecosystem with over 900,000 packages in the npm registry. By writing your CLIs in Node.js you can tap into this ecosystem including it's big amount of CLI-focused packages. Among others:
inquirer,enquirerorpromptsfor complex input promptsemail-promptfor convenient email input promptschalkorkleurfor colored outputorafor beautiful spinnersboxenfor drawing boxes around your outputstmuxfor atmuxlike UIlistrfor progress listsinkto build CLIs with Reactmeoworargfor basic argument parsing-
commanderandyargsfor complex argument parsing and subcommand support oclifa framework for building extensible CLIs by Heroku (gluegunas an alternative)
Additionally there are many convenient ways to consume CLIs published to npm from both yarn and npm. Take as an example create-flex-plugin, a CLI that you can use to bootstrap a plugin for Twilio Flex. You can install it as a global command:
Or as project specific dependencies:
In fact npx supports executing CLIs even when they are not installed yet. Simply run npx create-flex-plugin and it will download it into a cache if it can't find a locally- or globally-installed version.
Lastly since npm version 6.1, npm init and yarn supports a way for you to bootstrap projects using CLIs that are named create-*. As an example, for our create-flex-plugin really all we have to call is:
Setup Your First CLI
If you prefer following along a video tutorial, check out this tutorial on our YouTube.
Now that we covered why you might want to create a CLI using Node.js, let's start building one. We'll use npm in this tutorial but there are equivalent commands for most things in yarn. Make sure you have Node.js and npm installed on your system.
In this tutorial we'll create a CLI that bootstraps new projects to your own preferences by running npm init @your-username/project.
Start a new Node.js project by running:
Afterwards create a directory called src/ in the root of your project and place a file called cli.js into it with the following code:
This will be the part where we'll later parse our logic and then trigger our actual business logic. Next we'll need to create our entry point for our CLI. Create a new directory bin/ in the root of our project and create a new file inside it called create-project. Place the following lines of code into it:
There's a few things going on in this small snippet. First we require a module called esm that enables us to use import in the other files. This is not directly related to building CLIs but we will be using ES Modules in this tutorial and the esm package allows us to do so without the need to transpile for Node.js versions without the support. Afterwards we'll require our cli.js file and call the cli function exposed with process.argv which is an array of all the arguments passed to this script from the command line.
Before we can test our script we'll need to install our esm dependency by running:
We'll also have to inform the package manager that we are exposing a CLI script. We do this by adding the appropriate entry in our package.json. Don't forget to also update the description, name, keyword and main properties accordingly:
If you look at the bin key, we are passing in an object with two key/value pairs. Those define the CLI commands that your package manager will install. In our case we'll register the same script for two commands. Once using our own npm scope by using our username and once as the generic create-project command for convenience.
Now that we have this done, we can test our script. To do so, the easiest way is to use the npm link command. Run in your terminal inside your project:
This will globally install a symlink linking to your current project so there's no need for you to re-run this when we update our code. After running npm link you should have your CLI commands available. Try running:
You should see an output similar to this:
Note that both paths will be different for you depending on where your project lies and where you have Node.js installed. This array will be longer with every argument that you add to this. Try running:
And the output should reflect the new argument:
Parsing Arguments and Handling Input
We are now ready to parse the arguments that are being passed to our script and we can start making sense of them. Our CLI will support one argument and a few options:
[template]: We'll support different templates out of the box. If this is not passed we'll prompt the user to select a template--git: This will rungit initto instantiate a new git project--install: This will automatically install all the dependencies for the project--yes: This will skip all prompts and go for default options
For our project we'll use inquirer to prompt for missing values and the arg library to parse our CLI arguments. Install the missing dependencies by running:
Let's first write the logic that will parse our arguments into an options object that we can work with. Add the following code to your cli.js:
Try running create-project --yes and you should see skipPrompt to turn to true or try passing another argument in like create-project cli and the template property should be set.
Now that we are able to parse the CLI arguments, we'll need to add the functionality to prompt for the missing information as well as skip the prompt and resort to default arguments if the --yes flag is passed. Add the following code to your cli.js file:
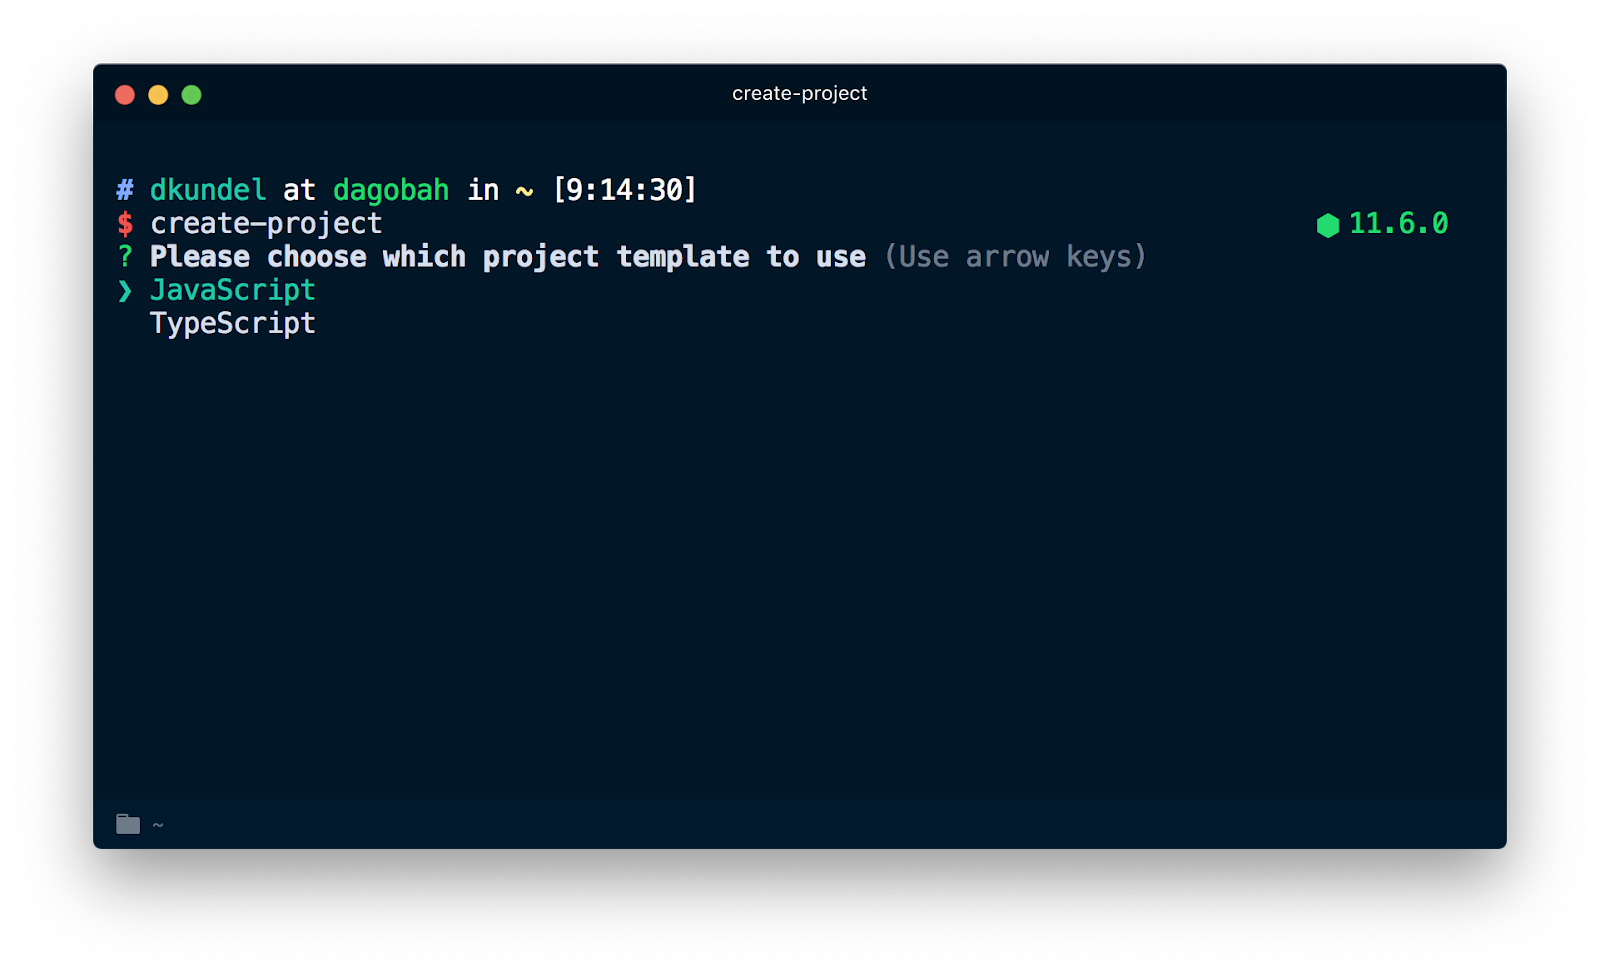
Save the file and run create-project and you should be prompted with a template selection prompt:

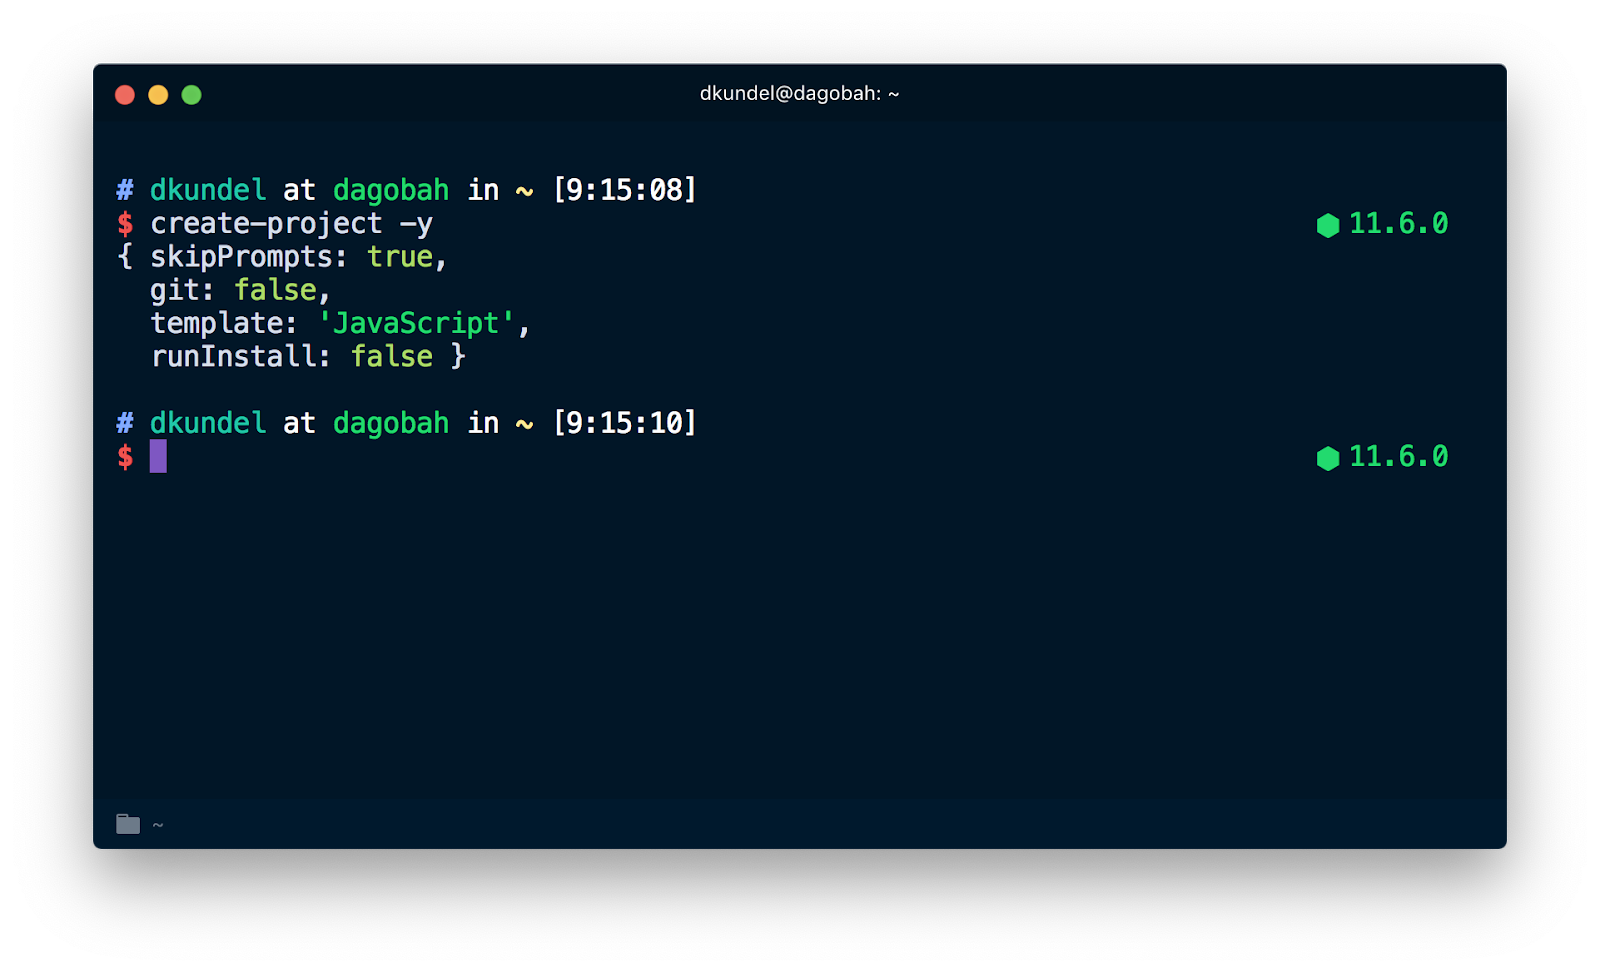
And afterwards you'll be prompted with a question whether you want to initialize git. Once you selected both you should see output like this printed:
Try to run the same command with -y and the prompts should be skipped. Instead you'll immediately see the determined options output.

Writing the Logic
Now that we are able to determine the respective options through prompts and command-line arguments, let's write the actual logic that will create our projects. Our CLI will write into an existing directory similar to npm init and it will copy all files from a templates directory in our project. We'll allow the target directory to be also modified via the options in case you want to re-use the same logic inside another project.
Before we write the actual logic, create a templates directory in the root of our project and place two directories with the names typescript and javascript into it. Those are the lower-cased versions of the two values that we prompted the user to pick from. This post will use these names but feel free to use other names you'd like. Inside that directory place any package.json that you would like to use as the base of your project and any kind of files you want to have copied into your project. Our code will later simply copy those files into the new project. If you need some inspiration, you can check out my files at github.com/dkundel/create-project.
In order to do recursive copying of the files we'll use a library called ncp. This library supports recursive copying cross-platform and even has a flag to force override existing files. Additionally we'll install chalk for colored output. To install the dependencies run:
We'll place all of our core logic into a main.js file inside the src/ directory of our project. Create the new file and add the following code:
This code will export a new function called createProject that will first check if the specified template is indeed an available template, by checking the read access (fs.constants.R_OK) using fs.access and then copy the files into the target directory using ncp. Additionally we'll log some colored output saying DONE Project ready when we successfully copied the files.
Afterwards update your cli.js to call the new createProject function:
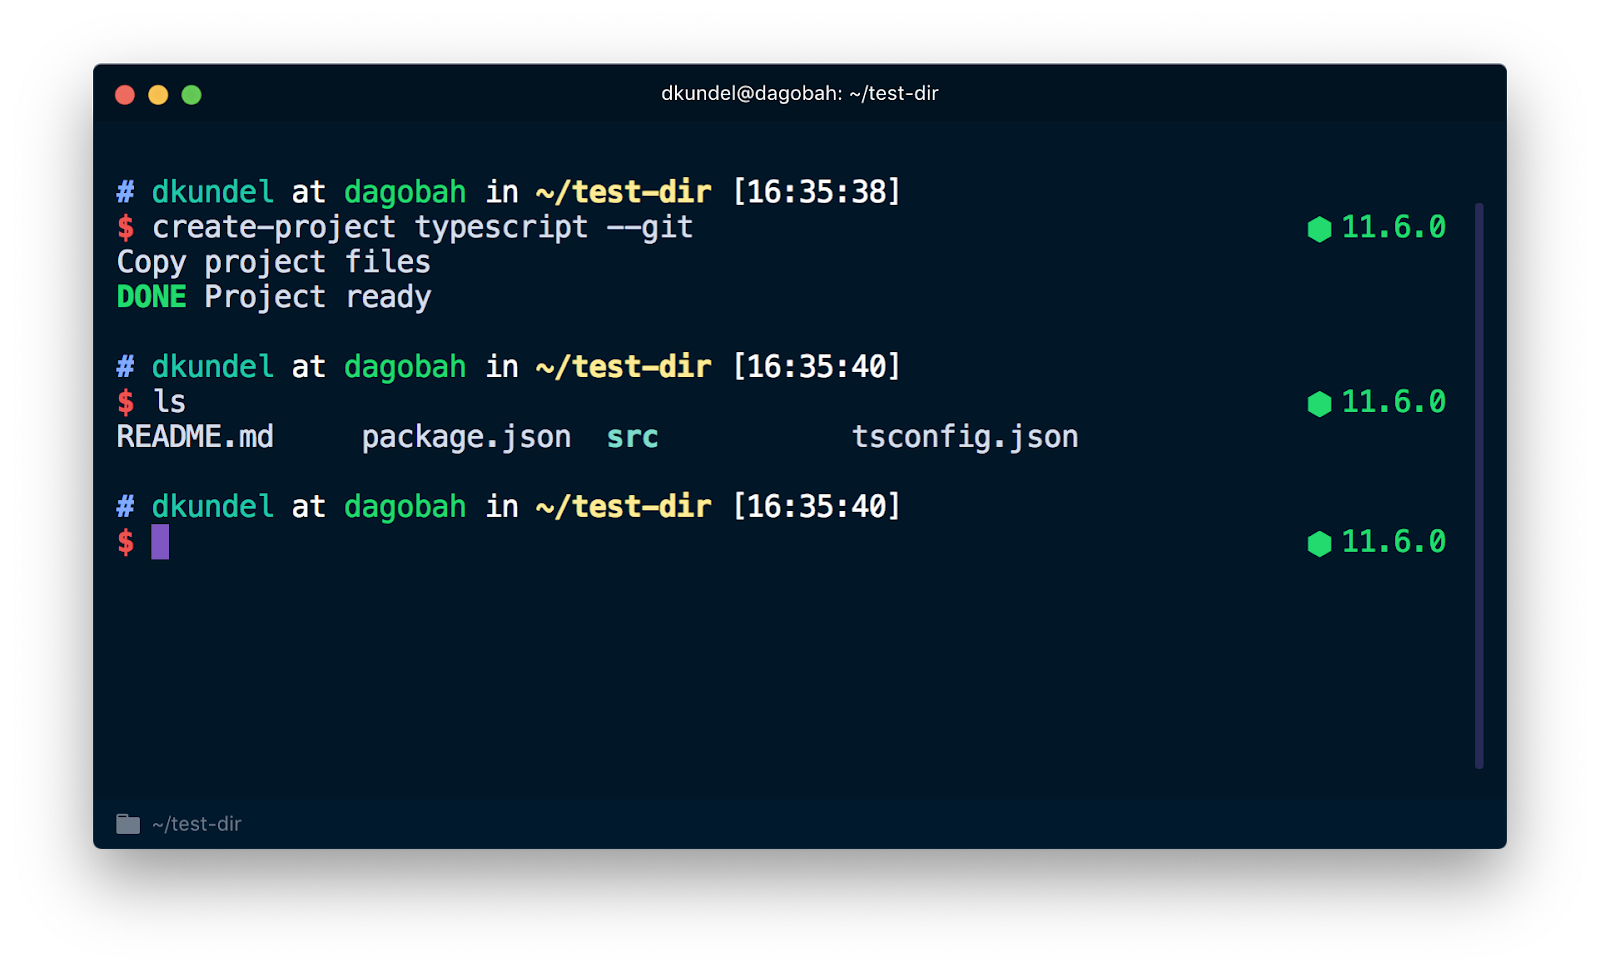
To test our progress, create a new directory somewhere like ~/test-dir on your system and run inside it the command using one of your templates. For example:
You should see a confirmation that the project has been created and the files should be copied over to the directory.

git and install our dependencies. For this we'll use three more dependencies:
execawhich allows us to easily run external commands likegitpkg-installto trigger eitheryarn installornpm installdepending on what the user useslistrwhich let's us specify a list of tasks and gives the user a neat progress overview
Install the dependencies by running:
Afterwards update your main.js to contain the following code:
This will run git init whenever --git is passed or the user chooses git in the prompt and it will run npm install or yarn whenever the user passes --install, otherwise it will skip the task with a message informing the user to pass --install if they want automatic install.
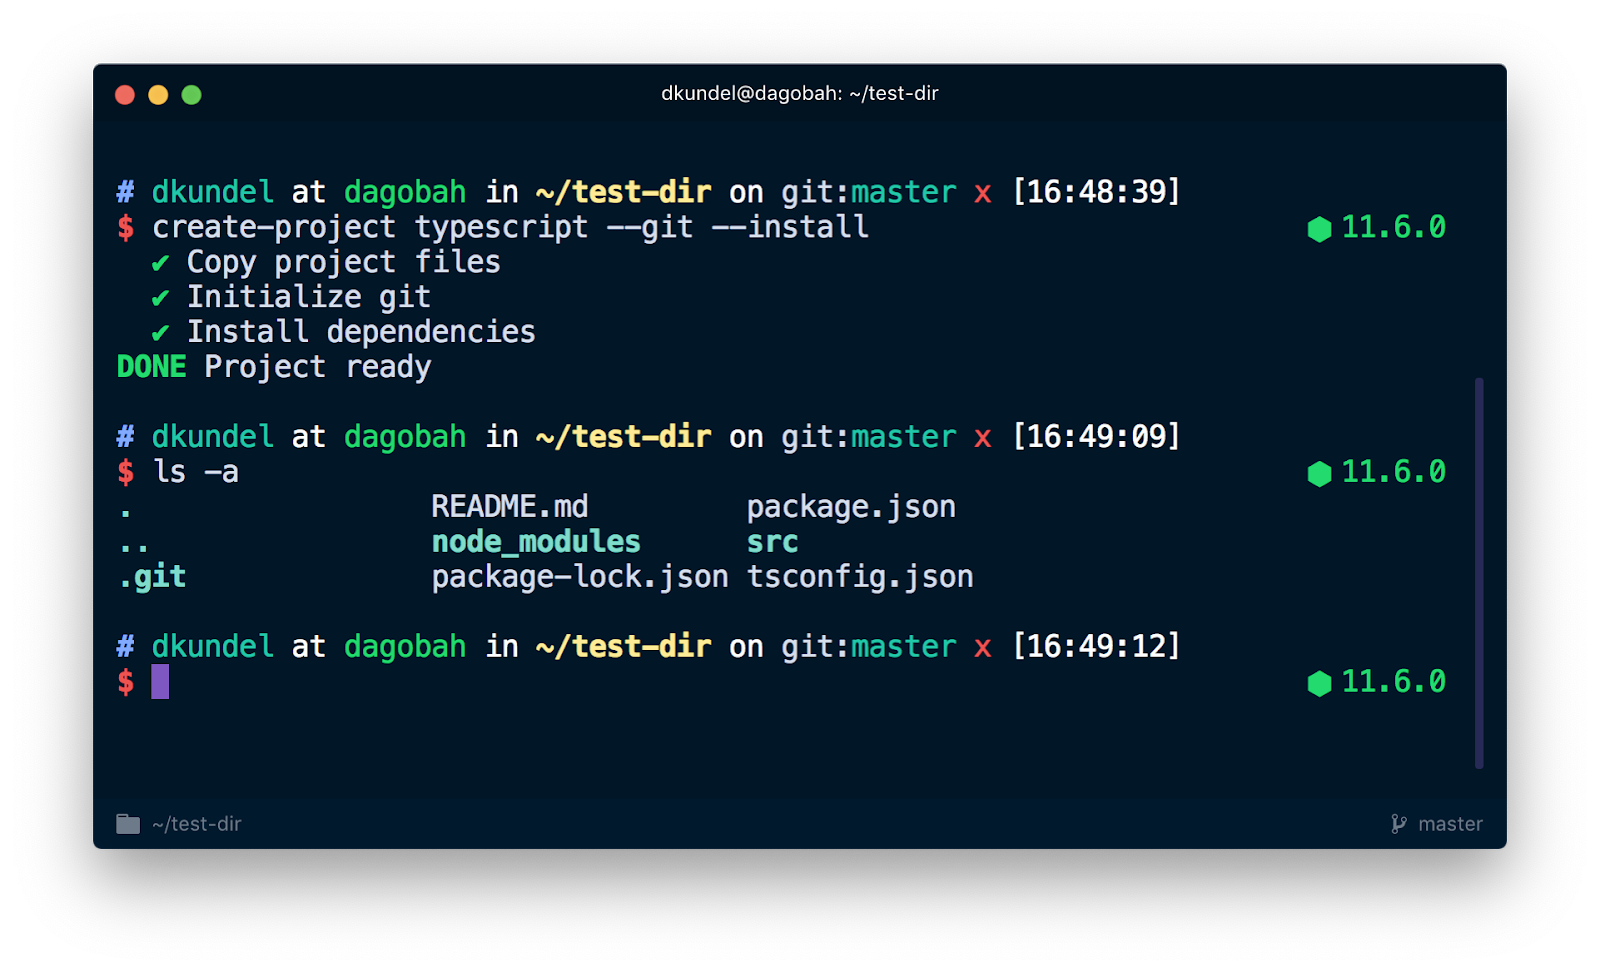
Give it a try by deleting your existing test folder first and creating a new one. Then run:
You should see now both a .git folder in your folder indicating that git has been initialized and a node_modules folder with your dependencies that were specified in the package.json installed.

Congratulations you got your first CLI ready to go!

If you want to make your code consumable as an actual module so that others can reuse your logic in their code, we'll have to add an index.js file to our src/ directory that exposes the content from main.js:
What's Next?
Now that you have your CLI code ready there are a few ways you can go from here. If you just want to use this yourself and don't want to share it with the world you can just keep on going along the path of using npm link. In fact try running npm init project and it should trigger your code.
If you want to share your templates with the world either push your code to GitHub and consume it from there or even better push it as a scoped package to the npm registry with npm publish. Before you do so, you should make sure to add a files key in your package.json to specify which files should be published.
If you want to check which files will be published, run npm pack --dry-run and check the output. Afterwards use npm publish to publish your CLI. You can find my project under @dkundel/create-project or try run npm init @dkundel/project.
There's also lots of functionality that you can add. In my case I added some additional dependencies that will create a LICENSE, CODE_OF_CONDUCT.md and .gitignore file for me. You can find the source code for it on GitHub or check out some of the libraries mentioned above for some additional functionality. If you have a library I didn't list and you believe it should totally be in the list or if you want to show me your own CLI, feel free to send me a message!
- Email: dkundel@twilio.com
- Twitter: @dkundel
- GitHub: dkundel
- dkundel.com
Related Posts
Related Resources
Twilio Docs
From APIs to SDKs to sample apps
API reference documentation, SDKs, helper libraries, quickstarts, and tutorials for your language and platform.
Resource Center
The latest ebooks, industry reports, and webinars
Learn from customer engagement experts to improve your own communication.
Ahoy
Twilio's developer community hub
Best practices, code samples, and inspiration to build communications and digital engagement experiences.


