Create a Real-Time Polling App using Twilio Sync and Laravel PHP
Time to read:
This post is part of Twilio’s archive and may contain outdated information. We’re always building something new, so be sure to check out our latest posts for the most up-to-date insights.

Real-time updates is a feature that is becoming increasingly common in modern web applications. There are several hosted API services that provide real-time functionality to web and mobile applications and Twilio Sync is one of these services.
Sync relies on the concept of state synchronization while making use of sync objects. Sync objects are the primitives you use to make your application's state discoverable and accessible at the right granularity. There are four different object primitives each with a different use case - I won't be talking about the different primitives but this document is a good place to start.
In this tutorial, we'll look at how we can add real-time functionality to a Laravel app while making use of Message Stream sync objects.
NOTE: Sync Message Streams let you broadcast JSON messages at a high rate to an elastic group of subscribers.
I chose Sync Message Streams due to their low-latency and near-zero lag publish/subscribe tool for real-time apps; a good complement to Sync’s high-fidelity state synchronisation primitives.
What We'll be Building
We are going to build a real-time polls application with Laravel, Vue and Chart.js while making use of Twilio Syncs. The complete code for this tutorial can be found on GitHub.
Note: A basic understanding of Laravel and Vue is required for this tutorial. Let’s get started!
Laravel Events and Broadcasting
Real-time functionality in an app is achieved through a pub/sub mechanism. To publish the message, we need to broadcast the message from the backend and then listen to the broadcasted message on the frontend.
Laravel by default uses log as the Broadcasting driver but in this tutorial, we'll look at how to extend Laravel's \Broadcaster class and create our own custom driver that makes use of Twilio sync natively. Please read this tutorial before proceeding. We'll be building on top of the application we came up with at the end of the tutorial.
With a working custom driver, we can now proceed to build out the other parts of our application.
The Voting Component
When doing development work with Laravel, I prefer using Vue for any front-end work which requires that we write some Javascript. I am also a big fan of Vue's component-based approach when building out front-ends.
For this tutorial, we'll be creating a Voting component responsible for visualizing the poll results, as well as casting votes.
Next, we register this component inside the resources/js/app.js file:
To speed things up in terms of view design, we'll run the php artisan make:auth command which adds authentication to Laravel apps as well as provide some basic layout for blade templates. Make sure you have your database setup and defined in the .env file before running the make:auth command.
Once auth has been added to the app, a home view is created which serves as the homepage page for logged in users. We'll be displaying poll results in this newly created home.blade.php template.
Get rid of everything inside the resources/views/home.blade.php template and replace its contents with this:
Let's then require Chart.js and Lodash in our application before updating the contents of the Voting.vue component. Chart.js will help us with the visualization aspect of the poll results while Lodash comes with a handful of methods that make it easy to work with objects and arrays in a Javascript environment:
Let's now lay out the component structure in resources/js/components/Voting.vue
Some breakdown on what is happening above:
Chart.js works by making use of the HTML5 canvas. That's why we use a <canvas> tag instead of the normal HTML <div> tags.
Let's also have a look at what is happening inside the <script> block:
We first import the modules we downloaded earlier. Now with Chart.js in place, we can comfortably draw a chart.
None of the code above is Vue specific. This is actually code from the Chart.js documentation.
If you’ve never used Chart.js before, you can have multiple datasets, each with their own configuration and data. The catch is that the data size must match the size of your labels. So in the above example, we have two labels and two pieces of data to plot. We'll make the chart dynamic later on.
In this particular case, we draw the chart once the Vue instance has been mounted. Vue's official documentation is a good starting point if you want to gain a better understanding of the various life cycle hooks in Vue applications. Later on, we'll be listening to published messages inside the mounted hook.
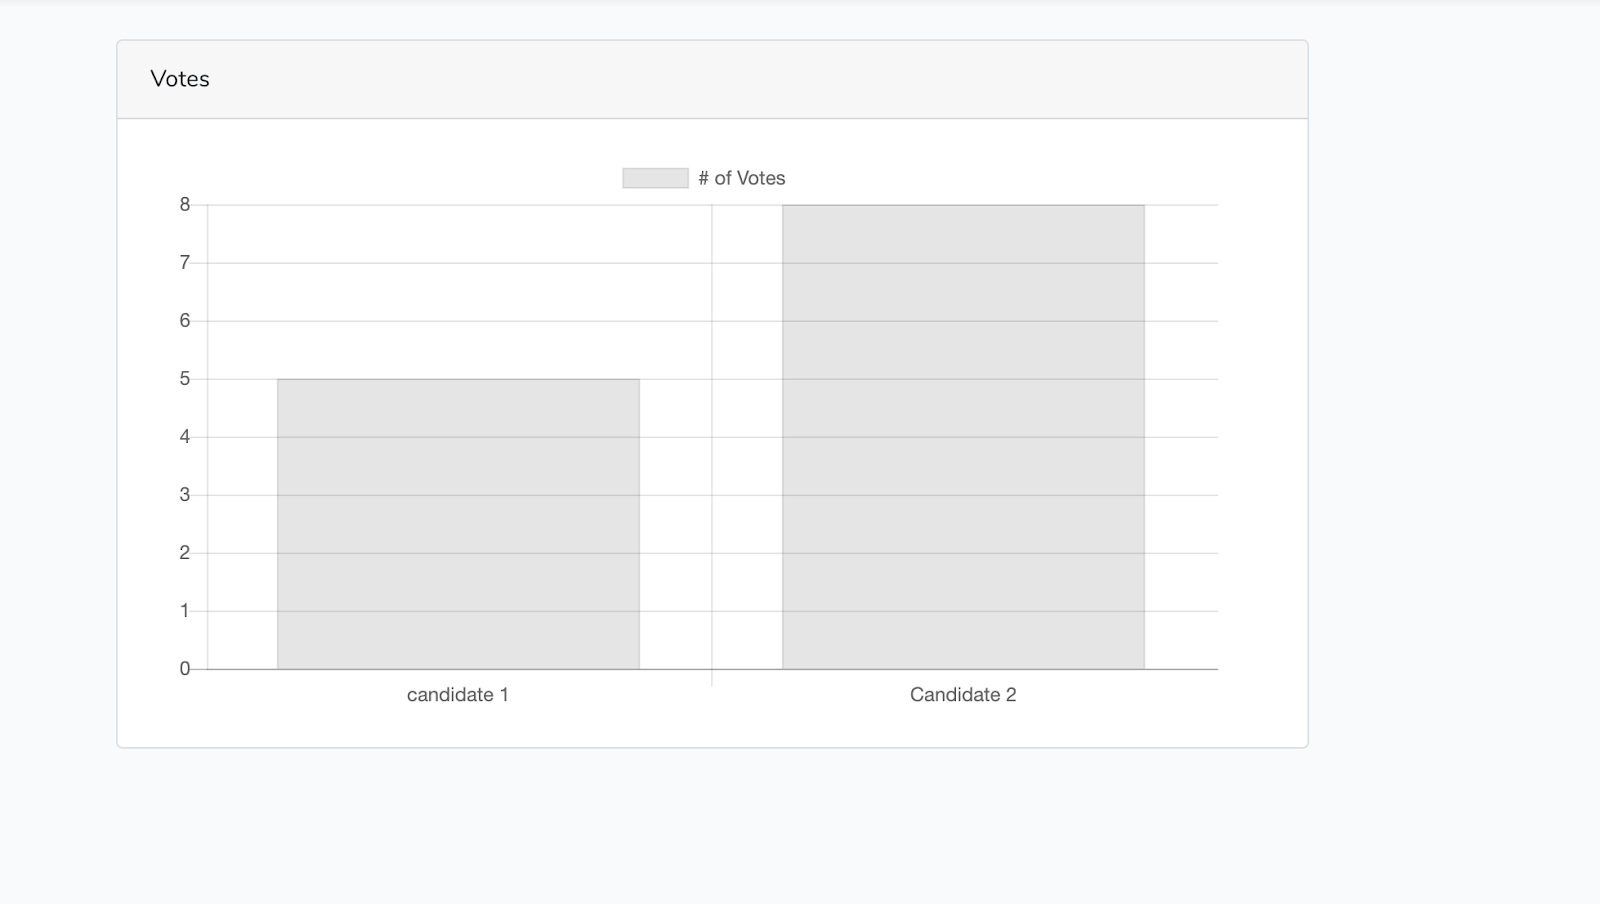
Up to this point, you can test things out by running npm run watch to serve your application. You should be presented with a chart that looks like this:

It's time we made this Chart dynamic.
The Backend
We'll create a Candidate model and migration as well.
Each of the candidates should have a name attribute as well as a votes_count attribute.
Let's update the up method of the newly created migration to implement these attributes. As a reminder, migrations are located in database/migrations
We can now run migrations to create the candidates' table:
For demonstration purposes, we'll only create two candidates for this tutorial. You can have as many candidates as you wish. To create a candidate, we first have to make name part of the fillable attributes in the Candidate model.
With this in place, let's fire up Laravel’s Psy shell and create the two candidates.
All set. For each vote cast using this platform, we'll increment the candidate's votes count by 1.
Our next task is defining the various routes and controller actions responsible for incrementing votes. Add the following routes to routes/web.php.
Since this is a simple app, we'll handle almost everything inside the HomeController. It’s not the best practice for your production-ready app, but it does the job for now:
*app/Http/Controllers/HomeController*
To those who had to generate the HomeController manually via the make:controller command earlier, you'll notice the file contents have been overwritten after running make:auth. You can refer to this file and update the contents as required.
The incrementVotes() method adds the votes count for a particular candidate by 1, then returns the total votes count for all the candidates. This is made possible by the candidates() method which returns a formatted response in JSON format.
Having defined the relevant routes and controller actions, we can now update the drawChart() method inside our Voting component to take two arguments. i.e:
Remember Chart.js takes in data that is already formatted? The names argument here is an array of the candidates' names while the votes argument is an array of votes.
To appropriately visualize this data, we have to make sure the index of the candidate's name in the names array corresponds to the index of the number of votes for that particular candidate in the votes array.
We also need to replace the placeholders for the labels and data in the Chart instance with dynamic values:
We are almost done, but some GUI is needed to let users cast votes. I'll use a button approach where each candidate will be represented by a button with their name on that button.
Update the <template> section of the Voting.vue component to include buttons. Do this inside the <div class="candidates"> that sits right above the chart.
Reloading the page at this point won't display any buttons since we've not supplied the candidates reactive data property with any data. To fix this, we'll fetch all the candidates in the created life cycle hook, then call drawChart() with the new data:
Above, we make an API request to the /candidates route we defined earlier. A successful response contains all the candidates' data which we then assign to the candidates reactive data property:
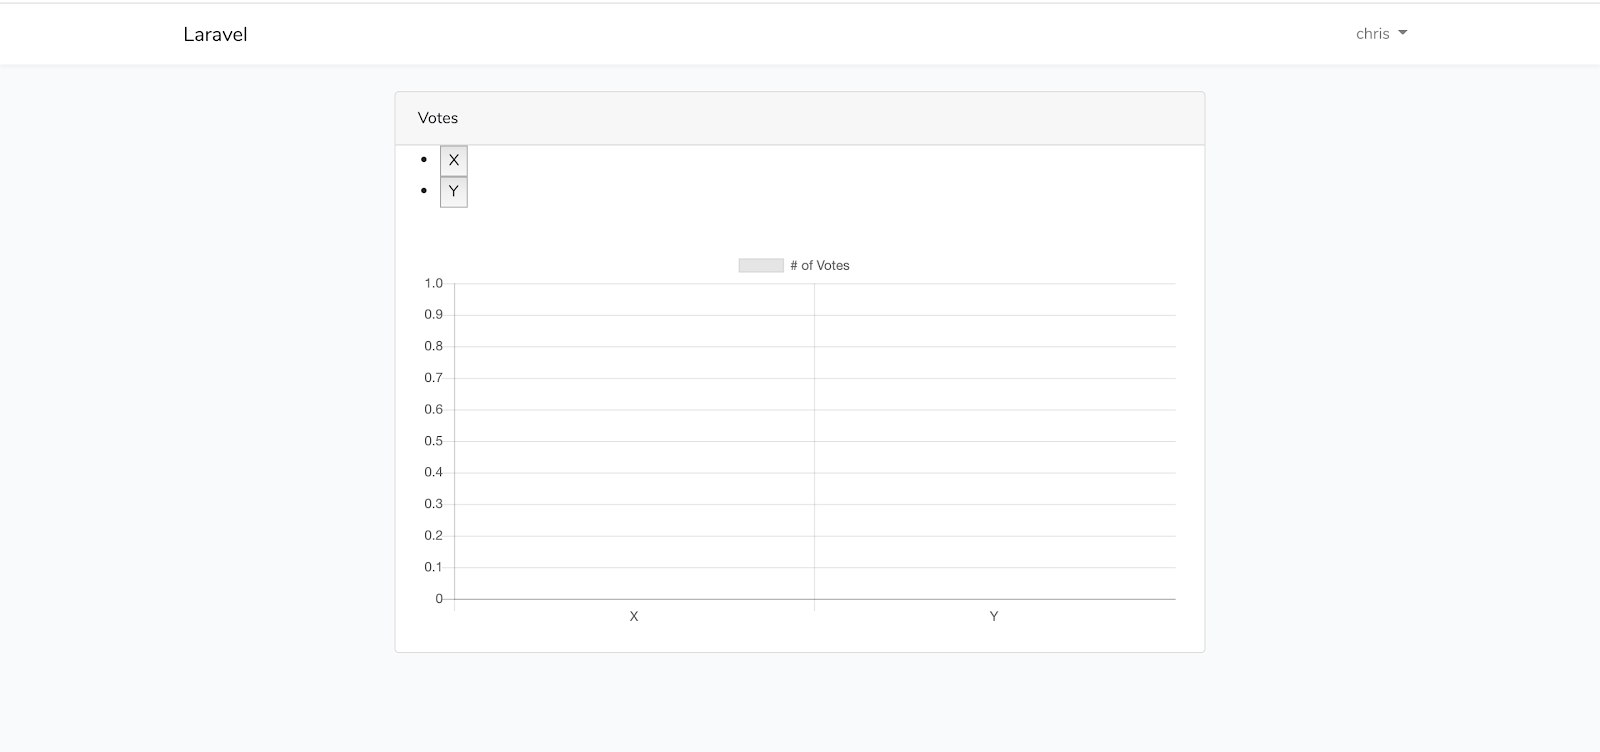
This is required for the buttons that let us vote to show up. After doing that, we then format the candidates' data in a way that lets us draw the chart dynamically. Try reloading the page and you should be presented with a page that looks like this:

So far, none of these candidates have any votes.
Casting Votes
For each button click, we'll be calling an incrementVotes() method which takes in the candidate id as the param. As the name suggests, this method will be responsible for incrementing the votes for that candidate:
Inside the method, we are making a post request to the candidates' route we defined earlier.
For successful requests, we update our chart with the new data. The code inside the response block is somewhat repetitive and could be refactored. You can do that later.
Our chart works perfectly fine at this point. Try casting a vote and you'll notice the results are correctly visualized on the current browser tab. The chart is not real-time though as someone else viewing the results from a different browser needs to refresh their browser every now and then for them to get the correct representation of the most recent poll results. This is where Twilio Sync comes in.
Real-time Updates
For real-time updates, we need to fire an event every time a vote is cast, then broadcast the event to our subscribers using the custom driver we built earlier.
Let's start by creating an incrementVotes event:
We want to broadcast the candidates' data to a public channel each time a new vote is cast. When working with Laravel, Event classes have to implement the ShouldBroadcast interface for broadcasts to work. We also need to specify the channel the event should broadcast on.
The snippet below shows what the IncrementVotes event will look like:
For those new to Laravel events and broadcasting, the official documentation will get you up and running. Let's then update the incrementVotes method inside the HomeController to fire our event every time a new vote is cast:
The last item to implement is subscribing to the votes channel on the front-end and listening for the broadcasted events. We'll need the Twilio Sync SDK for Javascript for this:
Once the SDK has been installed, we need to make our Voting component aware of this SyncSDK. Let's update app/resources/js/Voting.vue.
Ideally, we should listen to broadcasted events once our Vue instance has been mounted. Also note, a valid token is required to initialize the Sync Client in our browser. Since we already have a way to get this token inside the HomeController, we'll inject this token in our home view from the index method.
Let's start by updating the index method to this:
Once that is done, we pass this token to our Voting component as a prop in resources/views/home.blade.php
Inside our voting component, we also need to declare a props property and pass token as one of the expected props. That's basically how props work:
Now to the fun bit! Listening for broadcasted events:
Nothing new here. This code is exactly the same as the code from the other tutorial. The only difference here is that we are subscribing to the votes channel. Once the broadcasted message hits the front-end, we draw our chart with the new data. This should be captured in every other tab that is open, in real-time.
Testing Things Out
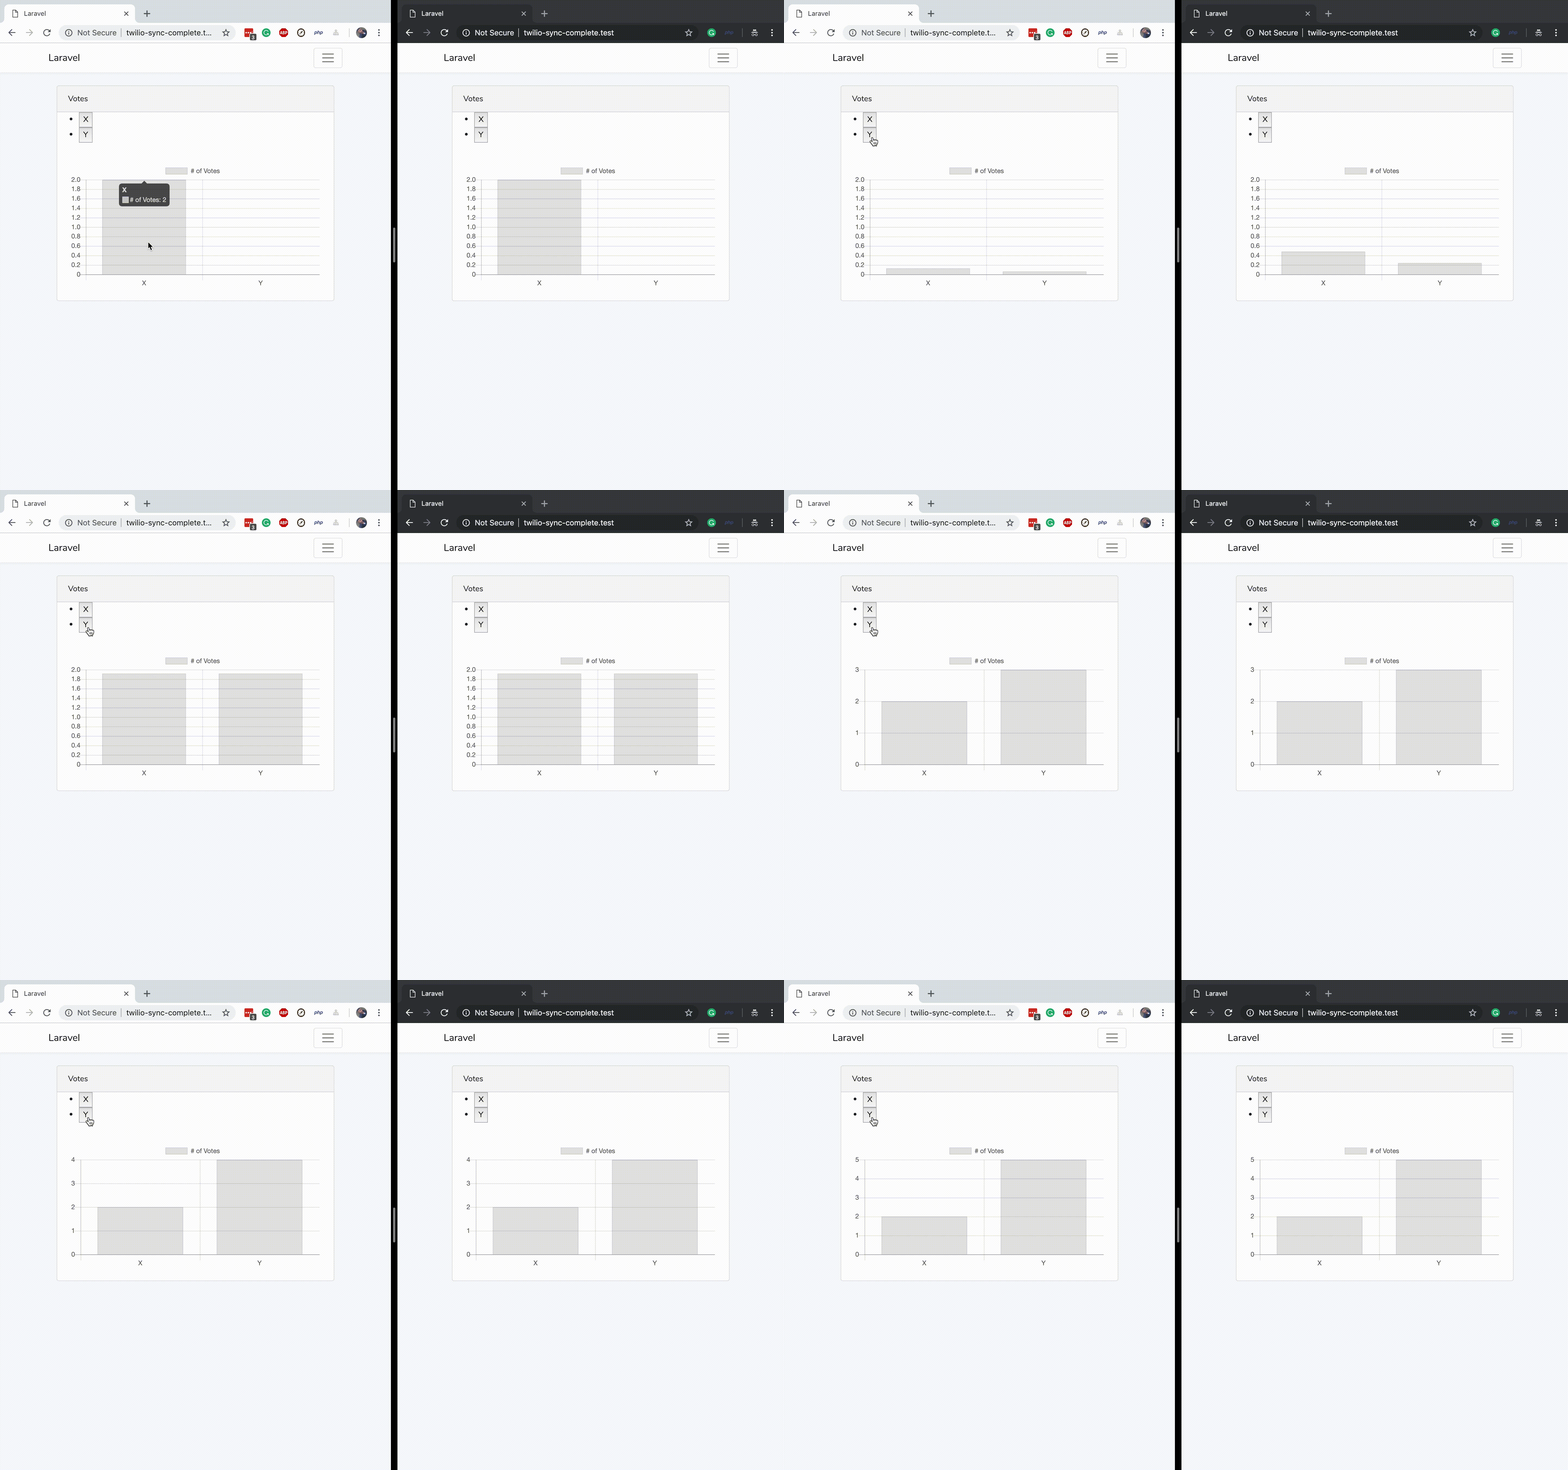
To test, open up your website in two browsers. Make sure you are logged in as different users in the two browsers. Cast a vote on one tab. Notice the new results are updated in both browsers? Below is a gif showing the sample application in action:

Conclusion and Next Steps
Congratulations if you've made it to this point. I hope you learned a thing or two. We covered extending Laravel's default broadcast driver as well as visualizing data in Realtime using Chart.js and Twilio Sync.
Our application does not have a limit as to the number of times one can vote. As a recommendation, you could restrict users from voting twice as you learn some more Vue.
If you liked the tutorial, please hit the like button and don't forget to share with friends. Cheers!
Chris is a backend software developer primarily using PHP for development. When not coding Chris prefers going to concerts and travelling. You can reach him on Twitter via the handle @vickris_ and on GitHub using @vickris.
Related Posts
Related Resources
Twilio Docs
From APIs to SDKs to sample apps
API reference documentation, SDKs, helper libraries, quickstarts, and tutorials for your language and platform.
Resource Center
The latest ebooks, industry reports, and webinars
Learn from customer engagement experts to improve your own communication.
Ahoy
Twilio's developer community hub
Best practices, code samples, and inspiration to build communications and digital engagement experiences.


