How to control and record voice calls with Node.js serverless functions
Time to read:
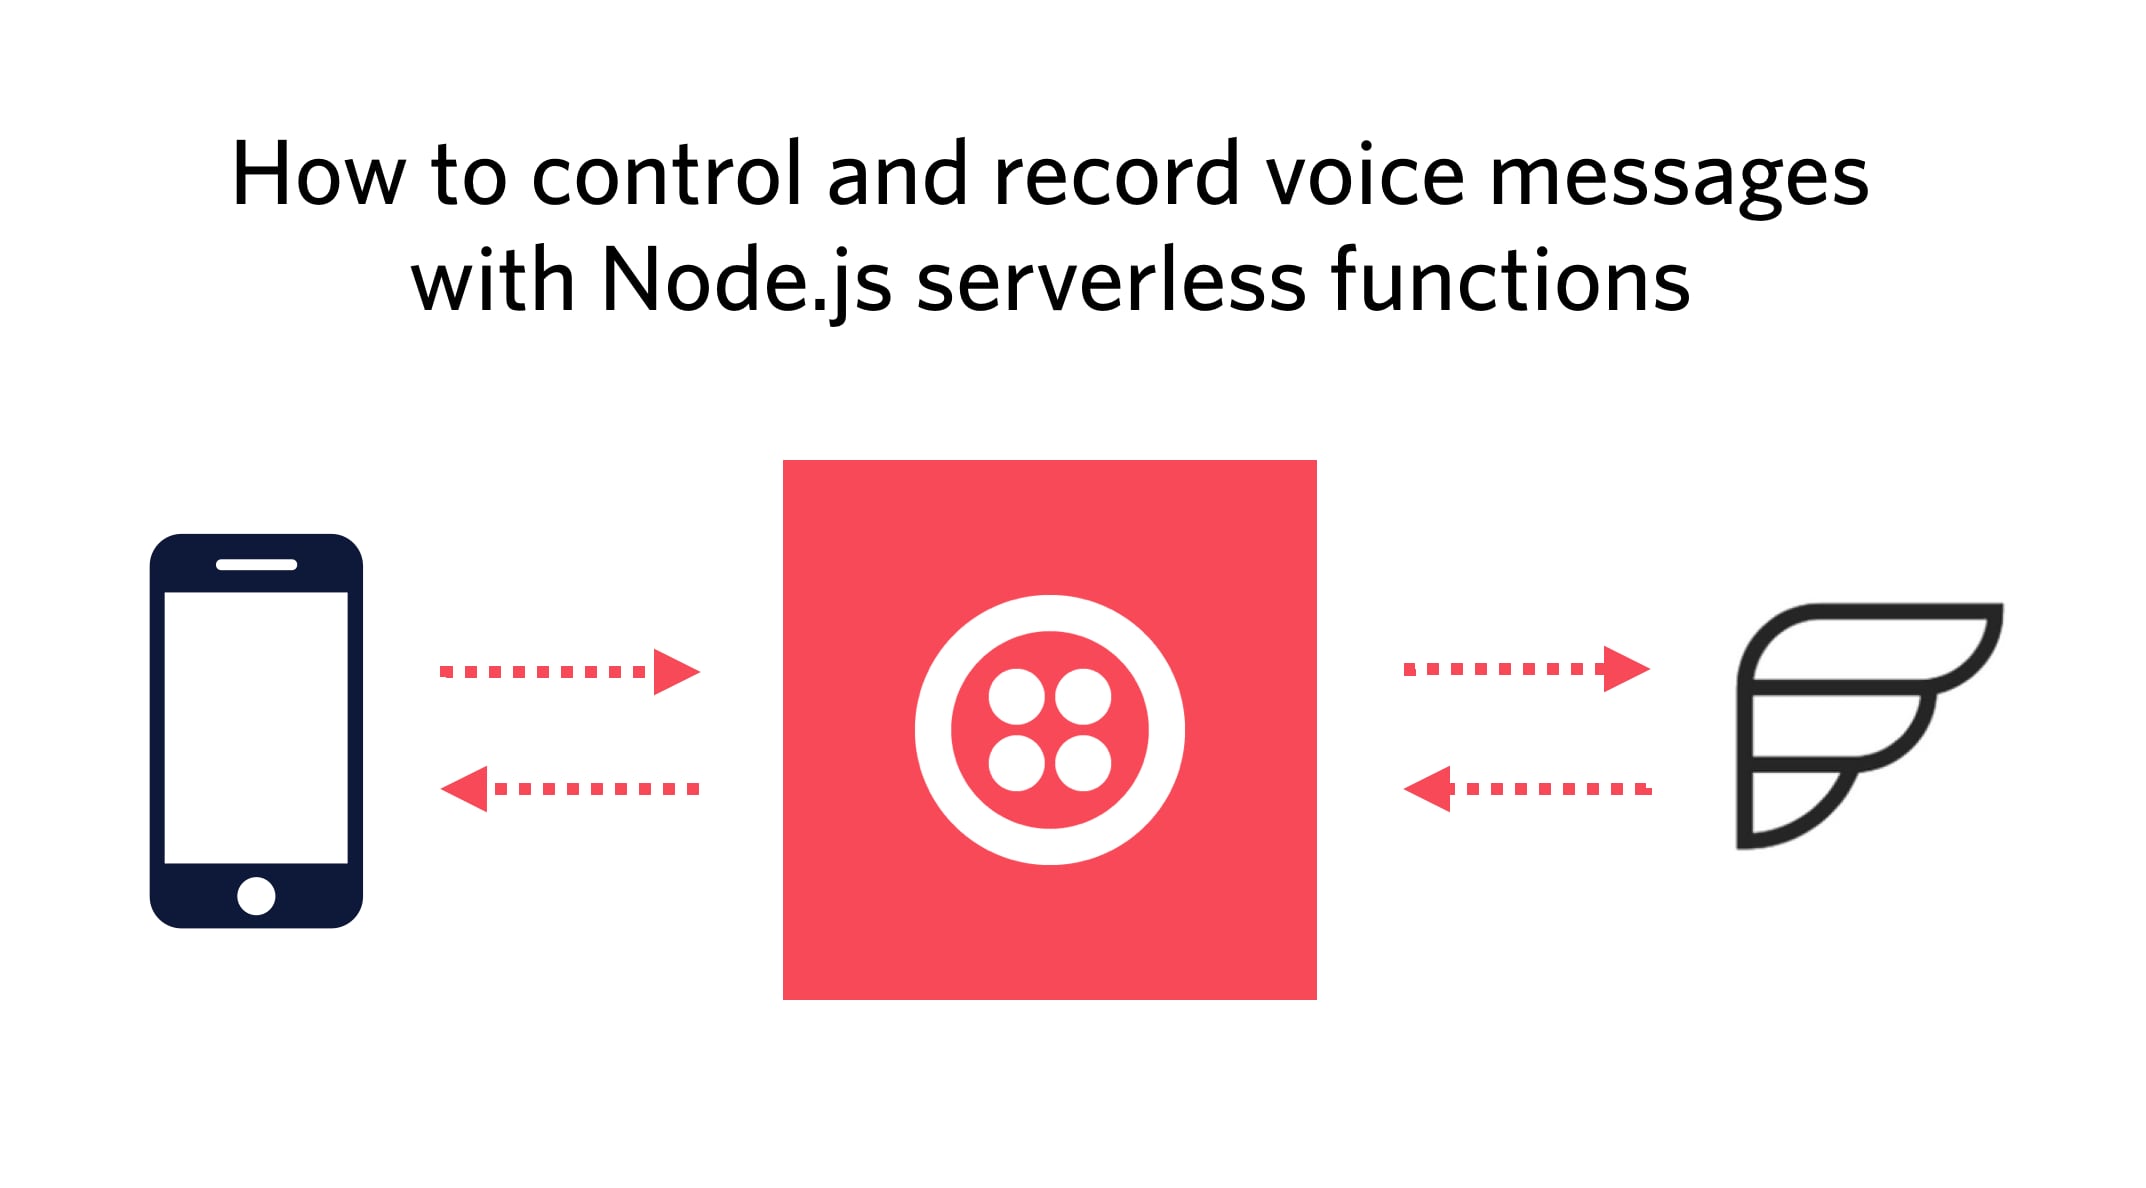
There are many ways to communicate with your friends and family. You might use good old SMS, Whatsapp, emails and of course phone calls. Recently, I came across a surprising new way of communication. It all started with my friend Michaela asking a question on Twitter.
Would it be possible to generate an RSS feed out of Twilio voice calls?
What she was looking for was a way to transform phone calls into an RSS feed referencing the recorded phone call. Why? Because she listens to many podcasts and sends very long voice messages to one of her friends via Whatsapp. As these messages usually don’t need a timely response, they both would prefer all the voice messages appear in their podcatchers rather than Whatsapp.
Let me introduce you to the idea of “PodBot - the surprise podcast from your friends”.
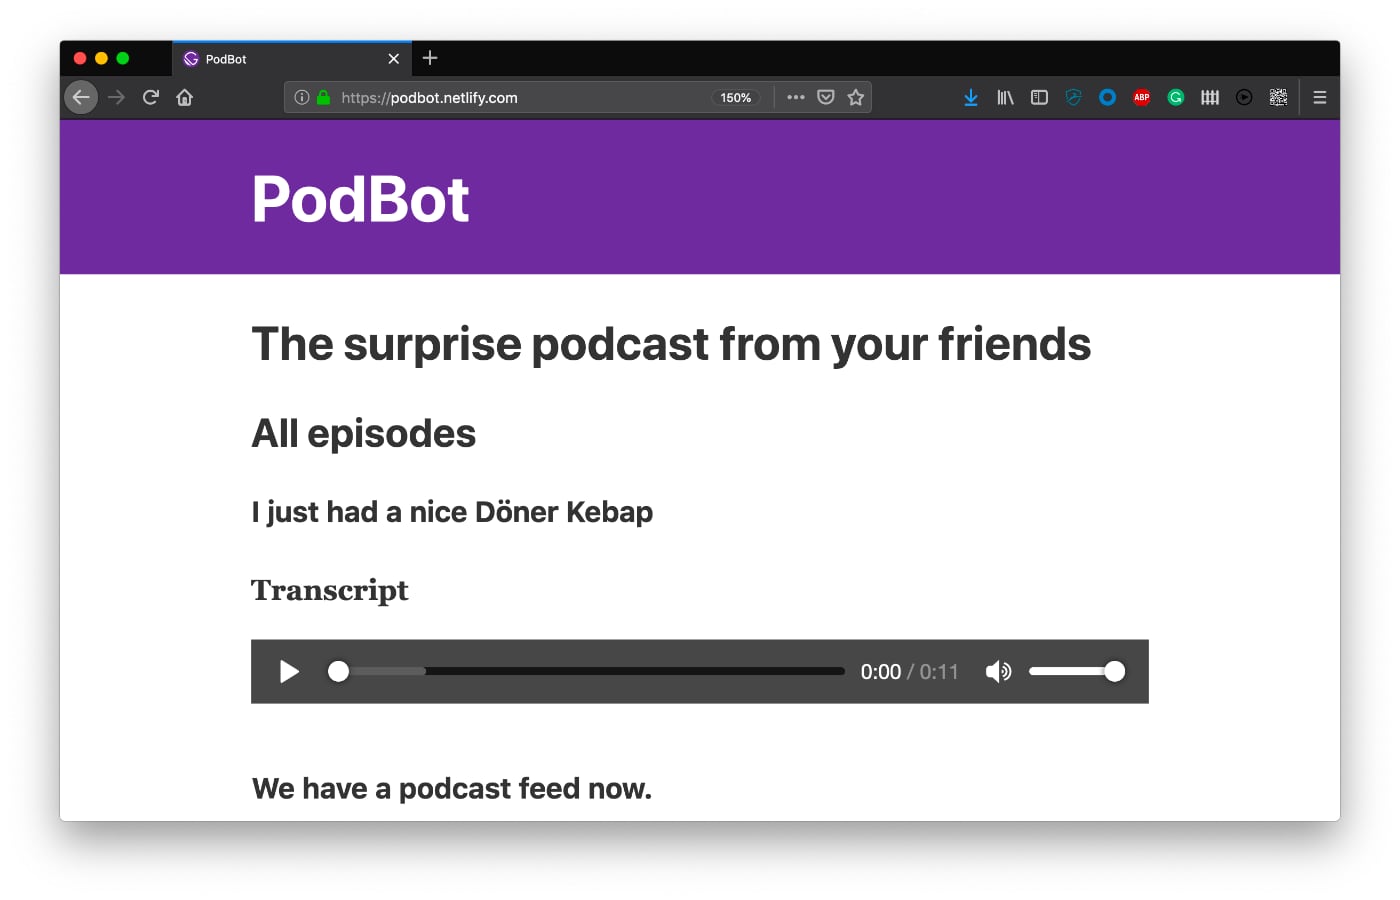
The idea is a follows: All you have to do to publish a new podcast episode is to make a phone call. There is no need for a microphone setup, and you wouldn’t need to record, store or upload audio files to a podcast platform.
Requirements for a voice call driven podcast site
To create a phone call driven podcast site you need several things.
You need a phone number that you can control programmatically. Luckily, Twilio Voice provides this exact functionality.
Additionally, you need a way to store the information and transcriptions of the incoming phone calls. Google sheets or cloud databases can be used with Node.js and thus can provide a quick data store used in Twilio Serverless Functions.
Moreover, you need a site hoster that can serve your podcast site and feed.
Configuring programmable voice calls, downloading audio files and building a site with all the information is a lot of work. That’s why we split building PodBot and all its tasks into several tutorials.
In this first tutorial, we’ll use Twilio serverless functions to accept and manage phone calls, recordings, and voice transcriptions. In later tutorials, we’ll extend the functions to write to a data store, and we’ll use this data to build the podcast site using Gatsby, including the mandatory RSS podcast feed. Sound good? Let’s get started writing functions, then! 🎉
Here’s what you need today:
- A Twilio account to buy a phone number and accept calls
- Node.js and npm installed
Function-driven voice calls to the rescue
To define what happens when someone calls a Twilio phone number you have to provide some configuration in an XML-based format that is called TwiML. The Twilio API requests this configuration right at the moment a call comes in. You can serve TwiML via TwiML bins, your custom-tailored application via webhooks, or serverless functions.
Before we implement this functionality, let’s recap and think about what we need to build. When someone calls PodBot we need to gather the following episode information:
- the title
- the recording URL
- the episode transcription
Luckily, Twilio provides ways to retrieve all this call information. Below you see the TwiML configuration to ask for the episode title, record it and get a transcript of the recording.
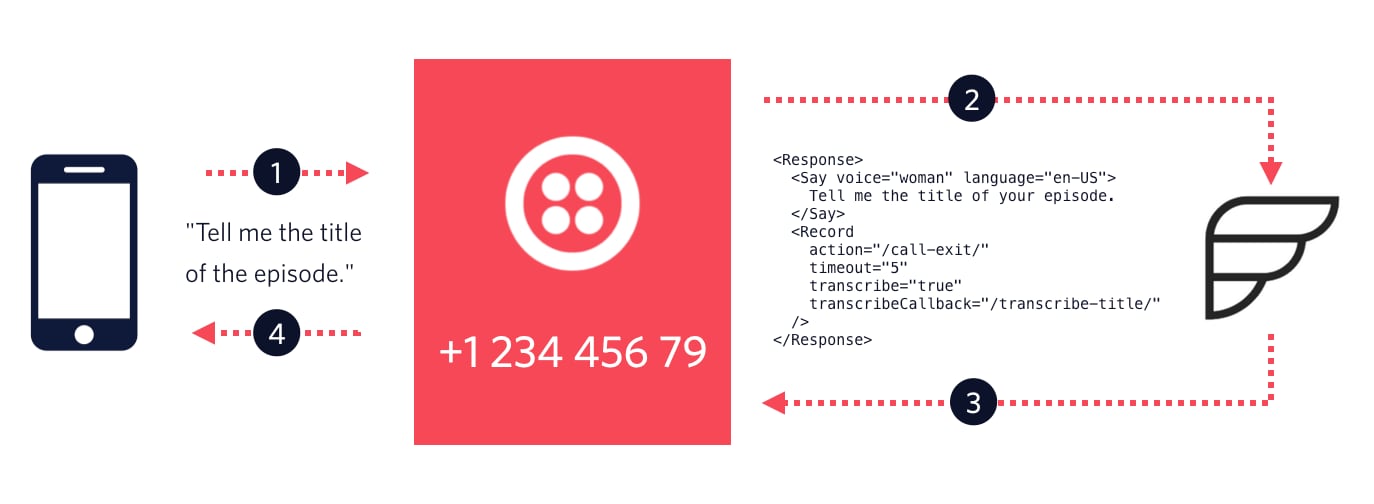
Let’s go into detail; when someone calls your Twilio number (step 1), Twilio asks your defined serverless functions for some TwiML configuration (step 2). The responded TwiML defines to ask for the title of the episode and to record the answer (step 3). Information about the complete recording should be sent to a /call-exit/ endpoint. The response of /call-exit/ will control what happens next by responding with more TwiML. The initial TwiML also specifies that the generated transcript should be sent to /transcribe-title/.
After Twilio receives this initial TwiML configuration, PodBot speaks to the caller saying “Tell me the title of your episode.” (step 4). Then it waits and records the answer until five seconds of silence has passed. Magic? Magic!
TwiML configurations like the one above can be chained together. This option makes it possible to ask for the episode title and record it followed by another action to end the phone call or to record more data like the episode itself.
Let’s set up the call handling in a new project. 🎉
To keep this tutorial crisp and short we’ll only record and transcribe the episode title. You can find a solution at the end of the article that you can tweak to your needs and run locally quickly.
The creation of serverless functions
Create a new directory for this project and also create three JavaScript files in the functions directory: call-enter.js, transcribe-title.js and call-exit.js.
Each of these JavaScript files represents one HTTP endpoint. These endpoints have to respond with TwiML when the Twilio API asks for the configuration. To build a TwiML response you can use the Twilio JS client which is available globally in Twilio functions.
The serverless entry point of your phone calls
call-enter.js is the first endpoint Twilio requests when someone calls your number.
The above defined serverless function will be called with context, event and a callback. The context object provides information about the current execution environment, event contains the request parameters passed into your function, and you can use the callback to respond to the request.
By calling the callback with null as the first argument, you signal that there were no errors. The second argument is a VoiceResponse which you can create by using the global Twilio object.
By defining the Record verb and its included action attribute, the second endpoint will be called after the caller is silent for five seconds.
Additionally, transcribeCallback defines the endpoint to retrieve the transcription when it’s ready.
Log the recording and say goodbye
After the caller gives the name of the episode and remains silent for 5 seconds, the next endpoint (/call-exit/) is called to request additional configuration and continue the phone call.
Above you see the first important part of logging phone calls in serverless functions. Using the event object, you can access the data Twilio included in the request. The CallSid is a unique identifier for the phone call. This identifier stays the same for a phone call across the three functions.
The recording URL is also accessible. To request the recording in MP3 format, append .mp3 to the RecordingUrl property of the event object.
Right now this function only logs the information, but with CallSid and RecordingUrl available you can store this data in a database or other stores.
To finish the phone call, configure the VoiceResponse to say “Thanks”.
The transcript logging
The last function you need is transcribe-title.js. The /transcribe-title/ endpoint’s only job is to log the transcript of the episode title. It doesn’t have to provide any additional configuration. Call callback with null to signal that there were no errors and you’re good to go.
At this point, you have three endpoints in place that can accept and control Twilio voice messages and log the recording URL and a transcript. With this setup, it’s time to test these with your first phone call.
Run Twilio functions locally
To run Twilio functions locally, you can use twilio-run. You can install the tool into your project but thanks to npx, which comes with recent npm version, all you have to do is to run a single command in the root of your project directory.
This command downloads npm-run if it’s not available in your environment and runs it. twilio-run looks for a functions directory which you have already prepared. The --live flag makes sure that the functions won’t be cached when a local server is started. This flag allows you to write functions without the need for a command restart.
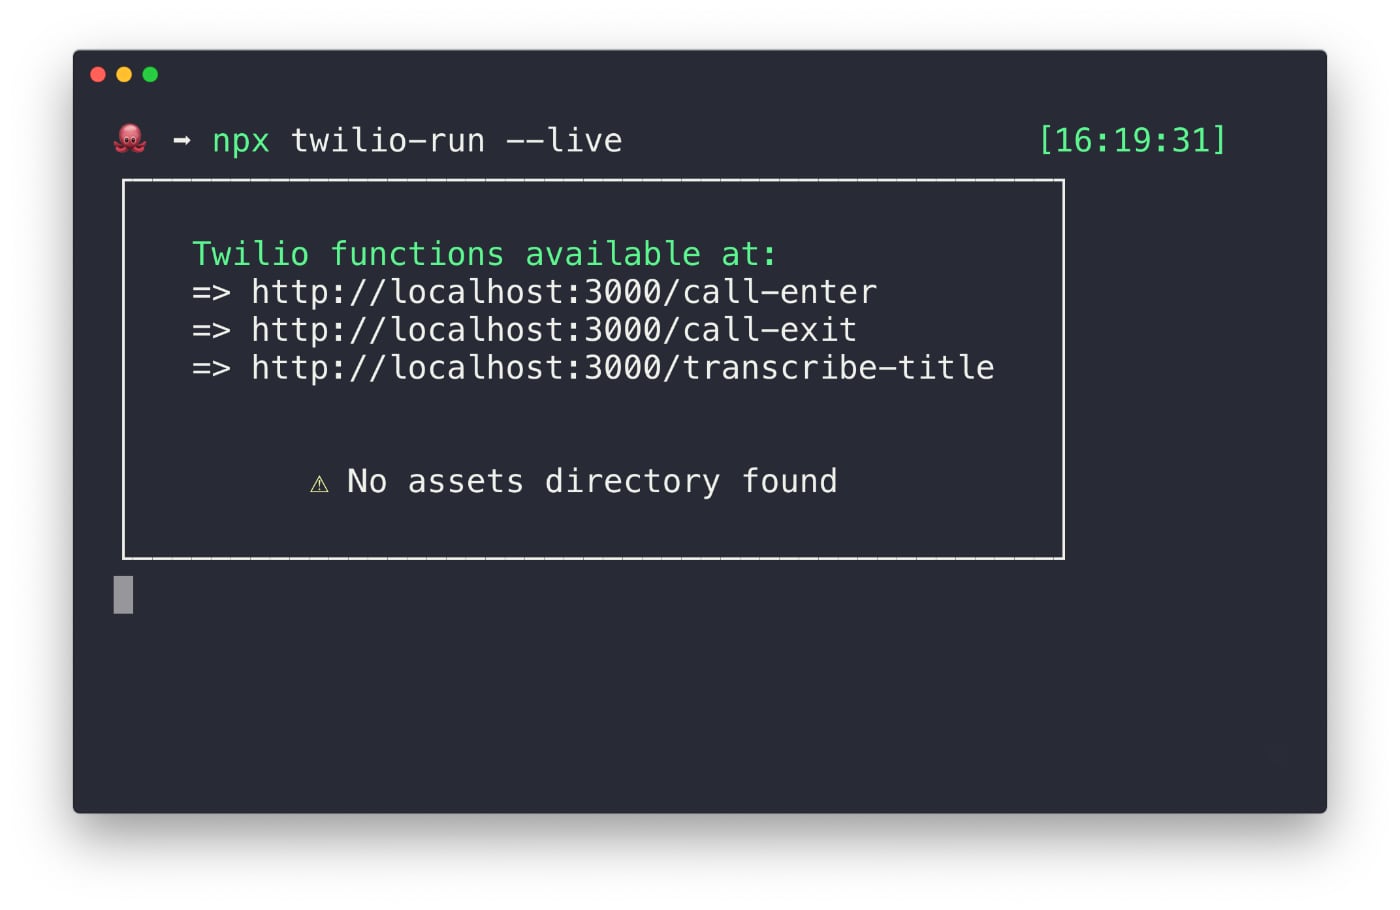
After running the command, the local server is started to debug and test your functions. Unfortunately, your localhost is not accessible on the internet. That’s the reason why twilio-run comes with another nifty configuration. If you run it with the --ngrok flag, it automatically spins up a publicly available URL which tunnels all requests to your local machine.
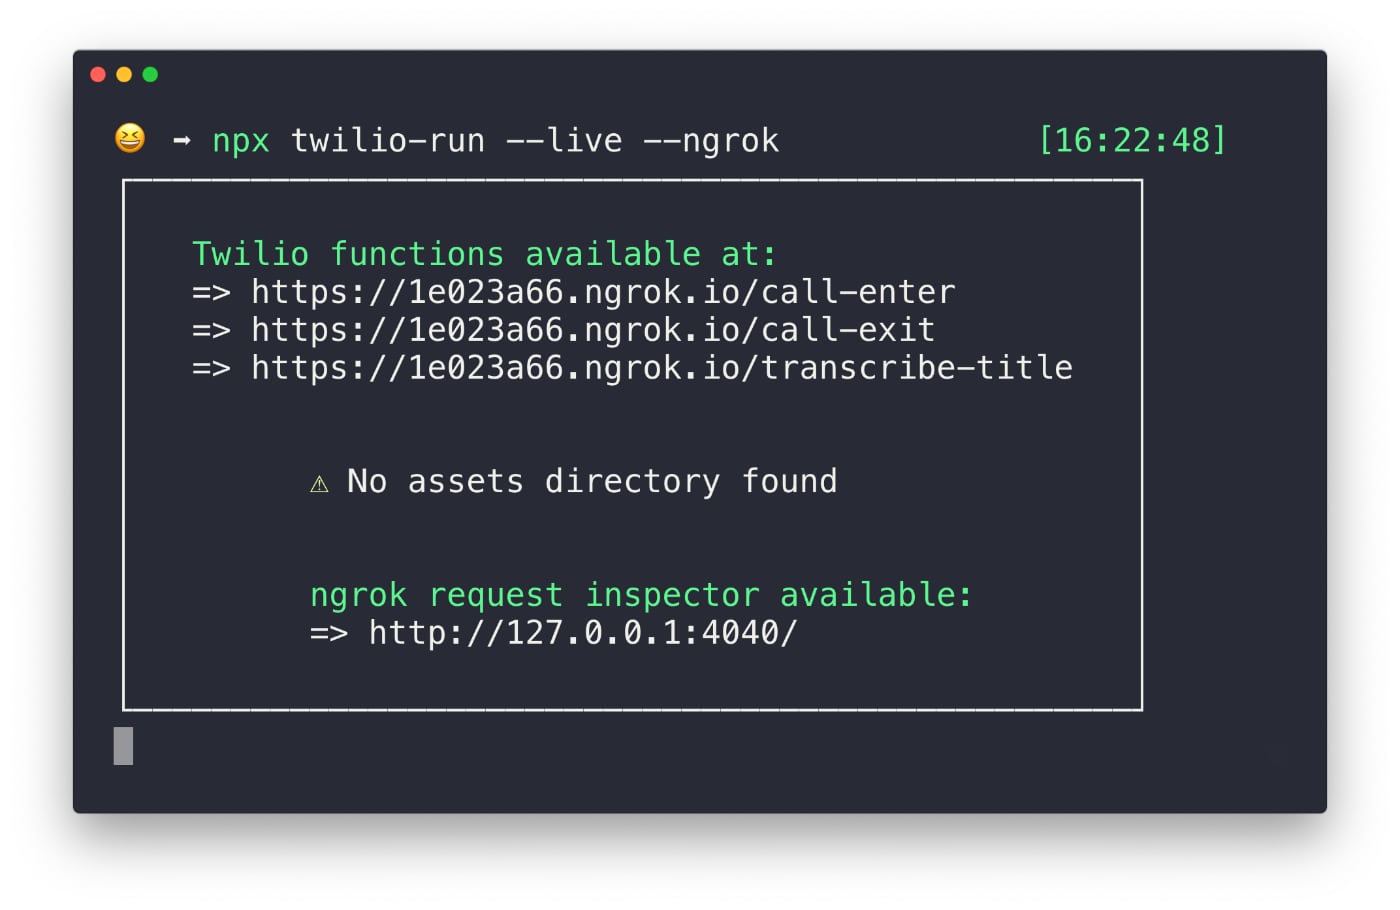
The provided URLs are what you need finally set up your call handling.
Connect your Twilio number with serverless functions
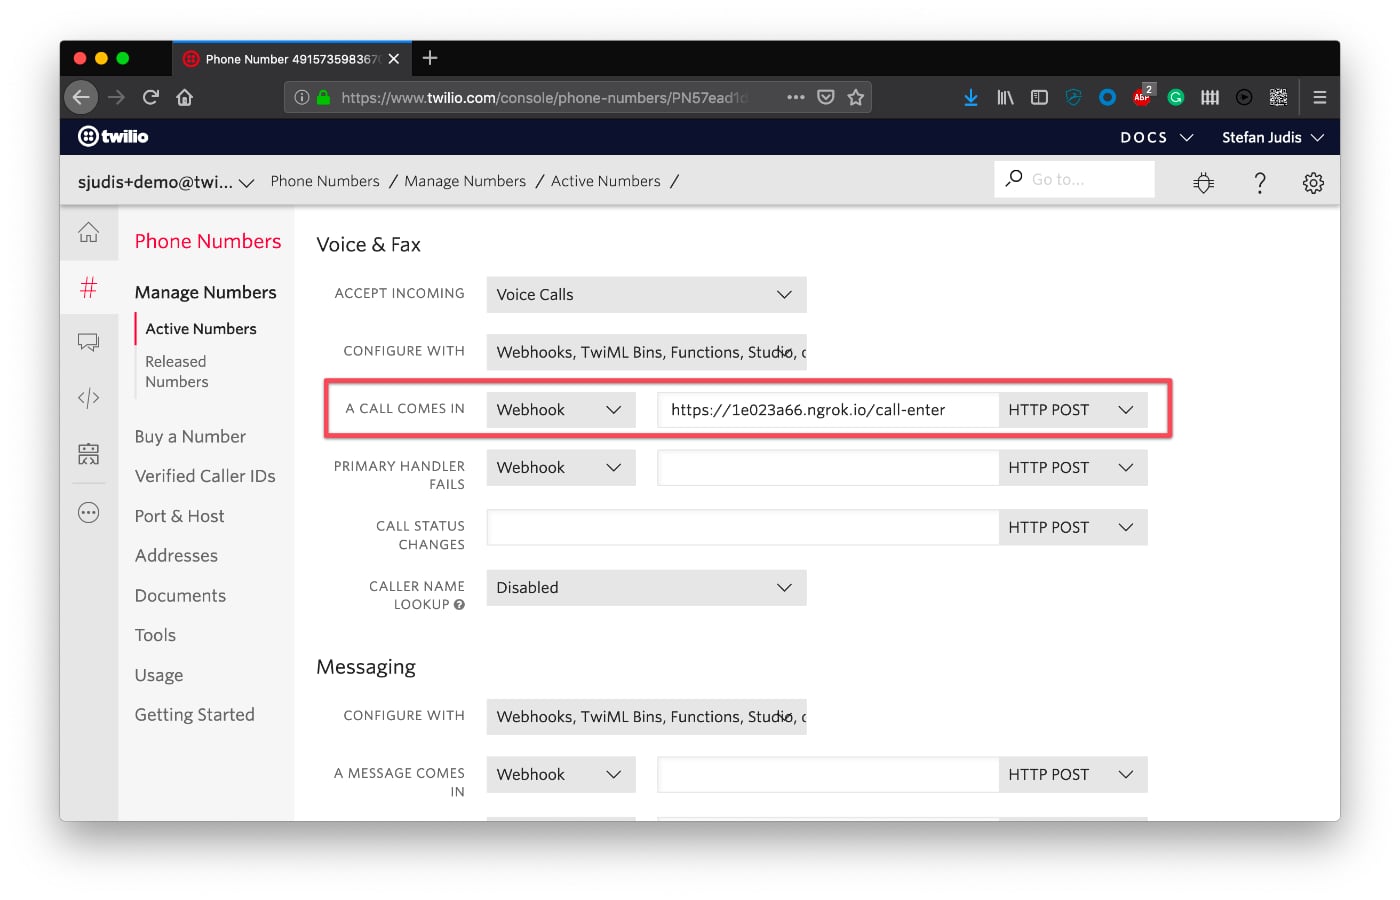
After you buy a number, you can set it up to use your local functions when a call comes in. On the configuration page for a particular number, you’ll find the setting for incoming calls. Select the webhook option for incoming calls and copy/paste the public URL for /call-enter/. Hit
“save” and call your number.
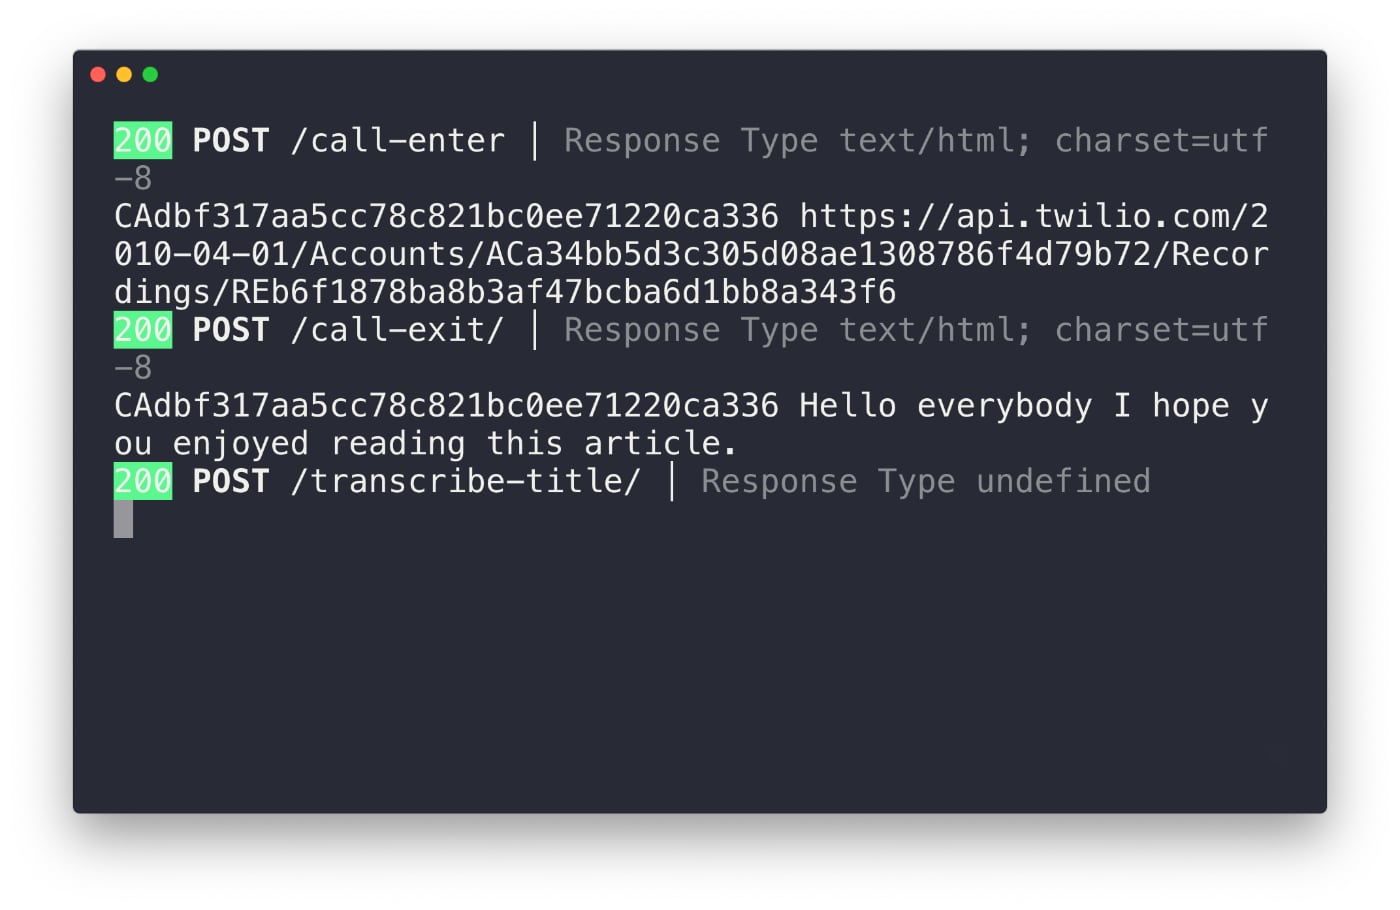
When you call your number and tell PodBot the title of the podcast episode you should see the CallSid, RecordingUrl, and TranscriptionText logged to your terminal.
Using twilio-run you can develop functions in your local environment right from the command line. If you’re happy with the functionality of your local functions, you can then move them to the functions area in your Twilio console and adjust your number to use your functions instead of webhooks.
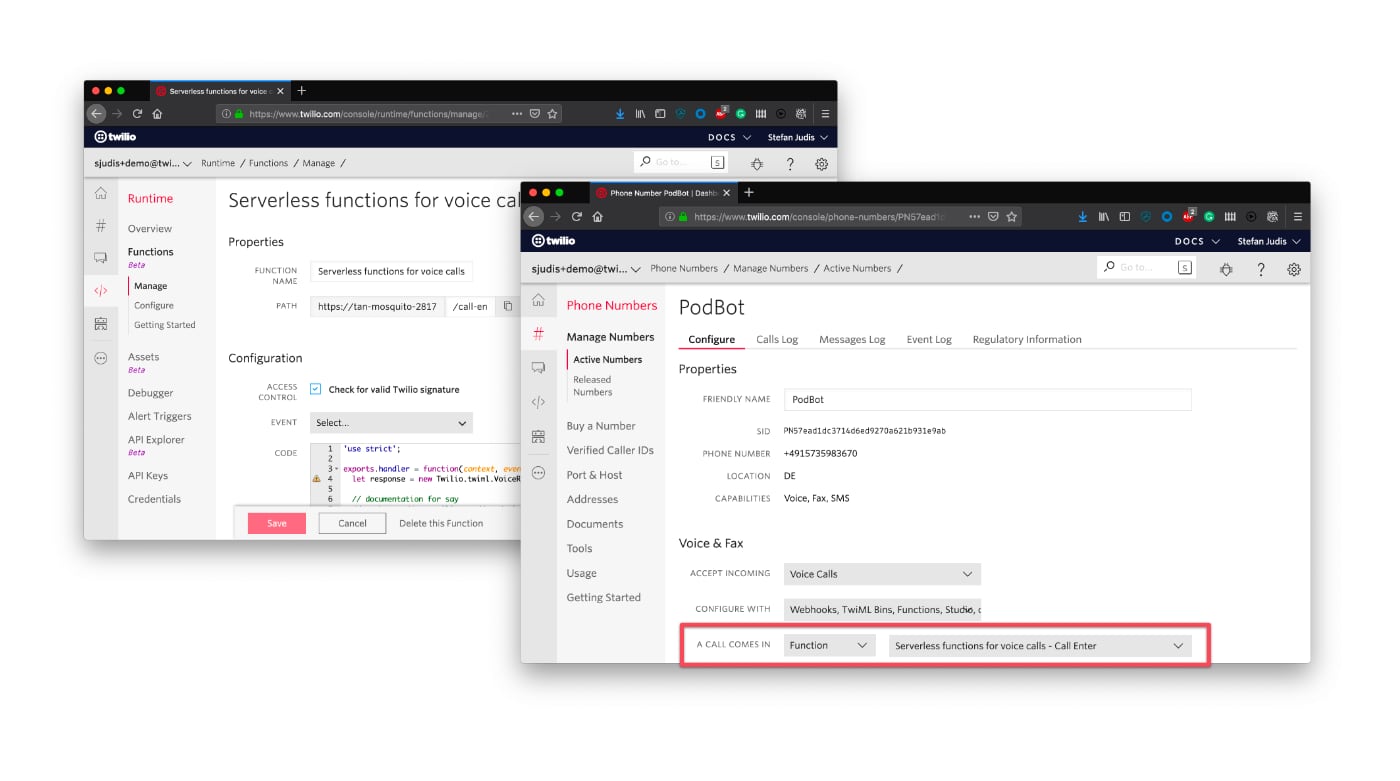
After you move the functions to Twilio and adjust the incoming call handling, you have a voice bot running in the cloud that is ready to log information for further usage. At that point, you'll no longer require a local setup.
This tutorial was the first step of building PodBot. With these three functions, you’re able to manage and log phone calls using Twilio. If you want to play around with it, you can check out my podbot-functions repo on GitHub or have a look at the function docs.
If you want to start your own podcast business or just want to say “Hi” you can reach me under the following channels.
- Email: sjudis@twilio.com
- Github: stefanjudis
- Twitter: @stefanjudis
Related Posts
Related Resources
Twilio Docs
From APIs to SDKs to sample apps
API reference documentation, SDKs, helper libraries, quickstarts, and tutorials for your language and platform.
Resource Center
The latest ebooks, industry reports, and webinars
Learn from customer engagement experts to improve your own communication.
Ahoy
Twilio's developer community hub
Best practices, code samples, and inspiration to build communications and digital engagement experiences.


