Build a WhatsApp Chatbot with Twilio WhatsApp API, PHP, and Laravel
Time to read:
March 06, 2020
Written by

Conversations with family and friends about sensitive topics can often lead to arguments. Ironically, many of these conversations don’t take place in person anymore, they happen in real-time via chat apps like WhatsApp.
When these awkward situations occur, you might find yourself needing to fact check a statement or quickly look up some information. Usually, this would require you to fire up your web browser which could be quite inconveniencing when time is of the essence. In a perfect life, it would be better to use a chatbot to seamlessly connect with for information. With services like the Twilio WhatsApp API, you can build custom solutions like these to power-up your chatting experience.
In this tutorial, we will build a simple WhatsApp Chatbot that allows you to get information about a developer's GitHub profile using just their username.
After successfully following this tutorial, you will have learned how to respond to WhatsApp messages sent to your Twilio WhatsApp number and also how to send free-form messages using the Twilio WhatsApp API.
Prerequisites
To complete this tutorial, you will need the following:
- Basic knowledge of Laravel
- Laravel Installed on your local machine
- Composer globally installed
- Twilio Account
- WhatsApp Enabled Twilio Number
Getting Started
This tutorial will make use of Laravel. Start off by first creating a new Laravel project using the Laravel installer. Open up a terminal and run the following command to generate a new Laravel application:
Next, you will need the Twilio SDK and Guzzle HTTP client for interacting with the Twilio WhatsApp API and making HTTP requests respectively. Both packages can be installed using Composer. Open up a terminal that points to the whatsapp-chatbot directory and run the following commands to have them installed:
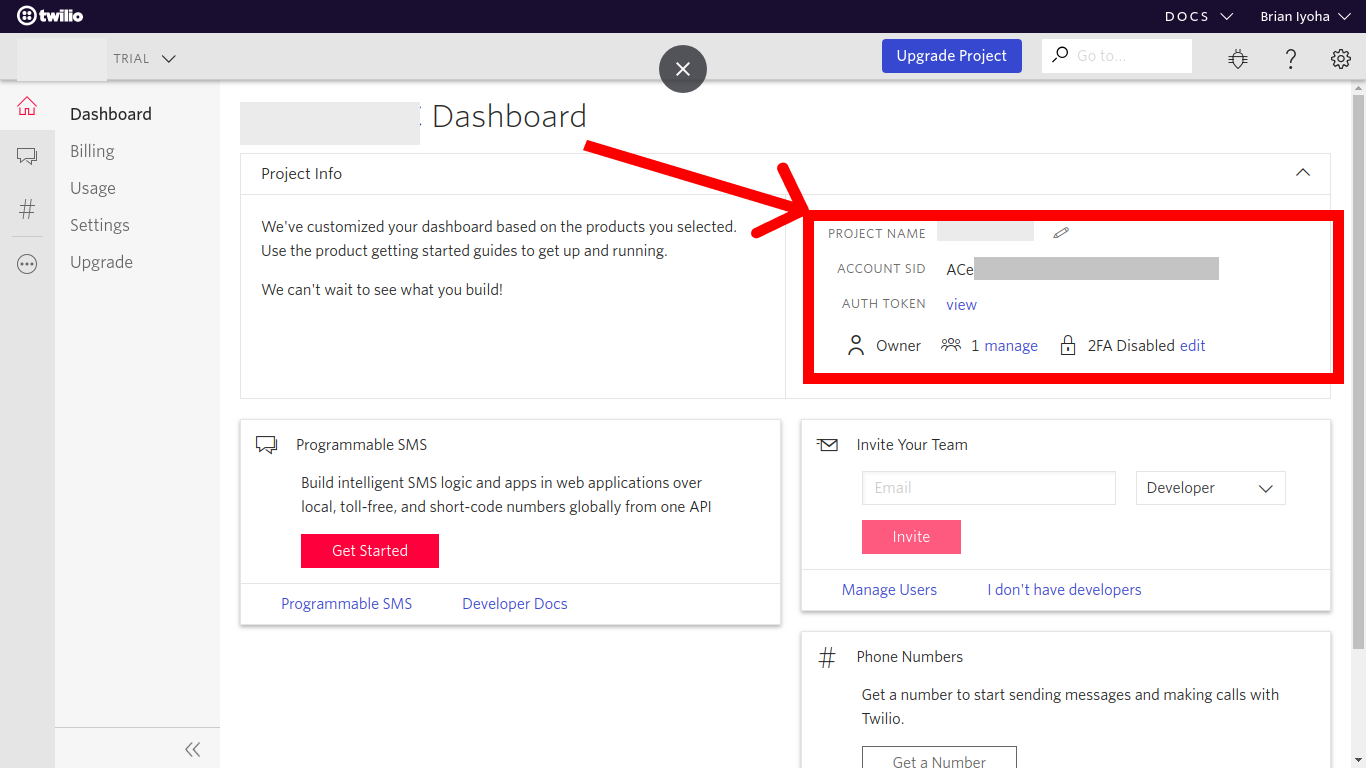
Next, head over to your Twilio dashboard and copy your ACCOUNT SID and AUTH TOKEN which will be used for authenticating your requests with the Twilio SDK:
Proceed to update your environmental variables with these credentials. Open up your .env file and add the following variables:
Setting up the WhatsApp Sandbox
As you might have already figured, to allow your chatbot to respond to messages it receives, you must have a way of sending messages via WhatsApp. Fortunately, Twilio provides a very robust WhatsApp API that allows you to send and receive WhatsApp messages right from your application.
Before you can start sending and receiving messages using the Twilio WhatsApp API in production, you must first get a WhatsApp Approved Twilio Number which will act as your WhatsApp number for sending and receiving messages. Since getting a Twilio number approved can take days, Twilio also provides a safe sandbox which can be used for development and testing purposes.
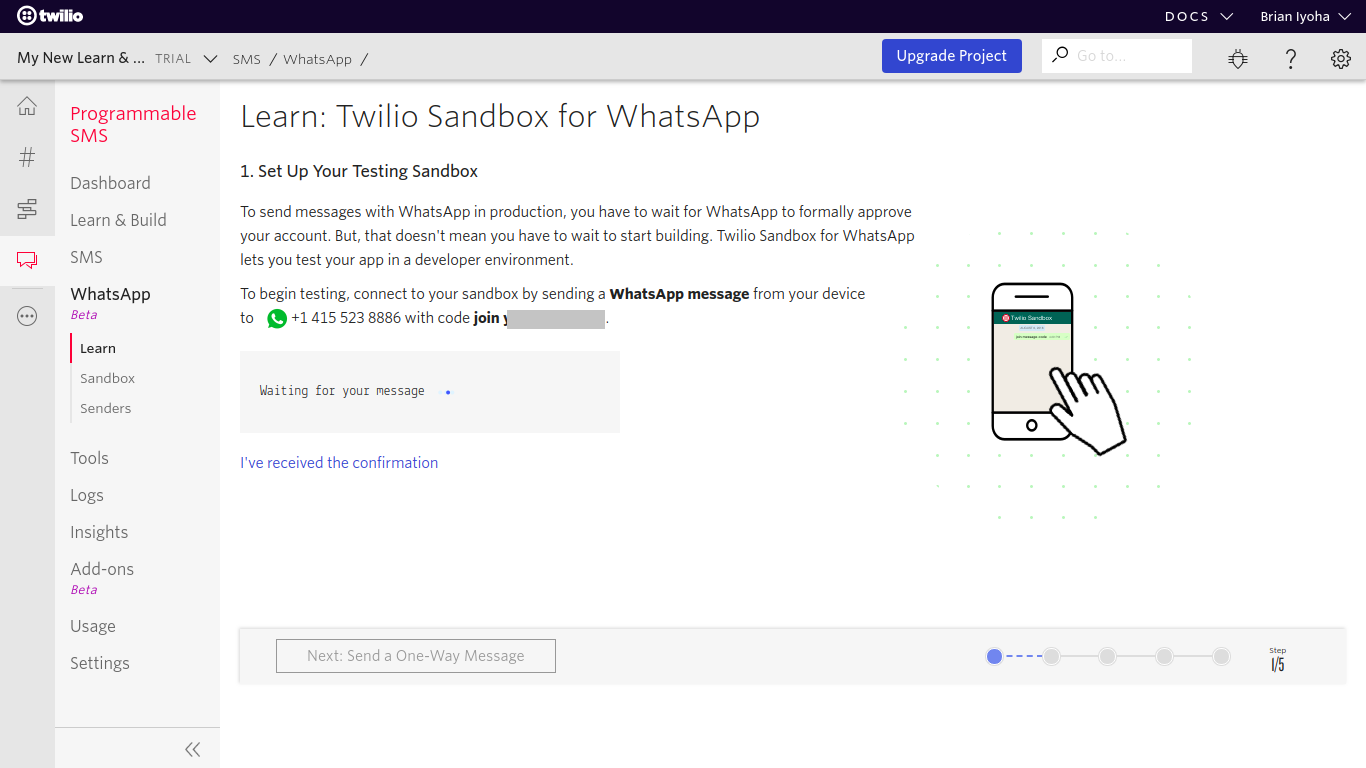
To get started using the Twilio WhatsApp Sandbox, head over to the WhatsApp section on your Twilio dashboard and send a message to the sandbox number provided; usually, +14155238886 with the provided code, which is in the format join-{unique word}:
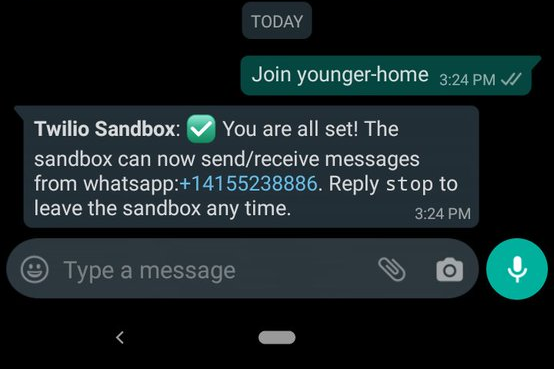
After successfully sending your code to the sandbox number you should receive a response like this:
Next, update your .env file to include your WhatsApp number; in this case, the sandbox number:
Building the Chatbot
At this point, you should have your Twilio sandbox setup and also installed the needed packages to build the chatbot. Now create a Controller that will house the logic of the chatbot. Open up a terminal in the project directory and run the following command to generate a new Controller class:
Open up the newly generated app/Http/Controllers/ChatBotController.php file and make the following changes:
Two new methods have been added to the class; listenToReplies() and sendWhatsAppMessage(). Let's break down each function. The listenToReplies() method is where messages sent to your WhatsApp number will be processed. The response sent will depend on the body of the message received. Whenever a new message comes in, Twilio will call the endpoint linked to this method, while passing information about the message as the body of the request. From the request body, you can get details about the message a user sent to your WhatsApp number, among which are the From and Body parameters that hold the sending phone number and message respectively:
Next, an HTTP request is made to the Github Developer API using the Guzzle HTTP library (installed in the earlier part of this tutorial) to get the user’s details using the username gotten from the WhatsApp message body. Depending on the response retrieved from the HTTP request, a WhatsApp message will be sent back to the user with either a summary of the user's profile or an error message. The helper sendWhatsAppMessage() function is what is used for sending out WhatsApp messages. It takes in two arguments; $message and $recipient.
The sendWhatsAppMessage() method makes use of the Twilio SDK for sending out WhatsApp messages:
First, your Twilio credentials stored in your .env file are retrieved before proceeding to create a new instance of the Twilio Client using your account sid and auth token. Next, the recipient and an array of options are passed to the messages->create() method from the client instance to actually send out a request via the Twilio API. The messages->create() method takes in two arguments; the recipient, which is the WhatsApp enabled phone number you want to send a message to - in this case, the sender of the initial text - and an associative array with the keys: from and body. The from property should be your Twilio WhatsApp phone number or sandbox number (for testing only) with the text whatsapp: prepended to it, while the body property holds the $message to be sent to the recipient.
NOTE: The recipient number should also have the text whatsapp: prefix prepended to it, but in this case the number retrieved from the request body already has it as a part of the string returned for the From property, hence why we don't manually input it.
Setup the Webhook
To enable your application to receive messages sent to your WhatsApp number, you must first add a webhook URL to your Twilio dashboard. Before you can do this, you must have set up your application route, which will serve as your webhook URL. Open up routes/api.php and make the following changes to add a new route (/chat-bot) to your application:
NOTE:
- Routes defined in
routes/api.phpmakes use of the API middleware group. - Routes defined in
routes/api.phpwill be prefixed with/api.
Exposing the Application to the Internet
To allow access to your Laravel application through a webhook, your application has to be accessible via the internet. Since you are still building your application, you can make use of ngrok to make the application accessible from the internet.
If you don’t have ngrok set up on your computer, you can see how to do so by following the instructions on their official download page. Next, open up your terminal and run the following commands to start your Laravel application:
This will expose the Laravel application running on your local machine on a specific port, which will be printed out to the terminal after successfully running the command. Take note of the port as it will be used shortly. Now, while still running the artisan serve command, open up another instance of your terminal and run this command to make your application publicly accessible:
NOTE: Replace 8000 with the port your application is running on.
After successful execution of the above command, you should see a screen like this:
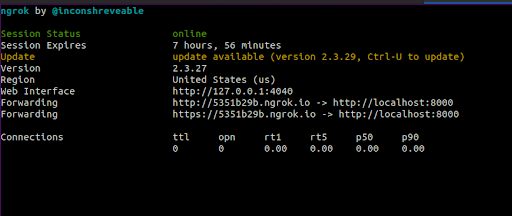
Take note of the Forwarding URL as we will be making use of it next.
Updating the Sandbox Webhook
Having exposed your application to the internet, you can now make use of your application route as the webhook URL for your WhatsApp sandbox. Head to the WhatsApp sandbox settings in your Twilio dashboard and update the input field labeled "WHEN A MESSAGE COMES IN" with the complete URL to your chatbot path:

NOTE: Your webhook URL should be in the format https://{ngrok-forwarding-url}/api/chat-bot
Testing
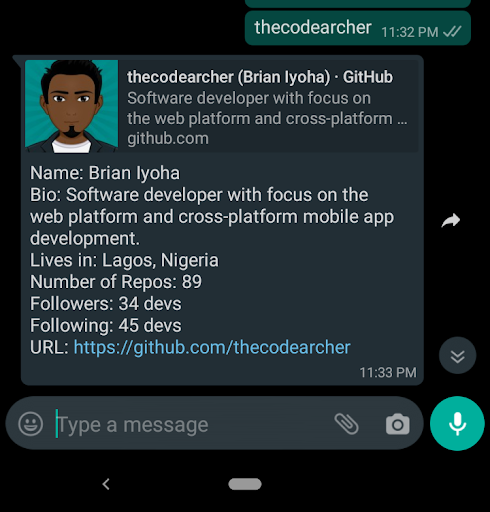
Awesome! You have successfully built your chatbot application. Now proceed to test it by sending a WhatsApp message to your sandbox number with a Github username. If everything works as expected you should get a response with a summary of the person's profile and a link to view their profile directly:
Conclusion
Now that you have successfully finished this tutorial, you should have a simple WhatsApp chatbot for looking up a user's profile on Github. With this, you also learned how to send out free-form messages using the Twilio WhatsApp API and also how to respond to messages sent to your Twilio WhatsApp number. If you would like to take a look at the complete source code for this tutorial, you can find it on Github.
This is also a great introduction to building the chatbot you need to calm the tensest family discussions. You can extend this chatbot to communicate with your favorite APIs so that you’re ready for the next argument.
I’d love to answer any question(s) you might have concerning this tutorial. You can reach me via:
- Email: brian.iyoha@gmail.com
- Twitter: thecodearcher
- GitHub: thecodearcher
Twilio.org helps social impact organizations expand their reach and scale their missions. Build your first application with Twilio and start engaging your audience at no cost with product credits from the Impact Access Program. Learn more about eligibility and how to start your benefits today.

Related Resources
Twilio Docs
From APIs to SDKs to sample apps
API reference documentation, SDKs, helper libraries, quickstarts, and tutorials for your language and platform.
Resource Center
The latest ebooks, industry reports, and webinars
Learn from customer engagement experts to improve your own communication.
Ahoy
Twilio's developer community hub
Best practices, code samples, and inspiration to build communications and digital engagement experiences.