What Are Laravel Policies and How to Use Them to Control Access
Time to read: 5 minutes
In the previous tutorial, we discussed Laravel Gates and how it is one of Laravel’s authorization features. In this tutorial, we’ll be discussing another key authorization feature in Laravel: Policies. One of the most useful features of Laravel is its ability to implement access control using them.
Prerequisites
To follow this tutorial:
- Read the previous article and build the application
- You must have prior experience with Laravel and be familiar with Laravel Gates
- PHP 8
- Your preferred text editor or IDE
- A database supported by Laravel
- A database tool such as PhpStorm's database tool window, MySQL's command-line client, or HeidiSQL
What are Laravel Policies?
Laravel Policies is a feature that allows developers to define authorization rules for resources within their applications, including models, views, and actions. For example, you may want to restrict access to certain routes of your application to authenticated users or those with a certain role or permission level.
Policies are defined as classes in Laravel, where each one corresponds to a particular model or resource in your application. The policy class contains methods that define the authorization rules for accessing the associated model or resource. These methods return either true or false, depending on whether the user is authorized to access it.
Given this, Policies provide a simple yet powerful way to define access control rules that can be easily managed and maintained.
Why are Laravel Policies important?
Laravel Policies are essential for any Laravel application that requires secure access to resources. Without proper authorization, users may be able to perform actions they are not authorized to, leading to data breaches, unauthorized access, and other security issues.
With Laravel Policies, developers can define specific rules for each resource, ensuring only authorized users can access them. This helps to minimize the risk of security vulnerabilities and ensures that sensitive data remains protected.
Create a Post Model
To explain how the policy works in this tutorial, we’ll need to add a post model to the existing application, so that users can create, view, and edit an article, but, only the author of the post can edit it.
To do that, in the top-level directory of the Laravel application you created in the previous tutorial, run the following command.
The command will create the post model. We can then add the properties and methods.
Create a Laravel Policy
Next, create a Laravel Policy by running the command below.
After running the command, Laravel will generate a new Policy in the app/Policies directory named PostPolicy.php.
Add an authorization rule
Next, you need to define authorization rules for the new Policy class. Authorization rules are defined as methods within the class. These methods should accept two parameters:
- The authenticated user
- The resource being accessed
Update app/Policies/PostPolicy.php to match the code below.
In this example, we have defined three authorization rules for the Post model: view, update, and delete. The view() method returns true if the authenticated user is the owner of the post and false otherwise. The update() and delete() methods do the same.
Register the Policy
After defining and fleshing out the Policy class, you need to register it with Laravel. Do this by adding it to the $policies array in app/Providers/AuthServiceProvider.php, and adding $this->registerPolicies() to the boot() method, as in the example below.
Use the Laravel Policy in a controller
Now, we can use it in our controllers to control access to resources. For example, suppose we have a PostController with an update() method that allows users to update a post:
In this example, we have registered the PostPolicy class for the Post model. This means that Laravel will use this policy to authorize any actions related to the Post model.
Let’s see how to use Policies in our previous tutorial's application. The first is to create a Policy by running the following command.
Next, you'll have to register our Policy. Open the app/Policies/AuthServiceProvider.php file and locate the $policies array, inside it input this:
So, it now looks like this:
And at the top, paste the following use statements:
Next, navigate to App\Policies\subs.php and in the sub’s class paste this:
This will restrict access to certain contents to users who are subscribed.
Then, head back to the app/Providers/AuthServiceProvider.php, navigate to where we defined the Gates, and modify the code to match the following.
All set now! Run the following command to start up our server.
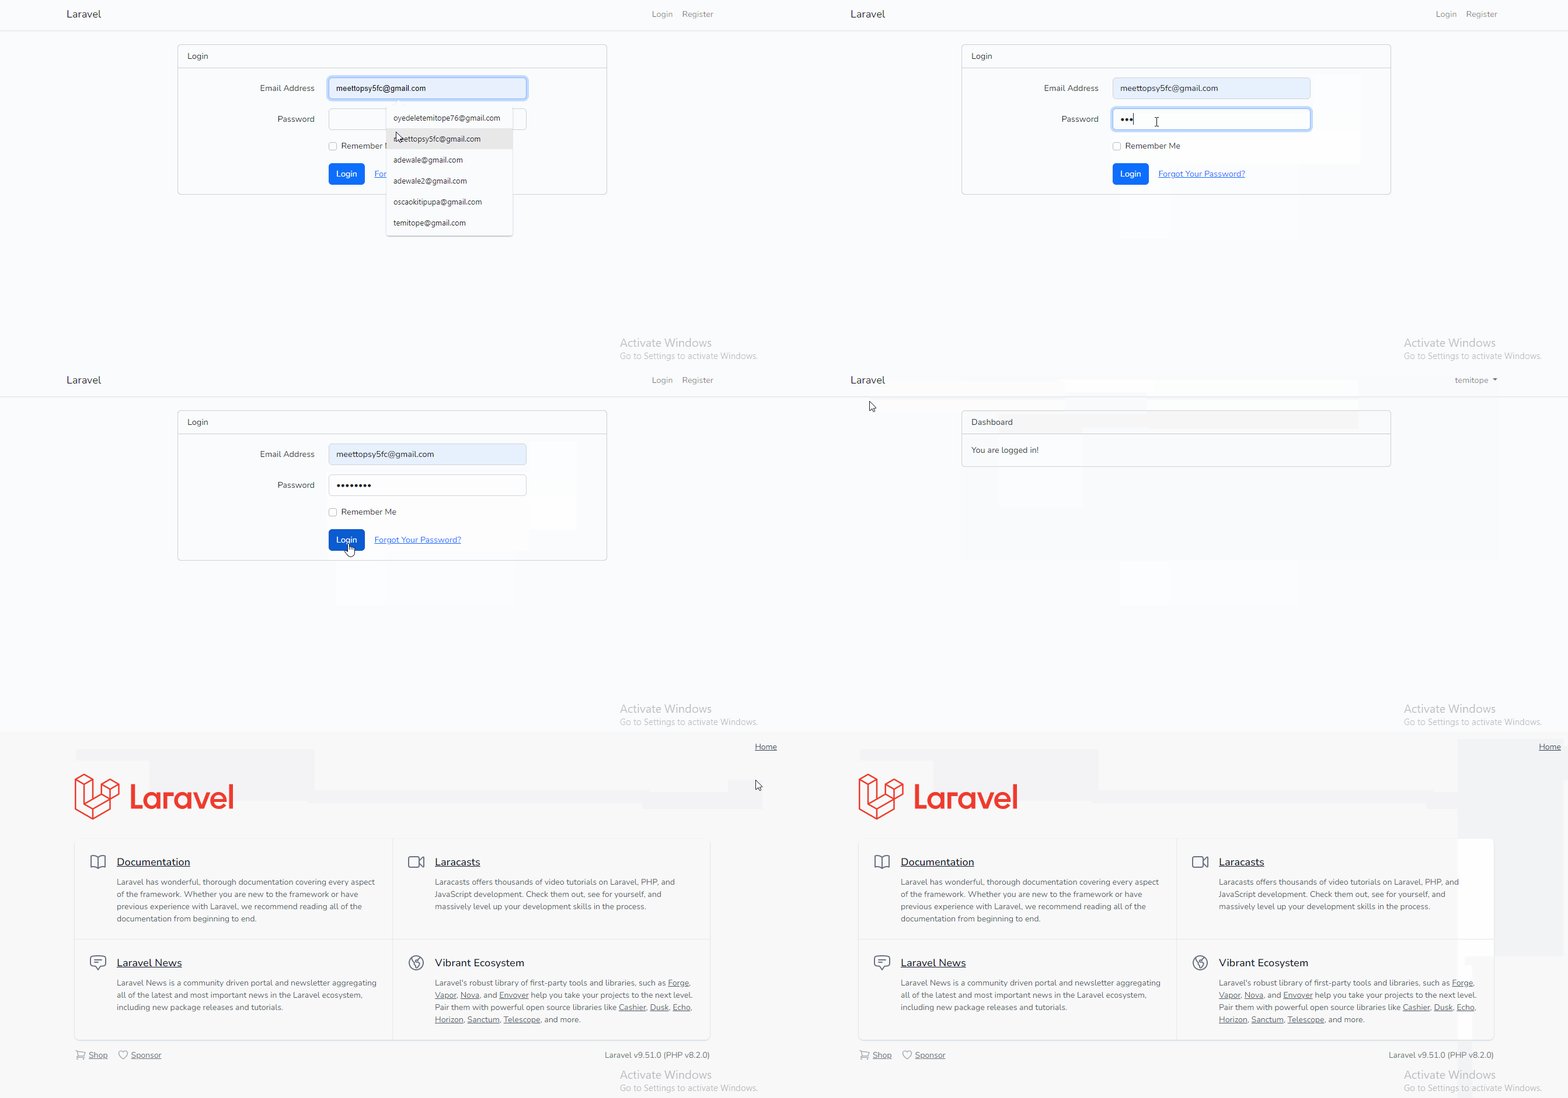
Checking the result in your preferred browser, you'll notice it still looks the same as before, as in the screenshot below. Our subscribers link doesn't show because the user is not subscribed.

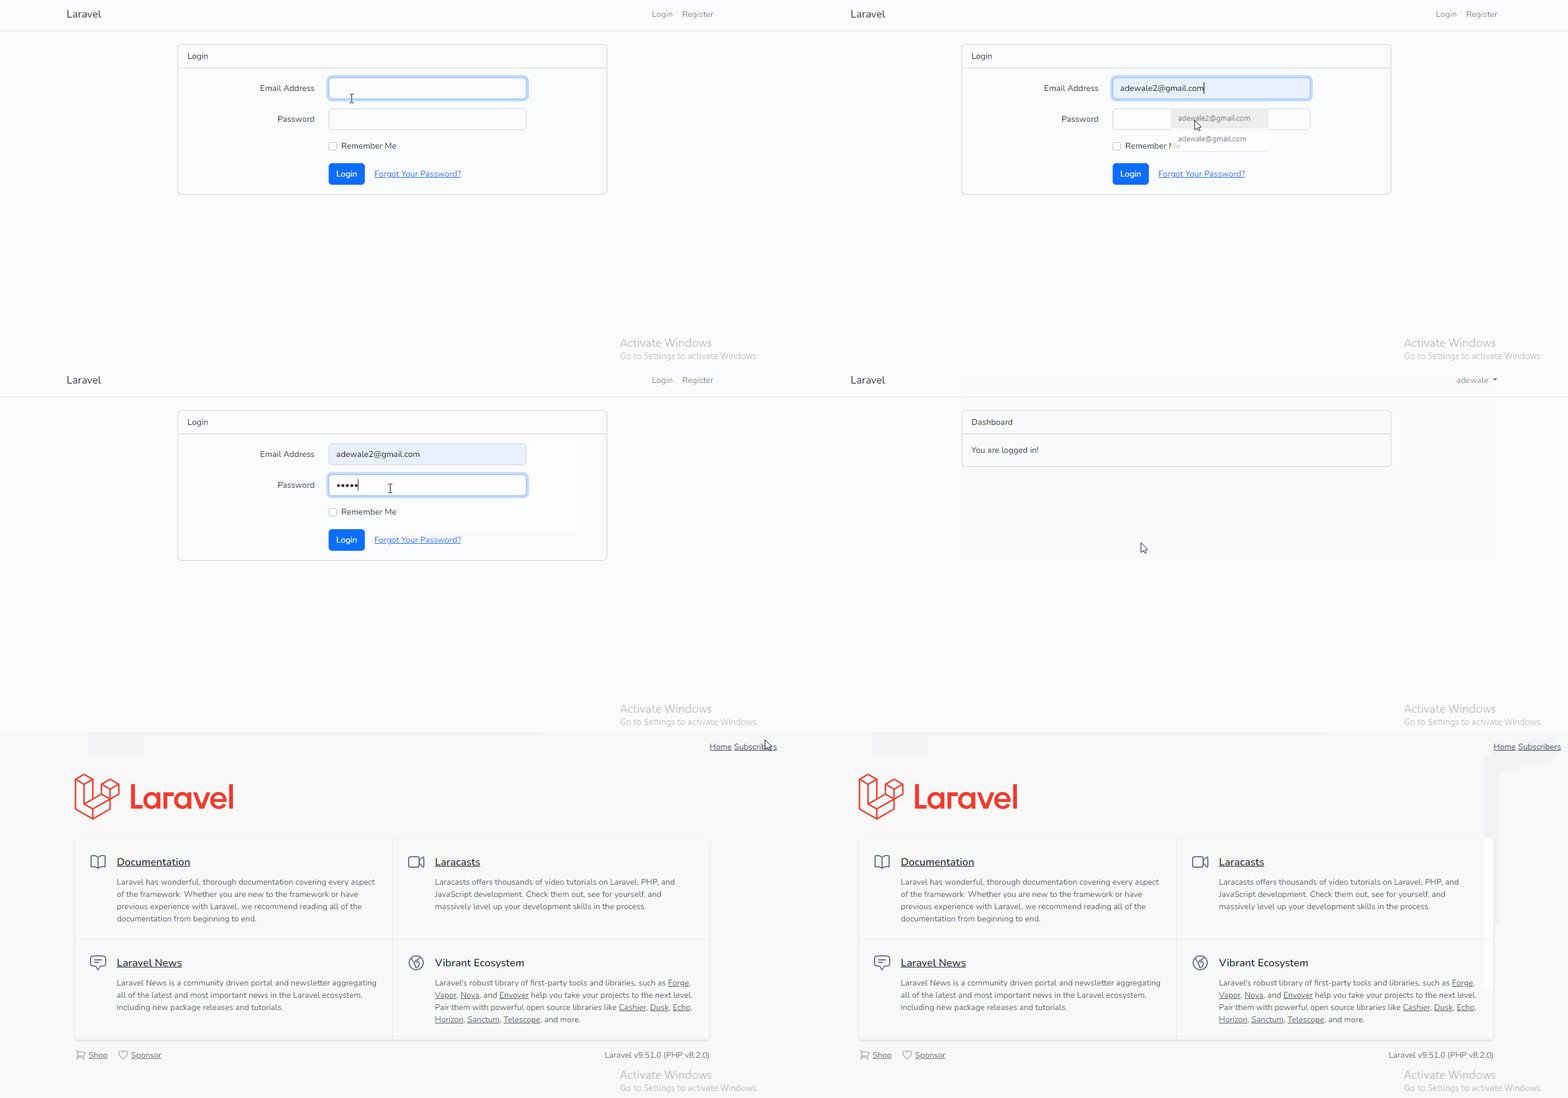
However, if we log in as a subscribed user, the subscriber link shows in the top right-hand corner of the default route, as in the screenshot below.

When should you use Policies?
Laravel policies can be used in various situations where access control is required in a web application. Here are some examples of when policies might be used:
- Control access to user data: In a web application that stores user data, policies can be used to control who has access to the data. For example, a policy might be used to allow users to view and update their own data but not to view or update data belonging to other users.
- Manage permissions for actions: Policies can be used to manage permissions for specific actions in a web application. For example, a policy might be used to allow administrators to delete records, but not regular users.
- Restrict access to resources: Policies can be used to restrict access to resources in a web application. For example, a policy might be used to prevent users from accessing certain parts of a web application, unless they have been authenticated.
- Implement business rules: You can use policies to implement business rules in a web application. For example, a policy might be used to prevent users from updating an order if it has already been shipped.
Should you use Gates or Policies?
Gates and Policies provide different approaches to authorization in Laravel. Gates are more flexible and allow you to define custom authorization logic based on specific criteria, while policies provide a more structured approach to defining authorization rules for specific models.
Here are some of the key comparisons between Gates and Policies:
- Scope: Gates are designed for simple authorization scenarios, where only a single check is required to determine whether a user has access to a particular resource. On the other hand, Policies are designed for more complex authorization scenarios, where multiple rules may be required to determine whether a user has access to a resource.
- Flexibility: Laravel Policies are generally more flexible than Gates, as they can be used to control access to any resource in a Laravel application, while Gates are typically used to control access to specific actions or routes.
- Syntax: The syntax for defining Gates and Policies is slightly different. Gates are defined using a callback function, while Policies are defined as a separate class with specific methods for each action.
- Granularity: Laravel Policies allow for finer-grained control over resource access, as they can be defined for specific models or model types. Gates are typically defined at the route or controller level, which may not provide the same level of granularity.
Conclusion
In conclusion, Laravel Policies provide a powerful way to control access to resources in a web application. They allow developers to define authorization rules in a simple yet flexible way that can be easily managed and maintained. Policies can be used to control access to any resource in a Laravel application and can be easily integrated with controllers, routes, and middleware.
If you are developing a Laravel application and need to implement access control, I highly recommend using Laravel Policies. They are powerful and flexible features that can help you to build a more secure and reliable web application.
Temitope Taiwo Oyedele is a software engineer and technical writer. He likes to write about things he’s learned and experienced.
Related Posts
Related Resources
Twilio Docs
From APIs to SDKs to sample apps
API reference documentation, SDKs, helper libraries, quickstarts, and tutorials for your language and platform.
Resource Center
The latest ebooks, industry reports, and webinars
Learn from customer engagement experts to improve your own communication.
Ahoy
Twilio's developer community hub
Best practices, code samples, and inspiration to build communications and digital engagement experiences.


