How to Create a Monitoring System with AWS Technologies and Twilio Voice
Time to read:
In this post, you will learn how to create a monitoring system using Twilio Voice that will alert you when CPU utilization percentage of an AWS EC2 instance is over a specific threshold value. To do that you will utilize other AWS services such as:
- AWS CloudWatch, for monitoring your instance’s metrics.
- AWS Simple Notification System, for notifying our lambda function that our monitored metrics is over the threshold.
- AWS Lambda, for executing Twilio API requests so that it will alert you using your phone number.
The following provides an overview of the system that you will build in this tutorial.

In this tutorial you will configure a CloudWatch alarm that will trigger a call to the Twilio Voice API using SNS topic and AWS Lambda function.
Prerequisites
To complete this tutorial you will need:
- An AWS account.
- A Twilio account.
- A Twilio phone number.
- Gradle. It will be used to scaffold a Java application for your lambda function. The example in this tutorial uses Gradle version 7.5.1.
- A Java code editor. In this tutorial I will use Intellij IDEA Community Edition but feel free to use your own preferred code editor/IDE.
Also note that there will be a cost for buying a Twilio number that you will use to make a phone call. You can find out about its pricing in Twilio documentation. You can also view the cost for calling between countries.
Set up the alert system
Use your preferred terminal to create a new directory. Change into that directory with the following commands:
Additionally, you can also download code used in this tutorial from its GitHub repo. There are two directories in that repository: scripts and lambda. The former is for scripts used in creating and deleting AWS resources used in this tutorial and the latter is the source code for AWS Lambda function that you will create.
Set up the AWS CLI
To create AWS resources in this tutorial, you will use AWS CLI. To install it, follow the instructions in its documentation. Please note that you will use AWS CLI version 2 for this tutorial.
After installing AWS CLI, you need to configure it first before you can start using it. For this you need an access key ID and a secret access key. To get them do the followings:
Visit the security credentials page.
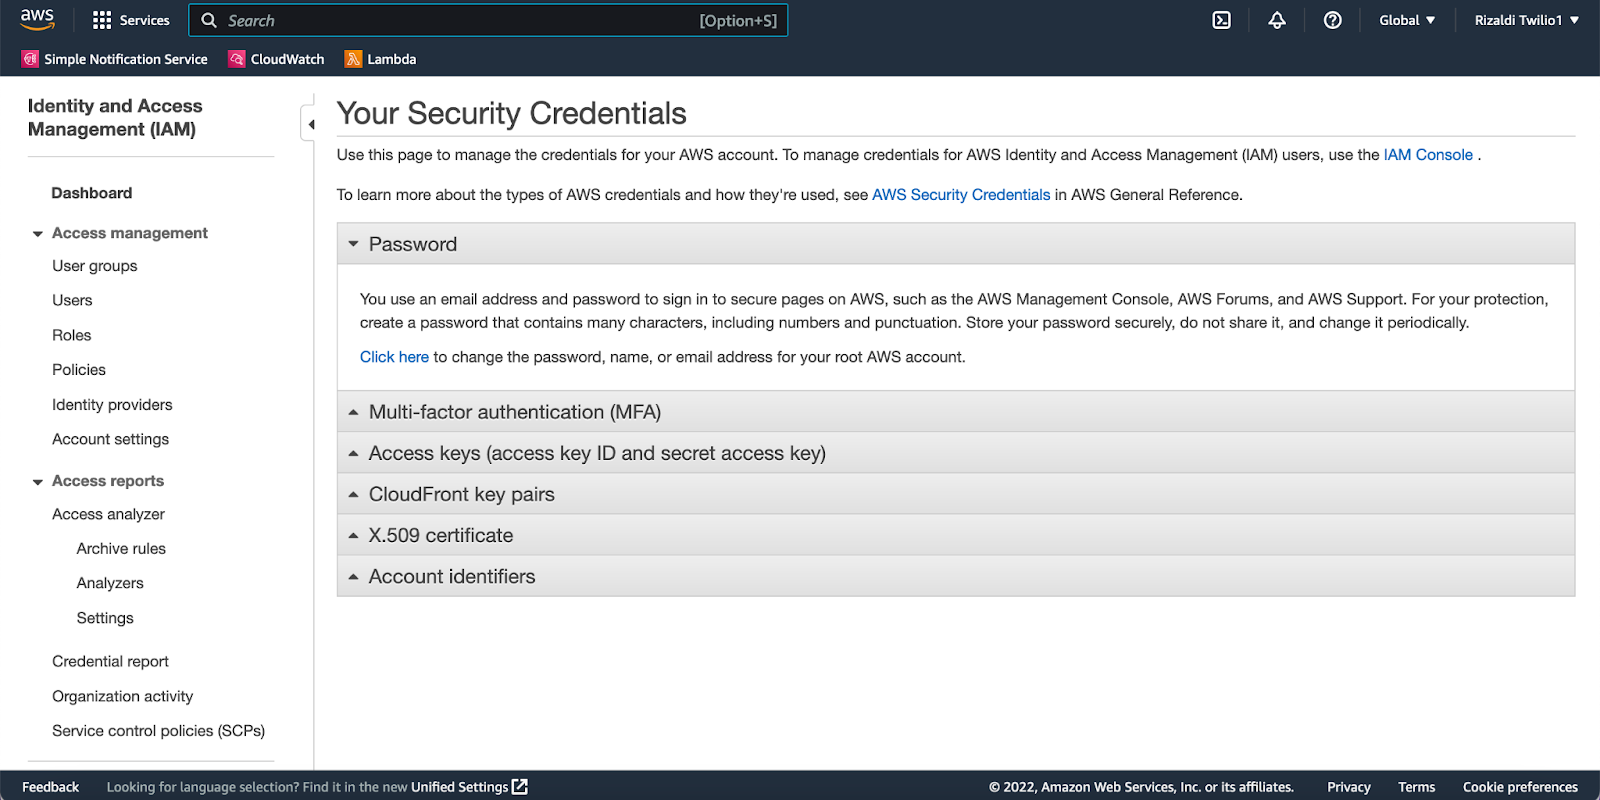
Under the Access keys (access key ID and secret access key) section, click Create New Access Key.
A dialog window will show up. Click Download Key File.
A .csv file will be downloaded. Open this file using your preferred text editor. In this file you will find your access key ID and secret access key.
Once you downloaded the .csv file, open your terminal and run:
You will be prompted to input your access key ID, secret access key, default region, and default output format. For access key ID and secret access key, input the information that you get from the downloaded .csv file. For default region type in us-east-1 and for default format type in json. Please note that you can choose any region in the context of this tutorial.
To test if your configuration is correct, run:
It will show the output below if you don’t have any instances right now.
Create an EC2 instance
Before creating an EC2 instance, you need 2 things:
- A key pair which you will use to ssh into your instance.
- A security group to define your instance ingress rule so that a ssh connection is allowed into your instance.
You can also execute commands in this section by executing file scripts/1-create-ec2-instance.sh in the aforementioned GitHub repo.
To create a key pair, in your terminal run:
Now you have a file named MyKeyPair.pem in your current directory. You will use this file later to ssh into your instance. Before moving onto the next step, grant the file user read permission:
An AWS EC2 instance has to be inside a virtual network called AWS Virtual Private Cloud (VPC). Run the command below to get your VPC ID and store it in the vpc_id variable.
Now that you have your VPC ID, you will create a security group inside that VPC. A security group acts as a virtual firewall for your instance to control inbound and outbound traffic. In this tutorial, we will use this to set up a rule so that you can ssh into your instance. Run the following command:
Run the following command to get the newly created security group’s ID and store it in the sec_group_id variable.
Next, you need to create a security group rule. Run the following command to create an ingress rule in your security group to allow an ssh connection from anywhere.
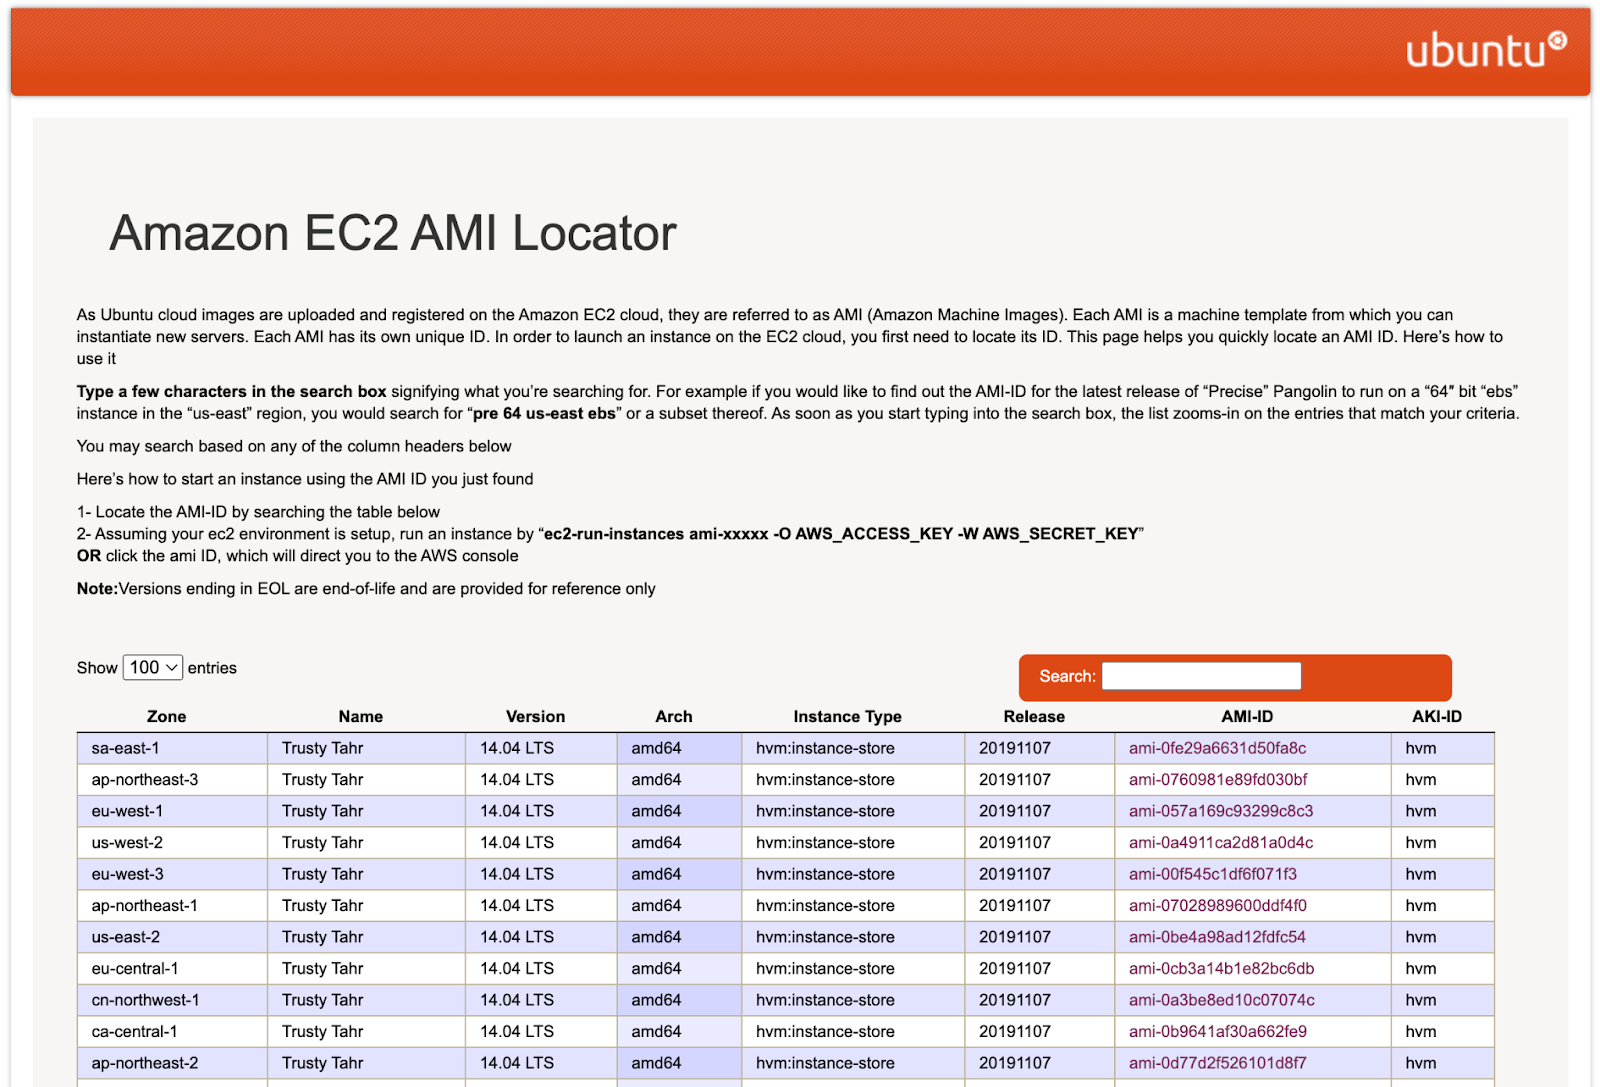
Next, create an instance using Ubuntu 22.04 LTS image. Find a compatible image in your preferred region.
To do this, access Ubuntu Amazon EC2 AMI Locator page.
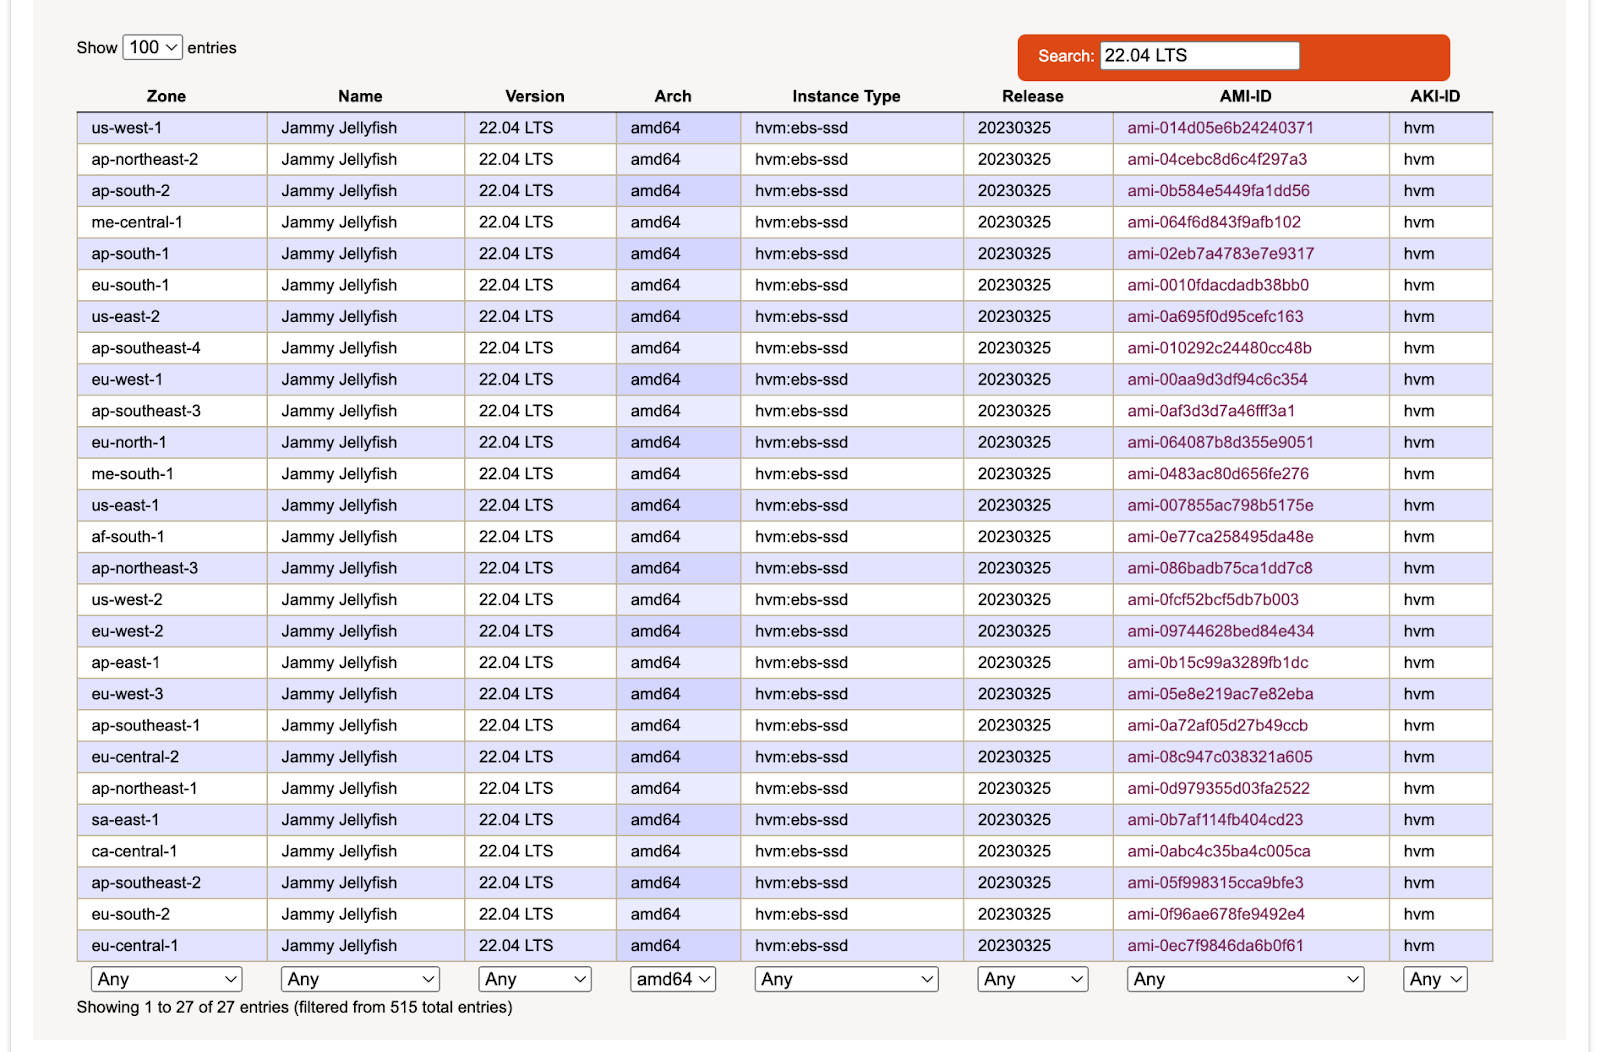
In the search box type in "22.04 LTS". Scroll down to the bottom of the page. Filter for the AMI-IDs with amd64 under the Arch column. Choose your preferred zone under the Zone column. Copy the AMI-ID.
Run the command below to create an EC2 instance. If you choose a region other than us-east-1 replace ami-XXXXXXX with the compatible image found in the previous step.
Now you have a new EC2 instance running Ubuntu 22.04 LTS image. Your instance will be a t3.micro instance, a low cost burstable general purpose instance type with 2 vCPUs and 1 GB of memory. This type of instance is included in AWS Free Tier so that it will incur no cost.
Once you run the command, it will show you a json output with details of the instance that you just created.
Now run the following command to get the newly created instance’s id and save it into the instance_id variable.
Create an Amazon SNS topic
The corresponding script for this section in GitHub repo is scripts/2-create-sns-topic.sh.
Run following command to create an AWS SNS topic:
Then run the following command to retrieve the newly created SNS topic’s Arn and save it into the sns_topic_arn variable.
Create a CloudWatch Alarm
The corresponding script for this section in GitHub repo is scripts/3-create-cloudwatch-alarm.sh.
Run following command to create a CloudWatch alarm:
Create Java application using Gradle
The code that you will write in this section can also be found in the aforementioned GitHub repo inside lambda directory.
In this tutorial we choose Gradle as build automation tool because we can scaffold a good starting code for the lambda function with the gradle init command.
Create a new directory called lambda and change into that directory.
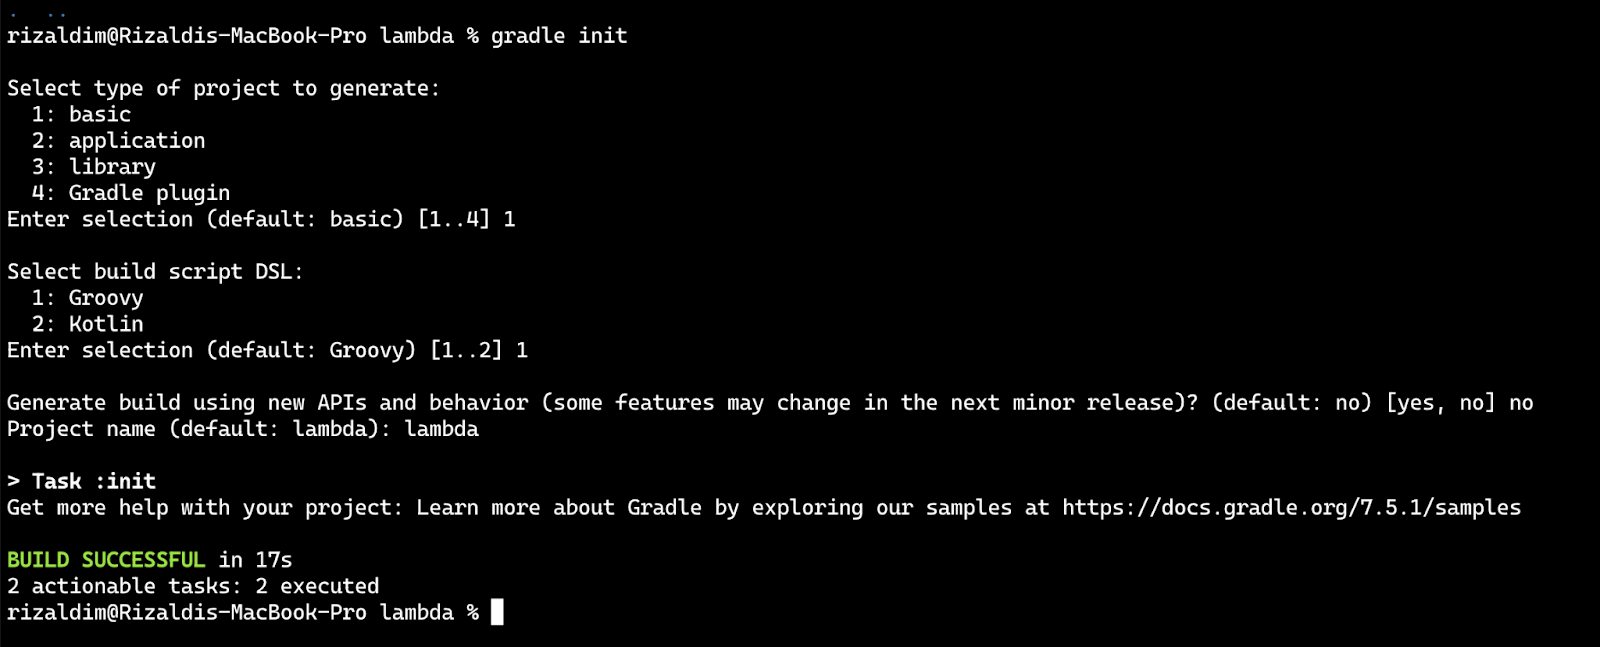
Then scaffold a Java application using Gradle:
Select "basic" as the type of project, "Groovy" as build script DSL, and answer "No" for using new APIs and behaviors. Keep the default project name as "lambda".
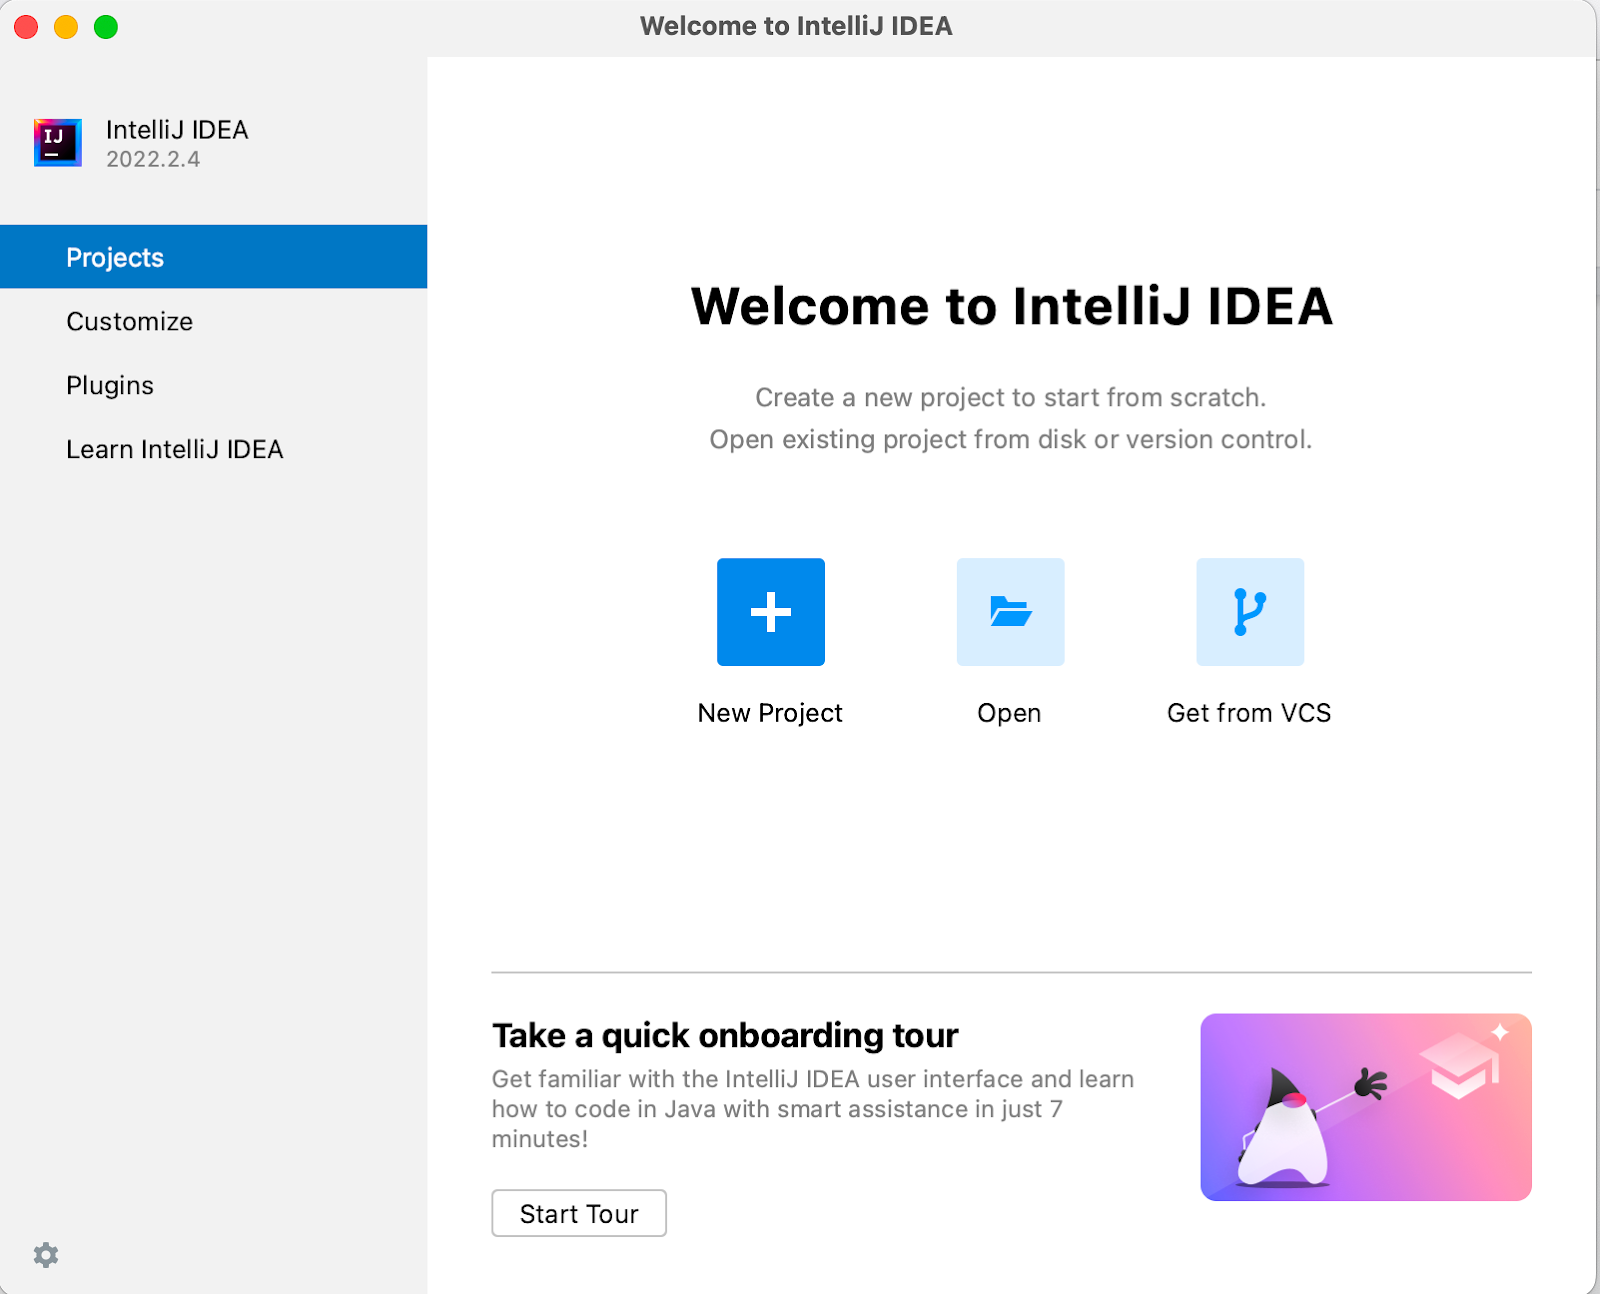
Next, open your code editor / IDE and open your lambda directory using that IDE. If you are using Intellij IDEA, you can select Open then choose your directory.
Now open build.gradle file and replace the contents with the following code:
In the previous code, a new Gradle task called buildZip is defined so that when gradle build is executed, you will also run the buildZip task. This task will store your Java classes and resources into a zip file which you will deploy as your Lambda function.
Next, create src/main/java/example subdirectory within the lambda directory. Create 3 new Java source files inside that subdirectory with the following commands:
Open the Trigger.java file. Here you will define the Trigger class with the following code:
Next, define the SNSMessage class inside the SNSMessage.java file:
Last, paste the following code in the HandlerSNS.java file which will contain your lambda function’s handler method.
Before we move into the next step let me explain how your lambda function will work.
Anytime there’s a new message in your SNS topic, the handleRequest method in the HandlerSNS class is called. An SNSEvent and Context object will be passed into that method. The former contains information related to the message received in the SNS topic while the latter contains information related to the request, such as request ID, log group name, etc.
The Gson library will parse information stored in the SNSEvent object and store it inside an SNSMessage object.
Using the information inside the SNSMessage object, it will construct a Twiml (Twilio Markup Language) object. This object is the representation of a voice message that will be prompted by Twilio when you pick up a call from Twilio.
The Twilio Client is initiated with the ACCOUNT_SID and AUTH_TOKEN environment variables in order to make a call to the Twilio Voice API.
Now that you already have your Java application, you need to build it and package it into a zip file before you deploy it as a lambda function. In your terminal, go back to your Java application project’s root directory. So for example, if you started this tutorial in ~/twilio-tutorial directory, change into ~/twilio-tutorial/lambda directory.
Inside that directory, to build the application run:
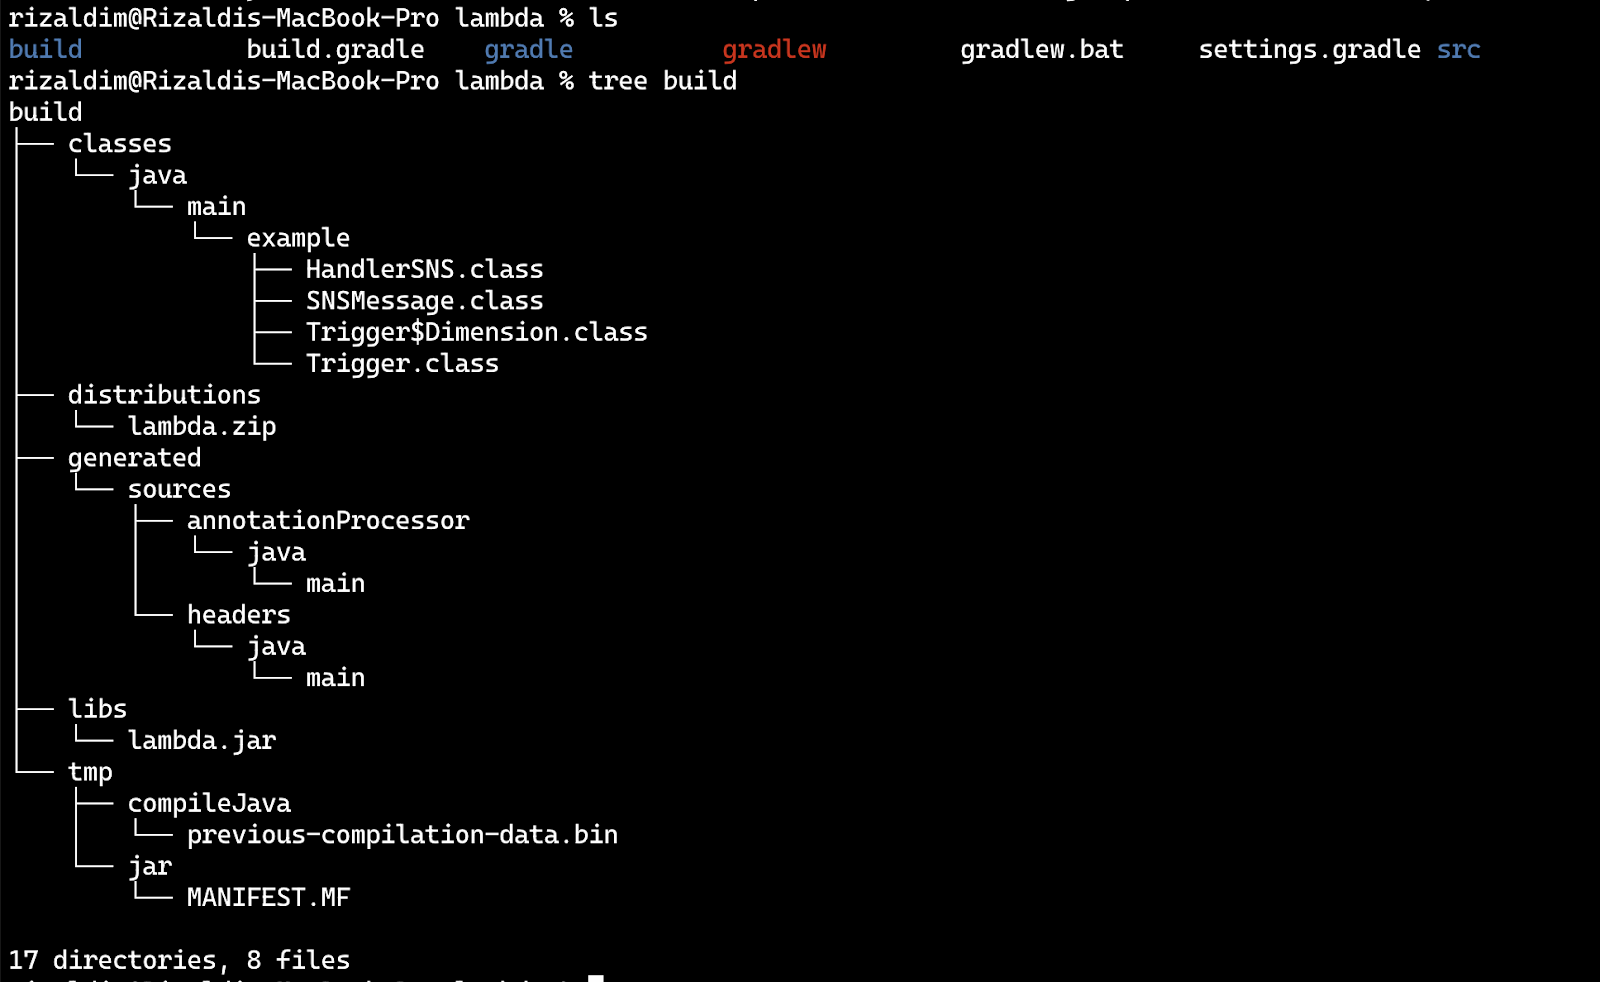
Inspect your directory and notice a new directory named build. Within the subdirectory build/distributions is a lambda.zip file as seen in the project structure below:
Create an AWS Lambda Function
Create an IAM role that will be assigned to the lambda function. A role is a way to give the lambda function an identity to help AWS decide what a resource can and cannot do. You can read more about the IAM role in AWS documentation.
Open your terminal and make sure that you are in the project root directory. Create a file named policy.json with the following contents:
Using that file, create a new role called lambda-role with the command:
Get the newly created role’s arn:
Attach AWSLambdaBasicExecutionRole to your new IAM role:
Create a new lambda function using the newly created role and zip file created earlier:
You can find the full script used in this section in the GitHub repo in file scripts/4-create-lambda.sh.
Set up environment variables for Lambda function
When writing code for the lambda function, you might notice that in the HandlerSNS class the code will get some values from environment variables. You need to set up the values for these environment variables in your lambda configuration.
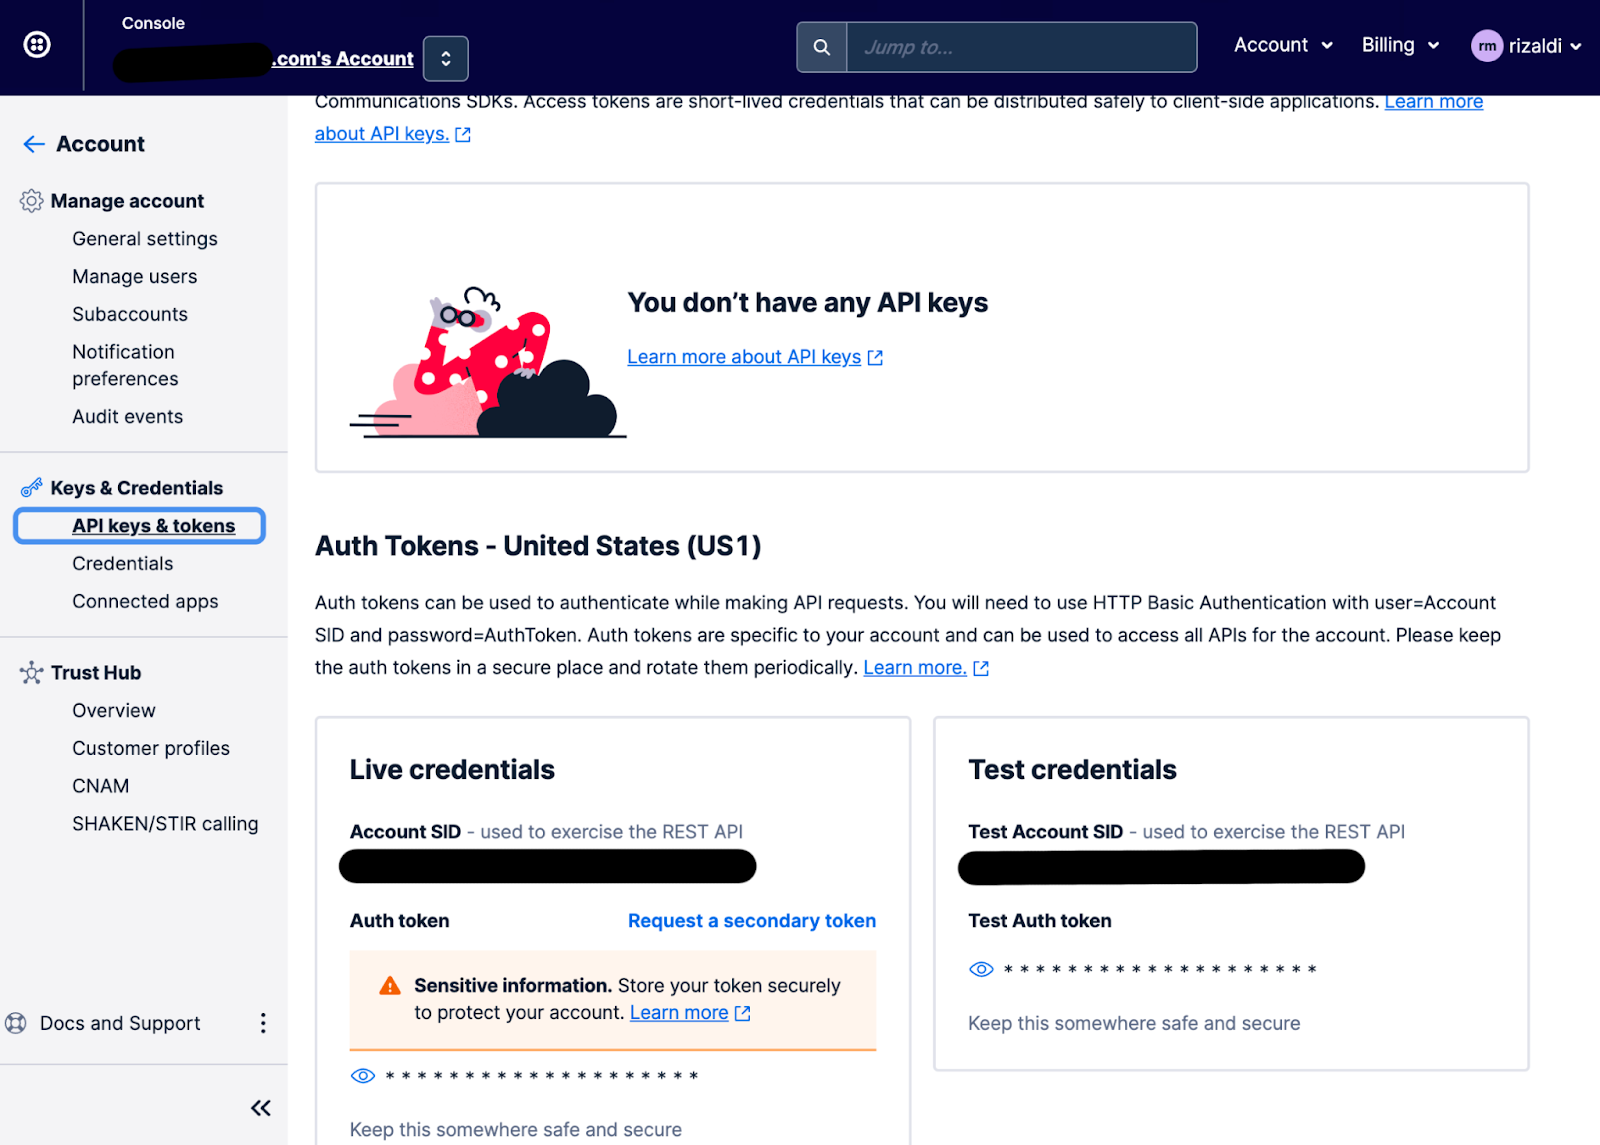
To get your ACCOUNT_SID and AUTH_TOKEN , navigate to the API keys and auth tokens page on the Twilio console. You will be able to find it at the bottom of the page in the Live credentials section.
Next, TWILIO_PHONE_NUMBER environment variable is for the phone number that you purchased from Twilio to make the call. While DEST_PHONE_NUMBER is for the phone number that will be called when there is a high CPU utilization alert, such as your personal phone number.
Now that you have all that information, you can run the following commands to set your lambda function’s environment variables. Don’t forget to replace <acc_sid>, <token>, <twilio_phone_number>, and <your_phone_number> with your relevant informationL
You can find the command in the GitHub repo in file scripts/5-lambda-env.sh.
Create Amazon SNS Topic Subscription
Once you created the SNS topic and the lambda function, the next thing to do is to create an SNS topic subscription and add permission for the SNS topic to call the lambda function. You can find commands executed in this section in the GitHub repo in file scripts/6-sns-subscribe.sh.
Get the lambda function’s ARN and then create an SNS subscription with the command:
Then add permission for the SNS topic to call your lambda function:
Test the alert system
The last thing to do is to test your setup to see if it works. One way to do this is to simulate high CPU utilization in your server using stress-ng command.
Using AWS CLI find out your instance’s public IP address:
Once you have the IP address, ssh into your instance using your key-pair file.
Once you’re logged in, install stress-ng package:
- Update package repository by running
sudo apt update - Install
stress-ngpackage:sudo apt install stress-ng
Once the package is installed, run:
To check your instance’s CPU utilization, you can access CloudWatch’s all alarms page, find cpu-monitor alarm, and click on it to see its details and graph.
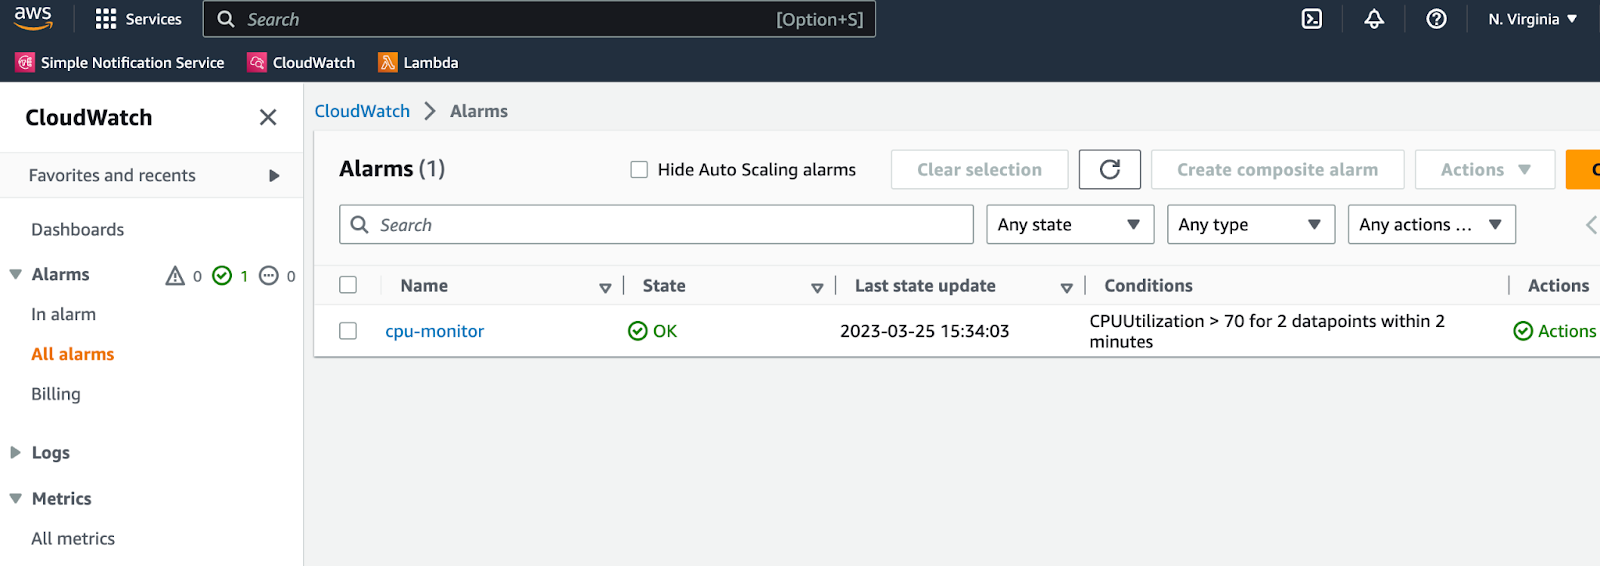
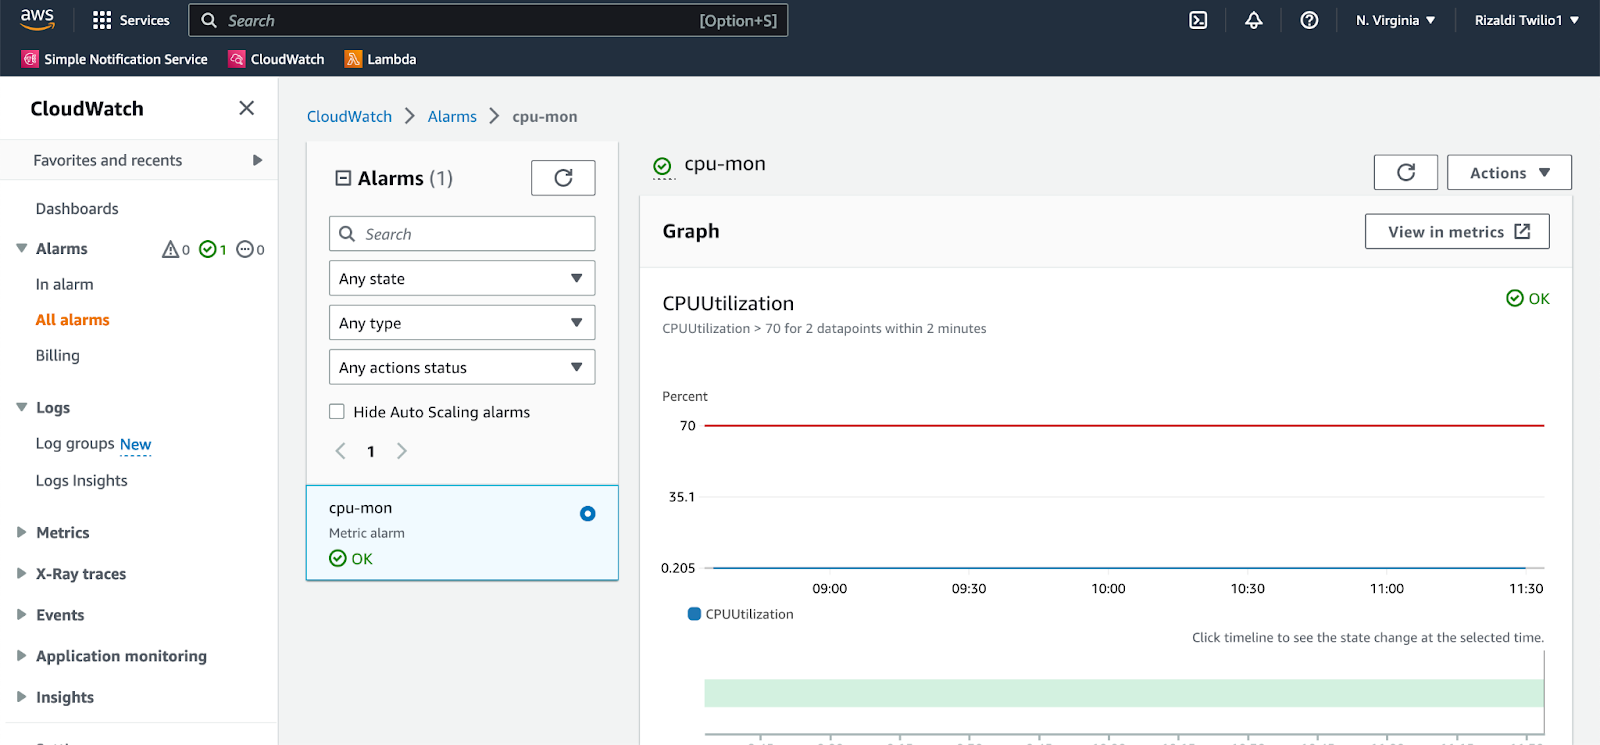
Wait a few minutes after you execute the stress-ng command, you will see that your instance CPU utilization will move up. After 2 minutes of CPU utilization over 70%, CloudWatch will send a message to the SNS topic. This will trigger your lambda function which will then call your phone number.
What's next for creating a monitoring system with Twilio Voice and AWS?
Congratulations on creating a monitoring system using the Twilio Voice API and AWS Lambda function! There are a lot of possibilities for improvement if you want to take this project further. You can add more details related to CPU utilization in your voice message, or you may also add options in your voice message and then program your lambda function to respond to keypad input. You can read more about Twilio Voice API by going through the documentation.
Rizaldi Martaputra is a software developer from Indonesia. In the first few years of his career in software development, he worked as Android app developer but then switched into DevOps role since it allows him to tinker with more diverse tasks and help him optimize his team’s whole software development process. You can follow him on GitHub.
Related Posts
Related Resources
Twilio Docs
From APIs to SDKs to sample apps
API reference documentation, SDKs, helper libraries, quickstarts, and tutorials for your language and platform.
Resource Center
The latest ebooks, industry reports, and webinars
Learn from customer engagement experts to improve your own communication.
Ahoy
Twilio's developer community hub
Best practices, code samples, and inspiration to build communications and digital engagement experiences.


