Verify Phone Numbers in Symfony 4 PHP with Authy and Twilio SMS
Time to read:
Introduction
One of the most appropriate ways to ensure that your application’s database contains only valid phone numbers stored against each user, is by properly verifying the phone number during the registration process. This amongst other things will ensure sanity in your application, reduce the number of false or fraudulent registrations and easily convert this data for marketing purposes.
In this tutorial, I will show you how to verify phone numbers in a Symfony 4 project by leveraging Twilio’s Verfiy API. Together we will build an application that will capture users’ phone numbers and use Twilio to send a 6 digit code through SMS. After receiving this code, the user will be required to enter it for proper verification.
Once we are done with the step-by-step process of implementing this feature, you will have learned how to structure a proper registration flow that takes phone number verification into consideration.
Prerequisite
A reasonable knowledge of object-oriented programming with PHP will help you get the best out of this tutorial. To make the tutorial less difficult for Symfony newbies, I will endeavor to break down any complex implementation or logic.
You will need to ensure that you have Composer installed globally on your computer. Lastly, an existing Twilio account will help you get up to speed in no time. In case you don’t have an account already, don’t worry, we will set up a new one later in this post.
What we’ll build
As mentioned earlier the application that will be built in this post will be used to capture the phone number of users during the registration process. The details of the users will not be persisted into the database until his or her phone number is verified.
To successfully implement this flow, we will leverage one service specifically made available by Twilio named Authy API. This service can be used to verify phone numbers by sending codes via voice and SMS. But for the sake of this tutorial, we will send a 6-digit code via SMS.
Here is what the verification workflow will look like:
- Create a new Authy application in order to obtain an API KEY
- Send a verification token via SMS once a user registers
- Check the verification token and then proceed to save user’s details into the database.
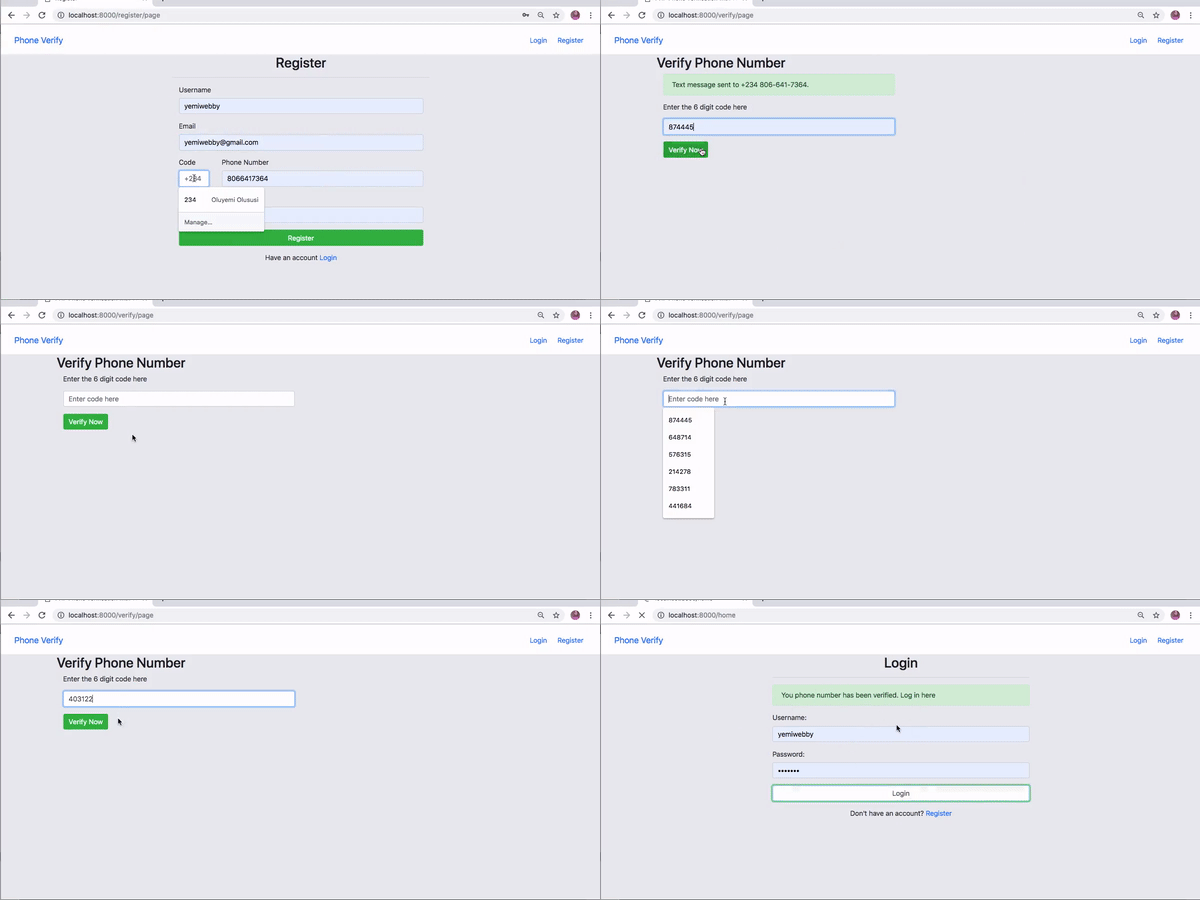
With this properly covered, you will have an application that can seamlessly capture and confirm user phone numbers as part of the onboarding process as shown below:
Getting started by installing and setting up a new Symfony project
To begin, we will use Composer to create a new Symfony application. Start by opening a terminal and navigate to the preferred folder for project development on your computer and run the following command:
The preceding command will create the application in a new folder named phone-verify-twilio and install the relevant dependencies for the project. Once the installation is complete, change directory into the new project folder and start the built-in web server as shown below:
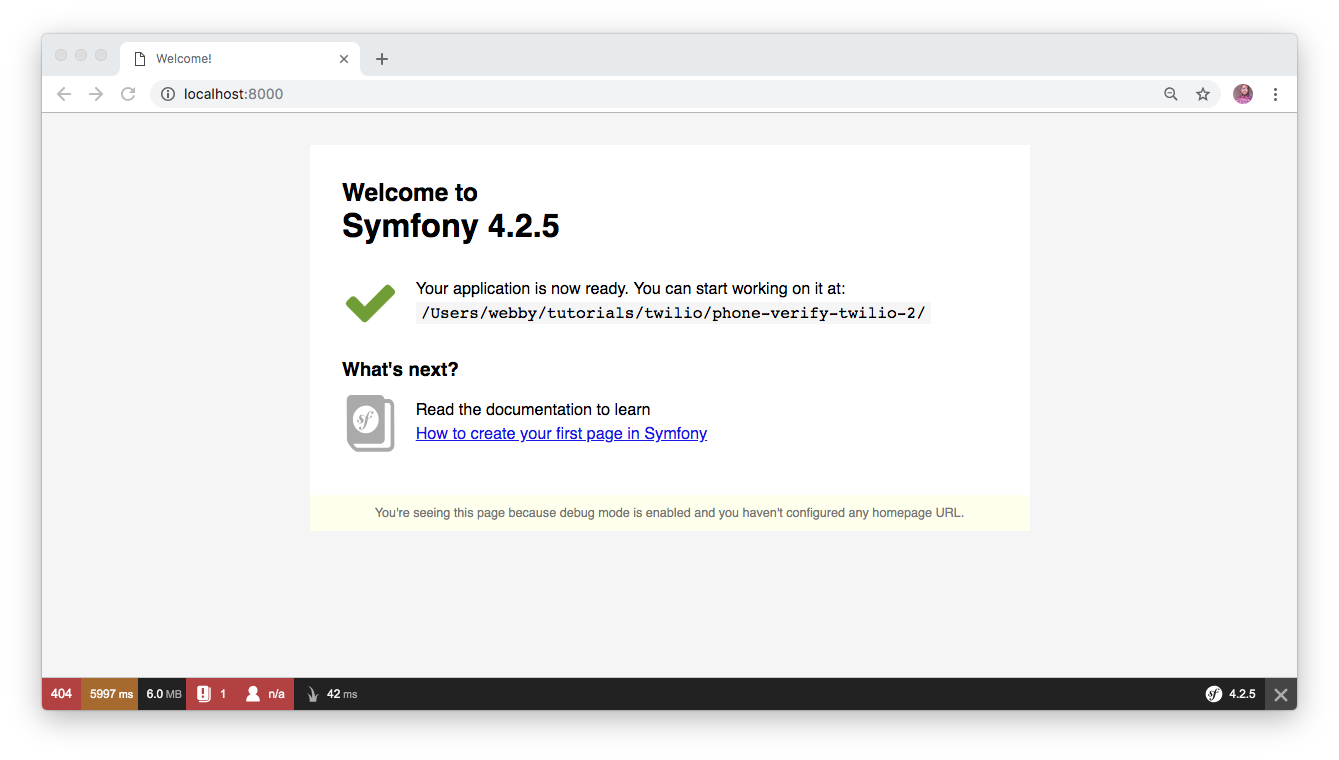
Open your browser and navigate to http://localhost:8000 to view the welcome page. The version displayed here is the current one for Symfony as at the time of writing:
Installing Other Dependencies
Next, as stated earlier we will be interacting with the Authy API by leveraging some of its awesome features for the purpose of verifying phone numbers from within our web application.
In order to give our application a proper structure and to effortlessly make an HTTP request to the Authy API, we will need to make use of the Authy PHP Helper Library. To proceed, hit CTRL + C on your keyboard in order to stop the development server and run the command below to install Authy PHP client for this project:
This will install the latest version of the tool within the project.
Twilio Account Setup
A Twilio account is required for you to have access to the APIs and other services offered by Twilio. Click here to get started with a free Twilio account.
Next, go ahead and verify your phone number and proceed to the dashboard once you are done. You will have a similar page like the one shown here:
Then, click on the All Products and Services icon and scroll down to select Authy:
From the Authy API page, click on the Get Started button and verify your phone number so you can use Authy.
Once you are done with your phone number verification, click on Applications from the sidebar. This will show you the list of all Authy applications that you have created so far. Considering that you don’t have any application created at the moment, click on the Create Application button:
Next, give your new application a friendly name. I have named mine verify-app and click on Create:
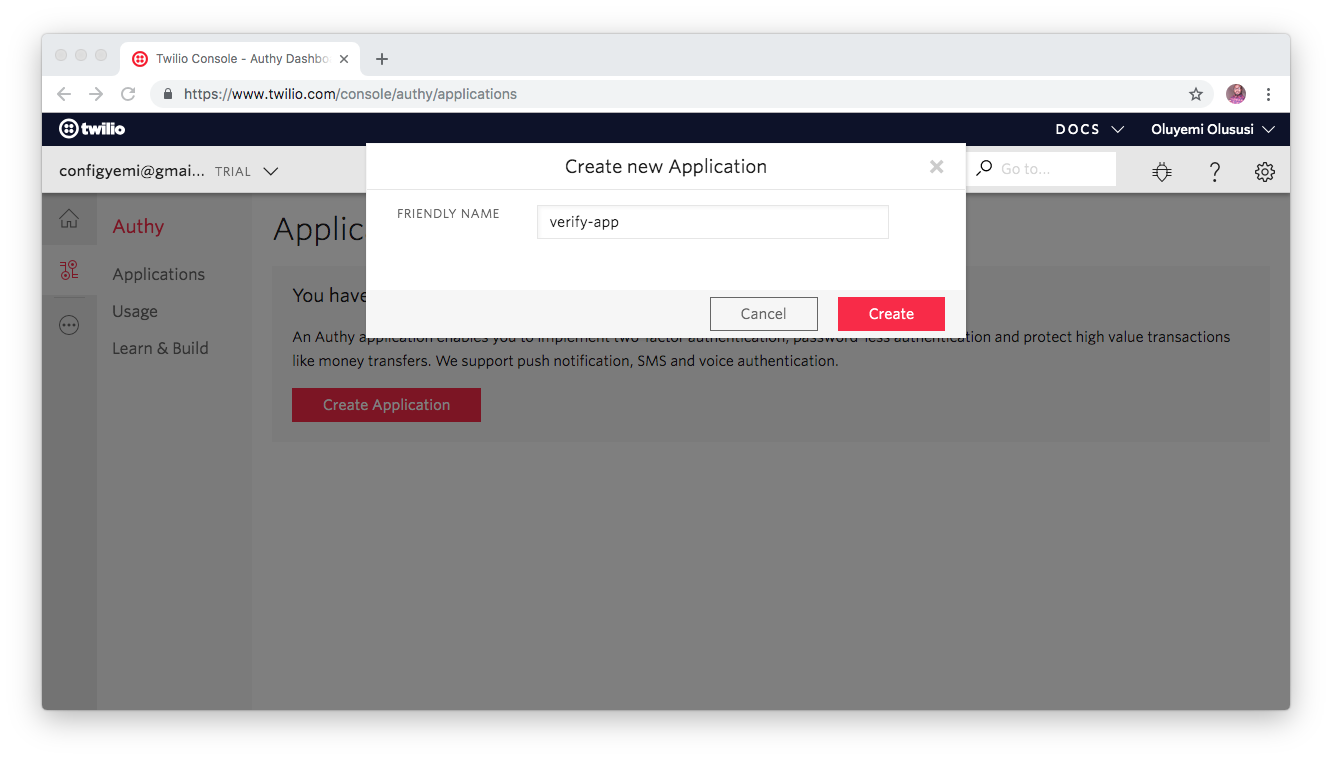
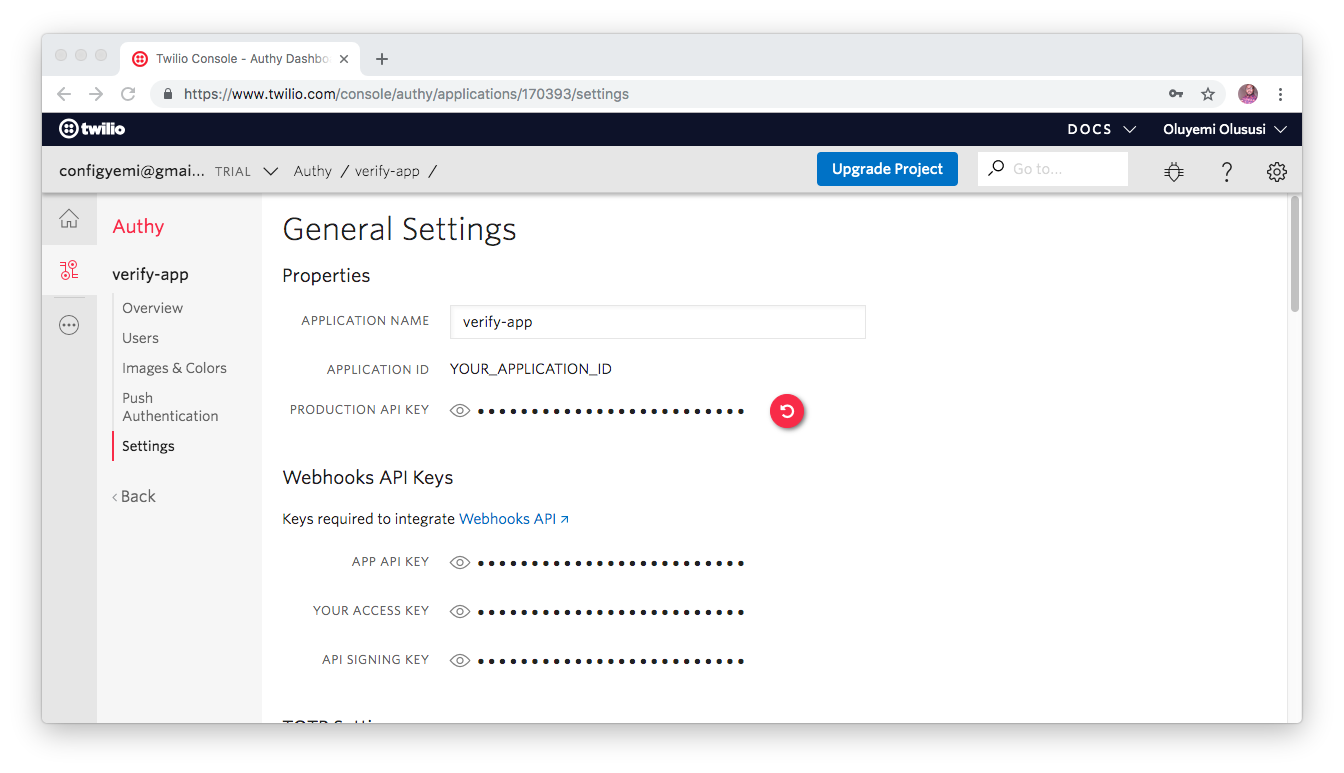
Once this process is completed, you have successfully created your Authy application with the necessary credentials required for a connection. Note, you will have to return to this page later for the API KEY.
Creating an Entity Class
During the process of registration, we intend to capture the details of any of our users and verify their phone number before proceeding to save their details in the database. Let’s begin by creating a model that represents a User. To do this, we’ll leverage the maker bundle that comes installed with Symfony to generate a new User entity. Run the following command for that purpose:
The command above will create two new files src/Entity/User.php and src/Repository/UserRepository.php. Open the User.php file and configure it like this:
Here, we have created a couple of fields for the database.
Create a DefaultController
Next, we need to generate a new controller to handle page rendering for the default page of our application. Open the terminal and run the following command:
Once this is done, you will have two new files created for you src/Controller/DefaultController.php and a corresponding view page for it in templates/default/index.html.twig. Open the DefaultController.php file and replace its content with the following:
The controller above will render the content within the default/index.html.twig file. Open template/default/index.html.twig and paste the following in it:
Generate the Security Controller
In this section, generate a new controller that will handle the login process for a user:
Open the newly created controller and replace its content with the following code:
Create the login page
Open the templates/security/index.html.twig file and configure it as shown here:
Here, we have created the necessary input fields required to authenticate a user.
Generate the RegistrationController
Generate a controller to handle user registration with:
Open src/Controller/RegistrationController.php and paste the following:
Create a Registration Page
Paste the content below for the registration page. You can find the file in the templates/registration folder:
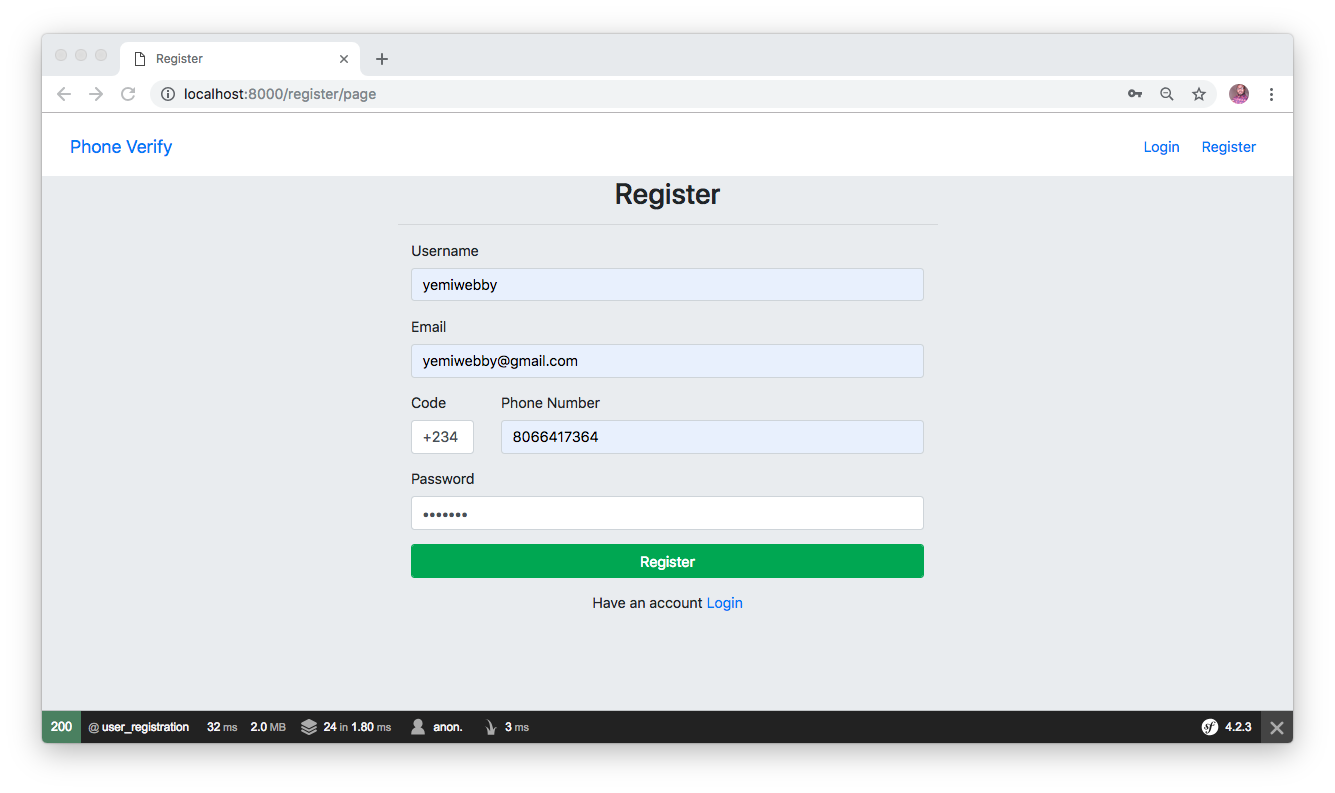
Here we have created input fields for username, email, country code, phone number, and password.
Add a Stylesheet
Create a new folder named css within the public folder, and create another file named style.css within the newly created folder. Paste the following code into the new file:
Update the Base Template
Update the base template with:
If you run the application at the moment with php bin/console server:run, you will see the page below once you navigate to http://localhost:8000:
At this point, our application is ready for users to start registering and verifying their phone number before they can access the secured areas of our application.
Update the DotEnv file
In the root directory of the project, we will update the .env file with the database credentials and also include our Twilio credentials as well. Open the file and configure it as shown below:
Note: Do not forget to replace the following with the appropriate credentials:
- db_user: Replace with your database username
- db_password: Replace with your database password
- db_name: Replace with your database name
- TWILIO_AUTHY_API_KEY: Replace with the production API key as obtained from your Authy application dashboard.
Next, run the following command php bin/console doctrine:database:create, to create a database with the value of your database name. At the moment, the database still has no tables in there. Run the following command that will instruct Doctrine to create the tables based on the User entity that we have created earlier.
Capture the User’s Phone Number and Send Verification Code
Back to the RegistrationController. Update the content with:
What we have added to the RegistrationController() is a method named registerUsers(). This method uses the HttpFoundation Component to grab the users inputs for verification purposes.
Lastly, we set the users details into session. The intention is to get these details from the session once the user’s phone number is verified and save it to the database. This will help us ensure that we populate the database only with the details of verified users.
Create HomeController and Validate Verification Code
Now, we will create a controller that will handle the verification of the user’s phone number and eventually save the details into the database. To achieve this, run the following command:
Navigate to the new file created by the command above in /src/Controller/HomeController.php and replace its content with:
We created a method to verify the code entered by users and saved it into the database.
Homepage
Also, update the index.html.twig file generated for the HomeController() with the following content:
This page will only be displayed to users once their phone number has been verified:
Create the Verify Page
Here, we will create a page where users can enter the 6-digit code they received and get the appropriate response depending on the verification status of the code. To begin, navigate to the template/home folder and create a new file named verify.html.twig and paste in it:
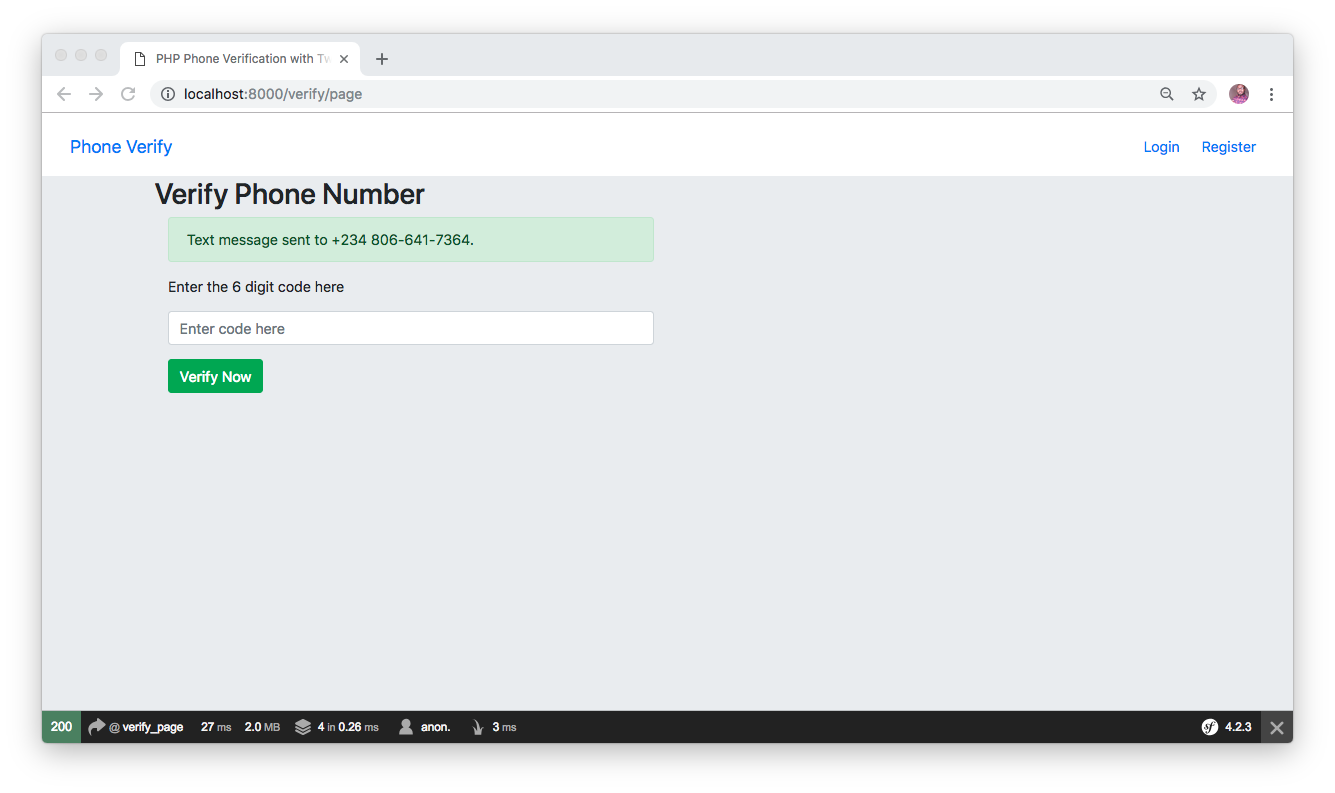
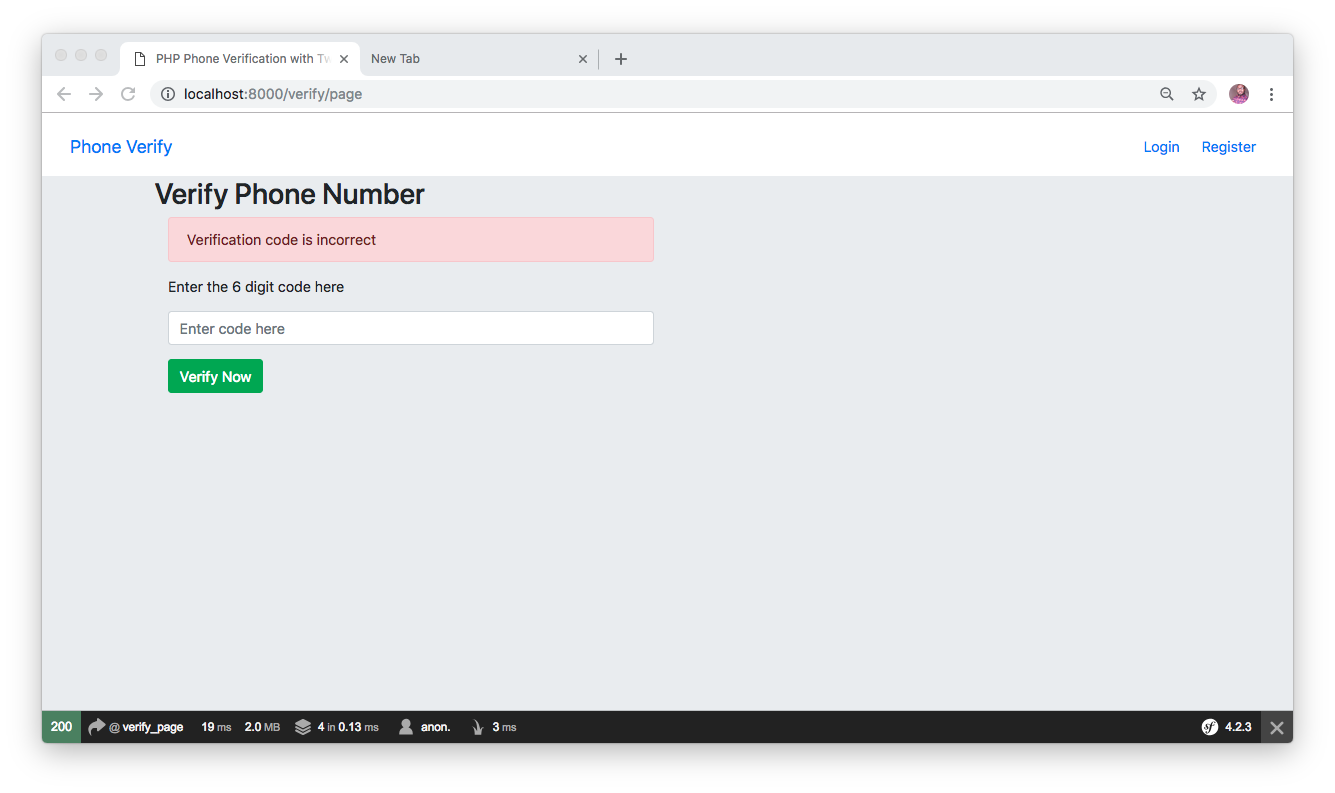
If the verification code entered by a user is wrong, then a message will be displayed as shown below:
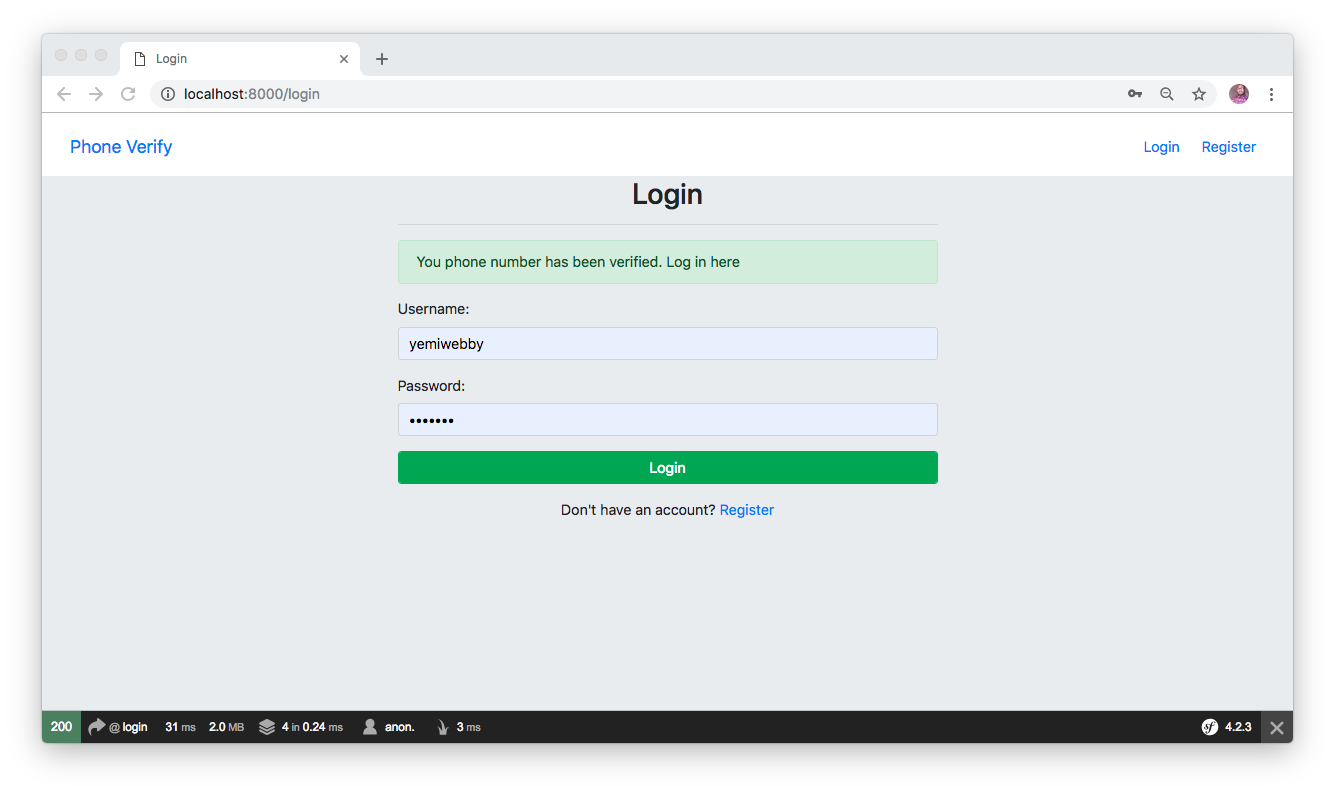
Otherwise, the user will be redirected to the login page and receive a message indicating that the phone number has been verified, and he or she can now login to view the protected page:
Update Security.yaml file
Next, update the contents of ./config/packages/security.yaml with:
Finally, add the logout route to ./config/routes.yaml file:
Testing the application
We are now ready to test the application. Don’t forget to restart the server if it isn’t running with php bin/console server:run. Next, navigate to http://localhost:8000 and try the application by registering a user:
Conclusion
In this tutorial, we have learned how to set up a new Symfony project and restructure our application to capture a user’s phone number, ensuring that the phone number is verified before the details of such user can be saved into our database. Thanks to Twilio’s Authy API, we can now have users with verified phone numbers in our application.
Please note that the registration flow implemented in this tutorial can also be implemented for an existing project or a new one as shown here.
I hope you found this tutorial helpful. Feel free to explore the source code here on GitHub and don’t hesitate to visit the official documentation of Twilio to view more details about Authy API and other resources.
Olususi Oluyemi is a tech enthusiast, programming freak and a web development junkie who loves to embrace new technology.
Twitter: https://twitter.com/yemiwebby
GitHub: https://github.com/yemiwebby
Website: https://yemiwebby.com.ng/
Related Posts
Related Resources
Twilio Docs
From APIs to SDKs to sample apps
API reference documentation, SDKs, helper libraries, quickstarts, and tutorials for your language and platform.
Resource Center
The latest ebooks, industry reports, and webinars
Learn from customer engagement experts to improve your own communication.
Ahoy
Twilio's developer community hub
Best practices, code samples, and inspiration to build communications and digital engagement experiences.


