How to Validate Twilio Event Streams Webhooks in Java
Time to read:
September 06, 2024
Written by
Reviewed by
How to Validate Twilio Event Streams Webhooks in Java
One of Twilio's stand out features is its Event Streams Webhooks. These are HTTP requests where the body of each webhook is a JSON array of CloudEvents. They let your application know when specific events happen, such as receiving an SMS message or receiving an incoming phone call.
The requests include details of the event, such as the incoming phone number or the body of an incoming message. With that information, your application can become extremely flexible and powerful.
However, like all application input — regardless of its source — you must validate it! The same goes for Event Streams Webhooks.
Gladly, Twilio makes this pretty trivial, as each webhook request is signed; supplied in the X-Twilio-Signature header. The signature, in combination with your account's Auth Token and the body of the webhook, can be used to verify that the request came from Twilio.
In this short tutorial, you're going to learn how to do just that. Sounds interesting? Then let's begin.
Prerequisites
To follow along with this tutorial, you'll need the following:
- A recent version of OpenJDK such as 22 (the latest version at the time of writing)
- Maven installed globally
- ngrok and an an ngrok account (whether free or paid)
- A Twilio account (either free or paid). If you are new to Twilio, click here to create a free account
- WhatsApp on your mobile or WhatsApp Web
- Your preferred text editor or IDE for Java development
- Your preferred web browser
Create the core of the project
The first thing to do is to create a boilerplate Java project. To save time, we're going to use Spring Initializr, as it takes care of the tedious aspects, such as creating the base file and directory structure, integrating a build tool, and setting the Java version.
In your browser of choice, open https://start.spring.io/, which you can see in the screenshot above. Then, check that:
- Language is set to "Java"
- Spring Boot version is set to "3.3.3" (or the latest stable version)
- Packaging is set to "Jar"; and
- Java is set to "22" (or the latest stable version)
Then, set Group to "com.example", Artifact to "ValidateWebhooks", and description to whatever you prefer. After that, click GENERATE to generate and download a project archive, which will be named ValidateWebhooks.zip.
Then, uncompress the archive wherever you store your Java projects and open it in your preferred text editor or IDE.
Add the required dependencies
The next thing to do is to add the additional dependencies which the application needs. These are:
- Twilio's Java Helper Library: This simplifies interacting with Twilio's APIs and related functionality, such as request validation
- Jakarta Servlet: This adds extra functionality to Spring apps for handling HTTP requests and responses
- spring-dotenv: This is a Dotenv property source for Spring applications
To install them all, open pom.xml in the project's top-level directory and add the following XML at the end of the dependencies element:
After that, add the following to the properties element:
Then, either use the Maven tooling in your text editor or IDE to download the dependencies to your classpath, or run the following command in the terminal in the project's top-level directory.
Add the ability to validate webhooks
Now, it's time to write Java code. Gladly, there's very little to write. Replace the existing code in src/main/java/com/example /ValidateWebhooks/ValidateWebhooksApplication.java with the following.
The code is the core of the Spring application, and provides a single RESTRest route (/webhook), accessible using HTTP POST. The route builds the request URL using a combination of the base URL defined in publicUrl (which will be defined shortly), the route's path (/webhook), and the request's query string. Then, it retrieves the supplied signature from the X-Twilio-Signature header and the request's body to verify the request.
Make the application publicly accessible on the internet
So that Twilio can send a webhook request to the Java app when it's running on your local development machine (and so that you can define publicUrl, required to validate the request signature) you need to make the app publicly accessible.
To do that, we'll have ngrok create a secure tunnel to it by running the following command.
You should now see output similar to the following in the terminal.
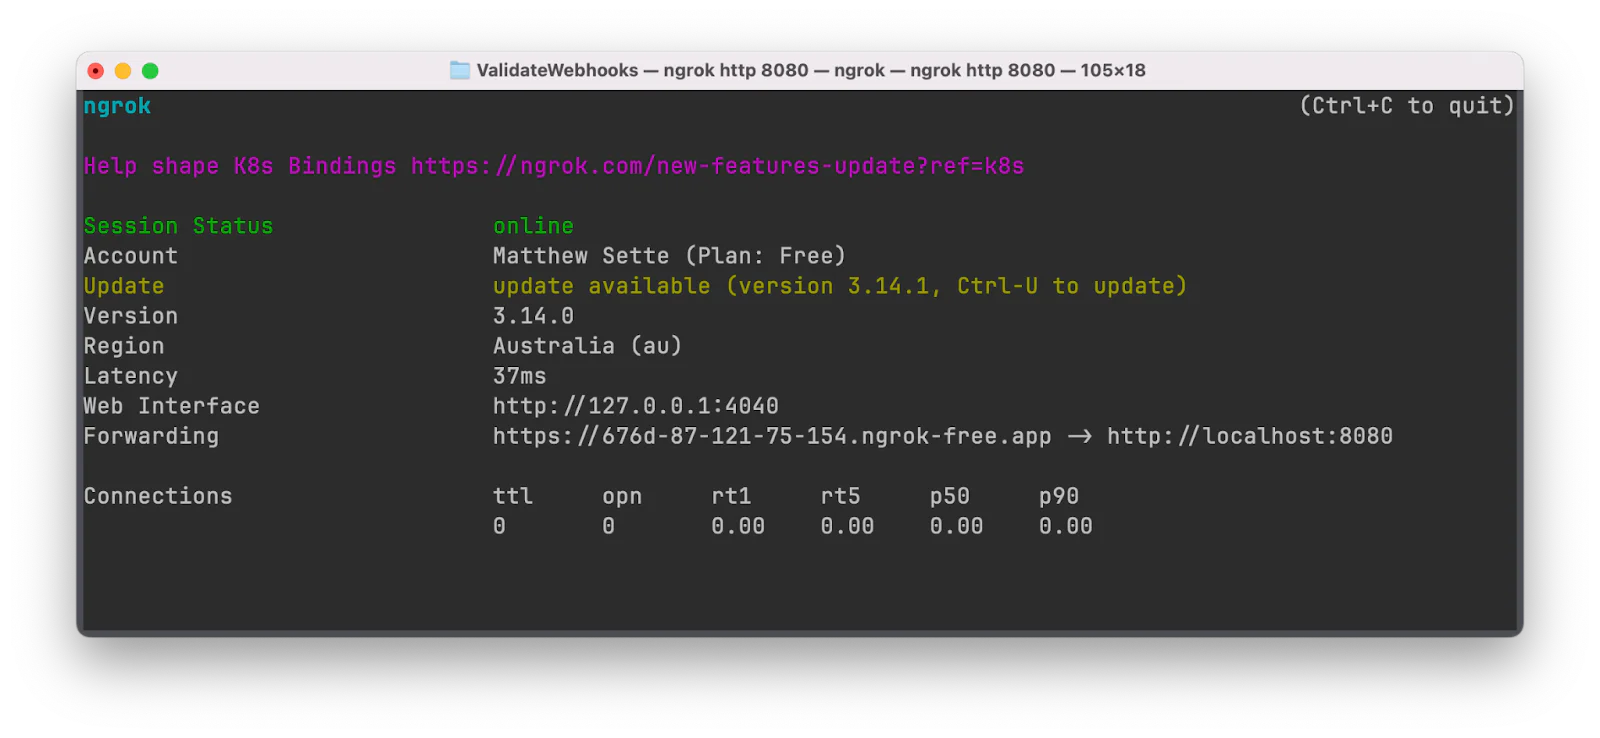
Take note of the Forwarding URL, as you'll need it in just a moment.
Set the required environment variables
The next thing to do is to set the two required environment variables. These are:
PUBLIC_URL: This is the Forwarding URL generated by ngrok.TWILIO_AUTH_TOKEN: This is your Twilio Auth Token, which you'll retrieve from the Twilio Console in just a moment.
In the project's top-level directory, create a new file named .env. Then, in the file, paste the configuration below.
Then, replace <PUBLIC_URL> with the ngrok-generated Forwarding URL (e.g., https://1149f39616c5.ngrok.app). After that, in your Twilio Console's Account Dashboard, copy your Auth Token and paste it into .env in place of <TWILIO_AUTH_TOKEN>.

Finally, in src/main/resources/application.properties, add the following at the end of the properties file.
Create a Sink Resource
The next step is to create a Sink resource representing your server’s endpoint. Technically, these are:
the destinations to which events selected in a subscription will be delivered
For the purposes of this application, it's also a quick and easy way to send event streams to our application, which we can then validate.
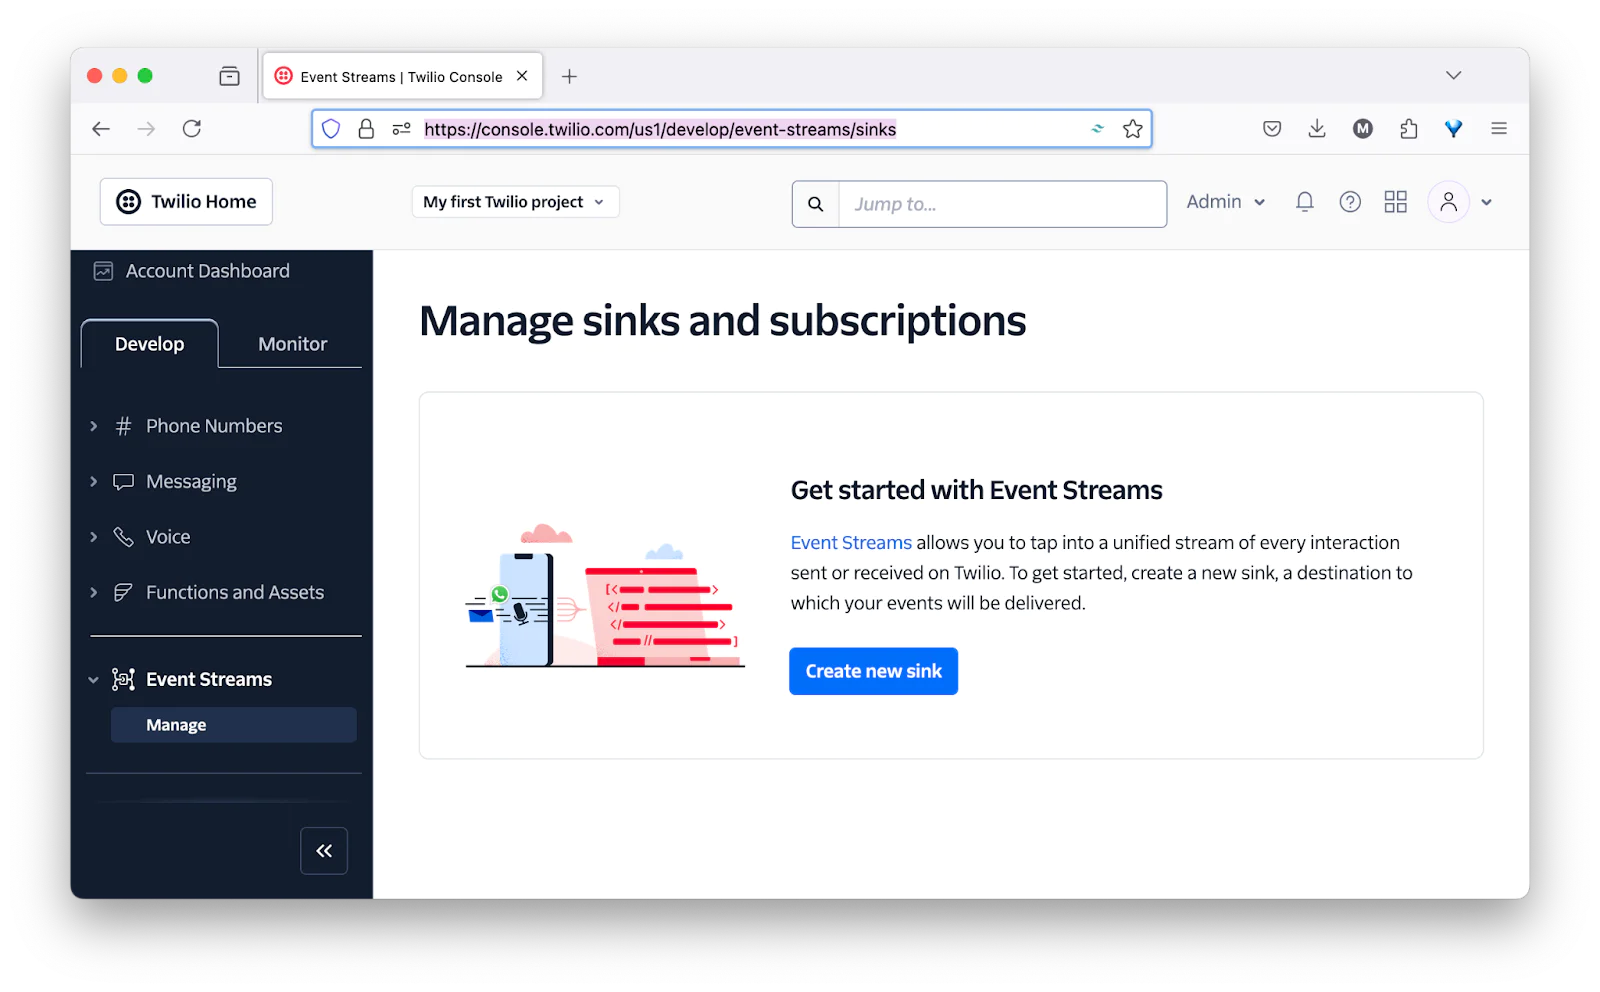
To create one, in the Twilio Console, navigate to Explore Products > Developer Tools (right near the bottom of the page) > Event Streams. There, click "Create new sink" to start the process.
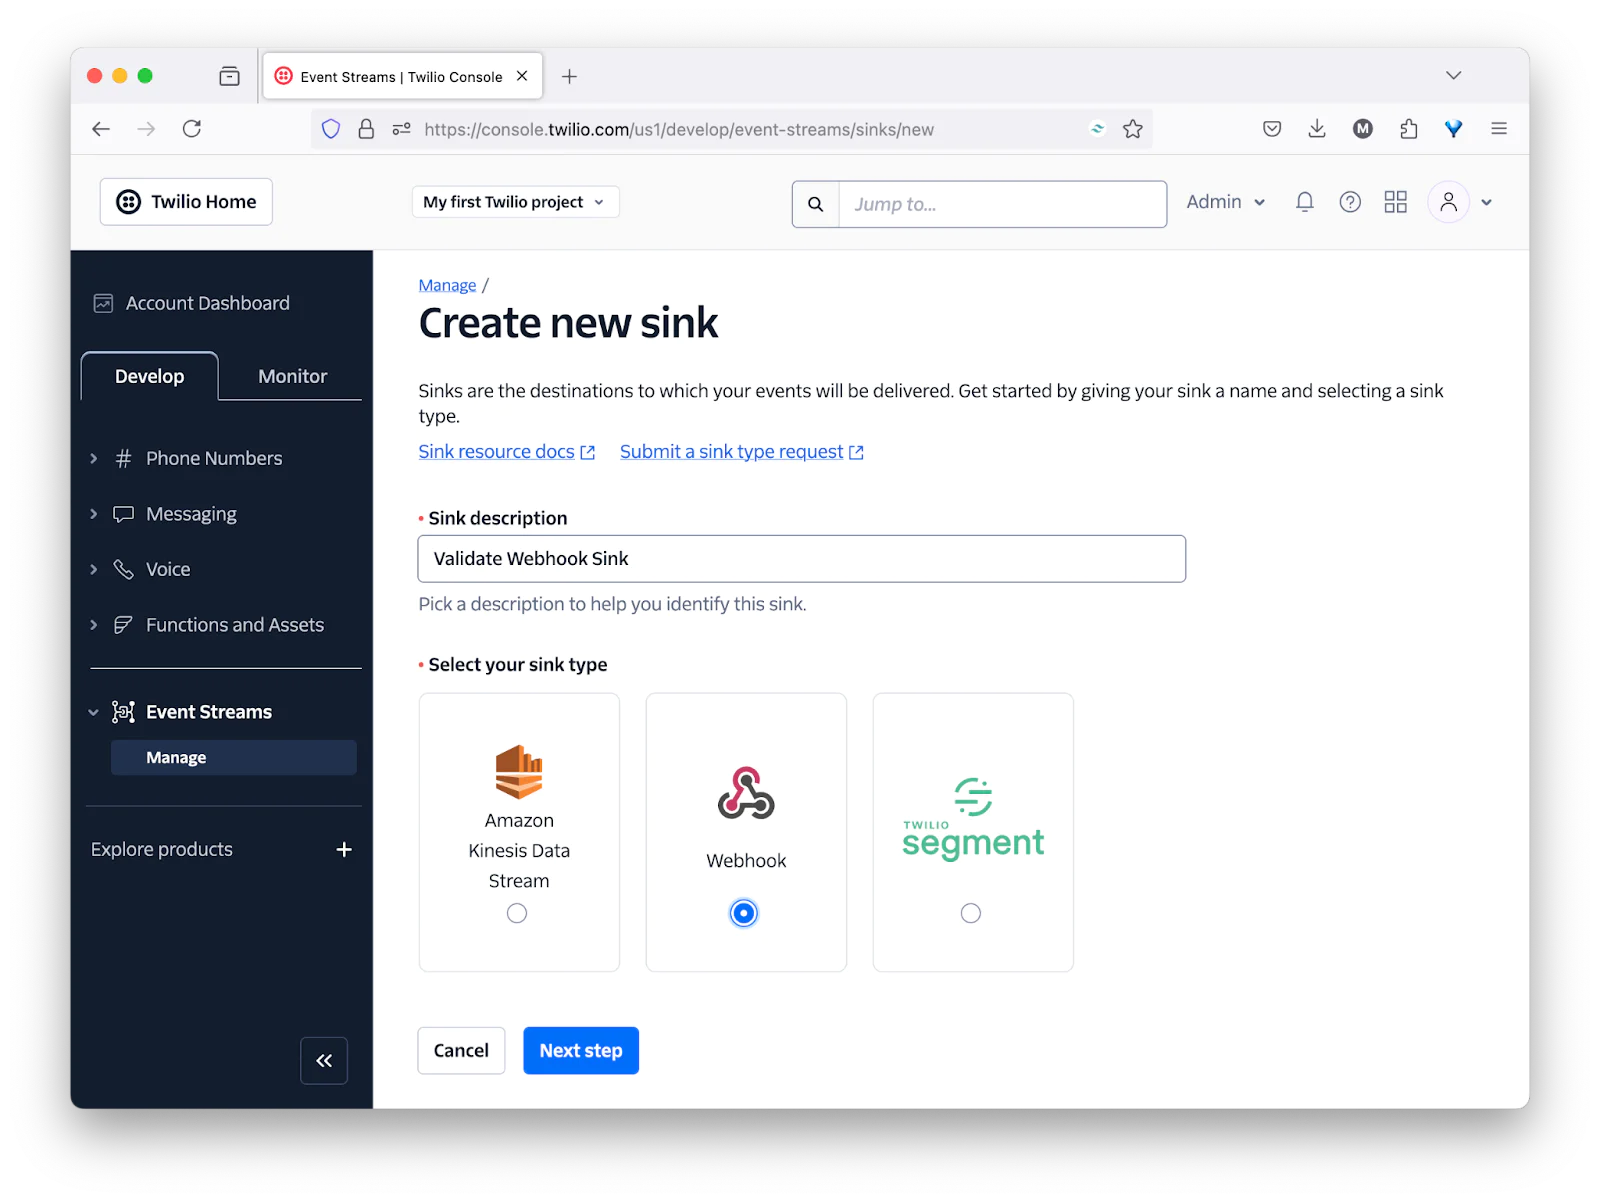
Then, set Sink description to "Validate Webhook Sink", set sink type to "Webhook", and click " Next step".
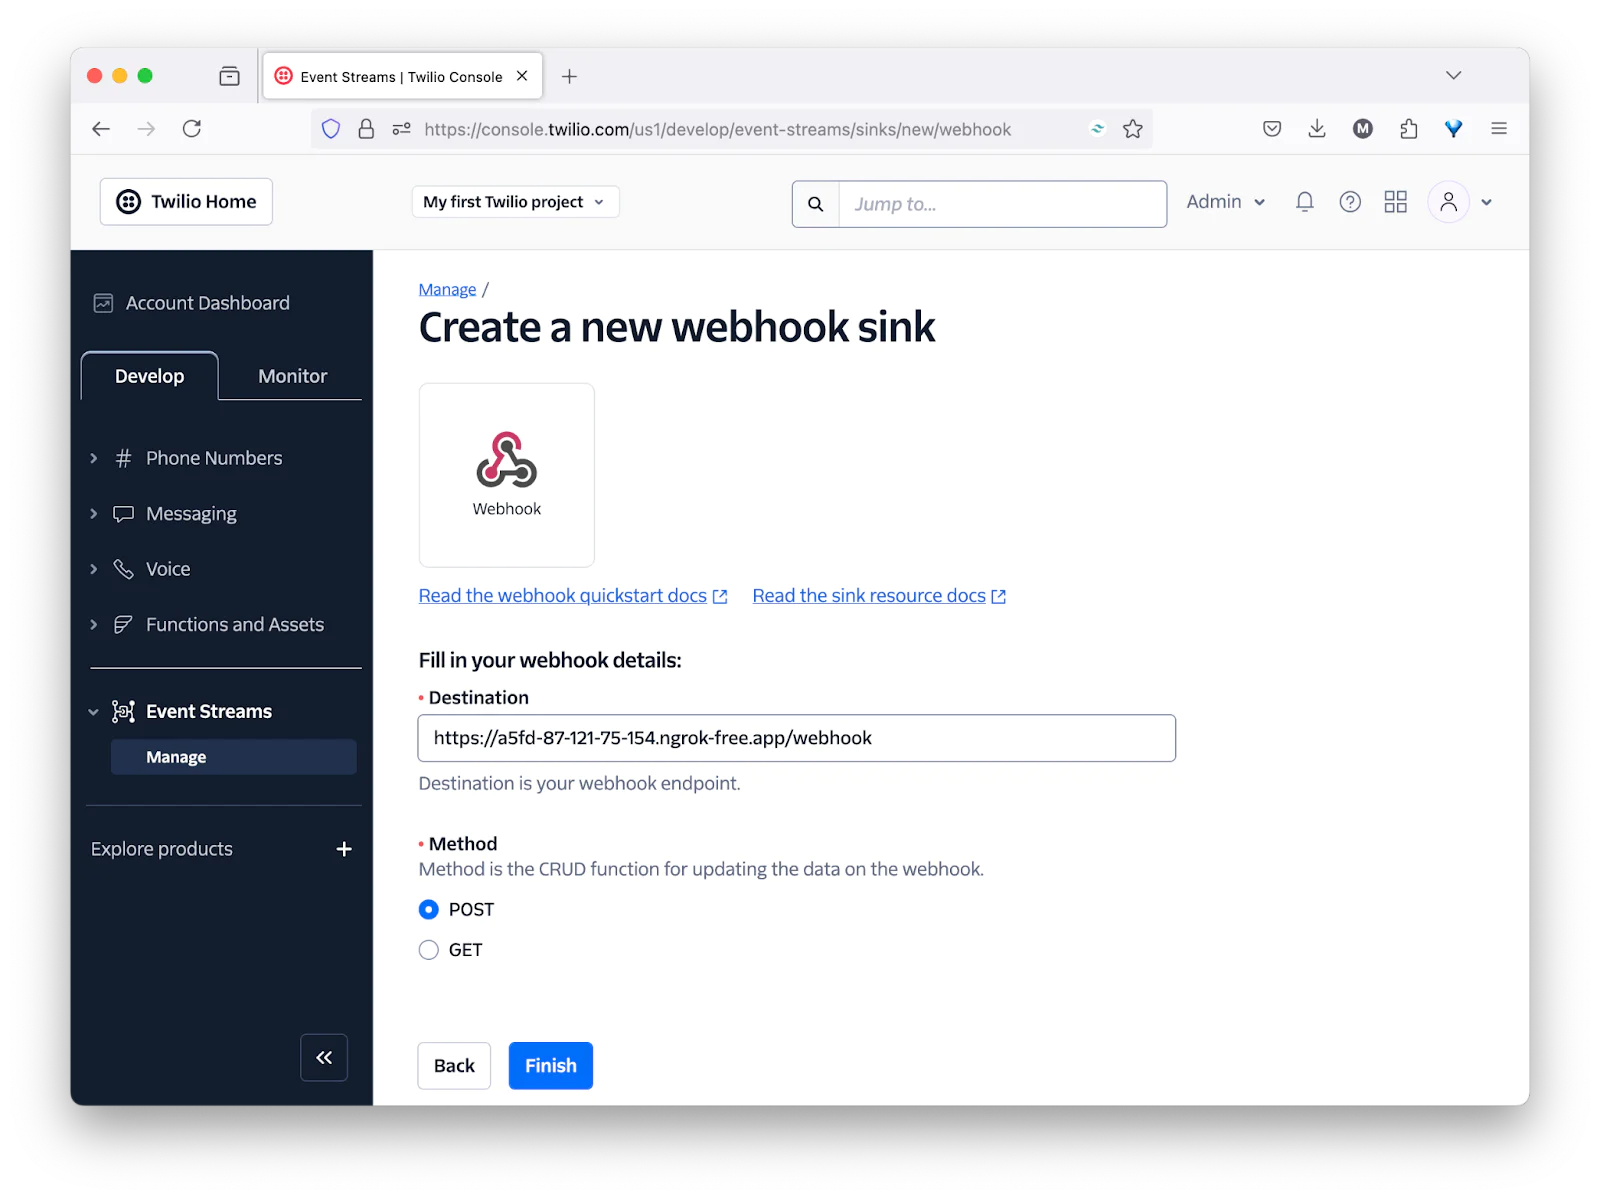
After that:
- Set Destination to the Forwarding URL printed by ngrok earlier and add "/webhook" at the end
- Leave Method set to "POST"
- Click Finish
Then, in the confirmation popup that appears, click "View Sink Details", taking you to the sink's properties page.
Test the application
You now have everything ready, so it's time to test the application. First, though, we have to start the application by running the command below.
This starts packages the application as a Jar and uses the embedded Tomcat HTTP server to run it, listening on port 8080.
Now, back in the Twilio Console, on the Sink resource's properties page, click "Send test event". Then, back in your terminal, you should see output similar to the following printed to the terminal if the webhook validated successfully:
If validation fails, you'll see "Invalid signature. Event discarded." instead.
Subscribe to incoming messages
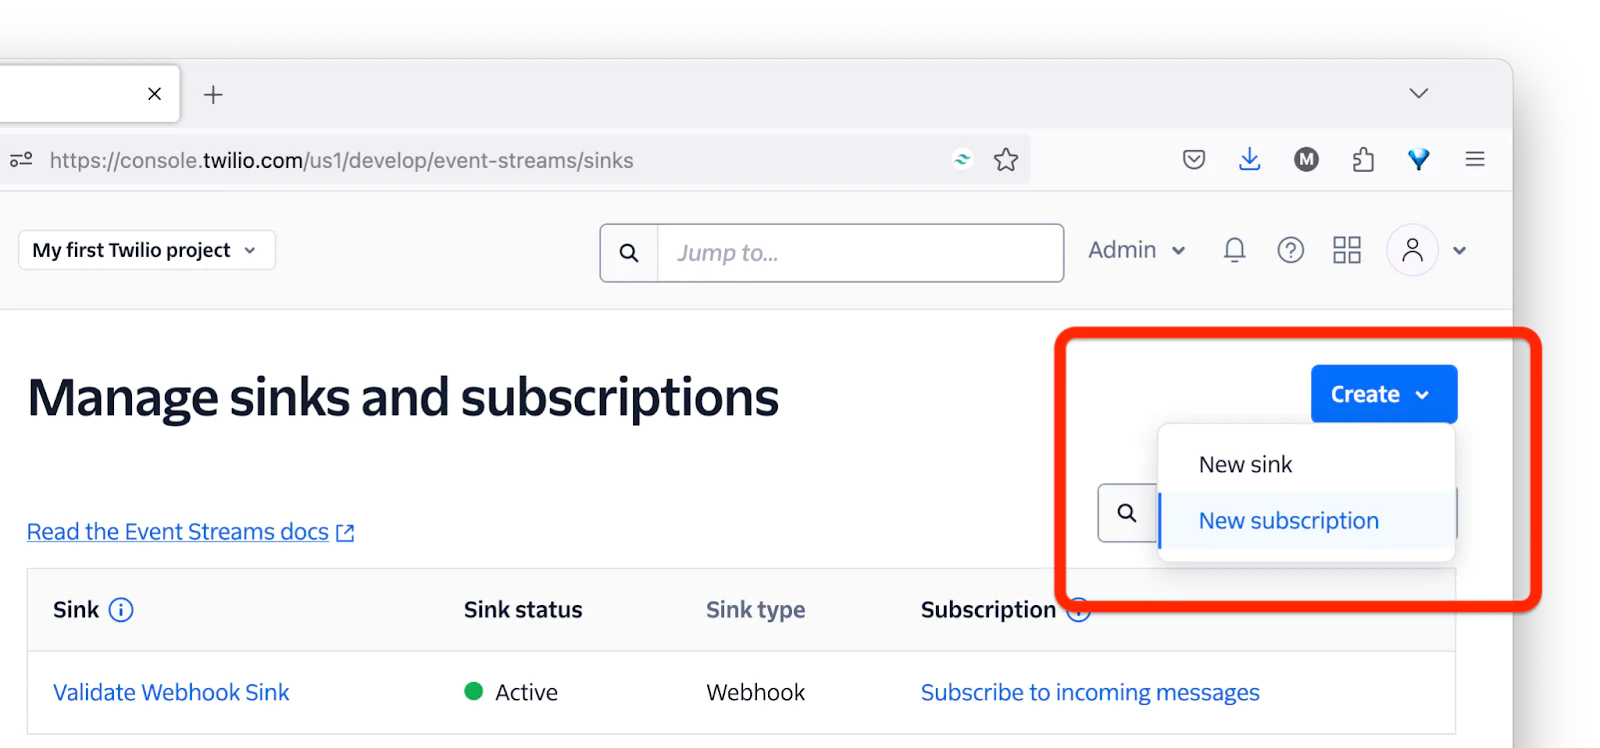
Finally, let's subscribe to an event so that you can see the application responding as it normally would in production. To do that, back in the Twilio Console, under Explore Products > Developers > Event Streams, click Create in the top right corner, then click New subscription.
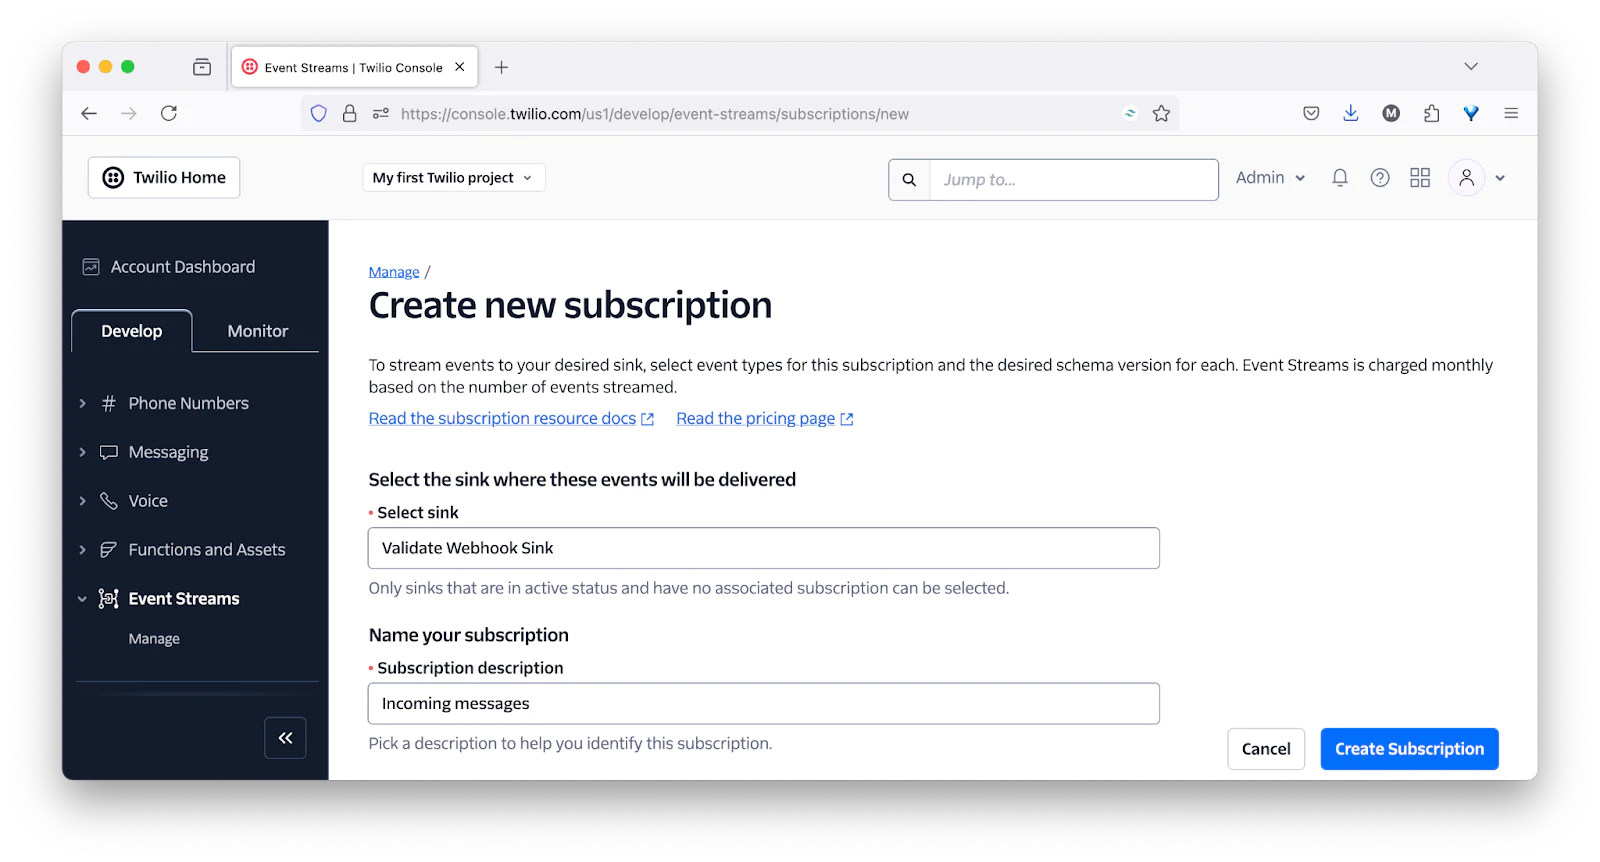
Then, in the Create new subscription form, select "Validate Webhook Sink" from the Select sink dropdown, and add a description for the subscription, in the Subscription description field, as in the screenshot below.
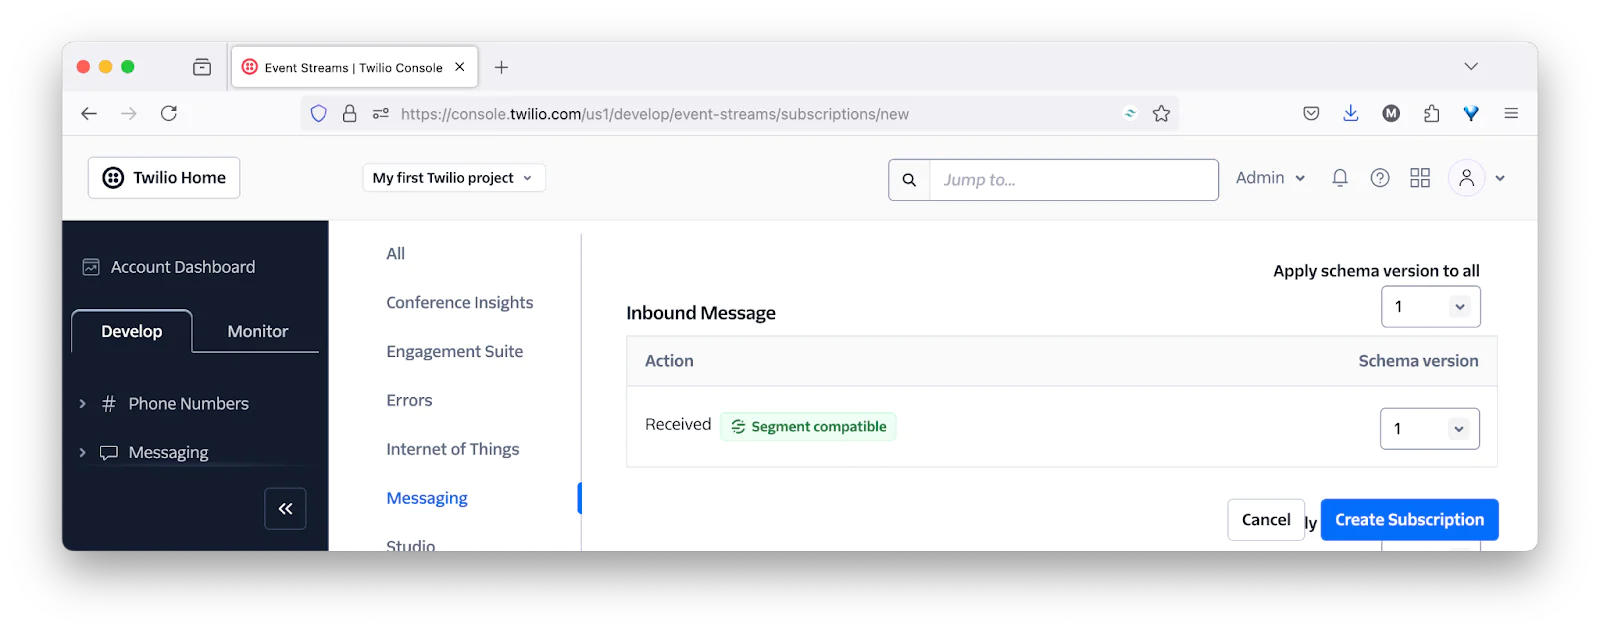
Then, scroll down to the Product groups section, click Messaging in the left-hand navigation menu, and under Messaging, scroll down to Inbound Message. There, under Action, you'll see Received. On its far right-hand side, set the dropdown to "1". Then, click Create Subscription in the bottom right-hand corner of the page.
Test the subscription
Now, let's test that the subscription works. Back in the Twilio Console, navigate to Explore Products > Messaging > Try it out > Send a Whatsapp message. There, first, follow the instructions to connect to the WhatsApp Sandbox.
After you've done that, with WhatsApp, send a message to your Twilio number. In your log file, you should see three log entries. The first should be "Valid signature. Processing event.".
The second should be "Event received" along with the event's details (an example of which you can see below, formatted for readability). The third should be "Request headers", along with a list of the request's headers.
That's how to validate Twilio webhooks in Java
There's not a lot to it, but it's still an essential task, as no input external to your application should ever be trusted.
Matthew Setter is a PHP and Go editor in the Twilio Voices team, and a PHP and Go developer. He’s also the author of Mezzio Essentials and Deploy With Docker Compose. You can find him at msetter[at]twilio.com. He's also available on LinkedIn and GitHub.

Related Resources
Twilio Docs
From APIs to SDKs to sample apps
API reference documentation, SDKs, helper libraries, quickstarts, and tutorials for your language and platform.
Resource Center
The latest ebooks, industry reports, and webinars
Learn from customer engagement experts to improve your own communication.
Ahoy
Twilio's developer community hub
Best practices, code samples, and inspiration to build communications and digital engagement experiences.