Understanding Database Transactions with Postgres and Twilio
Time to read:
August 22, 2024
Written by
Reviewed by
Understanding Database Transactions with Postgres and Twilio
When working with databases, maintaining data integrity is paramount. This ensures that your information is accurate, consistent, and reflects the real state of your system. Database transactions play a vital role in achieving this goal.
Transactions group a series of database operations into a single unit. These operations are either all successful or they need to be applied. This ensures that your data remains consistent, even in case of errors or unexpected interruptions.
This blog post dives into the world of database transactions using PostgreSQL, a powerful and popular open-source relational database management system. We'll explore the ACID properties that define a successful transaction, understand how PostgreSQL implements transactions, and see how this integrates with Twilio for secure user authentication and database updates with error handling.
Prerequisites
Here are what you need to follow along in this tutorial
- Node.js installed
- A free Twilio account ( sign up with Twilio for free).
- A PostgreSQL server (locally or live) or Docker/ docker-compose is installed in your local machine.
- Install Ngrok and make sure it’s authenticated.
ACID properties of transactions
The concept of database transactions revolves around the ACID properties, which stand for:
- Atomicity: This ensures that all operations within a transaction are treated as a single unit. Either all operations succeed, or none of them are applied. This prevents partial updates that could leave your data in an inconsistent state. Imagine a bank transfer scenario. You wouldn't want the funds to be deducted from the sender's account without them being credited to the receiver's account, right? Atomicity guarantees this all-or-nothing behavior in database transactions.
- Consistency: A transaction must transform the database from one valid state to another. This means it adheres to all the defined data constraints and business rules. Think of a product inventory system. A transaction updating the stock level after a purchase should ensure the new quantity doesn't fall below zero (violating a data constraint) and reflects the actual number of items available. Consistency maintains the validity of your data throughout transactions.
- Isolation: Transactions are isolated from each other, ensuring that the operations within one transaction don't interfere with the operations in another concurrent transaction. This prevents data corruption and unexpected results. Multiple users might be updating the same data simultaneously in a database. Isolation ensures each transaction "sees" a consistent view of the data, preventing conflicts and ensuring data integrity.
- Durability: Once a transaction is committed (marked as successful), the changes are permanent and persist even in case of a system failure or crash. Durability guarantees that successful transactions are etched into the database's storage, ensuring data isn't lost even if the system encounters an unexpected issue.
Transactions in PostgreSQL
PostgreSQL implements transactions using three key statements: BEGIN, COMMIT, and ROLLBACK. These statements ensure the Atomicity, Consistency, Isolation, and Durability (ACID) properties of transactions, which are fundamental for maintaining data integrity. Let's delve deeper into each statement and understand their roles in database operations.
BEGIN: Marking the start of a transaction
The BEGIN statement acts as a starting point for a new transaction. Any database operations executed after BEGIN become part of that specific transaction. Imagine it as a flag that signals the database to group subsequent operations into a single unit. Here's a breakdown of the
BEGIN statement:
- Syntax: BEGIN; (the semicolon is mandatory)
- Purpose: Initiates a new transaction.
- Effect: All SQL statements following BEGIN are considered part of the transaction until it's explicitly committed or rolled back.
Example:
COMMIT: Finalizing a successful transaction
The COMMIT statement signifies the successful completion of a transaction. It instructs the database to permanently apply all changes made within the transaction. Think of it as a confirmation button, ensuring the database persists in the modifications initiated by BEGIN. Here's a breakdown of the COMMIT statement:
- Syntax: COMMIT; (the semicolon is mandatory)
- Purpose: Finalizes a transaction and makes the changes permanent in the database.
- Effect: After COMMIT, the changes become visible to other users and applications interacting with the database.
Example:
ROLLBACK: Undoing unsuccessful transactions
The ROLLBACK statement serves as a safety net in case of errors or unexpected issues during a transaction. It instructs the database to undo all changes made within the transaction, essentially reverting to the state before the BEGIN statement was executed.
Imagine ROLLBACK as an emergency brake. If any operation within the transaction fails due to constraint violations, data inconsistencies, or other errors, ROLLBACK ensures the database remains in a consistent state by reversing all modifications. Here's a breakdown of the ROLLBACK statement:
- Syntax: ROLLBACK; (the semicolon is mandatory)
- Purpose: Cancels a transaction and undoes all changes made within it.
- Effect: The database reverts to the state it was in before the BEGIN statement for the current transaction.
Example:
In conclusion, the BEGIN, COMMIT, and ROLLBACK statements are the cornerstones of managing transactions in PostgreSQL. They ensure data integrity by guaranteeing the ACID properties and providing a mechanism to handle successful and unsuccessful database operations. By understanding their roles, you can effectively implement transactions within your PostgreSQL applications, safeguarding the consistency and reliability of your data
Use case with Twilio integration
Setting up Twilio account
To set up your Twilio account, sign up for an account and login into your Twilio Console using your account details. From the toolbar's Account menu, select API Keys and Tokens. Take note of your test credentials as shown in the photo below, which include the Account SID and Auth Token, you will use them later in your application.

Setting up Twilio Verify service
To complete the setup process, access your Twilio Console dashboard and navigate to the Verify service from the sidebar. To access the service, add it from the Explore Products option on the sidebar if it is not there already. In the Verify option, click Services and you will see the option to create a new one from the resulting screen as shown below. You will see the options to select the messaging channels you want the Verify service to use. This tutorial uses SMS channel.

If you are using a trial version of Twilio, you will need to add verified phone numbers to your console. Twilio can only send SMS to verified phone numbers for accounts on free trial. You can add it from the Phone Numbers option on the sidebar as seen in the image below:

Setting up the app
The API we will use in this guide is a simple user authentication API that allows users to create an account, verify it using OTP, and log in. To get the project running on our local machine, you can follow these steps:
Navigate to your terminal and clone the project from the GitHub repository by running the following command:
Make sure you are in the starter branch and then run the installation script within the project directory to install the needed packages:
Next, you will set up your environment variables for the application to run successfully. Create a .env file and copy the data in the .env.example file to it. Add your Twilio credentials obtained from the previous setup to the .env file and if you have a database server already, also add the credentials.
To set up the database connection, I am using the official docker image for Postgres for the server and also the pg-admin image to visualize the database activities. If you have your database server (local or live), you can skip the next step and fill your env with the database credentials.
The starter code already has a docker-compose.yml file where we define the containers we want to run. To fire up these containers, run the command below:
To confirm the container images are up and running, you can check with this command below:
Once your container images are running, you can copy the database credential from the .env.example to the .env you created. They are test credentials for a test database for this tutorial.
You can now access the pg-admin GUI on port 5050 of your local server as shown below:

The next step is to start the project. The starter code is designed to create a user table for your database server when you run it. You do not need to do any extra work of creating the table. To start the project run the command below:
Adding the endpoint logic
At this stage, the app is running correctly with your database server and Twilio connected. You will add the logic for each of the endpoints to demonstrate how database transaction works.
Signup logic
The code above accepts email, phone number, and password from the request body and uses it to create a user record in the database. Here are key things to note in the logic:
- The client variable spins up a database pool connection for the endpoint to use.
- The transaction is started with the BEGIN command for SQL to know that this is a transaction query.
- The query to check if the user already exists is executed and if there is a user with the same email, the ROLLBACK will be called and the transaction will be rolled back.
- If there is no existing user, the password is hashed and the new user is created using the INSERT command and an OTP is created for verification later.
- The twilioClient is used to send the OTP to the user's phone number and if there is any error, the catch block will get it and call the ROLLBACK command to roll back the transaction and nothing is written to the database.
- If the Twilio message is sent successfully, the transaction is committed to the database using the COMMIT command, and a successful response is returned.
- Finally, the database client pool is closed as the operation has finished.
Verify logic
The code above accepts phone, and code (OTP) from the request body and uses it to verify a user record in the database. Here are key things to note in the logic:
- The client variable spins up a database pool connection for the endpoint to use.
- The transaction is started with the BEGIN command for SQL to know that this is a transaction query.
- The query to check if a user with the phone number exists is executed and if there is no user with the same phone number, the ROLLBACK will be called and the transaction will be rolled back.
- If there is an existing user, the code from the request is matched with the OTP in the database, if there is no match, the transaction calls ROLLBACK and the endpoint returns an error response
- If there is a match with the code from the request, an UPDATE query is performed to make the otp column in the database null as it has been verified and is no longer needed. It also updates the isVerified field to true.
- The transaction is committed with the COMMIT command and a successful response is returned. If there should be any error before COMMIT is called, the catch block catches it and the transaction is rolled back.
- Finally, the database client pool is closed as the operation has finished.
Login logic
The code above accepts email, and password from the request body and uses it to log in as a user. Here are key things to note in the logic:
- The client variable spins up a database pool connection for the endpoint to use.
- Transaction is not used here as this query does not write to the database. It only reads to confirm the user exists and is verified.
- The query to get the user record is done using the SELECT command. If the user’s email does not exist, it returns an error response.
- If the user’s email exists, it checks the password’s validity. If the password does not match the one in the database, it will return an error response.
- When both the email and the password are correct, sensitive data is removed before returning the successful response.
- Finally, the database client pool is closed as the operation has finished.
Testing the app
Your app is now ready for testing. You can start the local development server by running this command if your server is not running at this point:
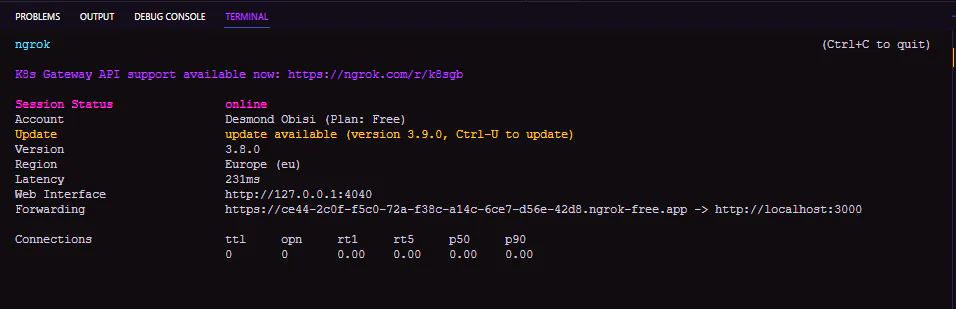
Once the app runs, you can access it at http://localhost:3000. To make sure it works well in a live environment, you will use ngrok to generate a live server for your app by running this command.
A live server will be created by ngrok as a proxy to your localhost server as shown below:
With the ngrok live server, you can create users, verify them, and log in to the application using tools like Postman or other alternatives for API queries. This demo video shows how to use Postman to test the APIs.
Benefits of using transactions
Transactions offer several advantages for maintaining data integrity and preventing errors in your database applications:
- Ensured data consistency: Transactions guarantee that your database remains in a valid state by ensuring all operations within a transaction succeed or fail together. This prevents partial updates and inconsistencies.
- Improved error handling: Transactions allow you to define clear rollback points in case of errors. This helps you revert to a known consistent state and prevents corrupt data.
- Simplified complex operations: Transactions can simplify complex database operations involving multiple inserts, updates, and deletes. They ensure that all these operations are treated as a single unit, improving data integrity and reducing the risk of errors.
For instance, imagine an e-commerce transaction where you're placing an order. A single transaction might involve updating the product inventory, adding the order details to a table, and deducting the amount from the customer's account. Transactions ensure all these operations happen successfully or none of them do, preventing inconsistencies like an order confirmation without sufficient stock
Conclusion
This blog post has equipped you with a solid foundation for understanding database transactions in PostgreSQL. We explored the ACID properties that guarantee data integrity, unpacked the functionalities of BEGIN, COMMIT, and ROLLBACK statements, and witnessed how they work in concert to safeguard data consistency.
By effectively implementing transactions within your PostgreSQL applications, you can ensure that your data remains accurate, reliable, and reflects the true state of your system. In the world of web applications, transactions play a crucial role in maintaining data integrity, especially when integrating with external services like Twilio.
You can learn more about transactions by referring to:
Desmond Obisi is a software engineer and a technical writer who loves doing developer experience engineering. He’s very invested in building products and providing the best experience to users through documentation, guides, building relations, and strategies around products. He can be reached on Twitter , LinkedIn, or through email at desmond.obisi.g20@gmail.com.


Related Resources
Twilio Docs
From APIs to SDKs to sample apps
API reference documentation, SDKs, helper libraries, quickstarts, and tutorials for your language and platform.
Resource Center
The latest ebooks, industry reports, and webinars
Learn from customer engagement experts to improve your own communication.
Ahoy
Twilio's developer community hub
Best practices, code samples, and inspiration to build communications and digital engagement experiences.