How to Send Translated Messages with Google and Django
Time to read: 11 minutes
July 26, 2024
Written by
Reviewed by
The world has increasingly become connected, and you might have friends from various regions around the globe. You will want to call them, leave automated voice messages, or send emails to them. This, however, might be a challenge if you don’t share a language.
In this tutorial, you will build a service named heart2heart where you will pass short messages over a call using Twilio Programmable Voice, or emails using SendGrid. The recipient will receive the message in their own language, with the translation service provided by Google Translation API.
Prerequisites
To follow through with this tutorial successfully, you will need the following:
- A free Twilio account
- SendGrid account
- A free Twilio phone number (instructions here)
- Google cloud account
- Working knowledge of Python, Django, and Git
Set up the voice translation application
For this tutorial, you will have access to a scaffold project that you can use as a starting point.
The scaffold project will include the bare structure and the initial dependencies needed to set it up. By starting with a common foundation, you can focus on the specific concepts and techniques covered in the tutorial without worrying about the initial project setup complexities.
Clone the repository
Get the scaffold project by cloning the repository as shown below:
Navigate into the directory
To start working on the project, get into the project directory using the below command:
Create and activate a virtual environment
A virtual environment allows you to create a project in isolation without affecting the global Python installation, meaning you can work on different projects, each with its distinct dependencies.
To create the virtual environment you will utilize the virtualenv package. It is not part of the standard Python library, so install it using the following command:
That will install the virtualenv package to be part of your global Python packages. Upon successful installation of the package, proceed and create a virtual environment in the "heart2heart" project using the following command:
The command creates a virtual environment named "venv". Activate the virtual environment with the commands appropriate for your operating system:
For Linux/ MacOS
For Windows
Install dependencies
The scaffold project has a few dependencies that you will need to enable you to set it up and run successfully. Install them using the following command:
This will launch a development server. You can see if the project is set up correctly by pointing your browser to http://127.0.0.1:8000. If all is well you should see the page below:
The project comes with the essential files and configurations to get you up and running quickly. Take a moment to explore the project structure and familiarize yourself with any pre-configured settings. If you encounter any issues during setup, see this guide on how to set up a Django project.
Create a .env file
In this project, you will utilize the SendGrid API and the Twilio Programmable Voice API. To be able to communicate with these services you will need API keys. It is a recommended practice to keep those keys away from your code and fetch them from an environment file or some key management solution whenever you need to use them. In the root of your project create a file named .env and place the following variables in it:
Save the file as it is for now. You will fill in the required variables in the steps that follow.
Set up the project to make calls
If you haven’t signed up for your free Twilio number yet, please follow this guide on how to get a phone number. This will give you a trial account that is sufficient for this tutorial.
Log in to the Twilio dashboard. It should look like this:

To get your API keys, scroll down to the Account Info part of your dashboard. There you will see your Account SID, Auth Token , and the phone number Twilio has assigned to you.

Copy the values and update the . env file in the following sections.
Save the changes and close the file.
Install the necessary helper libraries
For the application to make outbound calls, it has to connect to Twilio servers. To do that, you have to install the Twilio helper library. The library will connect to Twilio APIs and make API calls on your behalf.
Install it with the following command:
Once the library has been installed, you can now create functionality that will receive the user message and pass it as a voice message. In the project, navigate to the messageHandler app, then open up the views.py file. Update it with the following code:
The code defines a view function named voice_message. The function will handle POST requests triggered by the user submitting the form on the homepage of the heart2heart service. The form has various fields such as sender name, recipient name, and recipient phone number. Upon receiving the form data through the request.POST object, the function extracts the relevant information, constructs a personalized message, assigns it to constructed_message, and proceeds to initiate an automated voice call using the Twilio Programmable Voice API.
To communicate with the Twilio API, the code utilizes the Twilio Client object and passes the Twilio account SID and authentication token (TWILIO_ACCOUNT_SID and TWILIO_AUTH_TOKEN) that have been obtained from the . env file. Once the connection is established, the client.calls.create method is invoked to initiate a phone call. The twiml parameter within the method represents Twilio Markup Language, which contains the message to be read out to the recipient.
Save the changes and close the file.
Set up the project to send emails
To send emails, you need to have a SendGrid account and create an API key for the service. If you do not have one already, create a free SendGrid account here.
Create an API Key
Navigate to your SendGrid dashboard. Go to Settings, then API Keys, and select Create API Key on the top left corner of the view.

Give the key a descriptive name so that you will know what service it belongs to if you come back to the dashboard later. Leave the key permission on the default selection for full access and click on the Create & View button.

Upon creation of the key, you will be redirected to a new window, with the key shown in plain text.
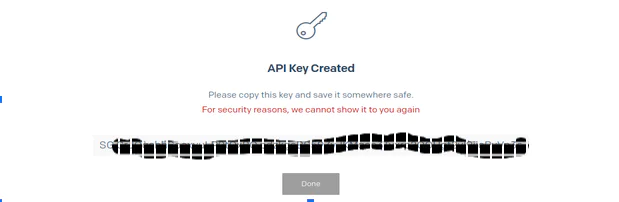
Copy the key and paste it into the .env file assigning it to the SENDGRID_API_KEY key in the file.
After adding the SENDGRID_API_KEY, update the DEFAULT_FROM_EMAIL key too, with the email address you used to sign up on SendGrid. Save the changes and close the . env file.
Create a dynamic template with SendGrid
SendGrid can send plain text emails, but for this service, you will utilize SendGrid's ability to send dynamic templates.
To send emails with dynamic templates, you can reuse available templates provided by SendGrid, or create some yourself. For this application, you may utilize the built-in templates. Go to the Email API section, and click on the Dynamic Templates.

Click on the Create a Dynamic Template button. You will be prompted to give the template a name. After entering a name, click on the Create button.

Upon the creation of the template, you will be redirected to the templates page. Select the template you have created. This will show you the template ID.

Copy the id and paste it under the TEMPLATE_ID key in the .env file.
Save the .env file and close it. Click on the Add Version button to continue working on the template. This will take you to a new page where you will be required to select the design of the template you want to use. The default option for designs is “ Your Email Designs.”
Use this option if you want to design the template yourself. However, for this tutorial, you will utilize the SendGrid provided designs, so select SendGrid Email Designs.

Once you select the design you want to use, your browser will redirect you, to where you can edit the template to suit your liking.

Twilio templates utilize handlebars.js to pass values to templates, so recipient_nameand message will be replaced by values you will pass to the template at the time of sending the email. Once you are satisfied with the design, click on the Save button to save it.
Update the email_message function
To send emails with the dynamic template you have created, you have to set up the email_message function and install the SendGrid client library into the project using the following command:
Open the messageHandler/views.py file, and add the following lines of code to the file.
The code update imports the SendGridAPIClient class that will enable the code to interface with the SendGrid API and send your emails. In this code, you have a helper function called sendgrid_send_mail. This function takes in three arguments: the email of the recipient, the message you want to pass to them, and their name.
In the sendgrid_send_mail function, you create a mailobject that you will use to construct the various object parameters needed to send a dynamic email. The first thing you assign to it is the from_email . This object contains the email address and name of the sender. Then you create a to object that contains the email address and name of the recipient.
Since you are using dynamic templates in this project, the data you want to be inserted in the template when the email is sent is passed into the dynamic_template_data as key-value pairs.
The next thing you attach to the mail object is the ID of the template. Implement a try-and-catch block at the end of the function to send the email or print a message to the console in case of a failure.
To assemble the final mail, you call the sendgrid_send_mail function in the email_message function and pass it the required data as you get it from the request.POST object.
Set up the translation API on Google Cloud Platform
For your friends to receive your messages in the language you select, the messages need to be translated from your sending language to their language. To do that you will utilize Google Translation API.
To get access to the Google Translation API you will need to have a Gmail account, then use it to log in to Google Cloud. If you don’t have a Gmail, create one here. Then log in to GCP (Google Cloud Platform).
Note that to sign up to GCP you will need to provide a payment method, but you will not be charged initially. The payment information is only used to confirm that a human is signing up to use the platform. The 90-day trial account will initially award you with $300 in free credits.
Navigate to the Google Cloud console.

Create a new project by clicking on the NEW PROJECT button in the top right corner of the window. That will take you to the page below.

You can leave the default name for the project, or you can give the project a new name. Once that is done click on the CREATE button. Upon successful creation of a new project, it is selected by default.
On the search bar next to the project selection, search for "Cloud Translation API".

Click on the result for "Cloud Translation API". This will take you to the below page:

Click on the ENABLE button to enable the translation API for the selected project.
Enable billing
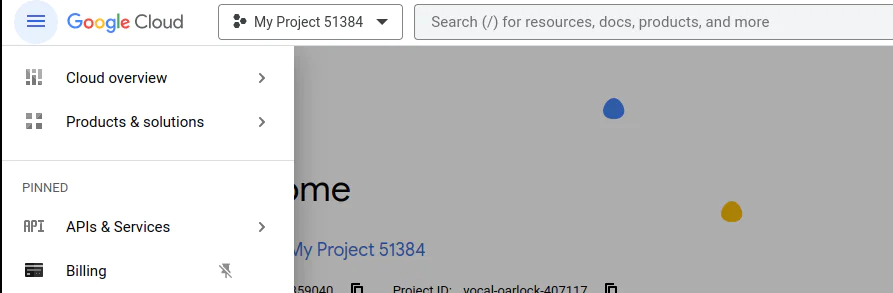
For the Translation API to work for the selected project, you need to enable billing. To do that, open the console Navigation menu – or the hamburger menu on the left – and then select Billing . Click on the Enable buttonto enable billing for your project.
Install the translation client library
Google provides official client libraries to assist you in making requests to the API. GCP offers two APIs for translation: Basic and Advanced. Each service has its own client library. For this use case, you will use the basic translation API. To install the library for the basic translation service use the following command:
Authentication to Google Cloud Platform
Upon installation of the translation library, you have to authenticate with Google. Google offers different ways of authenticating. To run translation from a development environment, Google recommends Application Default Credentials, which look for credentials in environment variables or credentials set by the Google Cloud CLI. This is the method you are going to use to authenticate your application.
Install the Google Cloud CLI
There are various ways in which you can install the Google Cloud CLI. You can choose the one that works for you here. For demonstration purposes, this is how you install it in Ubuntu:
Initialize it after installation using the following command:
That command will initialize the CLI, redirect you to a browser, and ask you to log in using a Gmail account. If you have more than one account, log in with the one you used to activate GCP. After a successful login, select the project you have created above.
Create Application Default Credentials
In the final step, you will create credentials for your project. These credentials can be used by any library that accepts them. Create them using the following command:
The above command will open your browser, asking you to log in to Google Cloud one more time. On success, a credentials file will be created and saved in your home directory. That completes the authentication setup. Your application is now ready to communicate with the translation API.
Create the translation function
If you’ve come this far, you’ve finalized the creation of a GCP project, and login credentials. It is time to create the function that will handle translation in your application. Update the messageHandler/views.py file with the following code.
The above code imports the translate_v2 library from google.cloud module. It then creates a custom translate_text function that takes in two arguments: the target which is the language you want your text translated into, and the text that is being translated.
Update the voice_message and add the following lines of code to it after the line containing the constructed_message variable assignment and before the messages.add_message() method.
The updated voice_message view function can now call the translate_text function to pass in the text and the language you want a user to receive a message in. When you press the Place Call button, the message will be translated. When a call is placed to the user, they will receive it in the language you set on the homepage.
Update the email_message function, and add the following lines of code to it after the line containing the constructed_message variable assignment and before the messages.add_message() method.
Similar to the voice_message view function, the message you pass will be translated. When an email is sent the user will receive the email in their language.
Test the translation voice message application
Having followed all the steps of the tutorial, you should have a complete application.
To test if everything works, save all files and close them. In the command line of your project activate the virtual environment, and run the development server using the following commands:
That will give you the following link: http://127.0.0.1:8000. Visit it, and you will see the home page. Here, you can follow the CTA and select if you want to send a voice message or an email message.
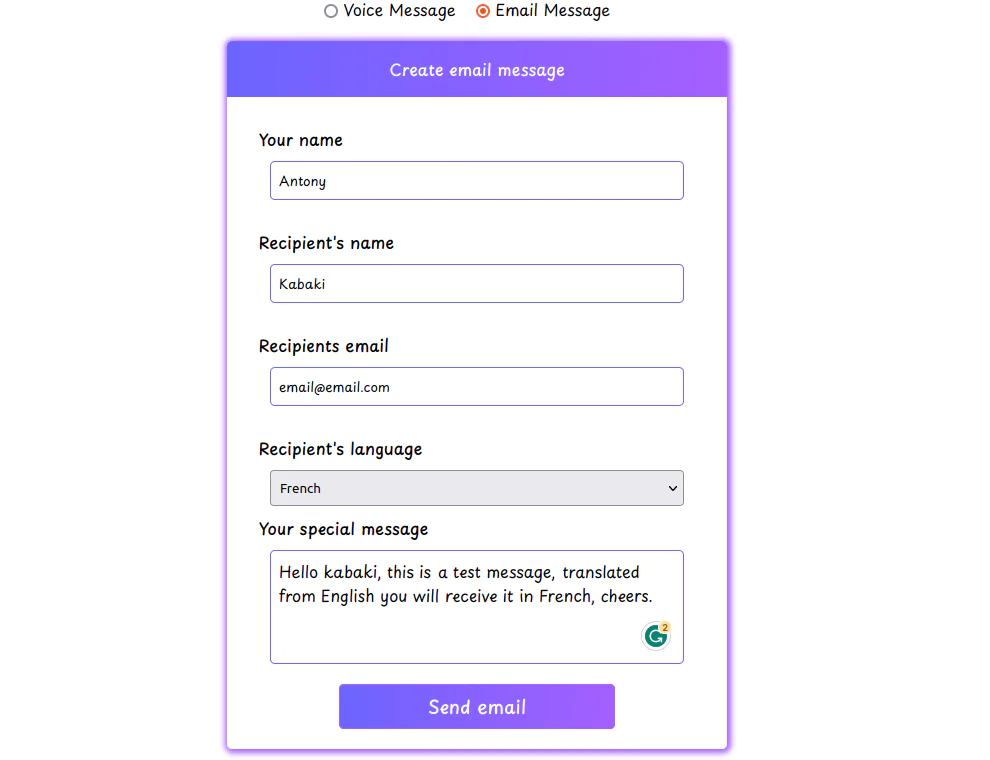
Test sending an email by selecting Email message, which will give you the following window. Enter all the required information as shown below, and click on the Send email button.
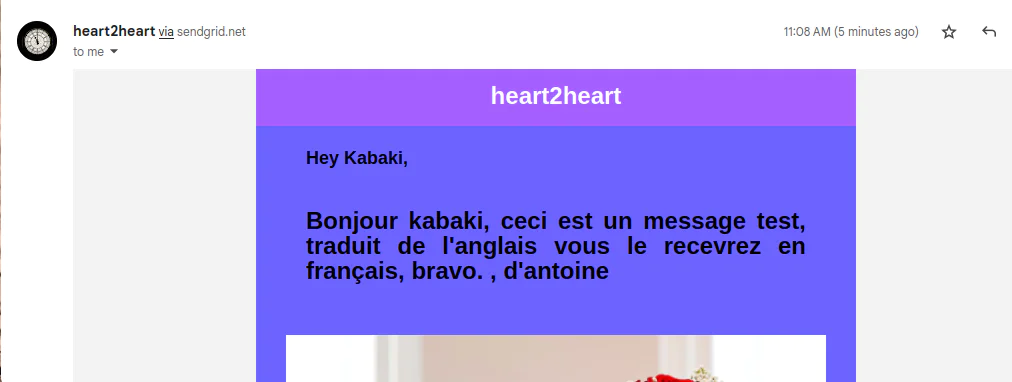
Upon sending the above message, the user will receive the below message translated to French from English.
You can now go ahead and try the voice message option.
Few things to note
- Making calls using a Twilio trial account will only make calls to verified numbers.
- Sending emails using a SendGrid trial account will only send a hundred emails per day.
- The Google Trial account is only valid for 90 days with a credit of $300 for use.
- If you want to read further on how to configure Google Cloud CLI, see their documentation here.
What's next for translating message apps?
You have built a way to send automated voice messages and dynamic emails to your friends that will automatically translate the message to their language.
You can find the source code for the completed project here. To build similar or more advanced applications, please visit Twilio.com or SendGrid.com, and upgrade your account to enjoy the full benefits of a paid account.
Have a look at the following articles on the Twilio blog to build similar applications:
- How to Translate English to Mandalorian with Twilio Serverless and SMS | Twilio
- Build an Auto-Translating Chat App With Twilio WhatsApp
- How to build an On-Demand Translation Service Using Twilio MMS, CamFind and Microsoft Translator
Kabaki Antony is a full-stack software engineer and a technical writer with a passion for creating innovative digital experiences. When not coding, he enjoys sharing knowledge with others by writing technical articles to help developers hone their skills. He can be reached at kabaki[dot]antony [atl] gmail [dot] com or on X [at] kabakiantony
Related Resources
Twilio Docs
From APIs to SDKs to sample apps
API reference documentation, SDKs, helper libraries, quickstarts, and tutorials for your language and platform.
Resource Center
The latest ebooks, industry reports, and webinars
Learn from customer engagement experts to improve your own communication.
Ahoy
Twilio's developer community hub
Best practices, code samples, and inspiration to build communications and digital engagement experiences.