How to send vCards with WhatsApp using C# and .NET
Time to read: 6 minutes
You can use the Twilio Programmable Messaging to send contact information in vCard format via WhatsApp. If you use WhatsApp regularly, on some occasions you may have had to send or receive the contact info of a person to whom you must text or call. In this post, you will see how to do this programmatically.
Prerequisites
You will need the following for your development environment:
- a .NET IDE (Visual Studio, VS Code with C# plugin, JetBrains Rider, or any editor of your choice)
- .NET 6 SDK (earlier and newer versions should work too)
- A Twilio account (try out Twilio for free)
- ngrok CLI
You can find the source code of this tutorial in this GitHub repository.
What is vCard?
vCard is a standard format for sharing contact information between people and applications. This information may include personal information, phone numbers, email addresses, employment information, and more.
It is used in mail applications such as Outlook and Gmail, in messaging systems such as WhatsApp and Telegram, and in any system that requires the transfer of contact information.
Configure Twilio
Get your Twilio Credentials
In your Twilio account, you will need to obtain the Account SID and the Auth Token to use the Twilio SDK. You can find your Account SID and Auth Token on the home page of your Twilio console.
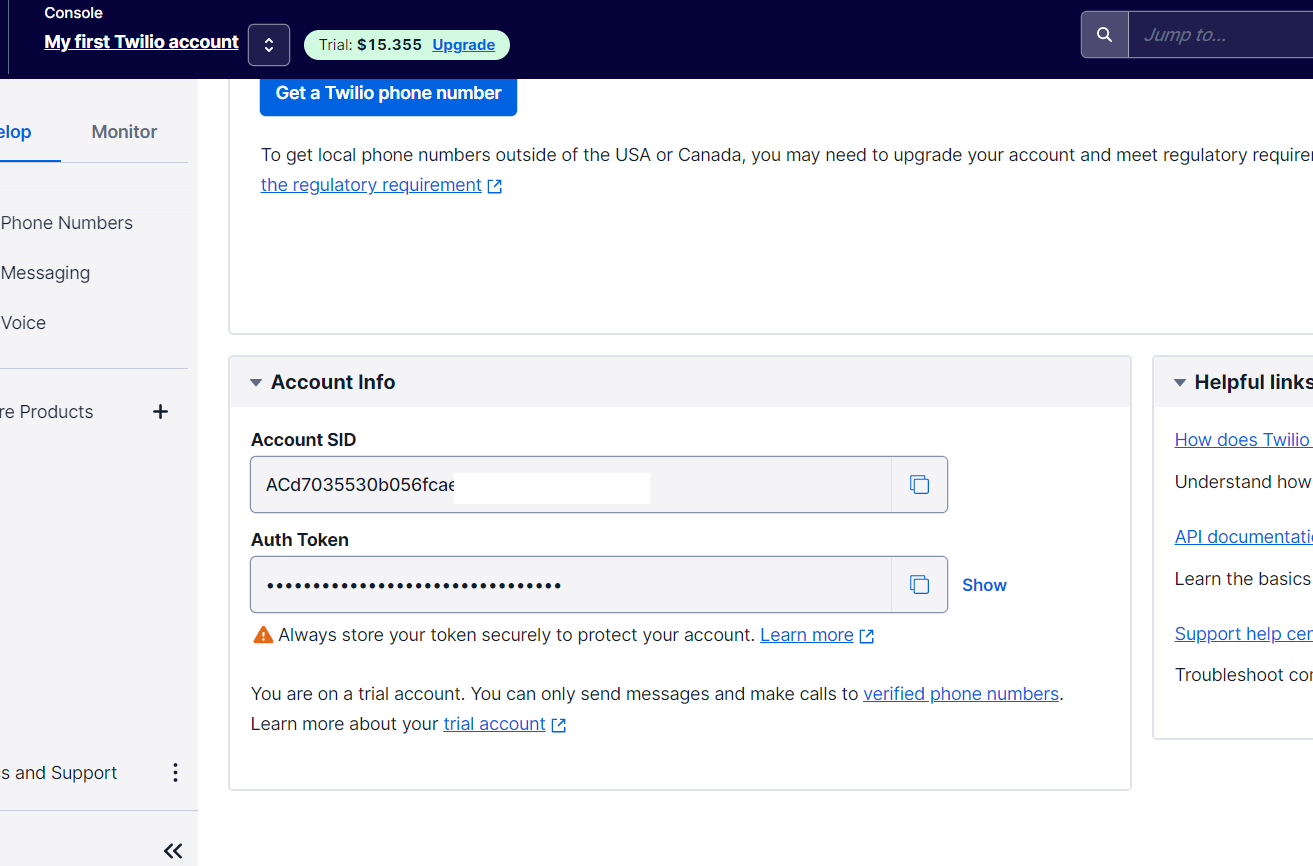
Copy them in a safe place because you will use them later.
Set up your account for Twilio WhatsApp
To send WhatsApp messages through your Twilio account, you need to have your account enabled for it. In this tutorial, you are going to use the Sandbox available to test your applications.
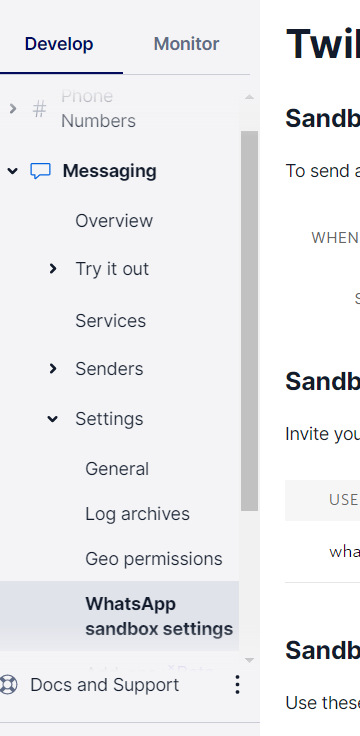
In order to get to the WhatsApp sandbox settings option where you are going to start, in the left-side menu of your console click on "Messaging" (if you don't see it, click on "Explore Products", which will display the list with the available products and there you will see "Messaging"). After that, in the available options open the "Settings" submenu, and finally, click on "WhatsApp sandbox settings".
Next, you have to follow the instruction on the screen, in which you must send a pre-defined message to an indicated number through WhatsApp. This will enable that WhatsApp number to use in test mode to send messages to your own WhatsApp number (if you want to send messages to other numbers, the people who own those numbers will have to do this same step).
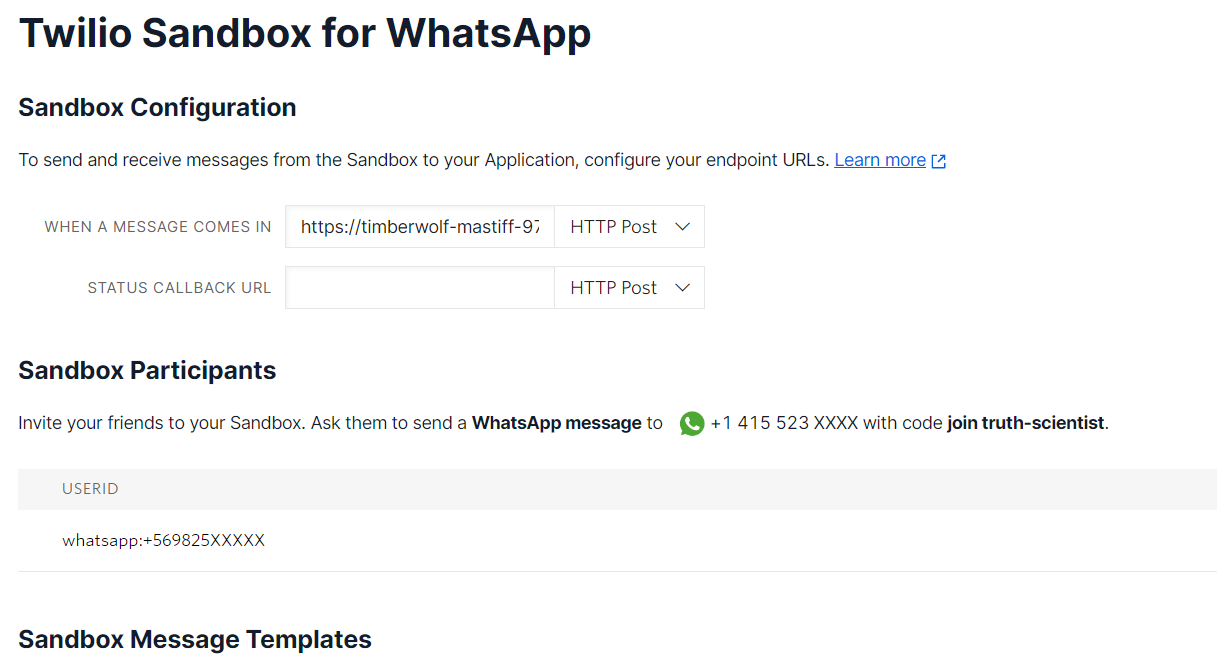
After that, you will receive a message in response confirming the Sandbox is configured.

Create a static file host
To send vCard files through Twilio with the SDK, you need to make those files available via a public URL, and for that, you'll need to use static file hosting. For this tutorial, you are going to use ngrok to expose a local directory via a public URL.
First, create a folder where you will store the vCard files. This folder can be located anywhere on your machine.
If this is your first time using ngrok, you need to register on ngrok's website, and add the authentication token in the console as the first command:
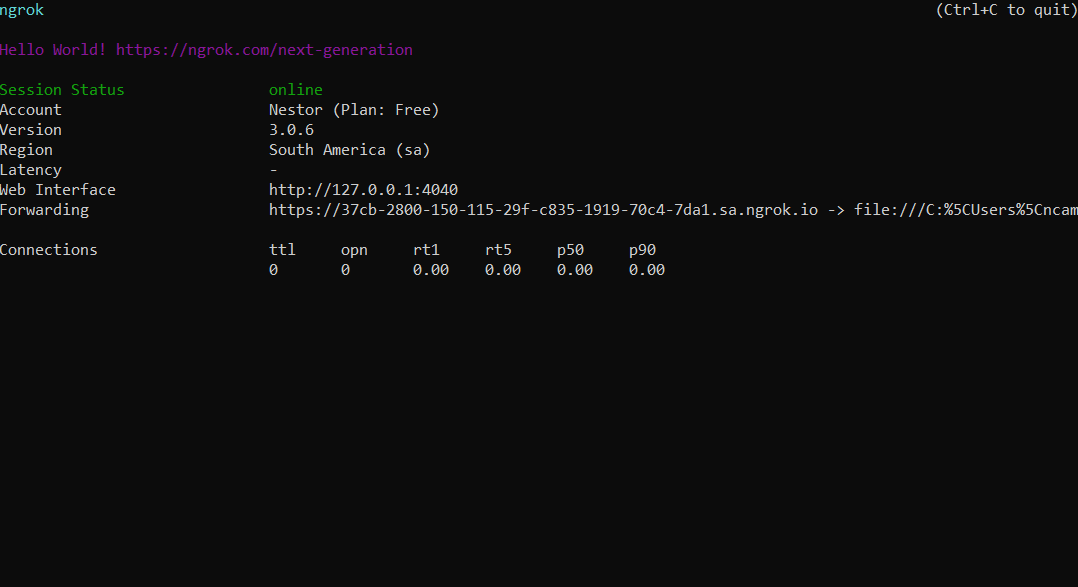
Now, run ngrok with the following command, specifying a folder path where you will save your vCard files:
Replace <folder path> with the full path to the folder where your vCard files will be located.
Copy the Forwarding HTTPS address that ngrok created for you, as you will use it in your .NET project.
Create a Console Project
You will need to create a console project using the .NET CLI. Open a console terminal and run the following commands to create a folder that will contain your project:
Next, create the project with the command below:
Add the API Key in the project
To add the Twilio Credentials into your project, you will use user secrets since it is a good option for local development that is easy to manage, more secure, and follows good development practices.
To set user secrets for your project, run the following commands at the command line inside your project's root folder:
Replace <Twilio Account SID> with the Twilio Account SID and <Twilio Auth Token> with the Auth Token you copied earlier.
To load user secrets, you must add the Microsoft.Extensions.Configuration.UserSecrets NuGet package. Add the package using the following command:
Install the Twilio and vCard libraries
You create vCard files manually or install a library that simplifies the process. You will use vCardLib to create and generate the contact information to share.
Additionally, you will install the Twilio SDK to be able to send WhatsApp messages.
Configure the project
Now, in the Program.cs file, replace all existing code with the following:
The code above imports all the libraries you'll use in the project.
Next, you are going to add the code that loads the configuration from your user secrets, where you stored the Twilio credentials. You will also add the Forwarding URL that ngrok gave you, and the full path of the folder where the vCard files will be stored.
Replace <ngrok URL> with the ngrok Forwarding URL and <full folder path> with the full path of the folder that stores the vCard files.
Create contact information with vCard
Now you are going to generate the contact information for a person using the vCardLib library. In the code presented below, you are adding the first name, last name, and a phone number (to which you can specify if it is a work phone, personal phone, or another). Then, you serialize the information to obtain a string with the data following the vCard standard to finally save it as a file in the corresponding folder.
Change the contact info as you wish.
What you have just done is generate a vCard file that you may have used before as a user when sending or receiving contacts on WhatsApp. It's time to send it using the Twilio SDK.
Share contact information on WhatsApp
Now you have to initialize the Twilio SDK with your credentials (Account SID and Auth Token), create the message, and then send it. As you can see, in the mediaUrl property of the message, you specify the URL of the vCard file, saved in the folder intended for it and exposed through ngrok.
Replace <from number> with the phone number (in E. 164 format which includes the country and area code, starting with the + sign) that Twilio has assigned to you in the Sandbox (the same one you used when you sent a message to enable your phone number on the platform). And replace <to number> with your phone number or any other number that has gone through the validation process in your account.
Now, run your console project to send your first vCard contact with WhatsApp:
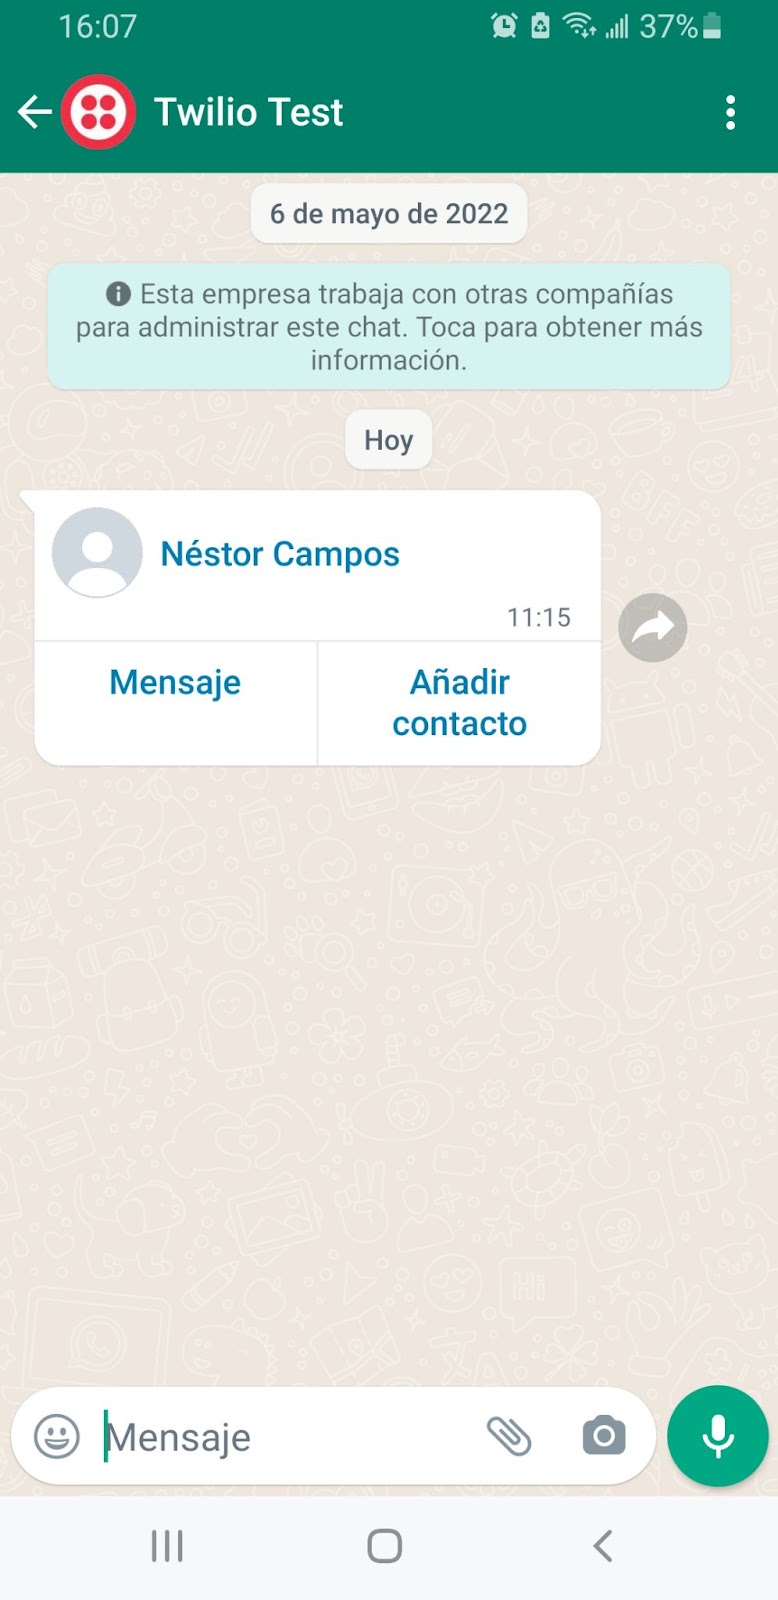
A few seconds later, you should receive a message on WhatsApp similar to the following:
Future improvements
Now you can send contact information via WhatsApp, but you can further improve it:
- vCard is a very complete standard, the more information you add about the contacts before sending it, the easier it is for the recipient to know which means of contact to use to write or call the other person, what company they work for, and more. The vCardLib library provides you with more classes to add all that information.
- You could use a real static file host service that will scale with your application. Alternatively, you could serve your files via ASP.NET Core and validate that the HTTP request came from Twilio, and reject it if not.
- Depending on your needs, you may not want to keep the generated files around. You could automatically clean up the files in multiple ways, like run a script every couple of minutes.
Additional resources
Check out the following resources for more information on the topics and tools presented in this tutorial:
Twilio WhatsApp – This page contains all the information about the requirements and benefits of using messaging over WhatsApp with Twilio.
Twilio SDK for C# and .NET – You can explain all the options provided by the Twilio C# SDK.
Source Code to this tutorial on GitHub - You can find the source code for this project at this GitHub repository. Use it to compare solutions if you run into any issues.
Néstor Campos is a software engineer, tech founder, and Microsoft Most Value Professional (MVP), working on different types of projects, especially with Web applications.
Related Posts
Related Resources
Twilio Docs
From APIs to SDKs to sample apps
API reference documentation, SDKs, helper libraries, quickstarts, and tutorials for your language and platform.
Resource Center
The latest ebooks, industry reports, and webinars
Learn from customer engagement experts to improve your own communication.
Ahoy
Twilio's developer community hub
Best practices, code samples, and inspiration to build communications and digital engagement experiences.

