How to Send SMS with Twilio Firebase Extensions
Time to read:
If you aren’t familiar with Firebase, it's Google's application development platform that provides essential tools and services to build high-quality apps without worrying over the infrastructure. One service Firebase provides is Firebase Extensions; it provides pre-packaged and open-sourced solutions that help you deploy extended functionality to your application to help automate tasks.
Twilio Lab’s Send Messages Extension on Firebase makes it easy for you to integrate Twilio’s Programmable Messaging API with Firebase applications. This tutorial will show you how to use the extension to send messages and how to track the delivery status of sent messages. Let’s get started!
Overview
This extension sends messages (SMS or WhatsApp) based on information on documents added to a specified Cloud Firestore collection. This specified Firestore collection will be chosen during installation as a configurable parameter.
During installation, you will provide the following configuration parameters:
- Cloud Functions location - For help selecting a location, refer to the location selection guide
- Twilio Account SID
- Twilio Auth Token
- Twilio phone number (Optional) - The phone number that will be used to send messages from. If none provided, the
fromvalue will be used when creating a document (see next paragraph) - Twilio Messaging Service Sid (Optional) - If provided, it will override the Twilio phone number parameter when sending messages
- Message documents collection - The specified Firestore collection that will be used to build and send messages
To send a message, you’ll need to add a document to the specified messages collection with the following format:
to- The phone number or WhatsApp number you want to send the message to, which should be in E.164 format.body- Body of the messagefrom(Optional) - The Twilio phone number or Messaging Service you want to use to send the message. This will override the from number or Messaging Service set in the extension settings.mediaUrls(Optional) - An array of URLs of media to send with the message. Only supported in the US and Canada. Check out the Create a Message docs for more info.
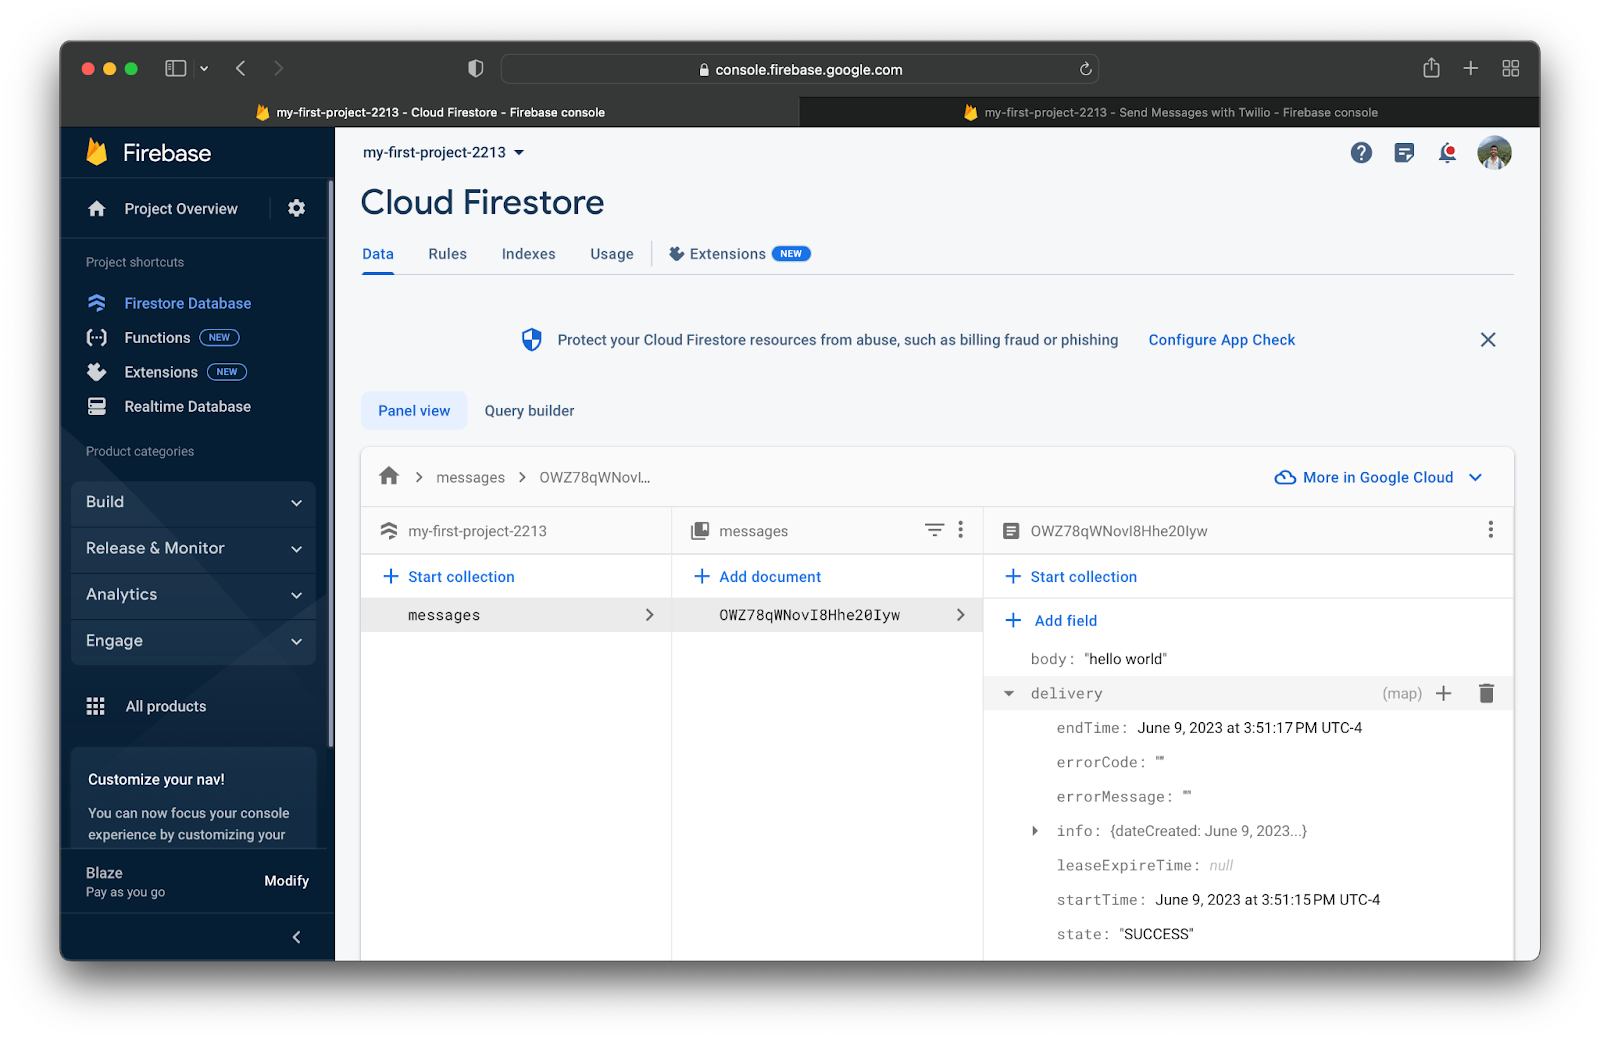
Once a message has been processed and sent, the document will be updated with a delivery field showing the delivery status info.
Now that you have a better understanding of how the extension works, let’s put it to use!
Prerequisites
- A Twilio account - Sign up with Twilio for free here
- A Twilio number - Read our docs here on how to obtain a Twilio number
- A Firebase account - Sign up for a free Firebase account here
- A Firebase Project with the Blaze plan
Setup Firebase Project
In this section, you’ll set up your Firestore Database and install the Twilio Firebase extension.
Create Firestore database
Once you have a Firebase project upgraded to the Blaze plan (as per the prerequisites), navigate to the Firestore Database menu on your Firebase Console:
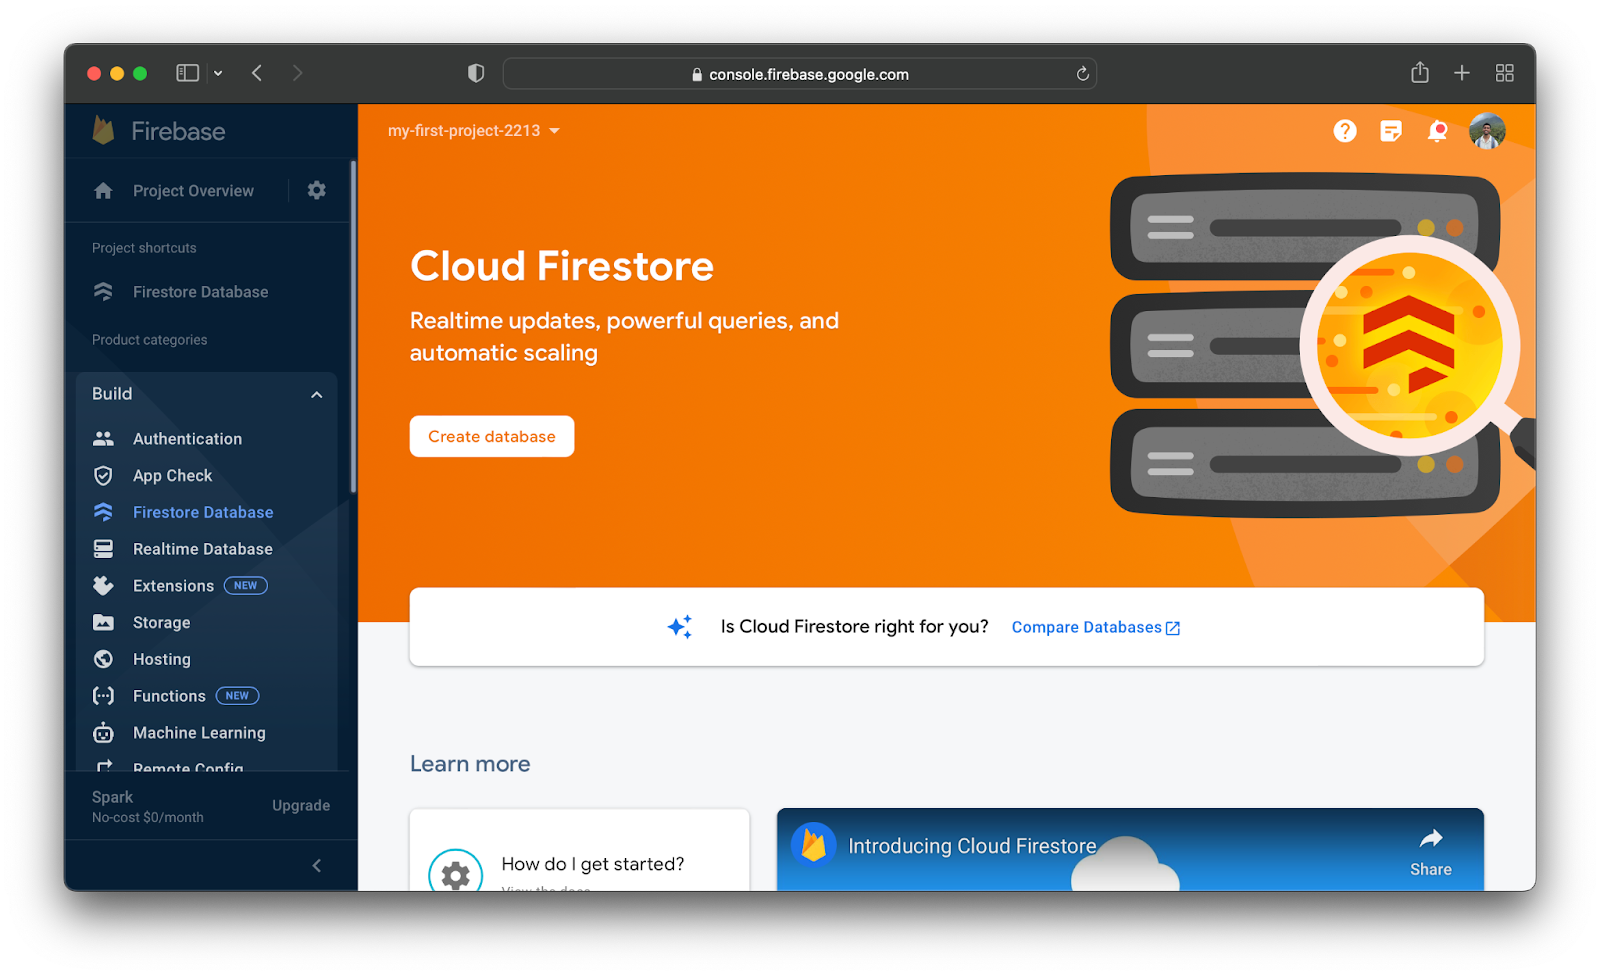
Select Create database and then Next to start the database in production mode. You’ll then be prompted to select your Cloud Firestore Collection:
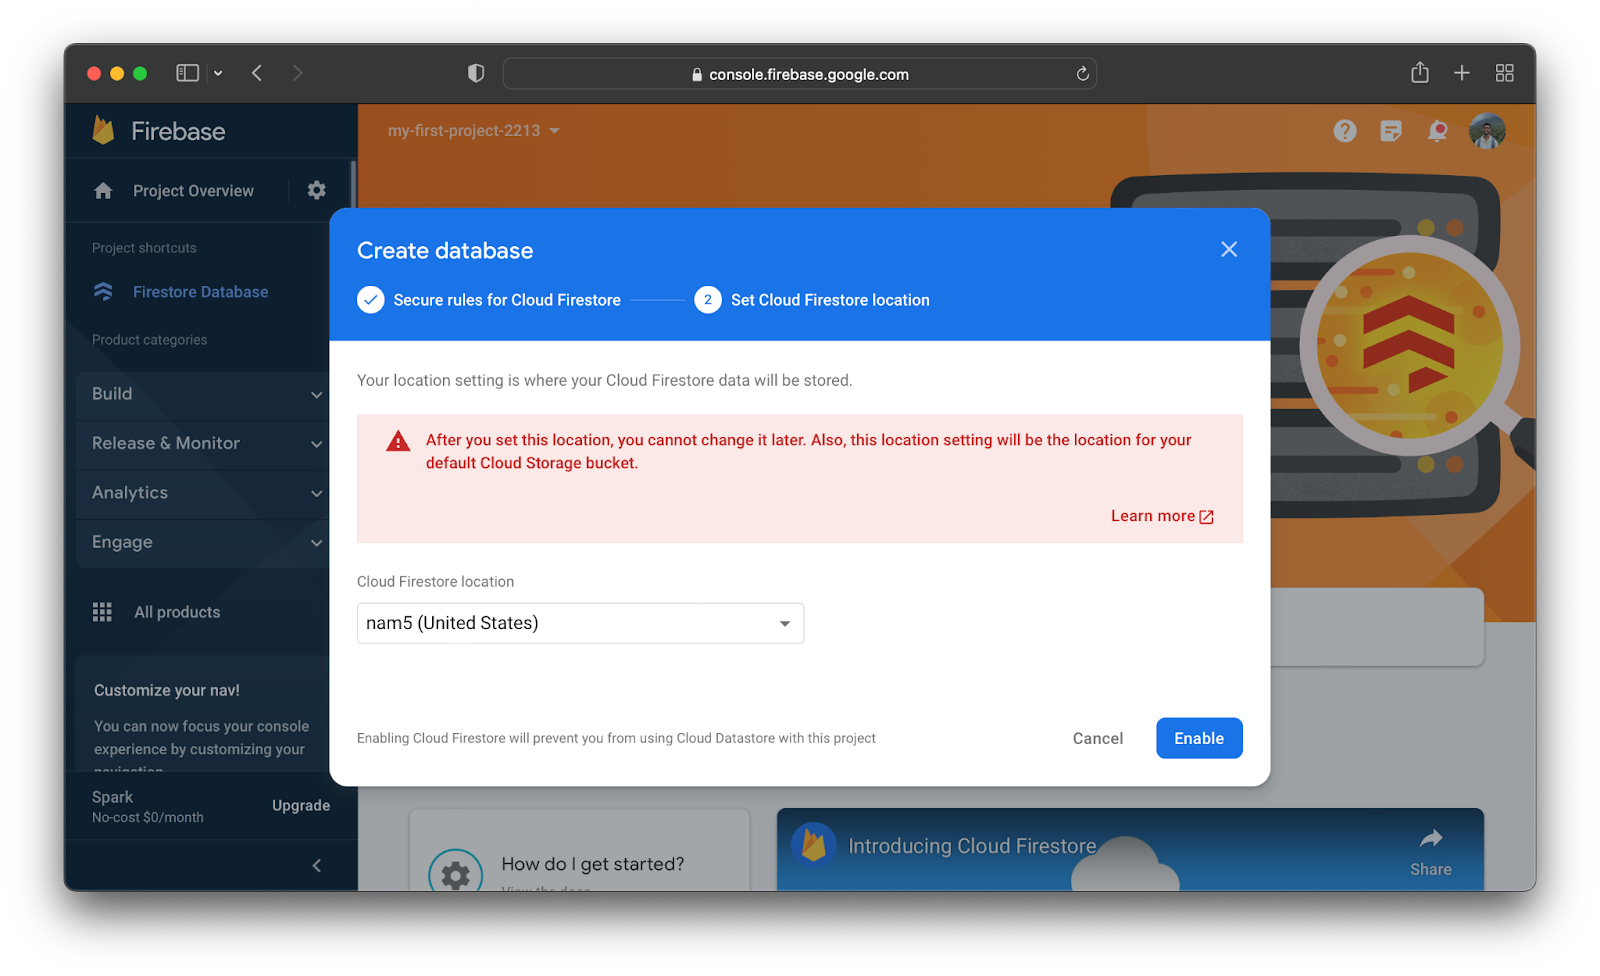
Select your preferred location and then click Enable.
Install the extension
Head over to the Firebase Extensions marketplace at https://extensions.dev, search for the Send Messages with Twilio extension, and click Install in Firebase console:
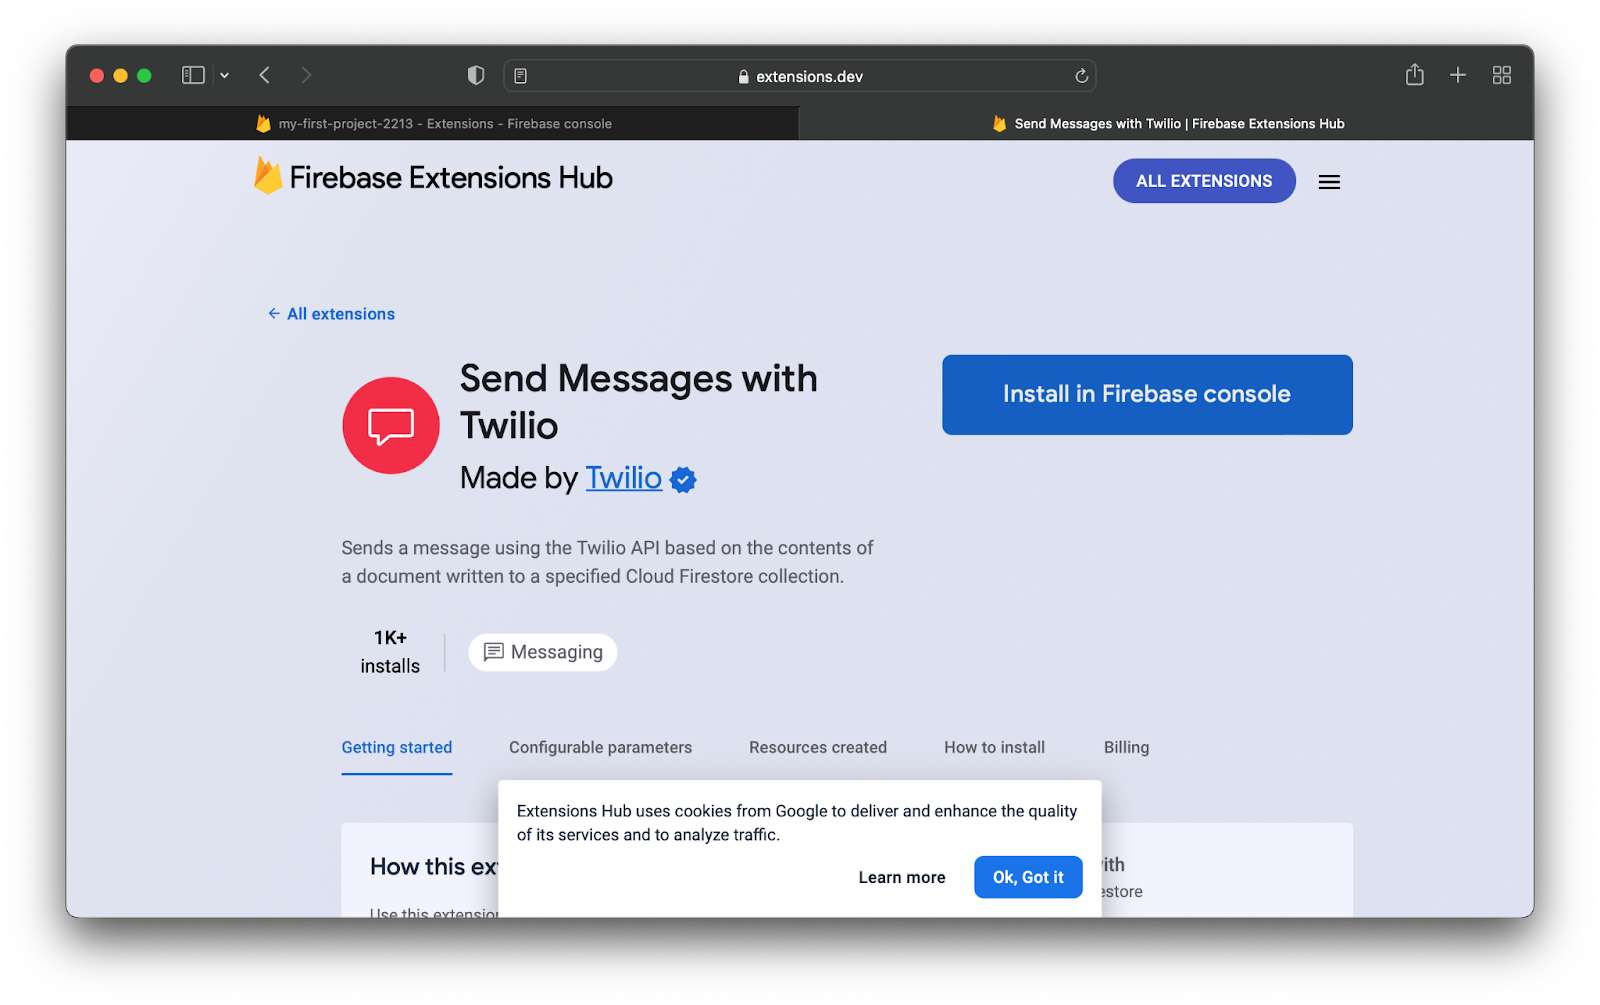
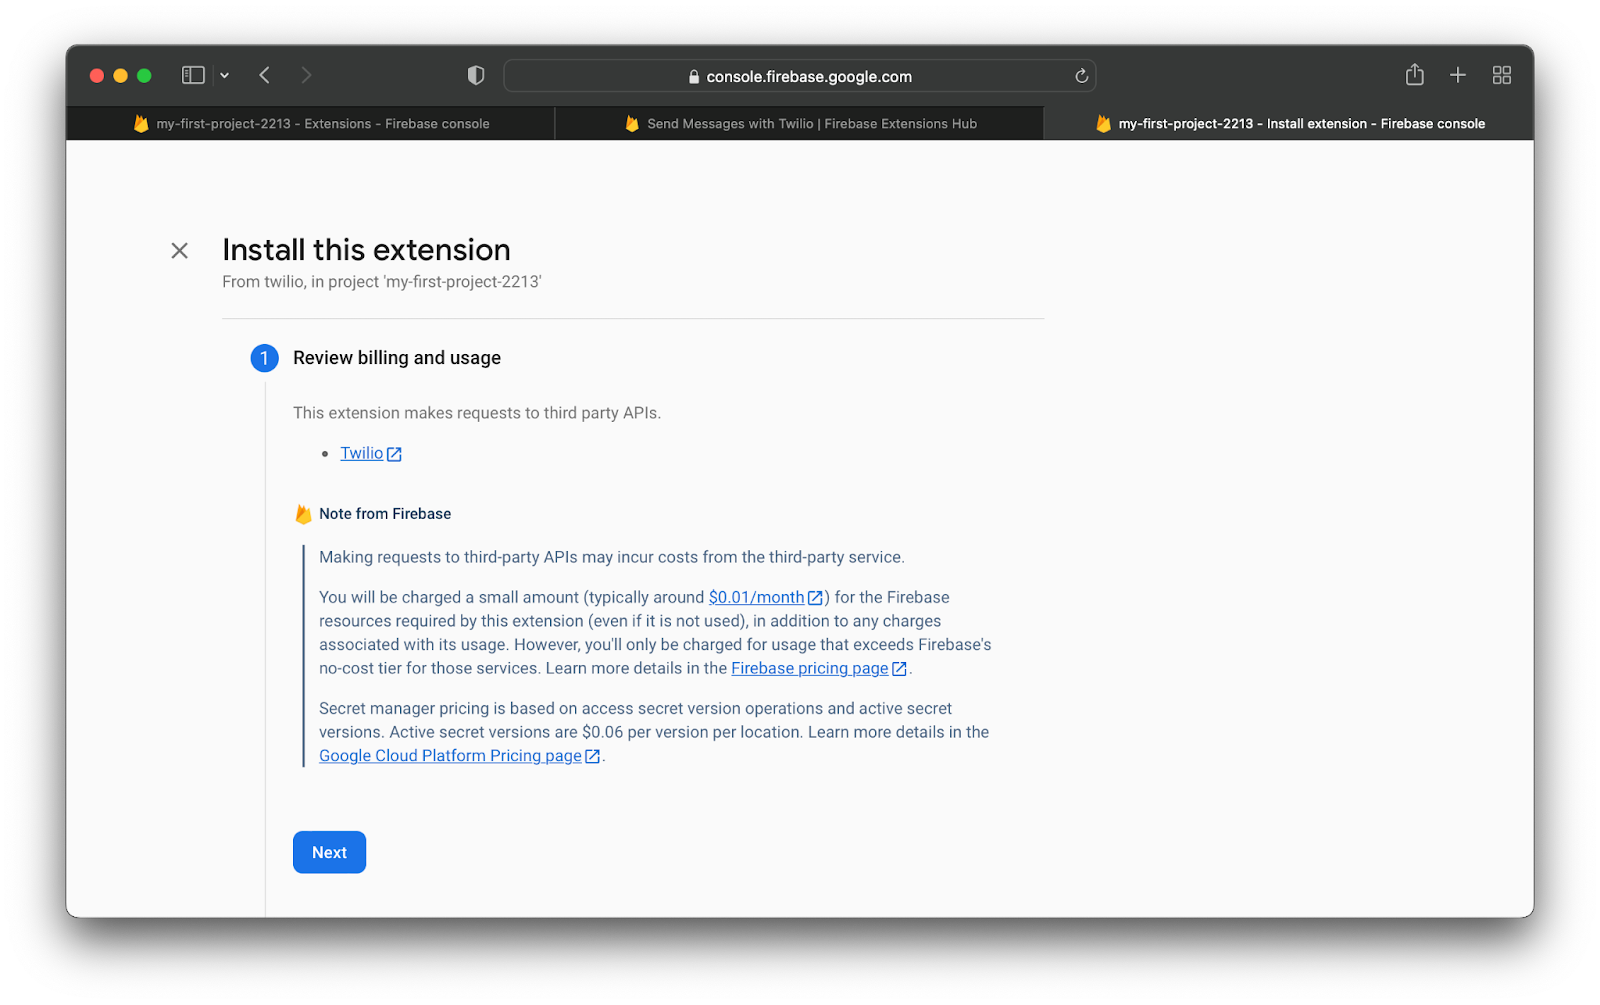
You’ll then be prompted with choosing which Firebase project you want the extension installed on. Select the project upgraded with the Blaze plan and you’ll then be directed to the installation page. Review the billing and usage information and select Next:
Next, review the API’s and resources that will be enabled for the extensions:
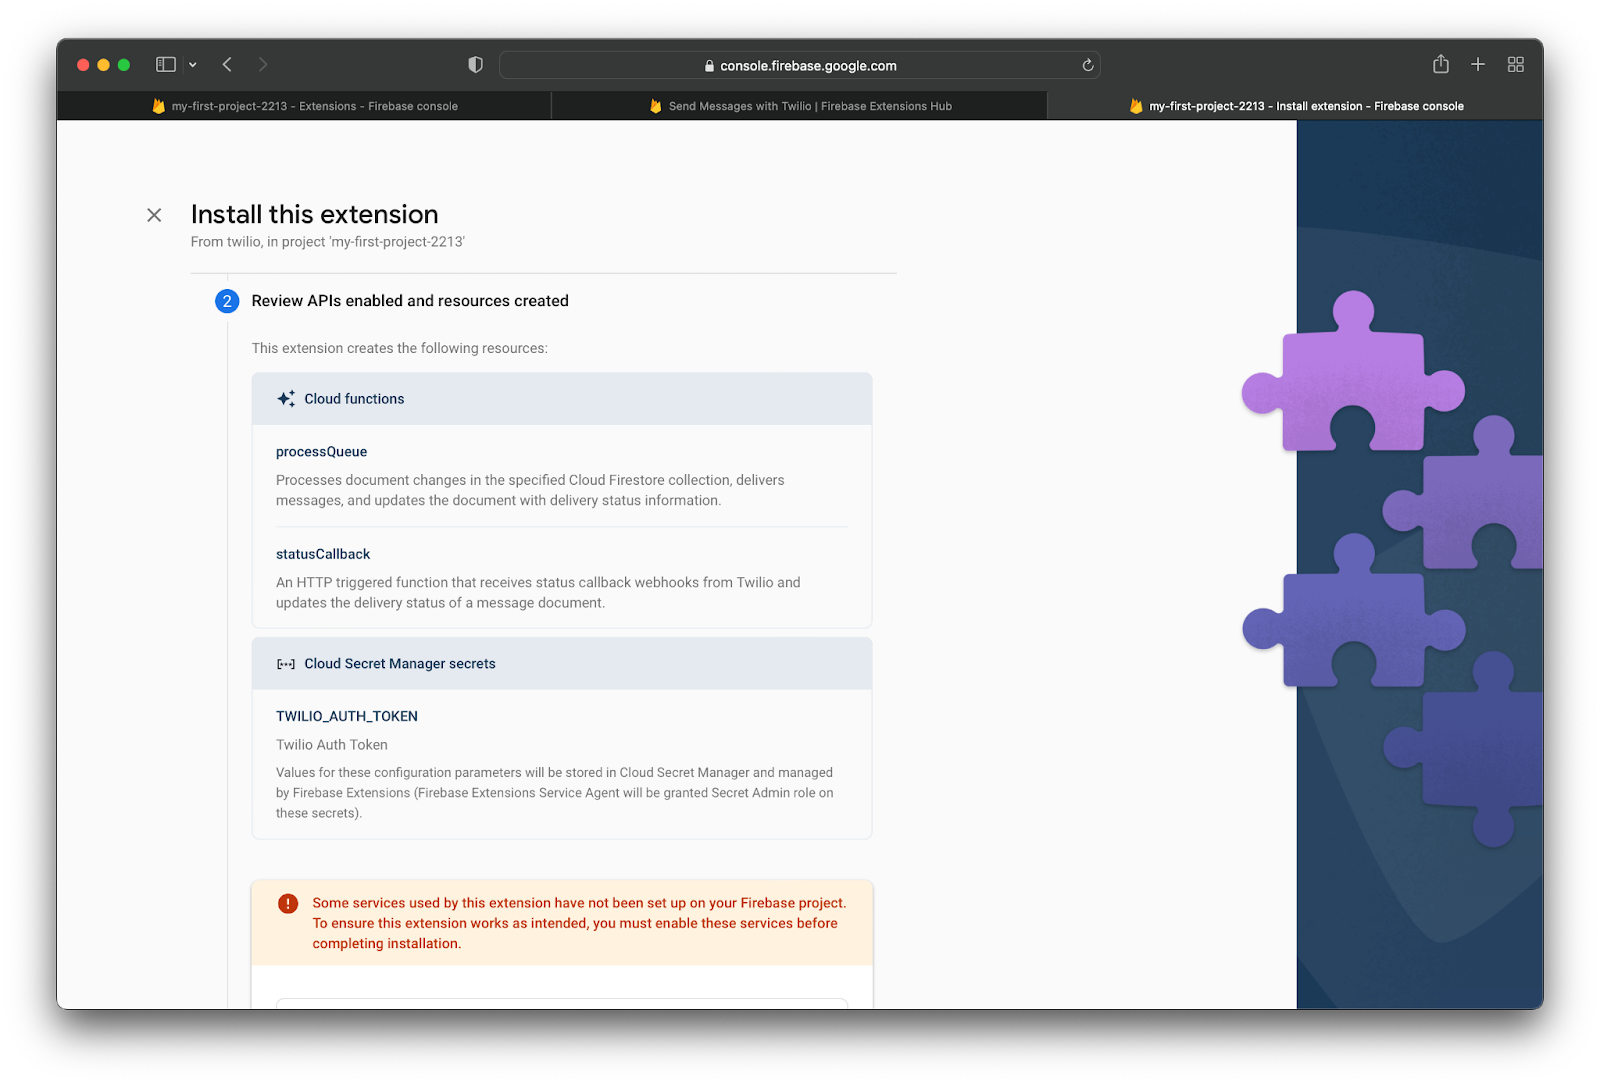
This extension will create two Cloud functions: processQueue and statusCallback. The extension will also use the Secret Manager API to securely store your Twilio Auth Token. You may be prompted to enable the Secret Manager and Artifact Registry services for the extension if they haven’t already been enabled for your project. If so, click Enable for both of these services and then click Next to continue the installation process.
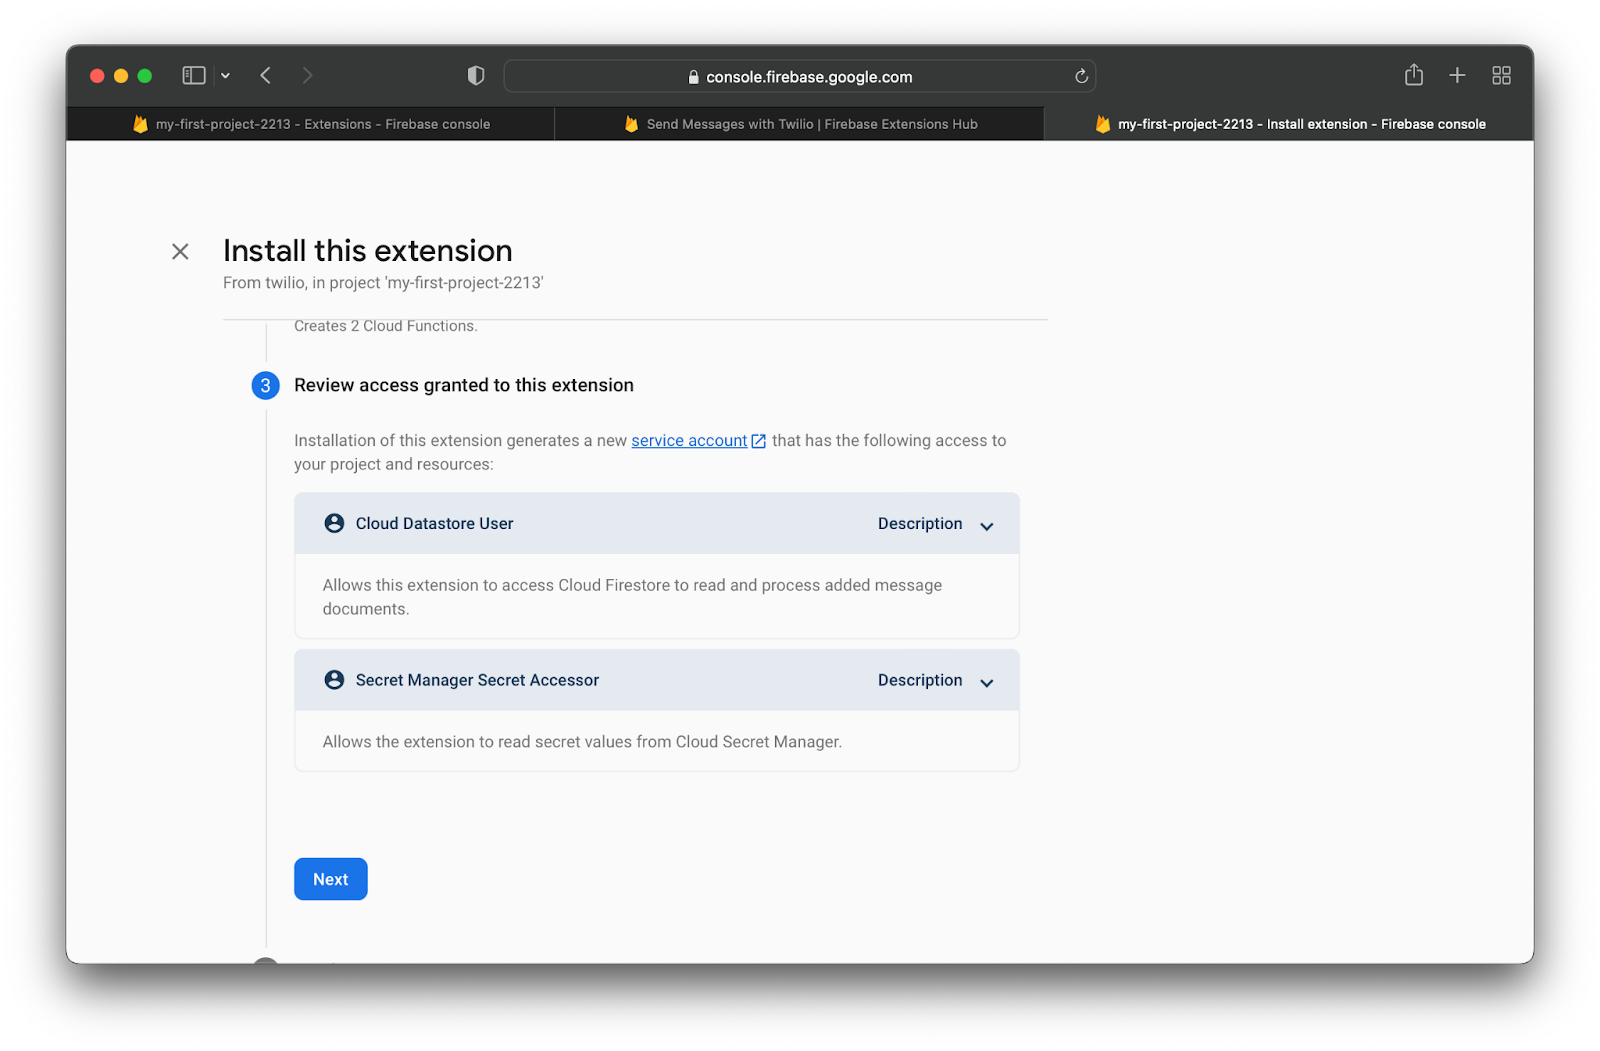
The next section will have you grant the extension access to Cloud Firestore and the Secrets Manager. Select Next to grant access.
You’ll now be in the configuration section of the installation process:
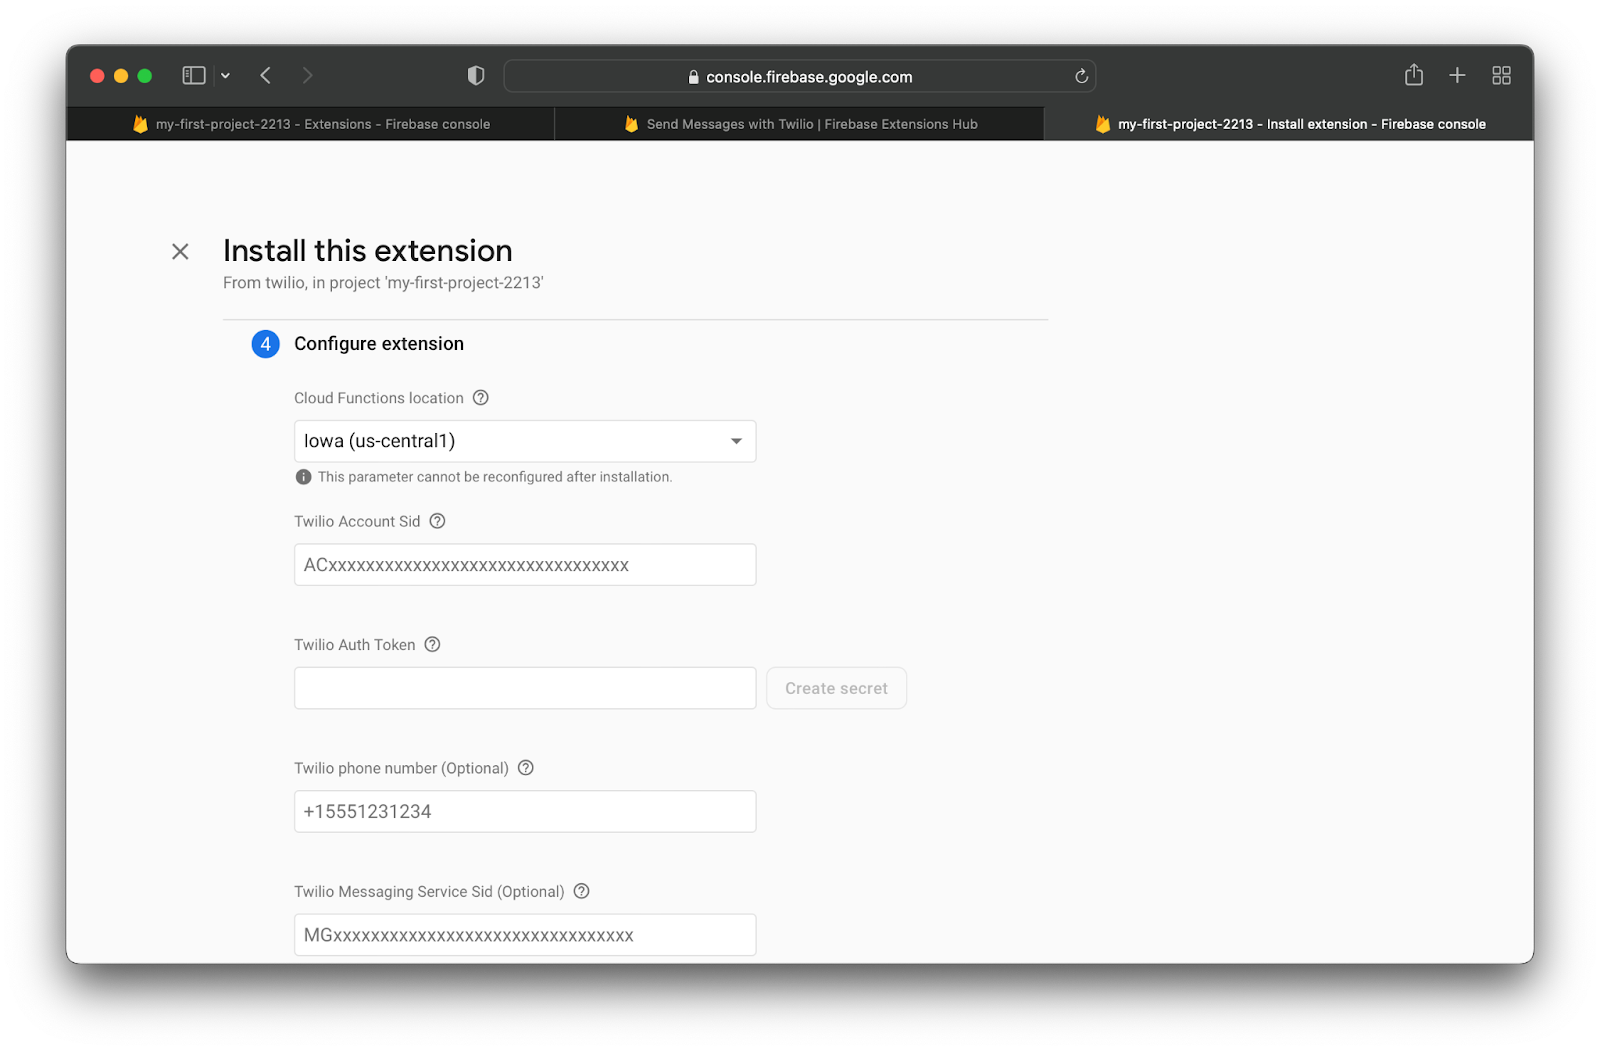
For the Cloud Functions location, choose your preferred location from the dropdown.
Enter in your Twilio Account SID and Twilio Auth Token in their respective fields. You can find both of these values on the front page of your Twilio Console:
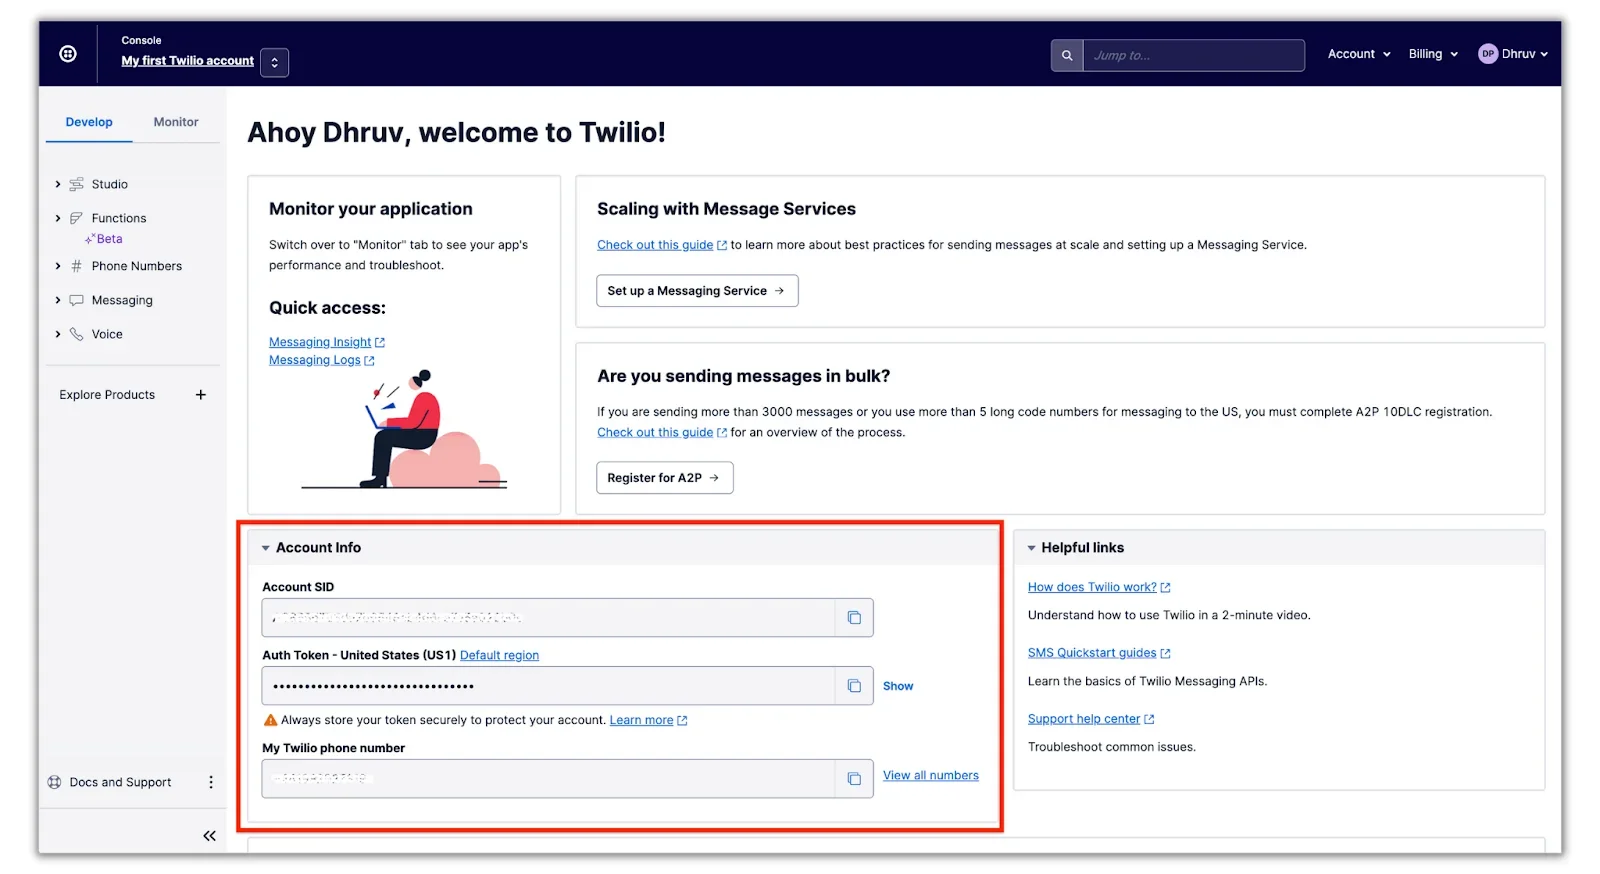
Once you’ve entered your Auth Token, click Create secret to add it to the Secret Manager. Add in your Twilio phone number within its respective field. If you have a Messaging Service SID with Twilio, you can add that in its respective field, which will send messages through your Messaging Service rather than the provided phone number. Lastly, the Message documents collection is the location of where you will be adding documents to for sending out messages. This value is defaulted to messages, but feel free to change it to a preferred name.
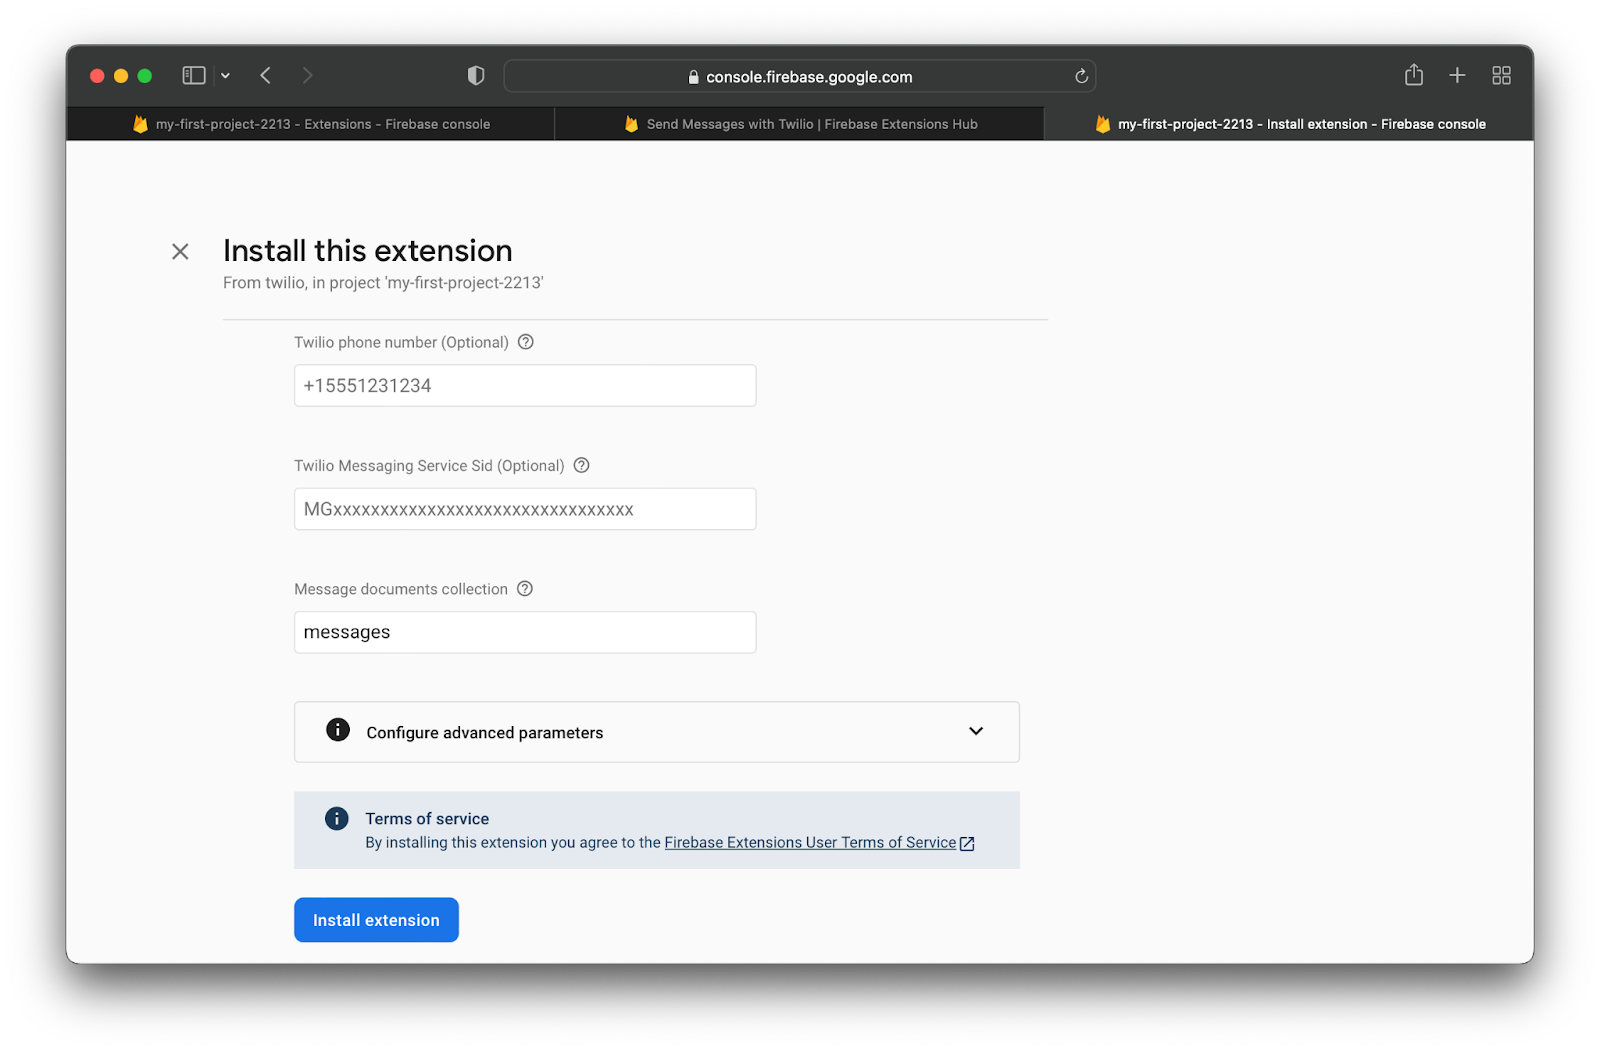
Finally, click Install extension and wait 3 to 5 minutes for your extension to install. Once installed, it’ll be ready to use!
Test the extension
Now let's see the extension in action!
For testing purposes, you’ll manually add in a new document to the messages collection through the Firestore dashboard. However, for most use cases, you can use the Firebase Admin SDK to add in a document like so:
Navigate to your Cloud Firestore dashboard on your console. You can locate this by clicking on Firestore Database within the Build dropdown on the left sidebar.
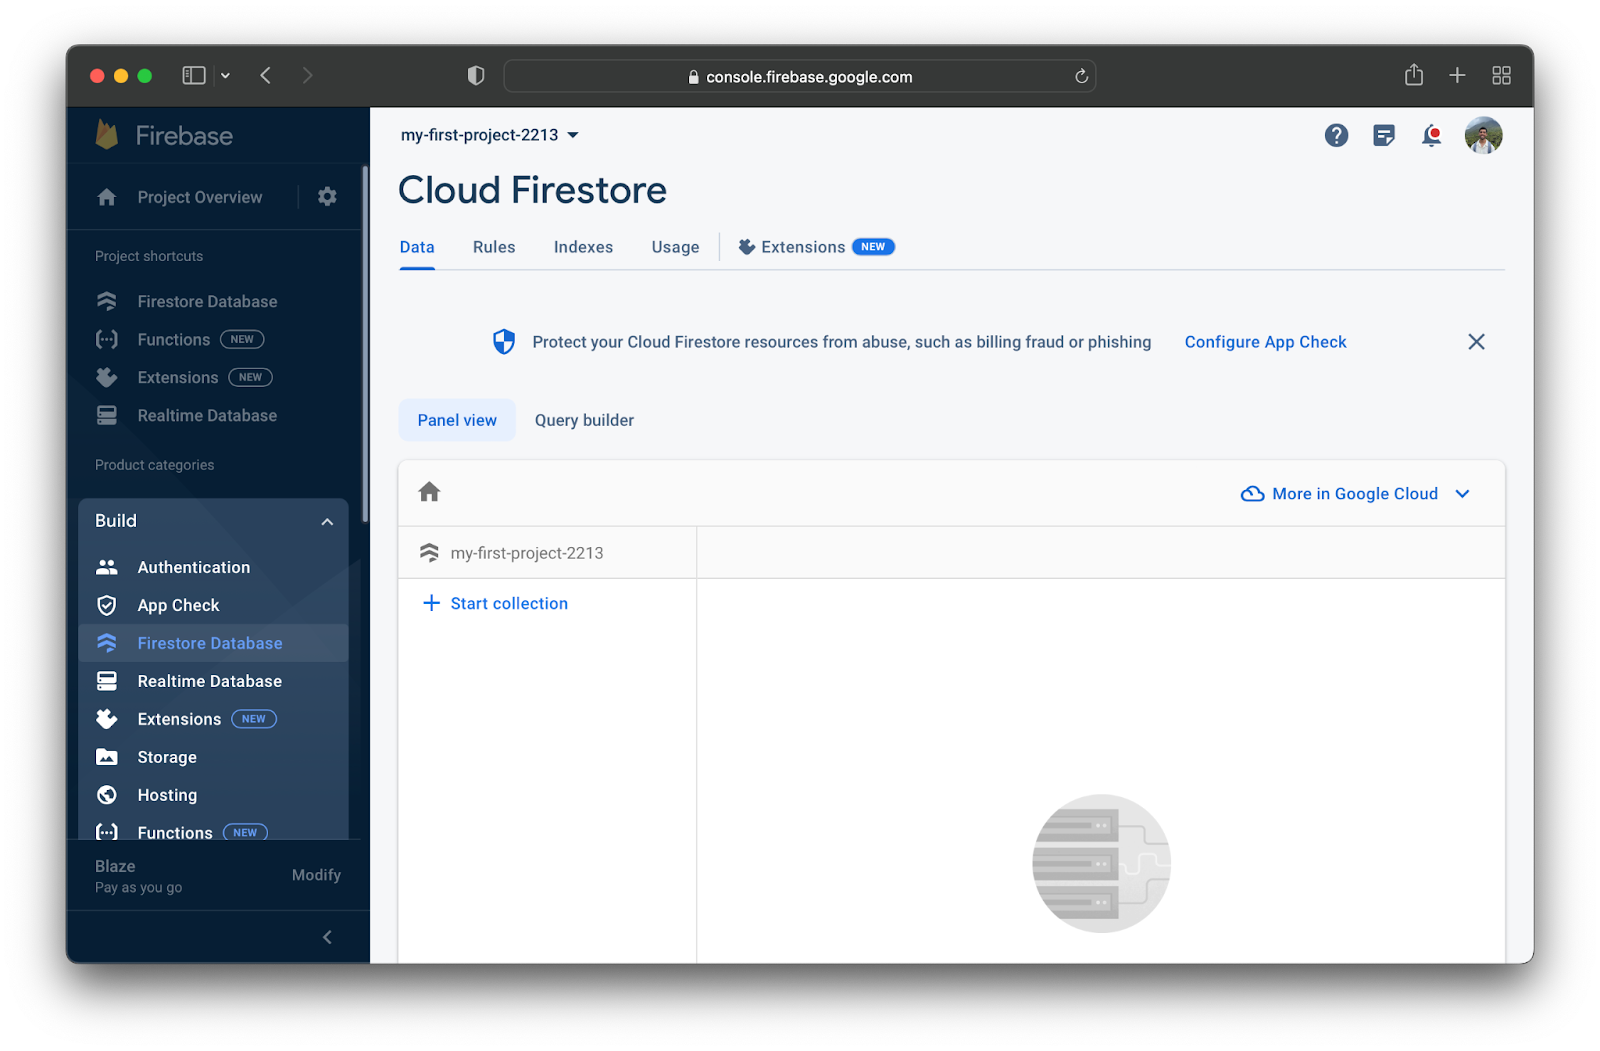
If you don’t see the collection you specified during installation, create it by clicking on + Start collection and choosing the name you specified during installation. If you did not specify a name, the default name will be messages. Click Next to add in your first document, which will be used to trigger the extension to send out a message.
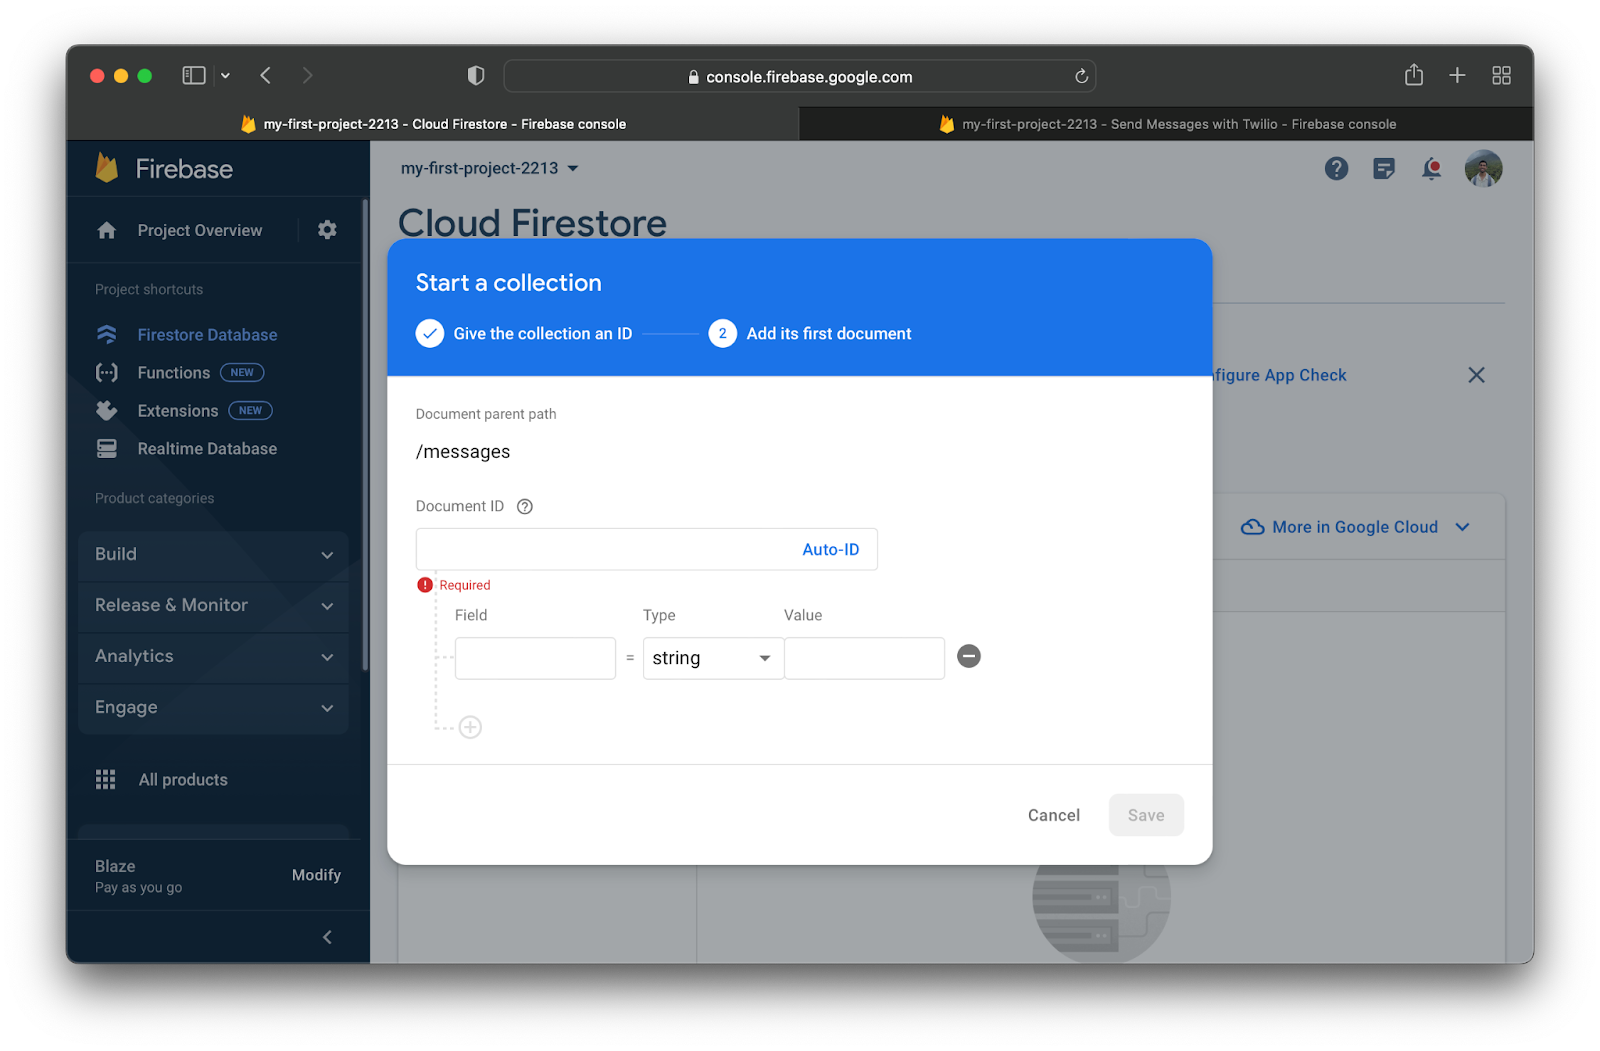
All documents need to have a unique ID, so click on Auto-ID to generate one. Now you’ll need to add in the necessary fields to send out a message. You should’ve already added in your Twilio phone number during the installation process, so you’ll just need to add in the to and body fields. If you did not provide your Twilio phone number or Messaging Service SID during the installation process, you can add that value for the from field.
When entering in the phone number values for the to and from fields, ensure they’re in E.164 format and when entering all values, ensure the Type is set to string. Feel free to enter whatever message you’d like for the body field. After filling in all of the fields, your document should look like the following:
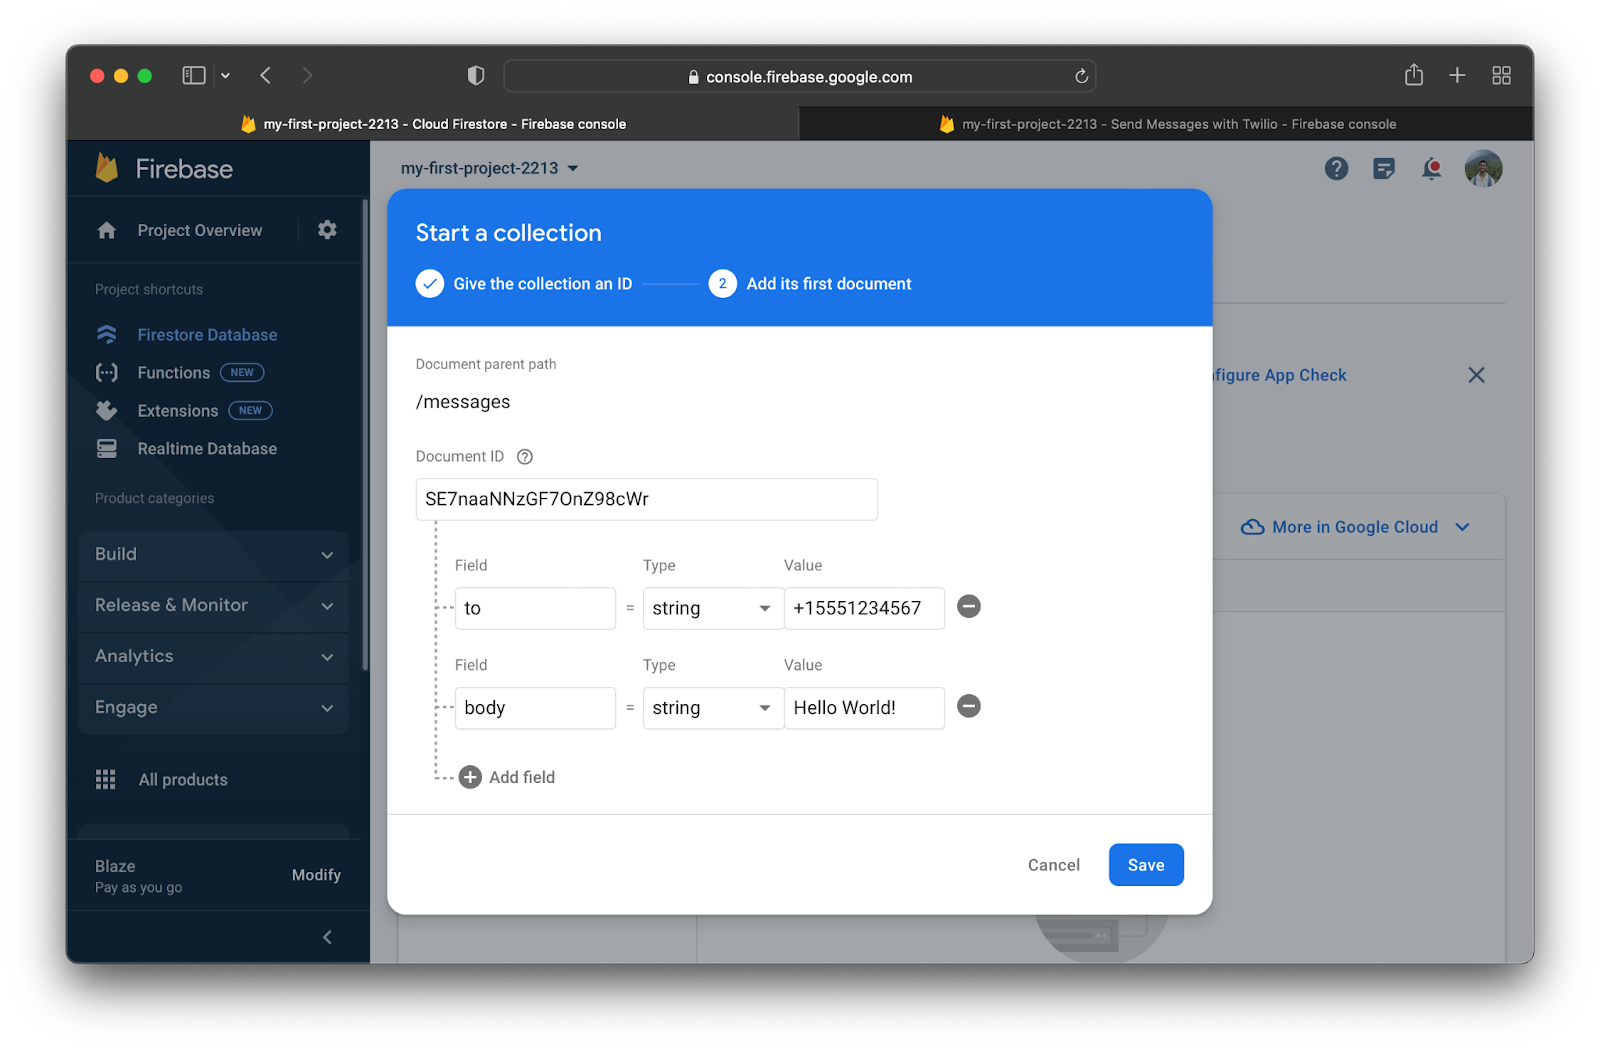
Click Save to send the message and wait a few seconds for the message to process. After a few seconds, you’ll notice the delivery field populate with data on the delivery status of the message like so:
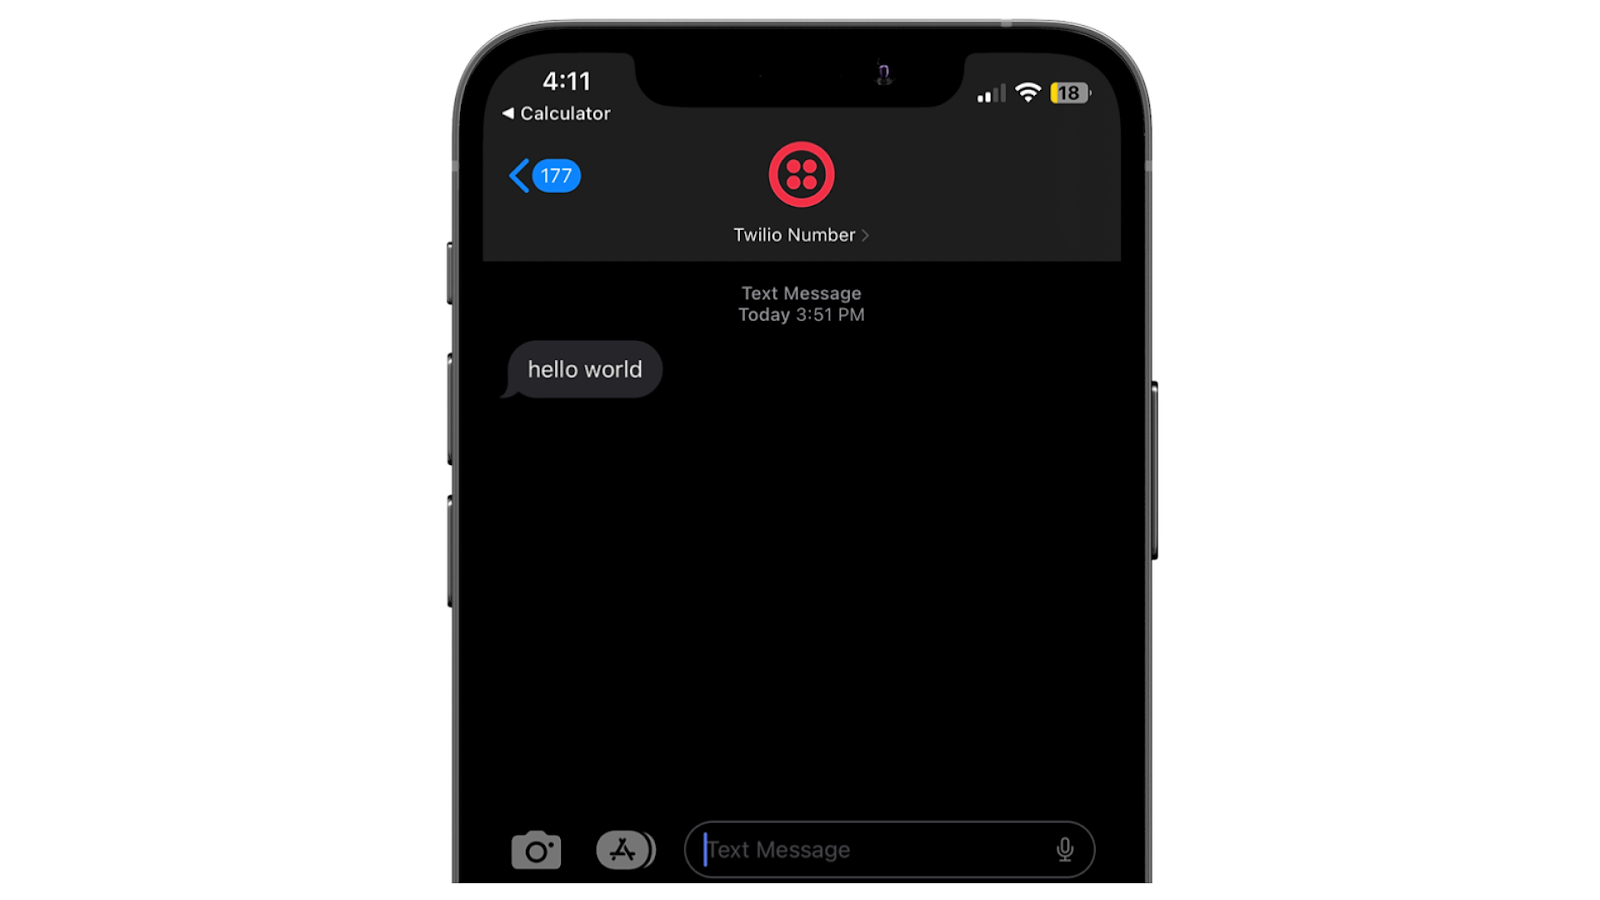
If the message was successful, you’ll receive an SMS to the provided to number:
Conclusion
In this article, you learned how to leverage Twilio’s Send Message extension on Firebase to send out messages and track the delivery of them seamlessly. With the power of Firebase and Twilio, you now have the necessary tools to create high-quality applications with advanced messaging capabilities. Happy building!
Dhruv Patel is a Developer on Twilio’s Developer Voices team. You can find Dhruv working in a coffee shop with a glass of cold brew or he can either be reached at dhrpatel [at] twilio.com or LinkedIn.
Related Posts
Related Resources
Twilio Docs
From APIs to SDKs to sample apps
API reference documentation, SDKs, helper libraries, quickstarts, and tutorials for your language and platform.
Resource Center
The latest ebooks, industry reports, and webinars
Learn from customer engagement experts to improve your own communication.
Ahoy
Twilio's developer community hub
Best practices, code samples, and inspiration to build communications and digital engagement experiences.


