How to Send SMS with Messaging API and OpenAI API
Time to read:
September 20, 2024
Written by
Reviewed by
You can't deny that excellent customer service doesn’t affect how you feel about a brand or business. According to McKinsey, 70% of buying experiences are based on how customers feel they are being treated. Even a simple "Thank you for doing business with us" or "We're glad you're our customer" significantly impacts customer satisfaction and experience.
According to Shep Hyken, a renowned customer experience expert and New York Times bestselling business author, compliments or affirmations are a powerful way to show customers that you value and appreciate them. Thus, a practical approach businesses can take is to leverage the power of positive affirmations into their customer engagement strategy. After all, a happy customer is a great way to create a repeat customer and get them to recommend your product or service to friends or colleagues.
This tutorial will show you how to build a word-of-affirmation service SMS application using the Twilio Programmable Messaging API and the OpenAI API. The application you build will send positive messages to users, one with predefined messages and another that generates new messages with OpenAI's GPT-3 model.
Prerequisites
To follow this tutorial, you will need the following:
- Python 3.9 or higher - Download it here.
- IDE or Code Editor of your choice. I recommend Visual Studio Code.
- A Twilio account.
- An OpenAI developer account.
- Basic understanding of HTML and Python.
Set up your development environment variables
Before we start building, you need to create your development environment variables. Follow this article to learn how to set your environment variables on Windows, macOS or any UNIX-based operating system.
To create a .env file, go to the root directory of your projects and create a text file. Next, install the python-dotenv package in your virtual environment using:
Then import a . env file into a Python application using:
To learn more about environment variables in Python, check out our blog's detailed article on working with environment variables in Python.
Create the Twilio messaging app
Run the following commands in your terminal to initialize a new Python virtual environment. This command will automatically activate your virtual environment.
Install the Flask and Twilio Python packages using pip:
You will be using the following packages and functions in your application.
- Twilio - A package that allows you to interact with the Twilio API.
- Flask - A lightweight and flexible web application framework for Python that allows users to build simple web applications.
Create a Python file and call it app.py. You will create the Flask application in this Python file to send the SMS. But first, let’s import all the necessary modules and packages with the code below.
Create the frontend interface of the application
In this section, you are going to create the frontend or client-facing side of the app.
Within your folder, create a templates folder. In this folder, create an index.html file and paste the code below.
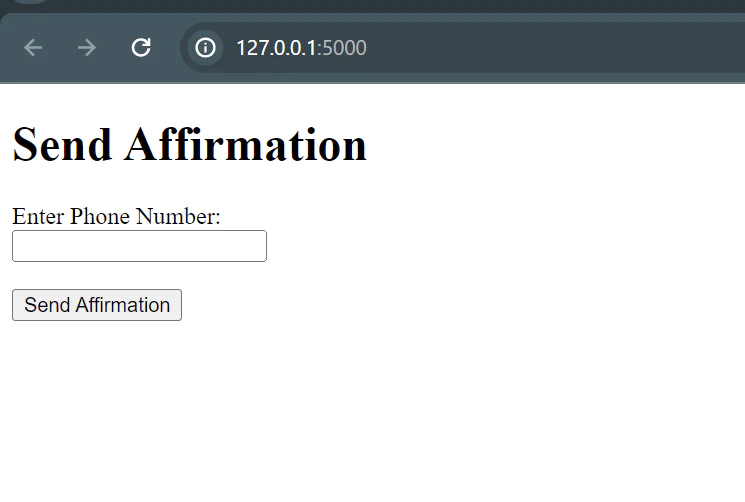
The index.html file is an HTML file that we serve as the template for the home page of your web application. This template will be rendered by the Flask route associated with the root URL ("/").
Our homepage will have the following declarations:
- A
<h1>tag for the title "Send Affirmation" title. - A
<form>tag that provides users with a form to input their phone number to receive affirmations. - A
<label>tag for the phone number input field. - A
<input>field allows users to enter their phone number and is required to be filled out before submitting the form. This should be in E.164 format when inputting the number. - A submit button
<button>that needs to be clicked for the action—send the affirmation form.

Set up your Flask application
Next, we initialize our Flask application. Before your HTML files will work as expected, there needs to be an application server or web server configured to serve the HTML files to clients upon request.
Next, you’ll need to set up a Twilio account if you don't have one. However, if you do, you will need to retrieve the Twilio credentials so you can interact with the Twilio API. Next, you need to buy a phone number if you don't have one.
To get your Twilio credentials, visit your Twilio Console and copy your Twilio Account SID and Auth Token and paste them into your .env file. You should check out our developer support page on Auth Token to learn about how these credentials work.
Next, you need to add your affirmations text. This text will be powered with a function that randomly picks an affirmation text from the list using the random module. Copy and paste the following code below to your app.py file:
Set up routes for your application
Next, we will add a '/' route that renders your index.html template, along with a '/send_affirmation' route triggered when a user submits a form with their phone number. When a user navigates to the application's root URL, Flask renders the index.html template.
With this, users just need to put their number in a form to receive and submit the affirmation. Our app will generate a random affirmation at the backend and send it to the provided phone number.
Once this number is submitted, your /send_affirmation gets triggered; then, the method for this route accepts POST requests. This method also retrieves the recipient's phone number from the form and retrieves a random affirmation using the generate_affirmation() function.
Here, the client.messages.create(...) acts as a gateway to Twilio's Python client library and service to create a new SMS message. Within the client.message is the message body that is generated from the generate_affirmation() function, the "from" which is your Twilio number, and the "to" for the recipient's number.
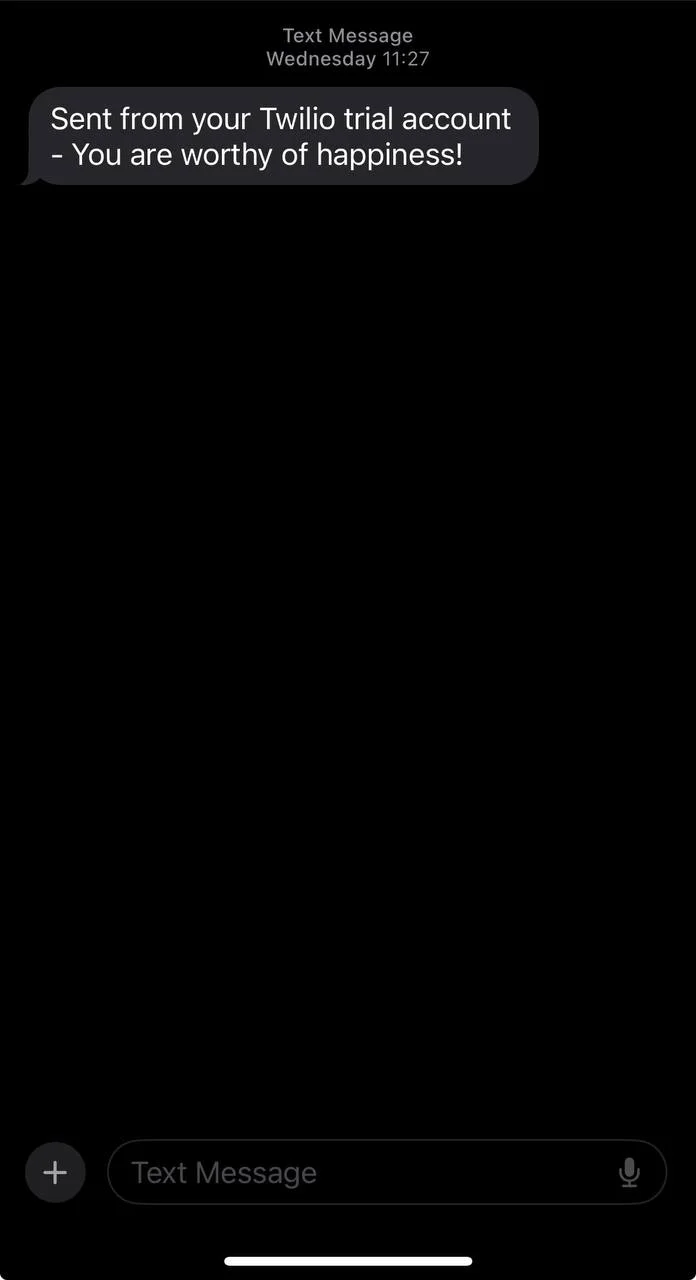
Next, the code attempts to send an SMS message with the affirmation to the number. A message saying "Affirmation sent successfully!" appears if this process happens successfully.
Finally, we run the Flask application.
Save your script and execute your Flask application by running the command below in your terminal.
Flask will automatically start a development server for you and run the web application on http://127.0.0.1:5000/ terminal. Next, input the customer phone number and wait.

The inputted number will receive the affirmation message immediately.
Integrate OpenAI API into your SMS project
OpenAI is an artificial intelligence (AI) research company infamously known for the Chat GPT AI chatbot and multiple advanced language models, such as GPT-3.5, GPT-4, Whispers, Dall-E 2, and GPT-4o. These various models have been trained for various natural language processing tasks ranging from speech recognition to text and image-generative AI capabilities
This article will explore GPT-4, a large multimodal model that accepts text inputs and accurately outputs text. It is important to know that this model isn’t open-source, but you can access it via the OpenAI API. If you prefer an open-source model, I recommend exploring the Meta-Llama-3.1-8B-Instruct model; here is the documentation.
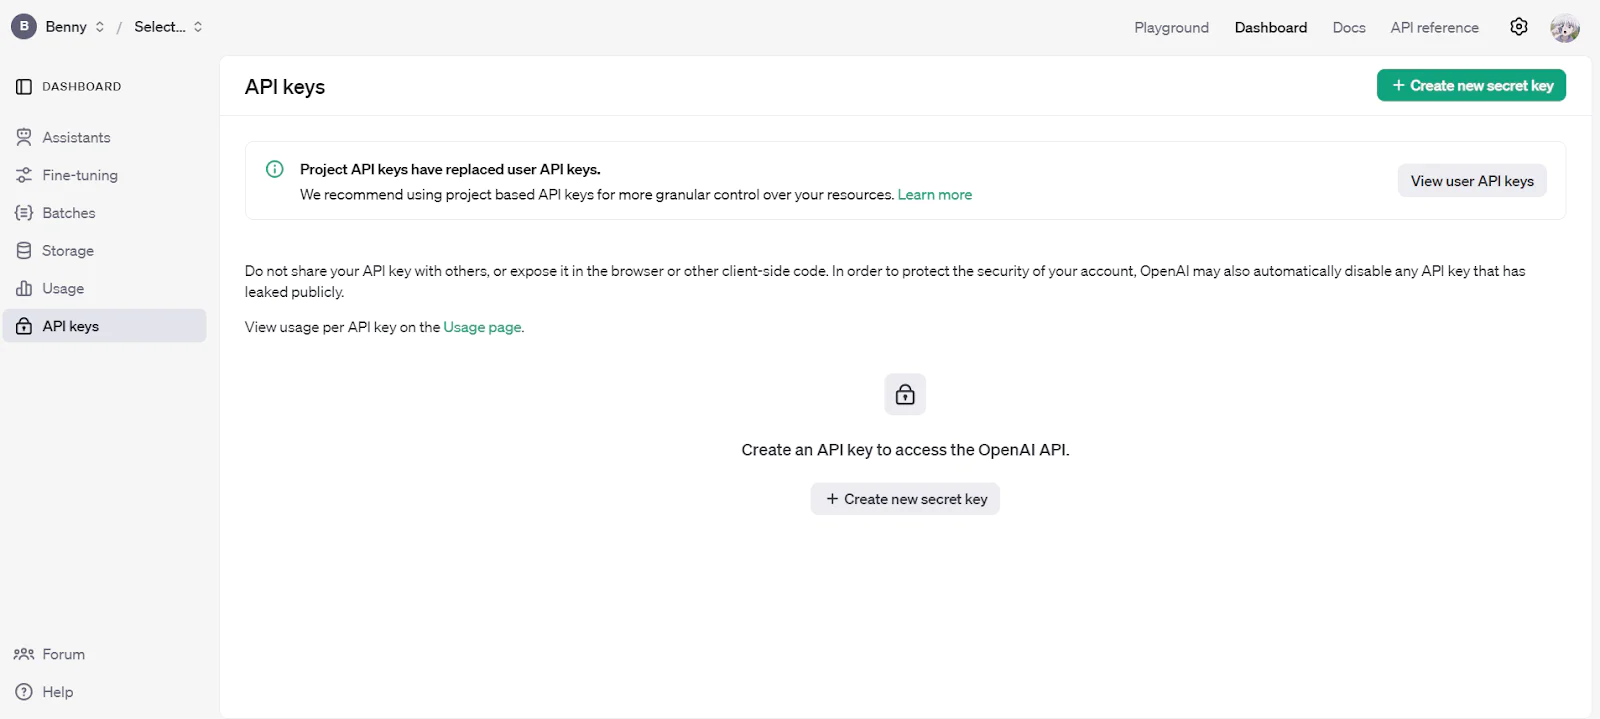
To use the OpenAI API, you must first create an OpenAI developer account. Then, visit the API keys section of your dashboard and click on “create a new secret Key” to generate an API key.
You would store this key in your .env environment.
Utilize the OpenAI API in your SMS Flask application
In this section, you will call the OpenAI API to generate messages.
To do this, navigate to your app.py file and add the line below. You can get your OpenAI key from your OpenAI developer dashboard. Similarly to your Twilio SID, phone number, and AUTH token, save this key in your .env file.
Next install OpenAI within your environment through your terminal.
Then import OpenAI within your app.py script.
Now, you will create a generate_affirmation() function. This function will interact with the GPT-4 model, which is great for natural language processing. The model has the ability to follow instructions with precision and efficiency. You can learn more about the GPT-4 from the Open AI documentation and explore other models like GPT-4o-mini.
Copy and paste the following code below to the app.py file:
This code explains how to generate the word of affirmation messages using OpenAI's GPT model. The def generate_affirmation() defines a message-generating Python function for our application. Our function includes the prompt for the text input our model receives. You can modify it to get a much better brand compliance output.
You also have the response, where you specify the model you want to use, followed by the prompt already defined, and the max_toxen to limit the number of text characters generated. Your output is the first generated text stripped of any whitespaces.
Remember to comment out the first affirmation function that uses the predefined random messages you wrote earlier.
Test your application
You can view the full code in this GitHub repository.
Execute your Python script with the command below:
This will create and run your web application locally on http://127.0.0.1:5000/. Once the site loads, enter a number via the form on the web app and submit. The inputted number will receive an SMS with an affirmation message.
Congratulations! Your customer just received some words of affirmation using the Open AI API. You can play around with the prompt to get better brand compliance output.
What's next for building SMS apps with OpenAI API?
In this tutorial, you learned how to build a web application service app that sends word-of-affirmation via the Twilio Programmable Messaging API. You also used OpenAI API to generate these messages.
While this guide provides a basic overview, you can use this application in the real world with a few tweaks, better prompts, and some automations through some additional steps.
Check out these other articles to learn more about the Twilio Messaging API and OpenAI.
- How to Send an Automated Greeting Card with Twilio SMS
- Build a Movie recommendation app with Wikidata and Twilio Messaging
- How to Build a Customized AI Chatbot on WhatsApp with Python, Twilio, and the ChatGPT API
Happy coding!
Ifeanyi Benny is an experienced data analyst and engineer who prioritizes innovation and loves sharing knowledge as an educator across various channels, international conferences, and user groups. Explore more via his Linkedin and contact him at iheifeanyi [at] gmail.com


Related Resources
Twilio Docs
From APIs to SDKs to sample apps
API reference documentation, SDKs, helper libraries, quickstarts, and tutorials for your language and platform.
Resource Center
The latest ebooks, industry reports, and webinars
Learn from customer engagement experts to improve your own communication.
Ahoy
Twilio's developer community hub
Best practices, code samples, and inspiration to build communications and digital engagement experiences.