Set Up Seamless Magic Link Authentication with SendGrid and Laravel

August 20, 2024
Written by
Prosper Ugbovo
Contributor
Opinions expressed by Twilio contributors are their own
Reviewed by

Set Up Seamless Magic Link Authentication with SendGrid and Laravel

Several password breaches over the years have sparked a revolt against standard password-based authentication, resulting in the growth of passwordless authentication.

Passwordless authentication is a method of logging a user into a system without a password or any other knowledge-based secret. One of these approaches is magic link authentication.

Magic link authentication is a contemporary and user-friendly mechanism enabling users to log in or register without passwords. Users can safely authenticate themselves by clicking a link via email.

This tutorial will walk you through implementing magic link authentication in a Laravel application using SendGrid.

Prerequisites

  • Prior knowledge of Laravel and PHP
  • PHP 8.2 or newer
  • Composer globally installed
  • A SendGrid account. Create a free account if you don't already have one.
  • Your preferred text editor or IDE

Set up the project

To begin, you need to create a new Laravel project via Composer, navigate into the project folder:

composer create-project laravel/laravel magic-link
cd magic-link

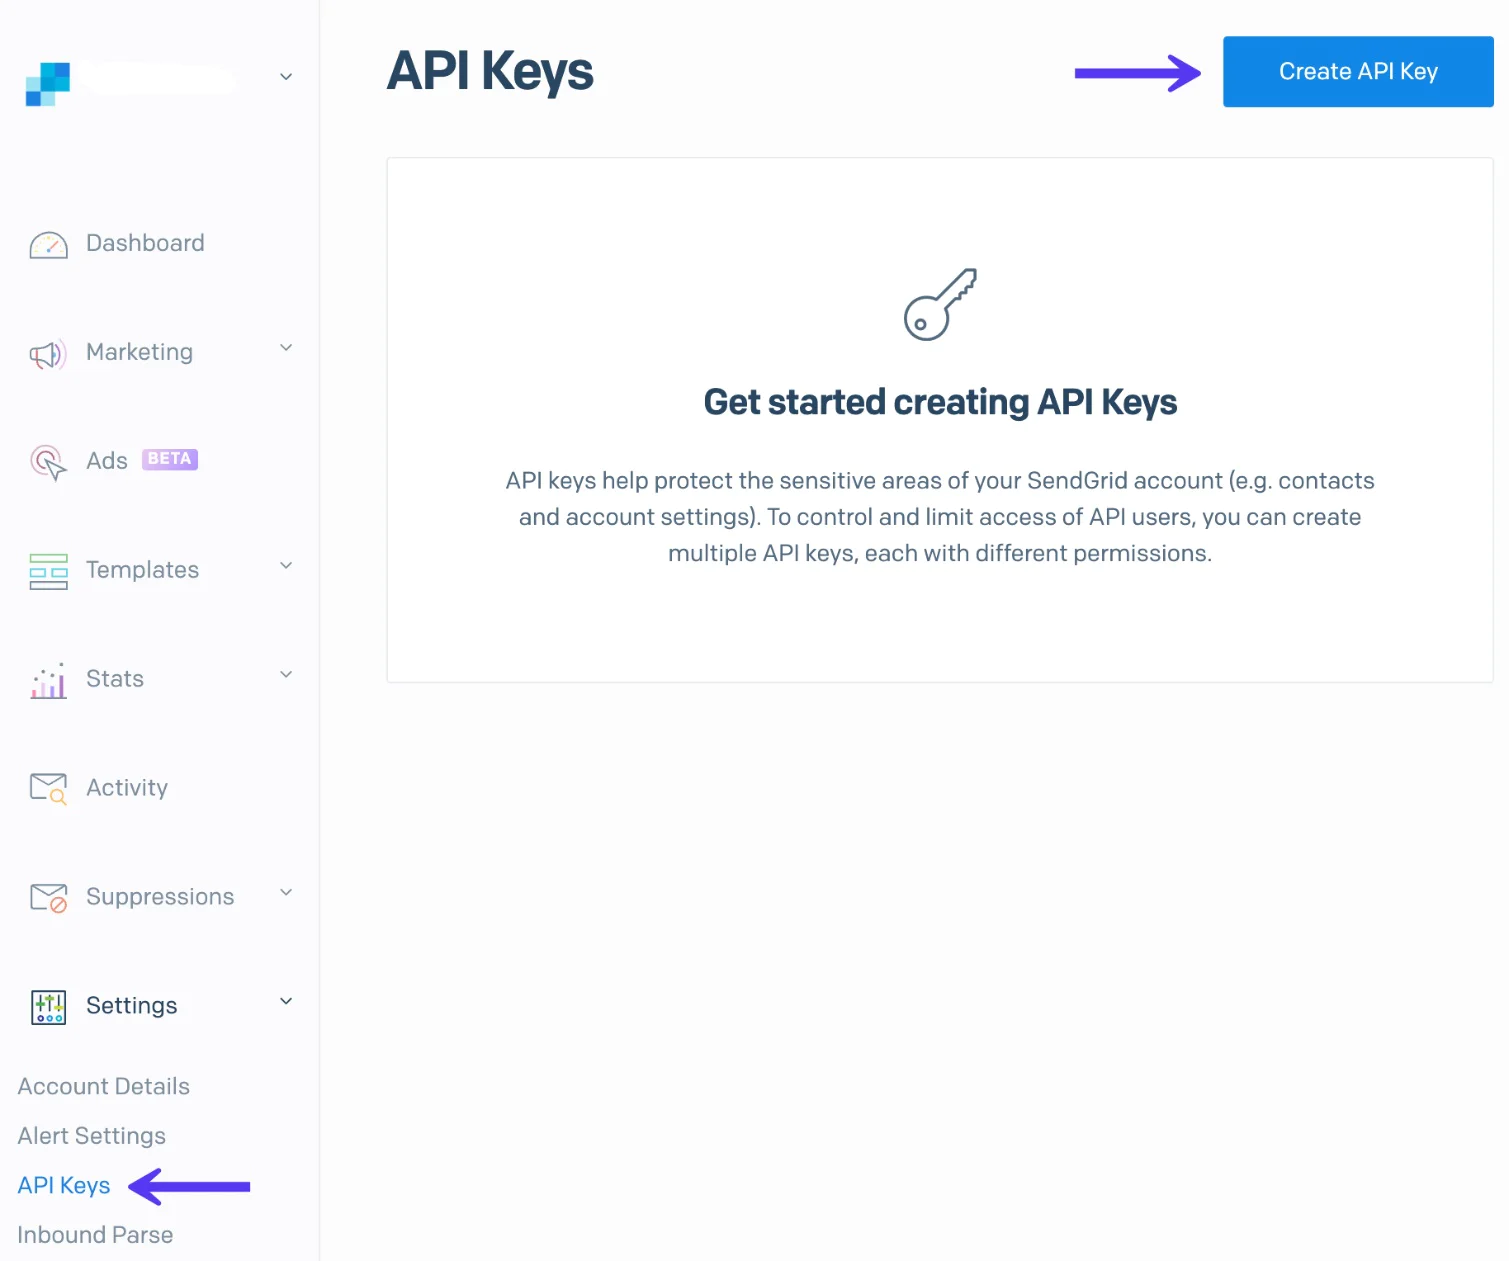
Next, generate an API key to connect your SendGrid account to Laravel. In your SendGrid Dashboard, navigate to the Settings tab on the left-hand side and choose API Keys. When you click the "Create API Key" button on the top-right corner, a form will be displayed. After completing this form, you will have access to your API credentials.

After that, open the .env file in your preferred IDE or text editor to store these credentials. there, update the mail configuration settings, they're prefixed with MAIL_, to reflect the configuration below.

MAIL_MAILER=smtp
MAIL_HOST=smtp.sendgrid.net
MAIL_PORT=587
MAIL_USERNAME=apikey
MAIL_PASSWORD=<<YOUR_SENDGRID_API_KEY>>
MAIL_ENCRYPTION=tls
MAIL_FROM_ADDRESS=<<YOUR_EMAIL@EXAMPLE.COM>>
MAIL_FROM_NAME="${APP_NAME}"

Make sure you replace the two placeholders with your newly generated SendGrid API key and your verified single-sender email address.

By default, Laravel 11 configures the application to use SQLite. You can modify the .env file to configure a different database, if you desire.

DB_CONNECTION=<<YOUR_DATABASE_TYPE>>
DB_HOST=127.0.0.1
DB_PORT=3306
DB_DATABASE=<<YOUR_DATABASE_NAME>>
DB_USERNAME=<<YOUR_DATABASE_USERNAME>>
DB_PASSWORD=<<YOUR_DATABASE_PASSWORD>>

The application would need the magic_links table to store information regarding the magic link. Run the command below to create the MagicLink model and migration classes:

php artisan make:model MagicLink -m

This generates two files, the model: app/Models/MagicLink.php and the migration: database/migrations/[timestamp]_create_magic_links_table.php, respectively.

Paste the code below into the migration file:

<?php

use Illuminate\Database\Migrations\Migration;
use Illuminate\Database\Schema\Blueprint;
use Illuminate\Support\Facades\Schema;

return new class extends Migration
{
    /**
     * Run the migrations.
     */
    public function up(): void
    {
        Schema::create('magic_links', function (Blueprint $table) {
            $table->id();
            $table->string('token');
            $table->longText('payload');
            $table->string('ip_address', 45);
            $table->timestamps();
        });
    }

    /**
     * Reverse the migrations.
     */
    public function down(): void
    {
        Schema::dropIfExists('magic_links');
    }
};

Then, add the code below to the model file:

protected $guarded = ['id'];

If you are having issues setting up SendGrid, you can check out this guide.

Building the Frontend

This application will require three pages: login, registration, and dashboard. First, you'll create a GuestLayout that contains shared codes for the login and registration pages by running the following command below:

php artisan make:component GuestLayout

The command created a GuestLayout.php file in the app/View/Components directory and a guest-layout.blade.php file in resources/views/components/. In guest-layout.blade.php, paste the following code:

<!DOCTYPE html>
<html lang="{{ str_replace('_', '-', app()->getLocale()) }}">
<head>
    <meta charset="utf-8">
    <meta name="viewport" content="width=device-width, initial-scale=1">
    <meta name="csrf-token" content="{{ csrf_token() }}">
    <title>{{ config('app.name', 'Laravel') }}</title>
    <!-- Fonts -->
    <link rel="preconnect" href="https://fonts.bunny.net">
    <link href="https://fonts.bunny.net/css?family=Inter:400,500,600&display=swap" rel="stylesheet"/>
    <!-- Scripts -->
    <script src="https://cdn.tailwindcss.com"></script>
    <script>
        tailwind.config = {
            theme: {
                fontFamily: {
                    sans: ['Inter', 'sans-serif'],
                },
            }
        }
    </script>
</head>
<body class="font-sans text-gray-900 antialiased">
<div class="min-h-screen flex flex-col sm:justify-center items-center pt-6 sm:pt-0 bg-gray-100">
    <div class="w-full sm:max-w-md mt-6 px-6 py-4 bg-white shadow-md overflow-hidden sm:rounded-lg">
        {{ $slot }}
    </div>
</div>
</body>
</html>

Next, create a new directory named auth in the resources/views directory, then, in that new directory, create a file named register.blade.php. Then, paste the code shown below into the new file:

<x-guest-layout>
    <!-- Session Status -->
    @if (session('status'))
        <div class='font-medium text-sm text-green-600 mb-4'>
            {{ session('status') }}
        </div>
    @endif
    <form method="POST" action="{{ route('register') }}">
        @csrf
        <!-- Name -->
        <div>
            <label for="name" class="block font-medium text-sm text-gray-700">
                Name </label>
            <input id="name"
                   class="block mt-1 w-full border border-gray-300  p-2 focus:border-indigo-500 focus:ring-indigo-500 rounded-md shadow-sm"
                   type="text" name="name" required autofocus autocomplete="name">
            @error('name')
            <ul class='mt-2 text-sm text-red-600 space-y-1'>
                <li>{{ $message }}</li>
            </ul>
            @enderror
        </div>
        <!-- Email Address -->
        <div>
            <label for="email" class="block font-medium text-sm text-gray-700">
                Email
            </label>
            <input id="email"
                   class="block mt-1 w-full border border-gray-300  p-2 focus:border-indigo-500 focus:ring-indigo-500 rounded-md shadow-sm"
                   type="email" name="email" required autofocus autocomplete="username">
            @error('email')
            <ul class='mt-2 text-sm text-red-600 space-y-1'>
                <li>{{ $message }}</li>
            </ul>
            @enderror
        </div>
        <div class="mt-4">
            <button type="submit"
                    class='justify-center inline-flex items-center px-4 py-2 bg-gray-800  w-full border border-transparent rounded-md font-semibold text-xs text-white uppercase tracking-widest hover:bg-gray-700 focus:bg-gray-700 active:bg-gray-900 focus:outline-none focus:ring-2 focus:ring-indigo-500 focus:ring-offset-2 transition ease-in-out duration-150'>
                Register
            </button>
        </div>
    </form>
</x-guest-layout>

Then, create a second new file named login.blade.php file in the resources/views/auth directory, and paste the code shown below:

<x-guest-layout>
    <!-- Session Status -->
    @if (session('status'))
        <div class='font-medium text-sm text-green-600'>
            {{ session('status') }}
        </div>
    @endif
    <form method="POST" action="{{ route('login') }}">
        @csrf
        <!-- Email Address -->
        <div>
            <label for="email" class="block font-medium text-sm text-gray-700">
                Email
            </label>
            <input id="email"
                   class="block mt-1 w-full border border-gray-300  p-2 focus:border-indigo-500 focus:ring-indigo-500 rounded-md shadow-sm"
                   type="email" name="email" value="{{old('email')}}" required autofocus autocomplete="username">
            @error('email')
            <ul class='mt-2 text-sm text-red-600 space-y-1'>
                <li>{{ $message }}</li>
            </ul>
            @enderror
        </div>
        <div class="mt-4">
            <button type="submit"
                    class='justify-center inline-flex items-center px-4 py-2 bg-gray-800  w-full border border-transparent rounded-md font-semibold text-xs text-white uppercase tracking-widest hover:bg-gray-700 focus:bg-gray-700 active:bg-gray-900 focus:outline-none focus:ring-2 focus:ring-indigo-500 focus:ring-offset-2 transition ease-in-out duration-150'>
                Login
            </button>
        </div>
    </form>
</x-guest-layout>

Finally, create a third file, named dashboard.blade.php, this time in the resources/views directory, and paste the code shown below:

<!DOCTYPE html>
<html lang="{{ str_replace('_', '-', app()->getLocale()) }}">
<head>
    <meta charset="utf-8">
    <meta name="viewport" content="width=device-width, initial-scale=1">
    <meta name="csrf-token" content="{{ csrf_token() }}">
    <title>{{ config('app.name', 'Laravel') }}</title>
    <!-- Fonts -->
    <link rel="preconnect" href="https://fonts.bunny.net">
    <link href="https://fonts.bunny.net/css?family=figtree:400,500,600&display=swap" rel="stylesheet"/>
    <!-- Scripts -->
    <script src="https://cdn.tailwindcss.com"></script>
    <script>
        tailwind.config = {
            theme: {
                fontFamily: {
                    sans: ['Inter', 'sans-serif'],
                },
            }
        }
    </script>
</head>
<body class="font-sans antialiased">
<!-- Page Content -->
<main>
    <div class="min-h-screen flex flex-col sm:justify-center items-center pt-6 sm:pt-0 bg-gray-100">
        <div class="w-full sm:max-w-md mt-6 px-6 py-4 bg-white shadow-md overflow-hidden sm:rounded-lg">
            Welcome,<span class="font-medium text-base text-gray-700 "> {{ Auth::user()->name }}</span>
            <form method="POST" action="{{ route('logout') }}" class="mt-8">
                @csrf
                <a class="block w-full ps-3 pe-4 py-2 border-l-4 border-transparent text-start text-base font-medium text-gray-600  hover:text-gray-800 hover:bg-gray-50  hover:border-gray-300  focus:outline-none focus:text-gray-800 focus:bg-gray-50 focus:border-gray-300  transition duration-150 ease-in-out"
                   href="{{route('logout')}}"
                   onclick="event.preventDefault(); this.closest('form').submit();">
                    {{ __('Log Out') }}
                </a>
            </form>
        </div>
    </div>
</main>
</body>
</html>

Write the registration logic

For the registration process, the user fills out the form, the inputted values are validated, and if no error occurs, a unique link is generated and sent to the user by mail. When this link is clicked, the authenticity of the link is verified. If there are no errors, the user’s record is created, and the user is then authenticated.

To achieve this, you will need a controller to handle the registration logic. To create one, run the command below:

php artisan make:controller Auth/RegisterController

Open the newly created file ( app/Http/Controllers/Auth/RegisterController.php) and paste the following code into it:

<?php

namespace App\Http\Controllers\Auth;

use App\Http\Controllers\Controller;
use App\Models\MagicLink;
use App\Models\User;
use App\Notifications\RegisterNotification;
use Illuminate\Http\RedirectResponse;
use Illuminate\Http\Request;
use Illuminate\Support\Facades\Auth;
use Illuminate\Support\Facades\Notification;
use Illuminate\Support\Facades\URL;
use Illuminate\Support\Str;

class RegisterController extends Controller
{
    public function index()
    {
        return view('auth.register');
    }

    public function create(Request $request): RedirectResponse
    {
        $request->validate([
            'name' => ['required', 'string', 'max:255'],
            'email' => ['required', 'string', 'lowercase', 'email', 'max:255', 'unique:' . User::class],
        ]);
        $token = Str::uuid();
        $magicLink = URL::temporarySignedRoute(
            'verify.registration',
            now()->addHour(),
            ['token' => $token->toString()]
        );
        Notification::route('mail', $request->email)->notify(new RegisterNotification($magicLink));
        MagicLink::create([
            'token' => $token,
            'payload' => encrypt($request->all()),
            'ip_address' => $request->ip(),
            'user_agent' => $request->userAgent(),
        ]);
        return back()->with(['status' => 'Please check your email to complete your registration']);
    }
}

The first method defined in RegisterController, index(), returns the view for registration and will be linked to a route later on. The create() method, which handles the first bit of the registration process, ensures that the data from the submitted form meets the criteria defined in the validate() method.

Next, a token that is pivotal in verifying the request is generated and passed to a temporary, signed route. The reason for using a temporary signed route is that if the URL changes after it has been sent out of the system, the change will be noted, and the route can also expire. Currently, its lifespan is set to one hour (this can be adjusted as desired).

Following that, a notification class is dispatched to send the email. Finally, records about this event are stored in the "magic_links" database, and the user is redirected back to the registration page with a message confirming that the registration link has been sent. It is worth noting that the user's record is not yet stored in the database, as only records of users whose registrations have been verified are entered.

You may have wondered why you had to save the user’s IP address. Well, if this link is accessed by a malicious user, the link can be used to access the original user’s account. So, it's important to assert that the computer that requested the link is attempting to use it.

The user table has certain fields that are not required. Therefore, it's worth cleaning them up by replacing the content of the database/migrations/0001_01_01_000000_create_users_table.php file with:

<?php

use Illuminate\Database\Migrations\Migration;
use Illuminate\Database\Schema\Blueprint;
use Illuminate\Support\Facades\Schema;

return new class extends Migration
{
    /**
     * Run the migrations.
     */
    public function up(): void
    {
        Schema::create('users', function (Blueprint $table) {
            $table->id();
            $table->string('name');
            $table->string('email')->unique();
            $table->rememberToken();
          $table->timestamps();
        });
        Schema::create('sessions', function (Blueprint $table) {
            $table->string('id')->primary();
            $table->foreignId('user_id')->nullable()->index();
            $table->string('ip_address', 45)->nullable();
            $table->text('user_agent')->nullable();
            $table->longText('payload');
            $table->integer('last_activity')->index();
        });
    }

    /**
     * Reverse the migrations.
     */
    public function down(): void
    {
        Schema::dropIfExists('users');
        Schema::dropIfExists('sessions');
    }
};

Now, run the migrations to effect these changes.

php artisan migrate:fresh

Create the notification class

In this application, rather than sending the mail via a Mailable class, the mail will be sent via a Notification class to whip things up quickly. To create the notification class, run the command below:

php artisan make:notification RegisterNotification

This creates a file named RegisterNotification.php in the app/notification directory. Open the file and paste the code shown below:

<?php

namespace App\Notifications;

use Illuminate\Bus\Queueable;
use Illuminate\Notifications\Messages\MailMessage;
use Illuminate\Notifications\Notification;

class RegisterNotification extends Notification
{
    use Queueable;

    /**
     * Create a new notification instance.
     */
    public function __construct(public readonly string $link,
    )
    {
        //
    }

    /**
     * Get the notification's delivery channels.
     *
     * @return array<int, string>
     */
    public function via(object $notifiable): array
    {
        return ['mail'];
    }

    /**
     * Get the mail representation of the notification.
     * @param object $notifiable
     * @return MailMessage
     */
    public function toMail(object $notifiable): MailMessage
    {
        return (new MailMessage)
            ->line('Your Registration Link is here!')
            ->action('Complete Registration!', url($this->link))
            ->line('Thank you for using our application!');
    }

    /**
     * Get the array representation of the notification.
     *
     * @return array<string, mixed>
     */
    public function toArray(object $notifiable): array
    {
        return [
            //
        ];
    }
}

With all the steps done, the first part of registration is complete. However, the need to verify the link sent via email and authenticate the user still needs to be met. For that, add the store() method below to app/Http/Controller/Auth/RegisterController.php:

public function store(Request $request)
{
    $e = MagicLink::where('token', $request->token)->first();
    if (($e->count() > 0) && $request->ip() === $e->ip_address) {
        $payload = decrypt($e->payload);
        $user = User::create($payload);
        Auth::login($user);
        return to_route('dashboard');
    }
    abort(401);
}

You may recall that a record of the event was kept in the database's "magic_links" table. If you examine the link, you will see that it contains a token. This token is checked with the database. If there is a match in the database and the IP address of the current request matches the stored IP address, the user is created, and then authenticated, before being redirected to the dashboard.

Finally, create the required routes in the routes/web.php file:

Route::middleware('guest')->group(function () {
    Route::get('/register', [App\Http\Controllers\Auth\RegisterController::class, 'index'])->name('register');
    Route::post('/register', [App\Http\Controllers\Auth\RegisterController::class, 'create']);
    Route::get('/verify/registration', [App\Http\Controllers\Auth\RegisterController::class, 'store'])
        ->name('verify.registration')
        ->middleware('signed');
});
Route::middleware('auth')->group(function () {
    Route::get('/dashboard', function () {
        return view('dashboard');
    })->name('dashboard');
    Route::post('/logout', function (Illuminate\Http\Request $request) {
        Illuminate\Support\Facades\Auth::guard('web')->logout();
        $request->session()->invalidate();
        $request->session()->regenerateToken();
        return redirect('/');
    })->name('logout');
});

Write the login logic

The logic for the login process is similar to the registration logic. The user fills out the form, the inputted value is checked against the database, and if a match is found a unique link is generated and sent to the user by email. When this link is clicked, the user is then authenticated if the link is valid.

To achieve this, you will need a controller to handle the registration logic. To create one, run the command below:

php artisan make:controller Auth/LoginController

Open the just-created file (app/Http/Controllers/Auth/LoginController.php) and paste the following code into it:

<?php

namespace App\Http\Controllers\Auth;

use App\Http\Controllers\Controller;
use App\Models\MagicLink;
use App\Models\User;
use App\Notifications\LoginNotification;
use Illuminate\Http\RedirectResponse;
use Illuminate\Http\Request;
use Illuminate\Support\Facades\Auth;
use Illuminate\Support\Facades\Notification;
use Illuminate\Support\Facades\URL;
use Illuminate\Support\Str;

class LoginController extends Controller
{
    public function index()
    {
        return view('auth.login');
    }

    public function create(Request $request): RedirectResponse
    {
        $request->validate([
            'email' => ['required', 'string', 'lowercase', 'email', 'max:255', 'exists:' . User::class],
        ]);
        $token = Str::uuid();
        $magicLink = URL::temporarySignedRoute(
            'verify.login',
            now()->addMinutes(10),
            ['token' => $token->toString()]
        );
        Notification::route('mail', $request->email)->notify(new LoginNotification($magicLink));
        MagicLink::create([
            'token' => $token,
            'payload' => encrypt($request->email),
            'ip_address' => $request->ip(),
            'user_agent' => $request->userAgent(),
        ]);
        return back()->with(['status' => 'Please check your email for your login link']);
    }

    public function store(Request $request): RedirectResponse
    {
        $e = MagicLink::where('token', $request->token)->first();
        if (($e->count() > 0) && $request->ip() === $e->ip_address) {
            $payload = decrypt($e->payload);
            $user = User::where('email', $payload)->first();
            Auth::login($user);
            return to_route('dashboard');
        }
        abort(401);
    }
}

The index() method returns the login view. The create() method validates the submitted data. A token just like in the RegisterController is generated and passed to a temporarily signed route whose lifespan is set at 10 minutes. Following that, a notification class is dispatched to be sent by mail. Finally, records about the event are stored in the "magic_links" database and a redirection back to the login page occurs, with a message confirming that the login link has been sent.

The store() method is used for verifying the login link, which is quite similar to the RegisterController's store() method. The only difference here is that instead of a new user being created, the user record is searched for based on the email stored in the "payload" column.

Next, run the command below to create a login notification class:

php artisan make:notification LoginNotification

After that, paste the code below in the newly created file ( app/Notifications/LoginNotification.php):

<?php

namespace App\Notifications;

use Illuminate\Bus\Queueable;
use Illuminate\Contracts\Queue\ShouldQueue;
use Illuminate\Notifications\Messages\MailMessage;
use Illuminate\Notifications\Notification;

class LoginNotification extends Notification
{
    use Queueable;

    /**
     * Create a new notification instance.
     */
    public function __construct(public readonly string $link)
    {
        //
    }

    /**
     * Get the notification's delivery channels.
     *
     * @return array<int, string>
     */
    public function via(object $notifiable): array
    {
        return ['mail'];
    }

    /**
     * Get the mail representation of the notification.
     */
    public function toMail(object $notifiable): MailMessage
    {
        return (new MailMessage)
                    ->line('Click the button below to login')
                    ->action('Login', url($this->link))
                    ->line('Thank you for using our application!');
    }

    /**
     * Get the array representation of the notification.
     *
     * @return array<string, mixed>
     */
    public function toArray(object $notifiable): array
    {
        return [
            //
        ];
    }
}

Finally, add the login routes to the "guest" middleware group where the register routes are found in the routes/web.php file:

Route::get('/login', [App\Http\Controllers\Auth\LoginController::class, 'index'])->name('login');
Route::post('/login', [App\Http\Controllers\Auth\LoginController::class, 'create']);
Route::get('/verify/login', [App\Http\Controllers\Auth\LoginController::class, 'store'])
    ->name('verify.login')
    ->middleware('signed');

Testing the application

After completing the necessary development steps, it's important to test the code to ensure it functions properly. Start the application by running the following command.

php artisan serve

The PHP development server will start on port 8000. You can now test this in your browser by visiting http://127.0.0.1:8000/register.

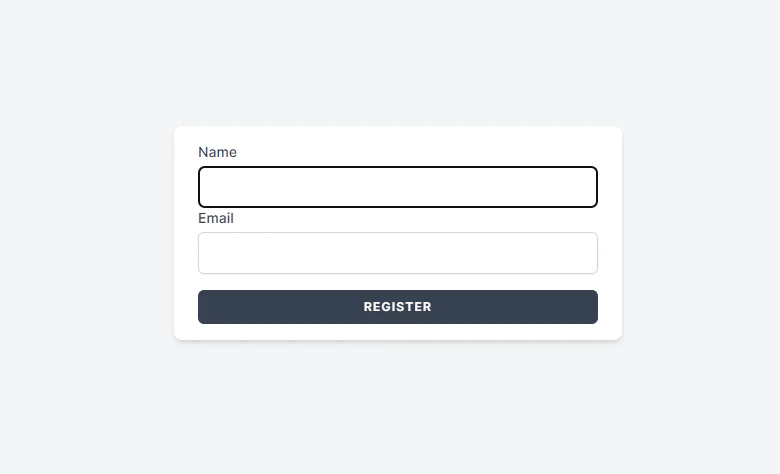
Input your name and email address, then click on the REGISTER button:

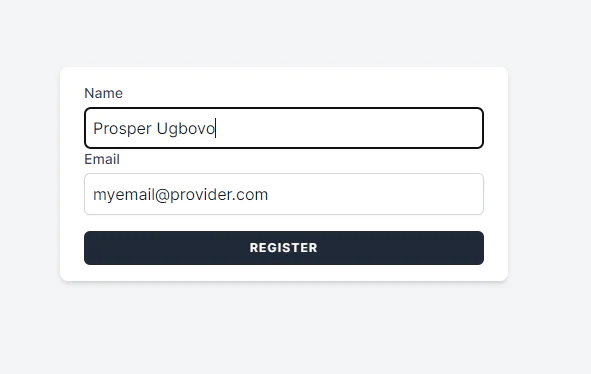
After a successful submission, you should see a success message above the form.

Next, check your email inbox for the registration link:

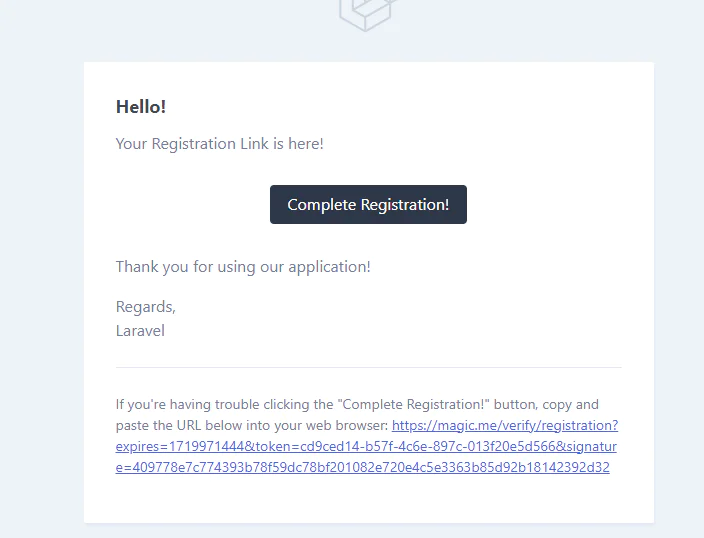
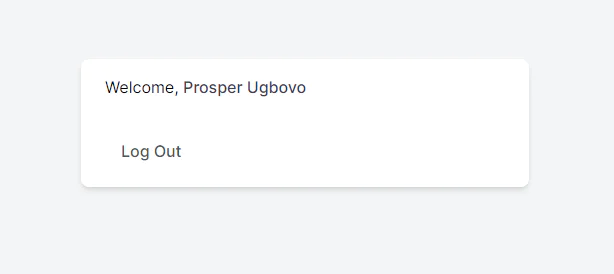
You will be authenticated when you click the Complete Registration button in the email, and a new user record will be created in the database. Then, you will be redirected to the “/dashboard” route.

In this tutorial, you learned how to create seamless Magic Links using SendGrid and Laravel. This solution increases security by eliminating the need for passwords while also providing a more convenient login process.

Additionally, schedule a process to clean up the MagicLink database every 24 hours to free up database resources. Happy coding!

Prosper is a freelance Laravel web developer and technical writer who enjoys working on innovative projects that use open-source software. When he's not coding, he searches for the ideal startup opportunities to pursue. You can find him on Twitter and Linkedin.