Recording and Saving Outbound Voice Calls with Python, Twilio and Dropbox
Time to read:
In this tutorial, we’ll be looking at how to record outbound voice calls via the Twilio Programmable Voice API as well as uploading the recordings to Dropbox using the Dropbox API. So basically, person #1 would call your Twilio number, ask to call a person #2 by entering their phone number, and then the call between person #1 and person #2 would be recorded and sent to Dropbox.
Technical requirements
To follow along, you’ll need the following:
- A free Twilio Account. If you use this link to register, you will receive $10 credit when you upgrade to a paid account.
- Python Development Environment
- Ngrok. This will make the development version of our application accessible over the Internet.
- A free Dropbox Account.
Creating a Python environment
Let’s create a directory where our project will reside. From the terminal, run the following command:
Next, cd into the project directory and run the following command to create a virtual environment.
To activate the virtual environment, run the following command:
If you are using a Windows computer, then the activation command is different:
Next, we’ll install all the dependencies our project will be needing:
- Flask: A Python web framework.
- twilio: A Twilio helper library for interacting with Twilio’s REST API.
- requests: A Python library for making HTTP requests.
- dropbox: A Python library for integrating with Dropbox’s API v2.
- python-dotenv: A library for importing environment variables from a
.envfile.
Next, run the following command to install all of the dependencies at once:
Setting up Twilio
Before we can get started with making outbound voice calls via Twilio, you’ll need to have a voice enabled Twilio phone number. If you don’t already have one, we’ll go over how you can purchase one in this section.
Head over to the Phone numbers section on the Twilio Dashboard. Click the “+” sign to start the process of buying a new number.

You’ll be presented with a screen similar to the one below
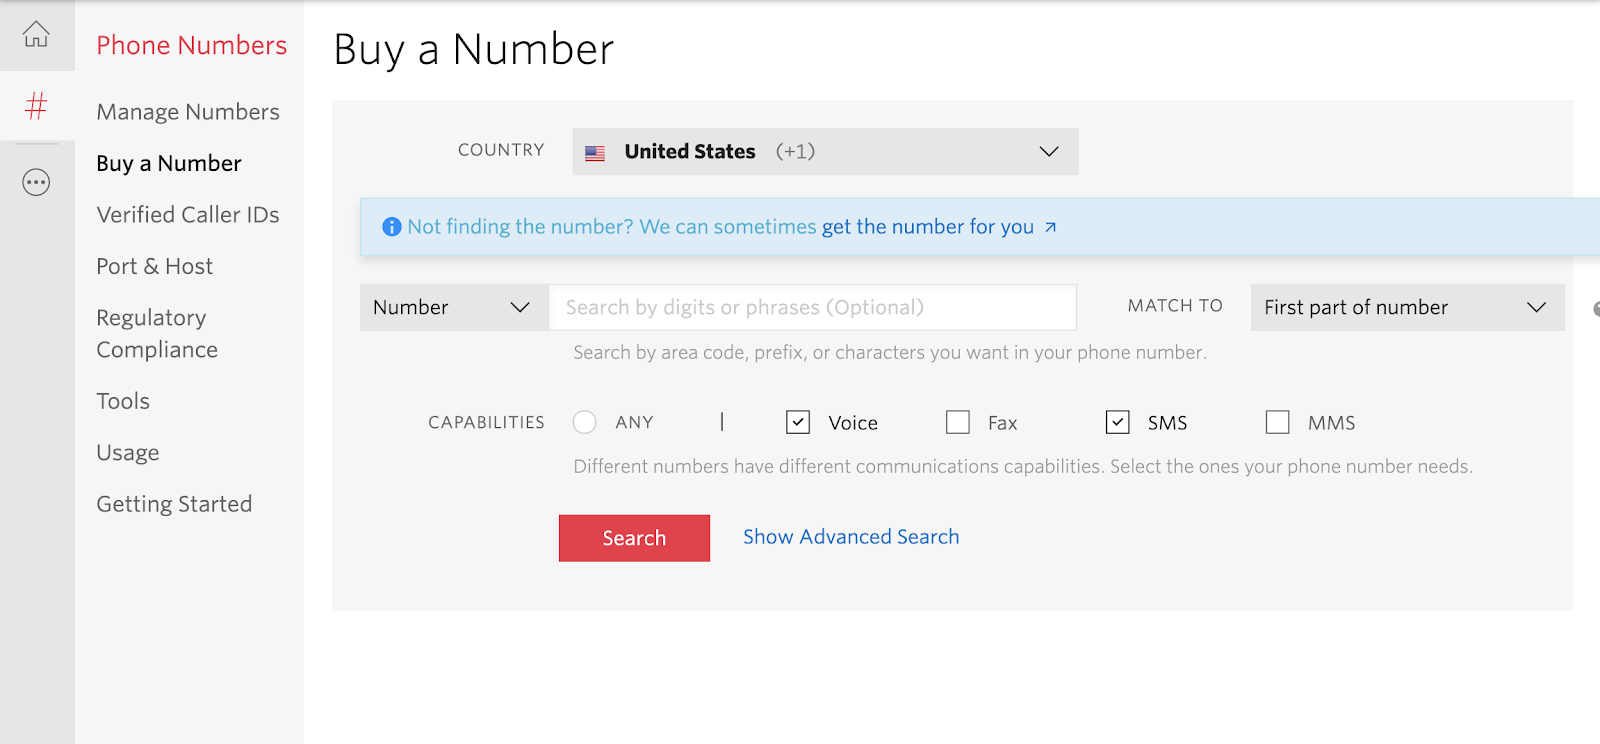
Select the “Country” you want the phone number to be from. Fill the “Number” and “MATCH TO” fields to suit your needs. For the “Capabilities” section, make sure the “Voice” checkbox is selected. If you would like the phone number to support other communication capabilities besides voice calls, you can select any other options you wish.
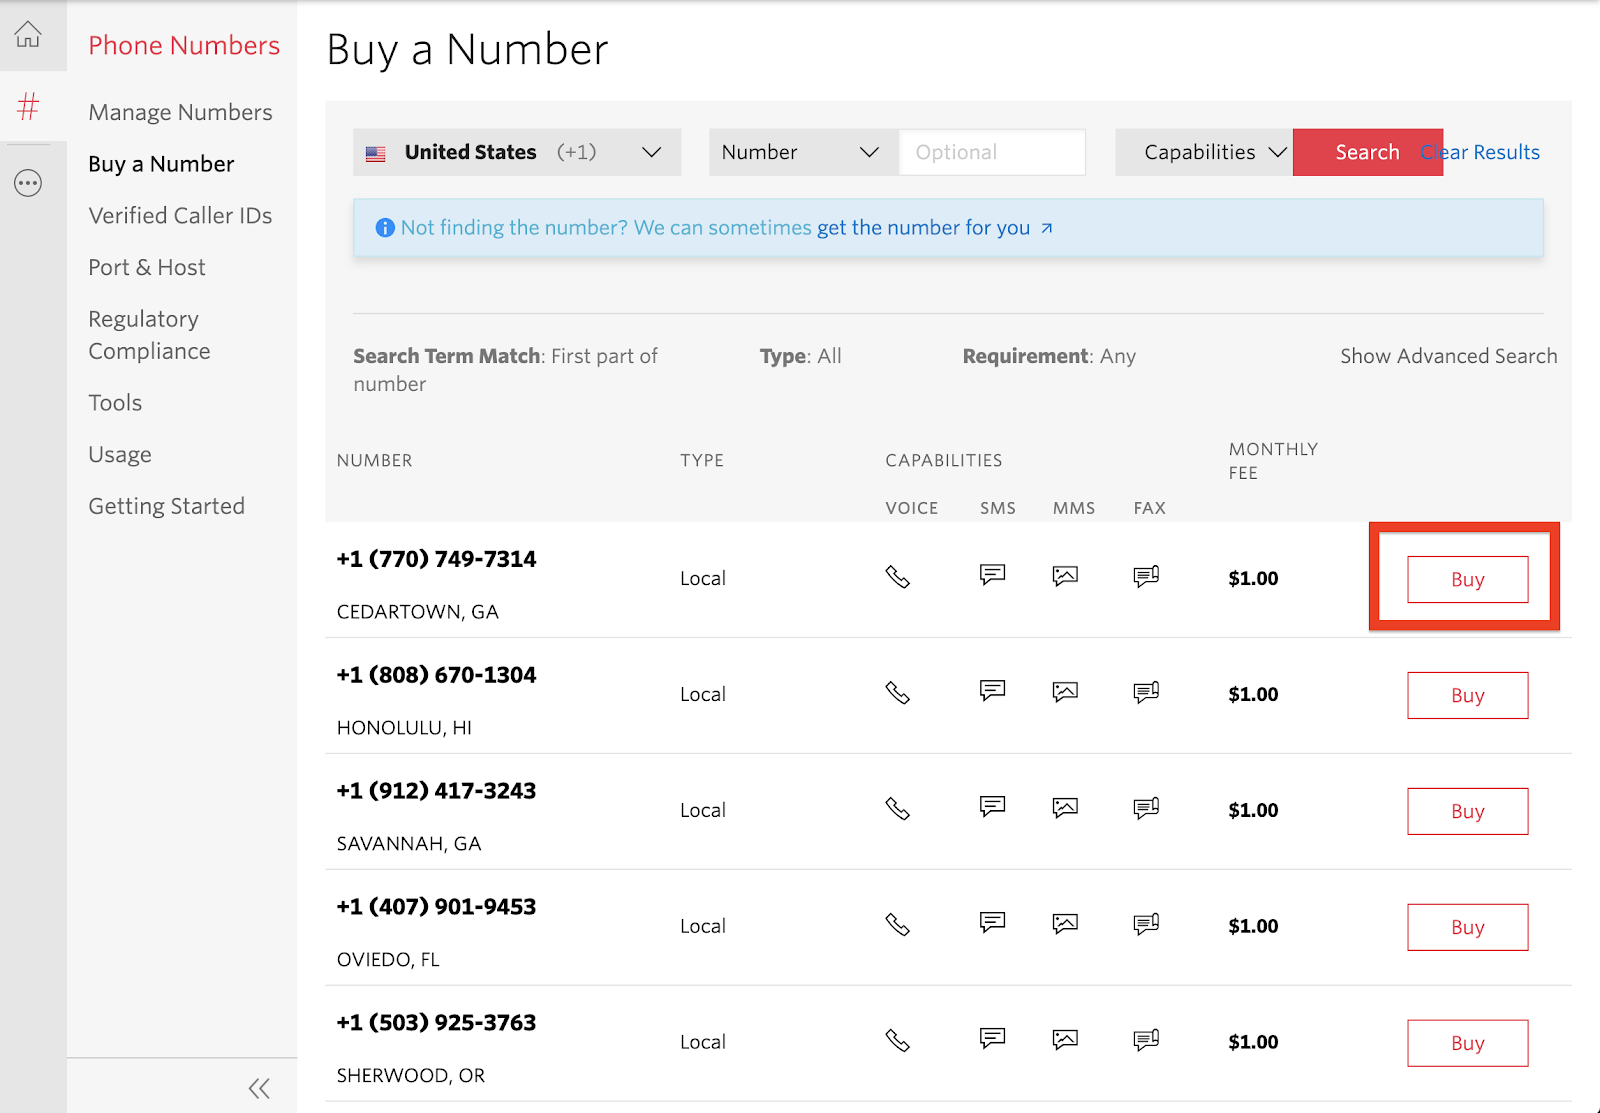
Next, you’ll be presented with a list of phone numbers along with their location, type, capabilities as well as pricing that match your search request. Click “Buy” to purchase the number that you like. Note that if you have a trial account you will be using your trial account funds to make this purchase.
Setting up Ngrok
Twilio makes use of webhooks to asynchronously notify our application when certain events occur. To be able to successfully respond to and process incoming calls, we need to configure an endpoint where Twilio can send an HTTP POST request whenever our Twilio phone number receives an incoming call.
Since we’ll be building our application locally, there is no way for Twilio’s requests to reach our application. Thankfully, this is where Ngrok comes in handy, allowing us to set up a temporary public URL so that our app is accessible over the web.
Run the following command on your terminal window to start ngrok:
In this command, 5000 refers to the port your Flask application will eventually be listening on.
You should now be presented with a screen similar to the one below:
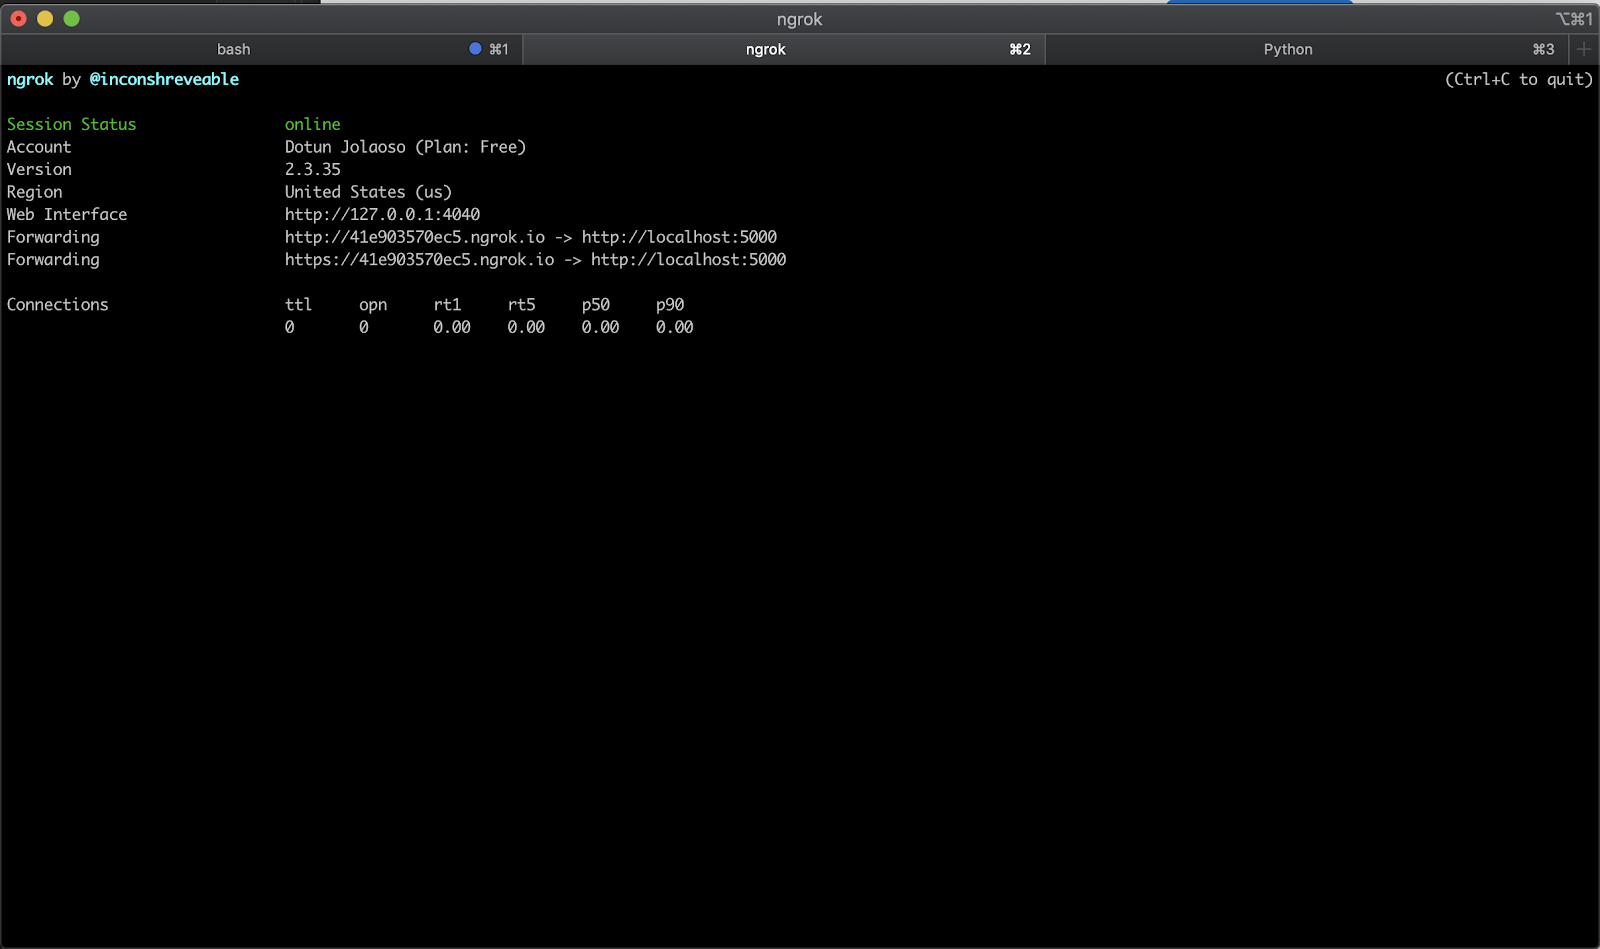
Take note of the https:// “Forwarding” URL as we’ll be making use of it shortly.
Next, head back to the Active Numbers section on your Twilio console and select the number you purchased earlier.
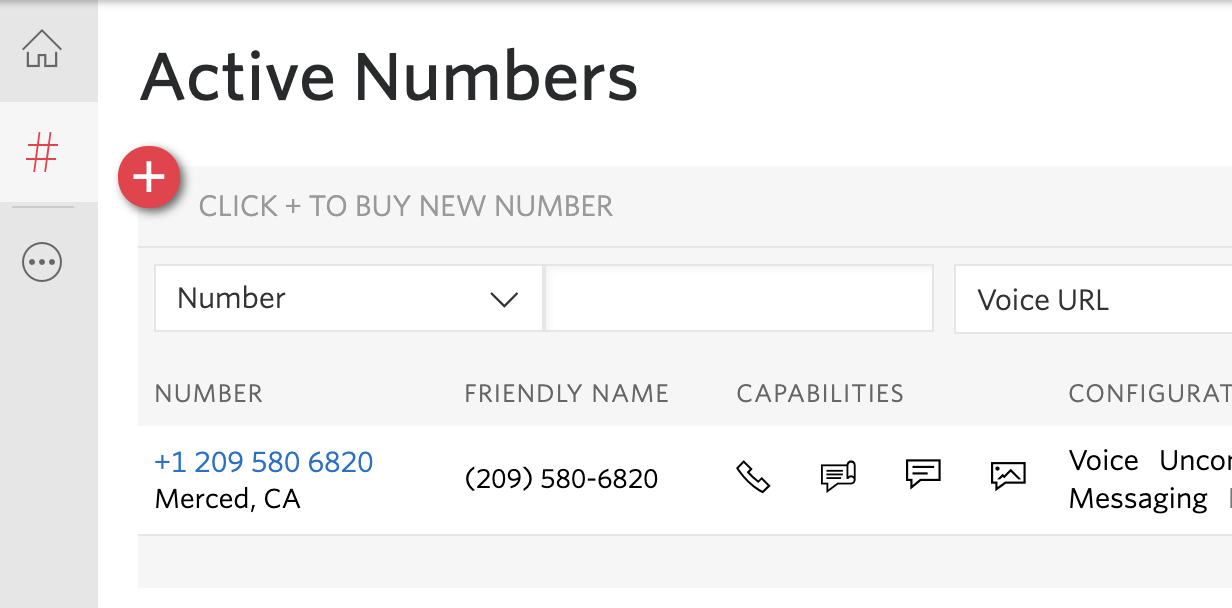
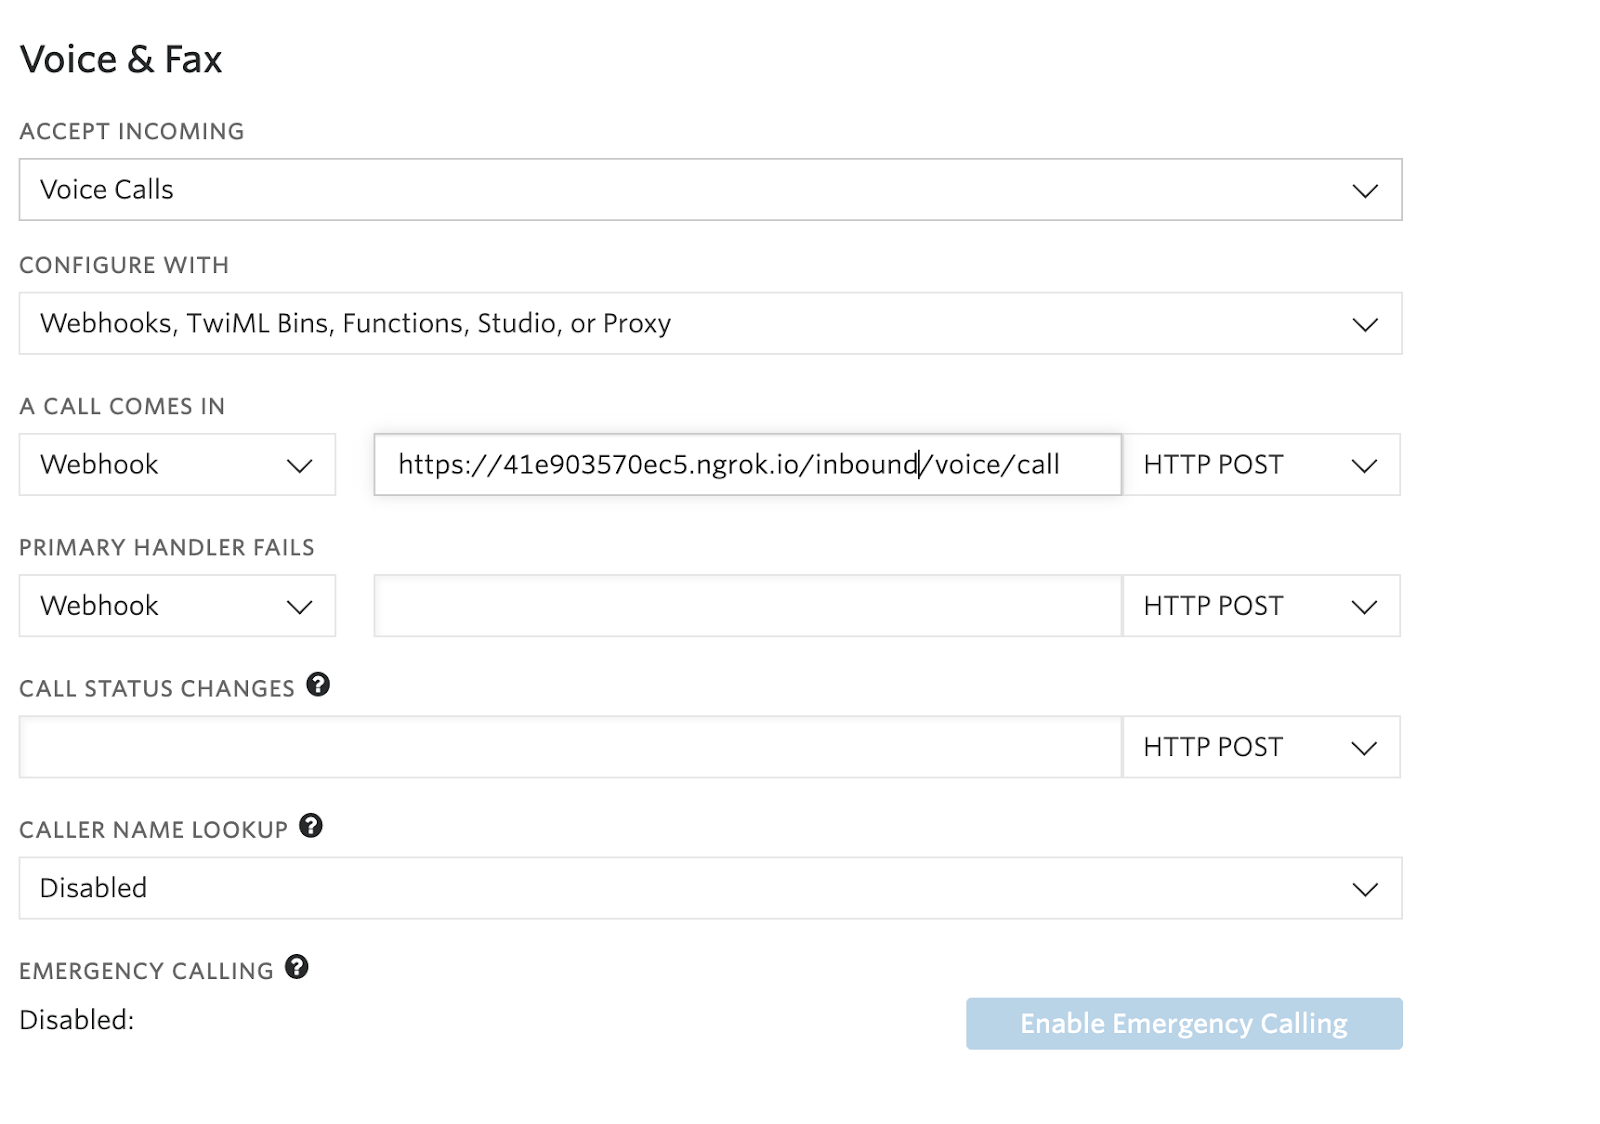
You’ll be presented with a screen that shows you details about the phone number. Under the “Voice & Fax” section, append the Ngrok URL we noted earlier with “/inbound/voice/call” and then paste it in the “A CALL COMES IN” field. Ensure the request method is set to HTTP POST and then click the “Save” button at the bottom of the page to save the settings. This is the endpoint Twilio will send a request to whenever a call is placed to our Twilio number.
Creating & Recording Outbound Voice Calls
At the root of your project’s directory, create a main.py file and edit the file with the following code:
At the top of this file, we’ve imported all the dependencies our project will be needing.
The load_dotenv() function loads our environment variables from a .env file. We’ll be creating one shortly.
The incoming_voice_call() function will be executed when our Twilio phone number receives a phone call. Let’s go over what’s happening in this function. We’ve defined a predefined message format and set of instructions to speak using the Twilio Markup Language (TwiML), which at its core is an XML document with special tags defined by Twilio.
The Python Twilio library provides some helper classes for working with TwiML. One of such classes is the Gather class which is used for working with TwiML’s <Gather> verb. This verb is used to collect digits from the caller. We prompt the user to enter the phone number they’d like to dial on their keypad, followed by a “#” symbol.
After they’ve entered the “#” symbol, Twilio will submit the sequence of numbers in a POST request back to the application at the relative URL given in the action parameter. If the user does not enter anything for 5 seconds, then the gather command times out and execution continues to the next instruction, which in this case is the <Say> verb, by which Twilio informs the user that an input wasn’t provided before the call ends.
Next, let’s add the function that will be responsible for making the outbound call, once Twilio makes the second request with the phone number that the user entered.
Just below the incoming_voice_call() function, add the following functions:
How does our application obtain the phone number that was entered by the user? Twilio includes it in the payload of the POST request with a key of Digits. This time we’re making use of TwiML’s <Dial> verb, which is used to connect the current caller to another party during an active call. Let’s go over what each argument to the Dial class does:
- The
recordargument is set to True to indicate to Twilio that the call between these two parties should be recorded. -
recording_status_callbackis the relative URL we want Twilio to make a request to once the recording has been completed. recording_status_callback_eventis used to specify which recording status changes should trigger a callback to our application. Available options arein-progress,completedandabsent. Note that if this parameter isn’t provided, the default value iscompleted.
Next, using the number function on the dial object which is an alias for TwiML’s <Number> noun, a call is then placed to the phone number. We also specify a url argument to this function which allows us to provide a relative URL that Twilio will invoke on the called party’s end after they answer, but before the two parties are connected.
The endpoint given in the url parameter is implemented in the seek_consent function, and must also return TwiML with instructions to follow by Twilio. Here we inform the called party that the call is going to be recorded, in accordance with privacy laws and regulations in many countries.
Setting up Dropbox
To be able to use the Dropbox API, we need to create an app on Dropbox. Head over to the Dropbox Developers page and select “Create app”. You’ll be presented with a screen similar to the one below:
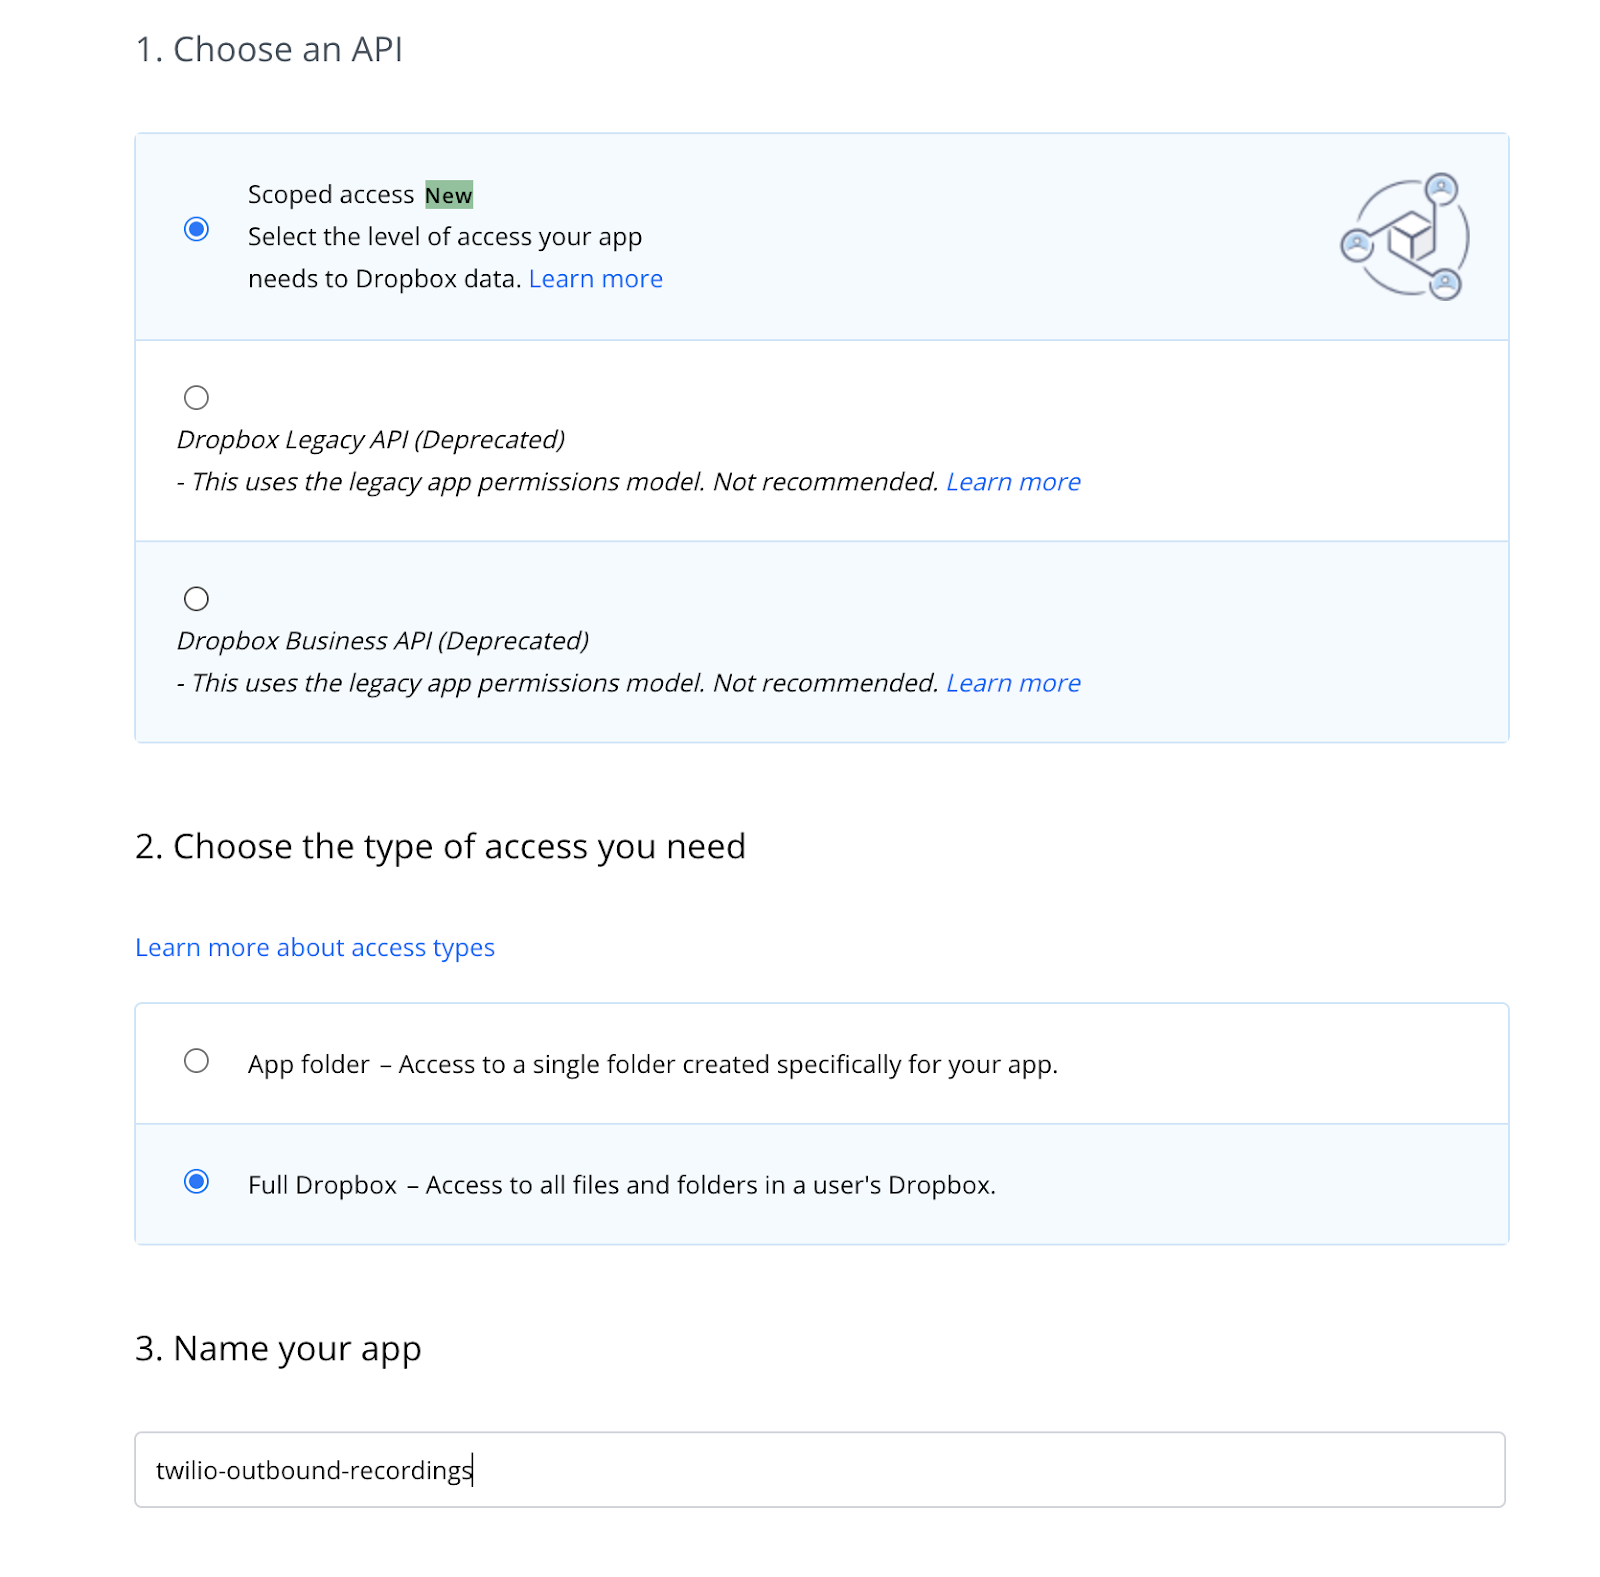
For the “Choose an API” section, select the “Scoped access” option. Select “Full Dropbox” as the type of access the application will be needing. Provide any name you find befitting under the “Name your app” section. Once you’re done providing all the details, Click “Create app” at the bottom of the page.
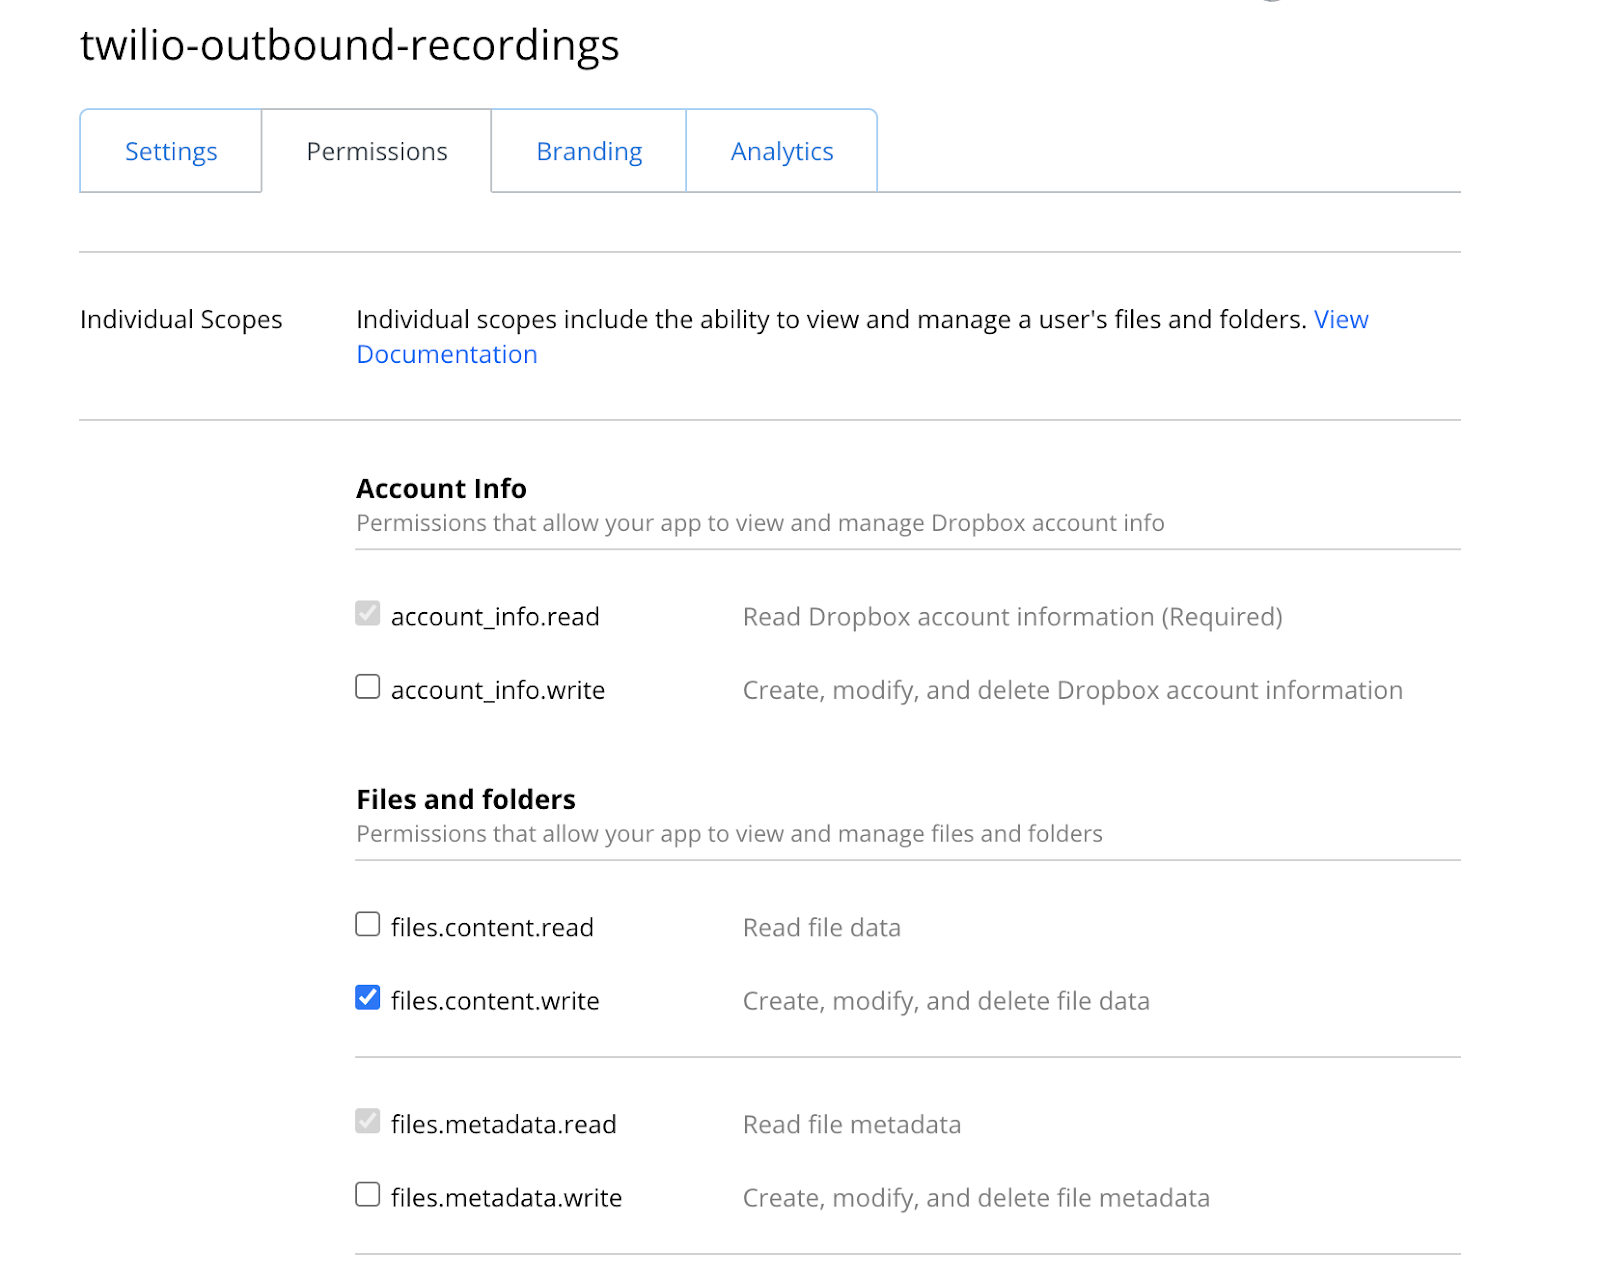
After the app has been created, head over to the “Permissions” tab and select the “files.content.write” permission for the app. This will enable the app to be able to create, modify and delete file data within Dropbox. Click “Submit” at the bottom of the page so that the changes can take effect.
Next, head back to the “Settings” tab and within the “OAuth 2” section, set the “Access token expiration” to “No expiration” and then click the “Generate” button just below the “Generated access token” header.
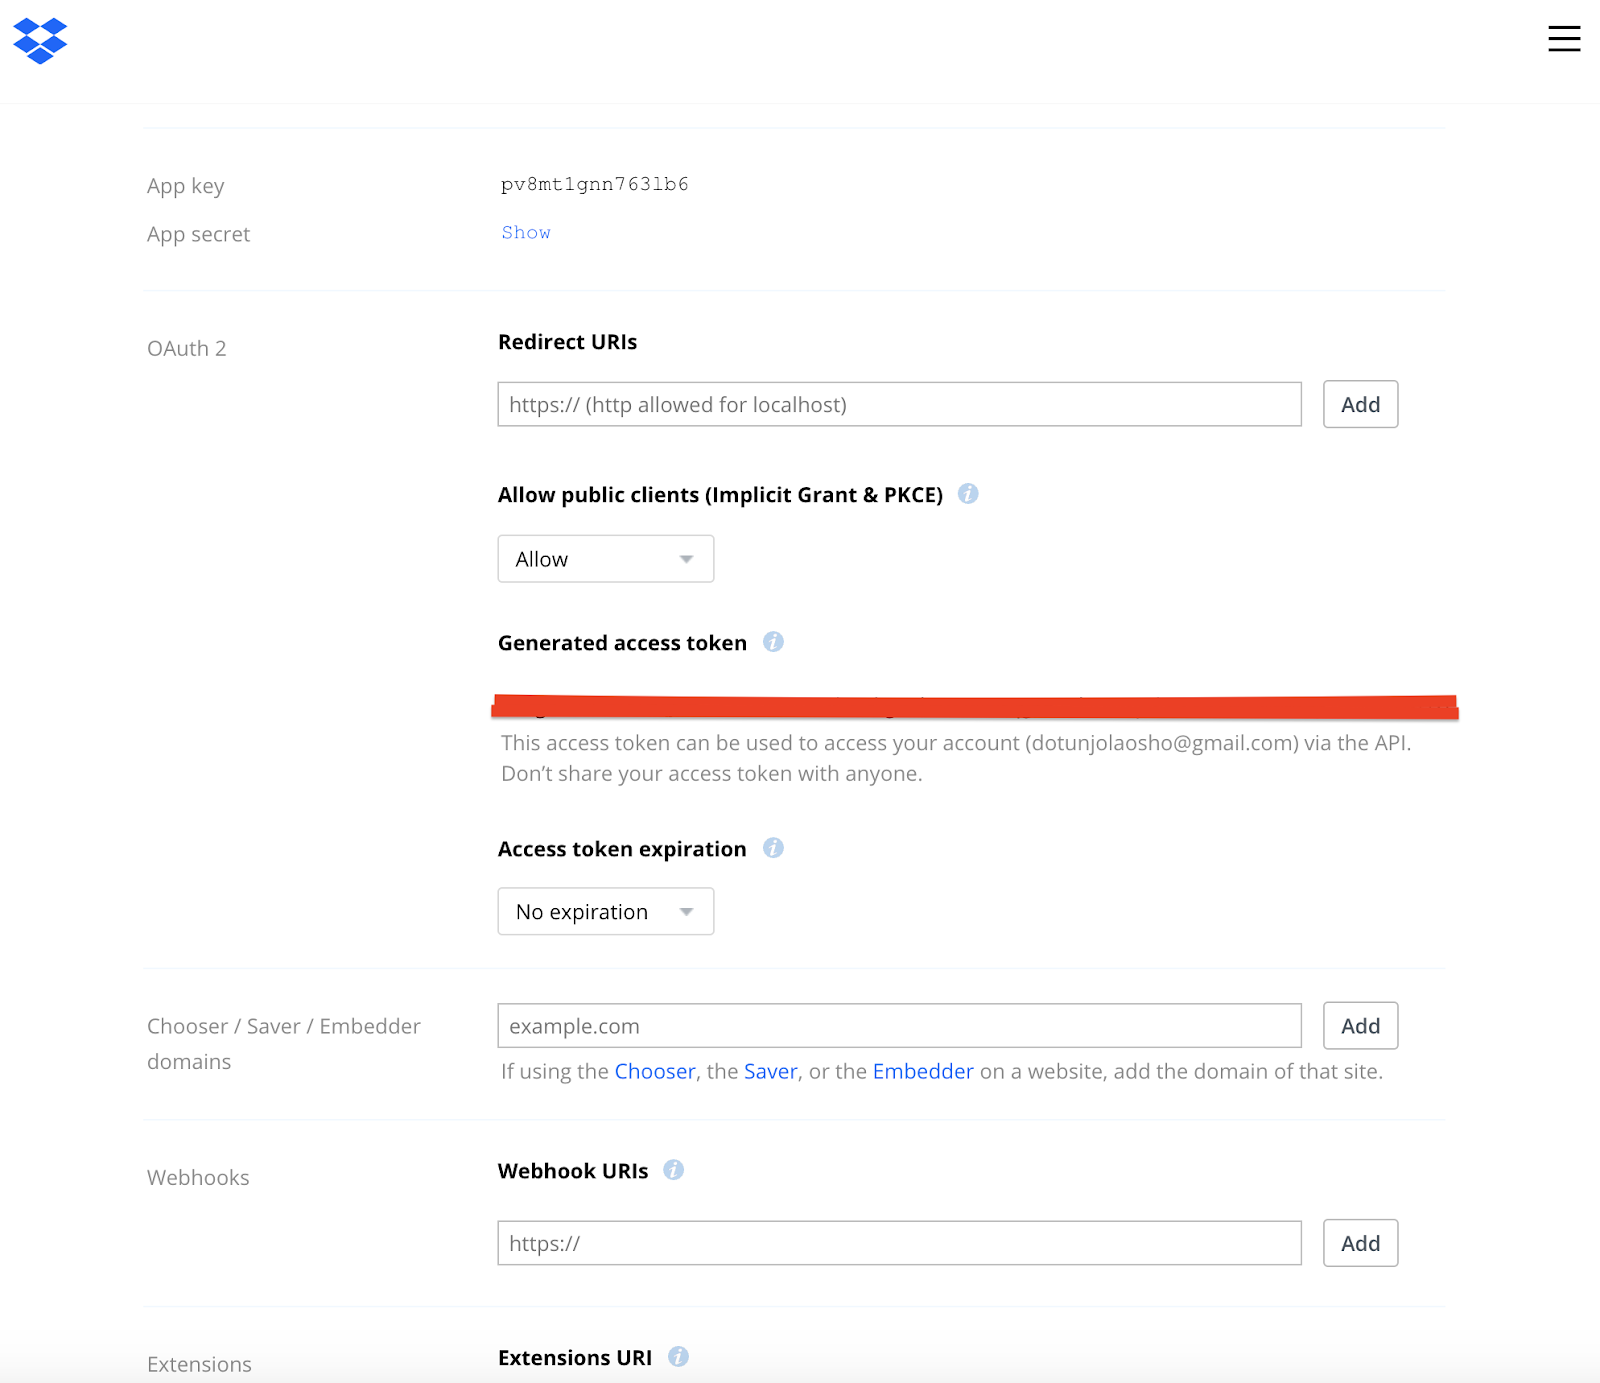
This will generate an access token tied to your Dropbox account. Take note of the generated token as we’ll be adding it to our environment variables shortly.
Uploading to Dropbox
Create a .env file at the root of your project and add a DROPBOX_ACCESS_TOKEN key. Set the value to the access token Dropbox generated for you in the previous section.
Next, within the main.py file we created earlier, add the following code just below the seek_consent function:
Once the call recording has been completed, Twilio will make a request to the /recording/callback endpoint that we passed in the recording_status_callback parameter of the Dial object. Within the upload_recording function, the dropbox_client is used to interact with the Dropbox API.
The DROPBOX_ACCESS_TOKEN we added to our environment variables is used to authenticate against Dropbox. Next, the RecordingUrl and RecordingSid are obtained from the payload that was sent to the endpoint by Twilio. The upload_path variable is then set to the file path the recording will have once uploaded to our Dropbox account.
Using the requests library, a GET request is made to the recording_url, indicating that the response should not be downloaded immediately, so that the large audio file does not use up a lot of memory. This is done by specifying the stream argument to be True. The files_upload method on the dropbox_client is used for uploading the file to Dropbox. The method accepts the raw attribute of the response along with the upload_path as arguments.
Bringing it all together, the final main.py will look like this:
Testing
To start the application, open a second terminal window, activate the virtual environment and run the following command:
Make sure you have ngrok running as shown earlier. Note that every time you restart ngrok a new temporary tunnel URL will be created, so you will need to go back to the Twilio console and update the webhook URL for your Twilio phone number.
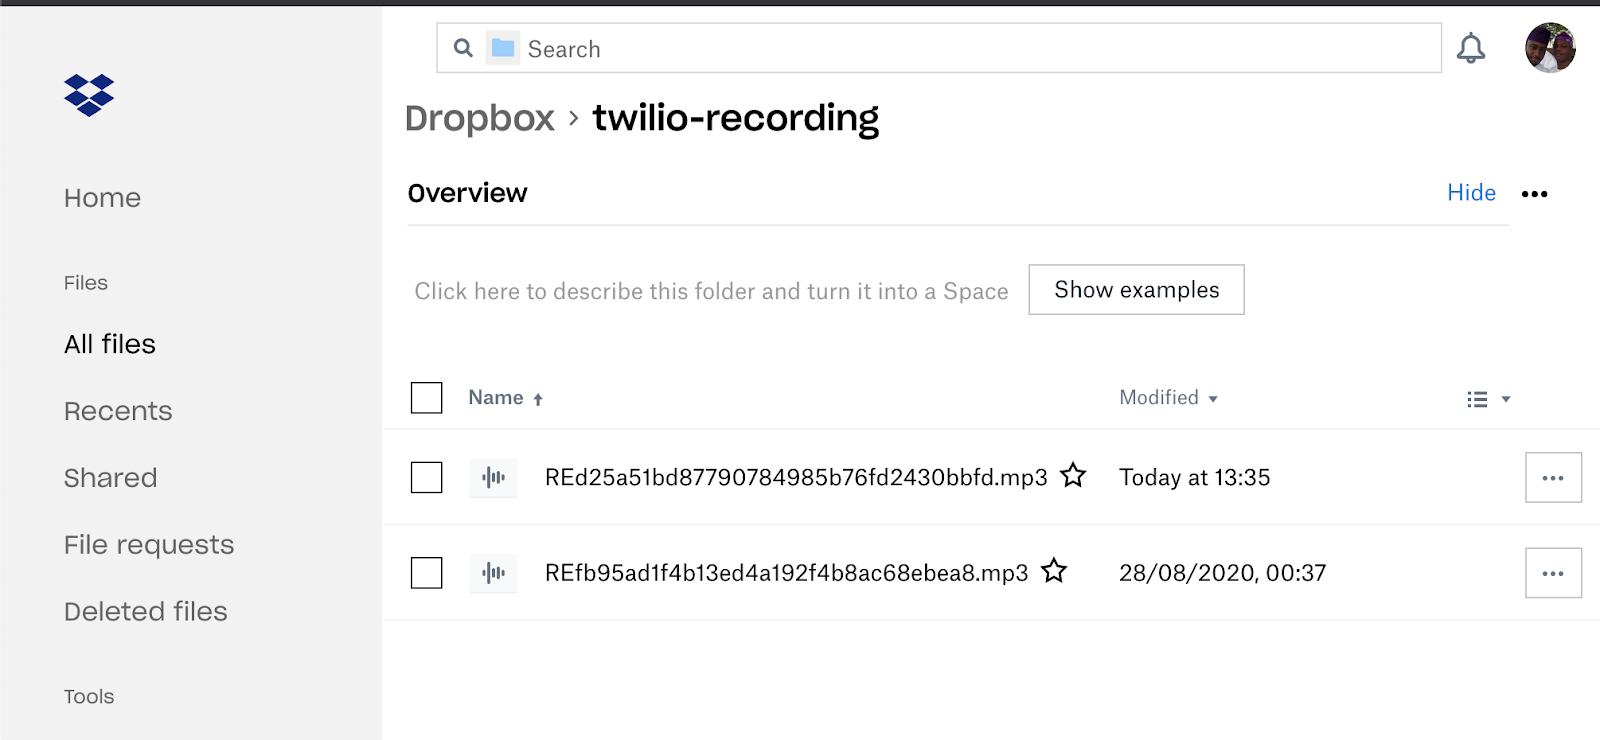
Next, place a call to your Twilio phone number and enter the phone number you would like to call including the country code, followed by the “#” symbol. If the other party accepts the recording consent warning by staying on the line the call between you and them will be established. Once the call ends, a copy of the recording will be uploaded to your Dropbox account.
Conclusion
In this tutorial, we’ve learnt how to record outbound voice calls via Twilio, along with uploading these recordings to Dropbox using the Dropbox API. It is important to note that there may be certain legal implications that apply where you live when recording voice calls, so be sure you know what those are. Twilio has some information about this here.
The source code for this tutorial can be found here on Github.
Dotun Jolaoso
Website: https://dotunj.dev/
Github: https://github.com/Dotunj
Twitter: https://twitter.com/Dotunj_
Related Posts
Related Resources
Twilio Docs
From APIs to SDKs to sample apps
API reference documentation, SDKs, helper libraries, quickstarts, and tutorials for your language and platform.
Resource Center
The latest ebooks, industry reports, and webinars
Learn from customer engagement experts to improve your own communication.
Ahoy
Twilio's developer community hub
Best practices, code samples, and inspiration to build communications and digital engagement experiences.


