Receive Flask Error Alerts by Email with Twilio SendGrid
Time to read: 6 minutes
It goes without saying that errors happen all the time in production. Gaining visibility into your application failures is the first step into being able to understand and therefore fix these errors.
In this tutorial we will set up email alerting in a Flask application with SendGrid. Every time an unhandled exception occurs, the application will send an email alert to an admin who can then determine the next steps for fixing the issue.
Tutorial requirements
Working through this tutorial will require access to the following items:
- Python 3.6 or newer. If your operating system does not provide a Python interpreter, you can go to python.org to download an installer.
- A Twilio SendGrid account. This article will walk through setting that up if you don’t already have an account. A free SendGrid account allows you to send up to 100 emails per day forever.
Setting up Twilio SendGrid
We are going to get started by setting up SendGrid for programmatic access. If you already have an account please skip to the “Getting your API key” section.
Creating your SendGrid account
If you don’t have a Twilio SendGrid account, the first step is to create it. To create your account follow these steps:
- Follow this link to the SendGrid sign-up page.
- Enter your username, password and email address.
- Proceed with the remainder of the form and then click “Create Account”
You will be prompted to give more information about yourself, please complete this as you see fit.
Verifying your account
You will receive an email from SendGrid to verify your account. Please complete the verification process before moving forward. Once you are done with that, please navigate to your SendGrid dashboard.
Getting your API key
Now we need to get the API key from SendGrid. The API key will allow us to authenticate with and make API requests to SendGrid.
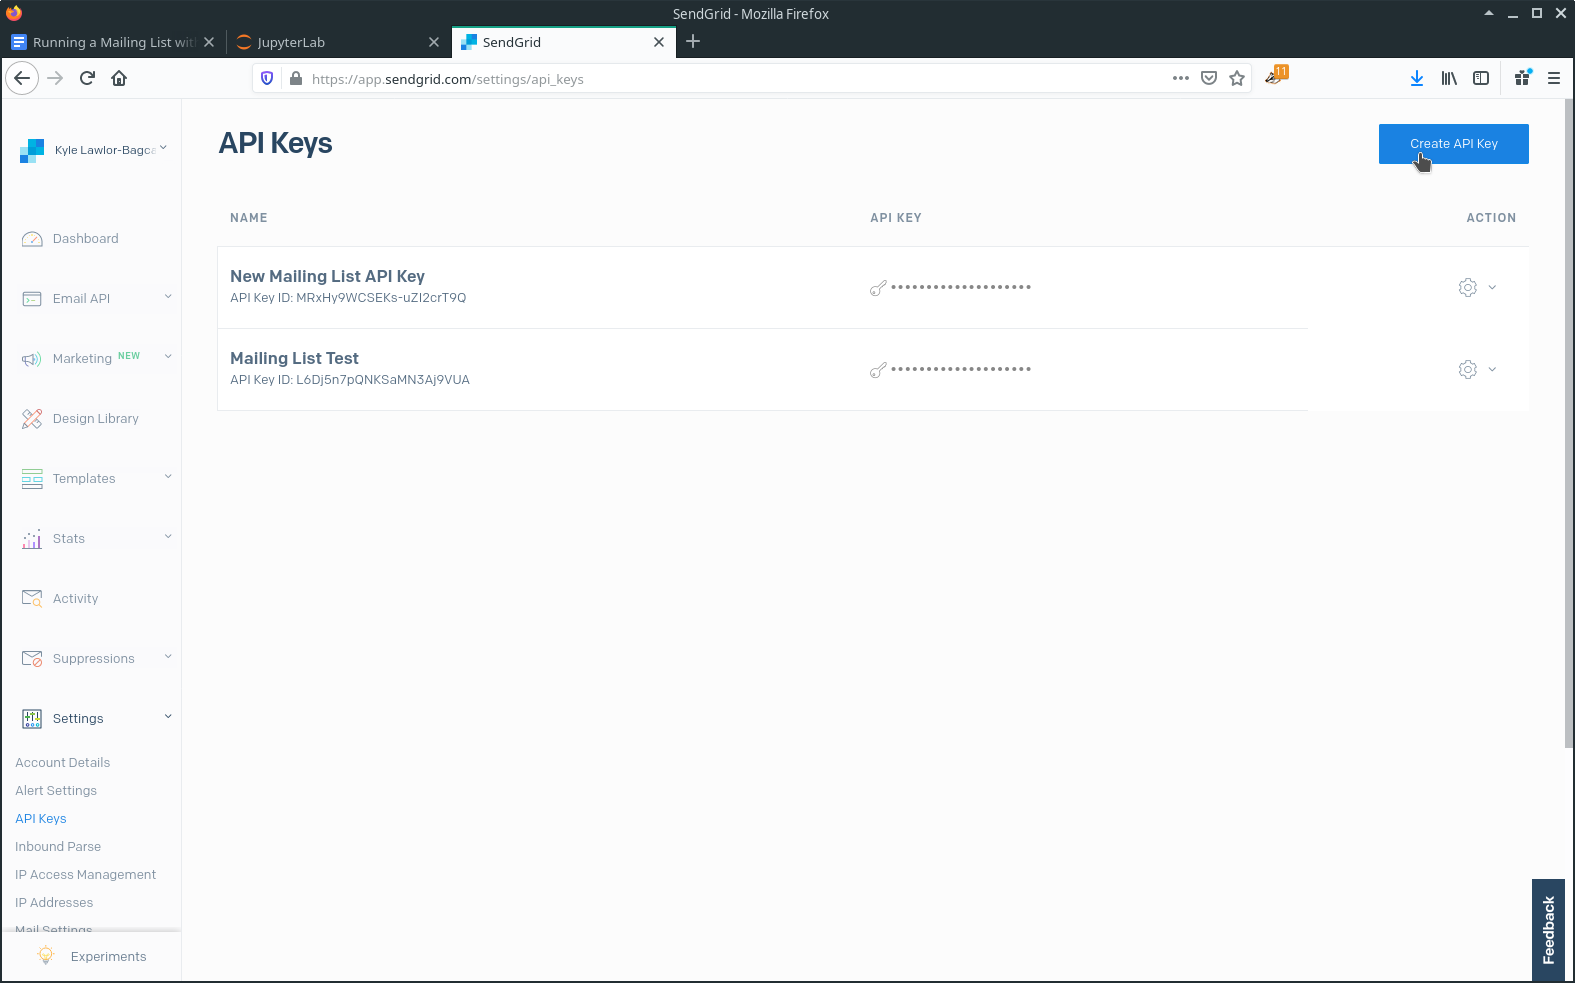
- From the dashboard, click on “Settings” and then click on “API Keys”
- Click the “Create API Key” button
- Let’s name the API Key “Flask Error Alerts”
- Select “Restricted Access”
- Go to the “Mail Send” dropdown and click it
- Enable the “Mail Send” option by using the slider
- Scroll to the bottom and click “Create & View”
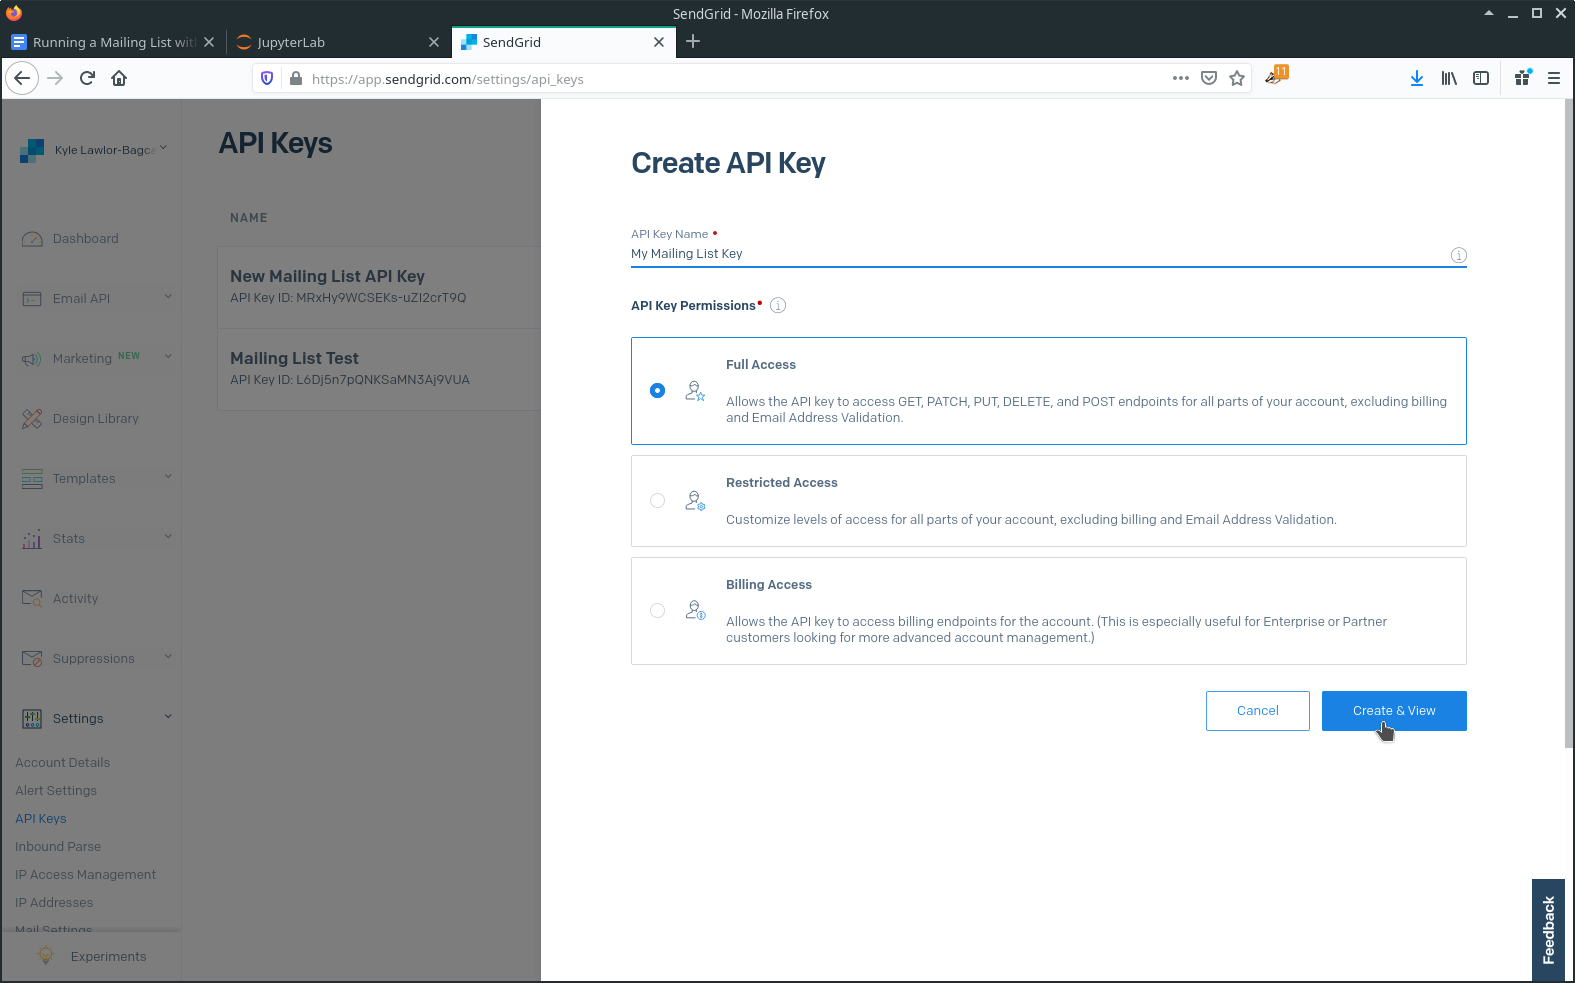
When we are done with these steps we will be provided with the API Key. Let’s copy and paste it into an empty text file for now.
Create a Python virtual environment
The next thing we need to do is get our Python environment set up and running. This setup will be used throughout the tutorial, so let’s make sure we get this right.
Following Python best practices, we are going to make a new directory for our project, and inside it we are going to create a virtual environment. We then are going to install the Python packages that we need within the virtual environment.
If you are using a Unix or Mac OS system, open a terminal and enter the following commands to do the tasks described above:
For those of you following the tutorial on Windows, enter the following commands in a command prompt window:
The last command uses pip, the Python package installer, to install the two packages that we are going to use in this project, which are:
- Flask is a microframework for web applications.
- Flask can optionally use python-dotenv for managing environment variables, so we are also installing this package.
- The sendgrid library is the official Twilio SendGrid Python API client.
Setting up the Flask application
Now that we have a directory for our project and virtual environment we can get going on writing the code for our basic Flask application. Let’s navigate into the flask-error-alerts directory in the previous step and fire-up our favorite text editor. We are going to create two files:
- .env
- app.py
The first file is called our “dot-env” file. It will be where we place our SendGrid API key from the previous step, as well as other configuration values for our Flask application. The second file is where our Flask application will be located. So with that said let’s make some changes to these files and test our Flask application.
Edit the .env file to contain:
Edit app.py to contain:
Now we can check the application runs as expected. To do that let’s first open a terminal make sure our virtualenv is active and then we’ll run the Flask app with the built-in development server:
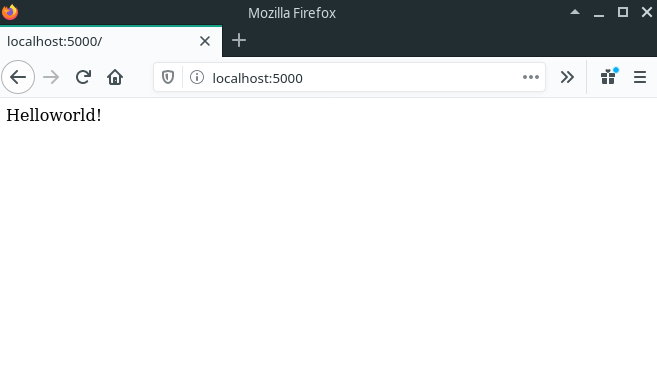
Next let’s navigate our browser to localhost:5000/ and check that we see the “Helloworld!” text.
Configuring alerts with SendGrid
Creating an unhandled exception
Now we need to configure the Flask application to send us email alerts when there are unhandled exceptions. The first thing we are going to do is modify our app.py to throw an unhandled exception.
Now that we have created a situation where an unhandled exception occurs, let’s restart the application and observe the current behavior. Use “Ctrl+C” to stop the Flask application, and let’s start it again:
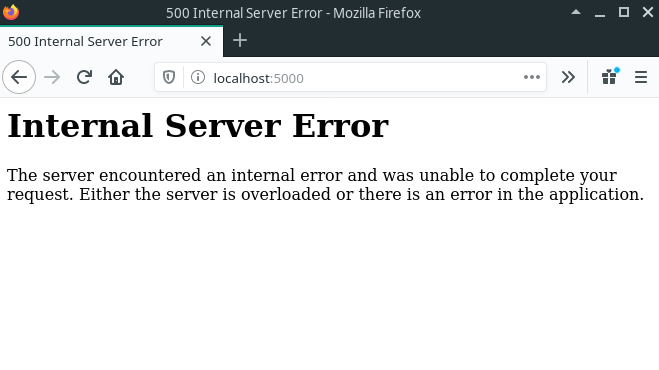
Now when we navigate to localhost:5000/ we are getting a 500 internal server, uh oh! But this is what we expected, the same will happen on an application that crashes due to a bug.
Hooking into unhandled exceptions
In order to be able to fire off an email in response to an unhandled exception, we need to add some code that will allow us to hook into Flask’s built-in exception handler. Once we’ve done that we will be able to use SendGrid to send an email about the exception. Fire up that text editor and let’s add this code to app.py:
One noteworthy item is that Flask has built-in error handlers which you can read more about here. We use the @app.errorhandler decorator to register a function with the Flask application. It’s quite similar to the @app.route decorator except that it allows us to register a function that gets executed when particular types of errors occur in our application. In this case we are paying attention to the InternalServerError exception. This is the exception that Flask and it’s underlying utility library Werkzeug raise whenever an unhandled exception occurs.
Another point to take note of is that we are using Python’s built-in traceback module to retrieve the traceback information. The variable we created called error_tb is a string that contains the traceback. This traceback is exactly the same as what we see in the terminal when the unhandled exception occurs in the Flask application. We will pass this information into our SendGrid email in the next section.
We also added a call to the app.finalize_request method. This maintains the default behaviour of our Flask application, which is that when an unhandled exception occurs, we will still return the internal server error response to the browser.
Sending the alert email with SendGrid
We’re now at the point where we can set up the code to send the alert email. So let’s do that by updating app.py to contain the following:
We have added a function called create_message which sets up a SendMail Mail object. This object pulls in the FROM_EMAIL and the TO_EMAIL from the .env file. With that said we need to add the following lines into our .env file:
Because we are using the .env file to load values we also had to add a call to the dotenv module’s load_dotenv function. This ensures that when our code runs the required environment variables will be available in our application code.
Near the top we have created an instance of the SendGrid API client:
This client automatically looks for an environment variable named SENDGRID_API_KEY and uses it to authenticate against the SendGrid servers. As with the other variables in our .env file, the load_dotenv call ensures that the variable is imported into the environment of the process.
The last noteworthy addition in this section is the call we make to the SendGrid API:
All that’s happening in that code block is that we attempt to send the email using SendGrid but if an exception occurs while doing that we just print out what the error was. In a production application you might want to retry this operation because the most likely source of error here is that the SendGrid service is temporarily unavailable.
Testing the alerts
Once you’ve made the changes to your code, let’s test it out! So the expectation here is that we visit our Flask application at localhost:5000/ we are going to:
- Receive a 500 internal server error in the browser.
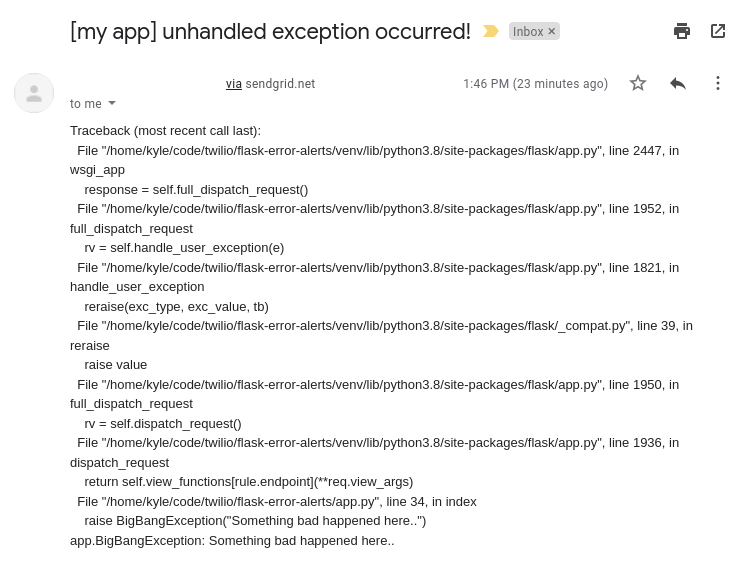
- Receive an email alert that contains the traceback.
To test that we need to restart the Flask application so that our changes take effect. So if you have the Flask development server running, stop that with “Ctrl+C” and then restart it with:
Now let’s navigate to localhost:5000/ and receive the 500 internal server error. A minute or two later you should receive an email that looks like the following:
Conclusion
There you have it! We have set up our Flask application to send email alerts whenever unhandled exceptions occur. With a relatively small amount of code we have built out a pretty handy alerting system.
I hope you’ve enjoyed following along in this tutorial and if you have any questions feel free to reach out. All the code developed in this tutorial can be found here.
Kyle Lawlor-Bagcal (wgwz [at] protonmail [dot] com) is a software engineer and systems developer who is passionate about good code and constantly learning new things. https://github.com/wgwz
Related Posts
Related Resources
Twilio Docs
From APIs to SDKs to sample apps
API reference documentation, SDKs, helper libraries, quickstarts, and tutorials for your language and platform.
Resource Center
The latest ebooks, industry reports, and webinars
Learn from customer engagement experts to improve your own communication.
Ahoy
Twilio's developer community hub
Best practices, code samples, and inspiration to build communications and digital engagement experiences.

