Use React and Rust to Build a Real-Time Video Chat App

July 09, 2024
Written by
Joseph Udonsak
Contributor
Opinions expressed by Twilio contributors are their own
Reviewed by

Use React and Rust to Build a Real-Time Video Chat App

Have you ever wondered what it would be like to build a video chat application with Rust? It’s easier than you might imagine, and with this tutorial I will show you how to use the Zoom Video SDK to build a video chat app. It will use React for the frontend and Rust (Axum) for the backend.

Requirements

To follow this tutorial, you will need the following:

Getting started

Quick overview

To start (or join) a session, you first generate a JSON Web Token (JWT) on the backend. After that, you initiate a client on the frontend using the Video SDK and render the video stream onto a designated HTML element.

In addition to that, the Zoom Video SDK allows you to determine video size and position, as well as giving you control over the video and audio streams. I will show how to take advantage of these features later on.

The process flow of the application on the frontend is as follows:

  • The frontend displays the list of currently available rooms. The user can either select from the list or create a new one. To create a new room, a form will be displayed requesting the room name and passcode (if required).
  • The room selected by the user is then passed to the backend. If the room has a passcode, the associated passcode is passed along.
  • For a provided room, the backend will then generate and return an access token. If a passcode is required to join the room, this passcode will be validated before the token is generated.
  • This token is then used by the frontend application to connect to the room in question.

Create the application

To get started, create a new folder named video_app, where you create your Rust applications, which will have two sub-folders named frontend and backend, by running the commands below.

mkdir video_app
cd video_app 
mkdir frontend backend

Build the application's backend

Change into the backend folder to begin creating the backend of the application. Now, start by initialising Cargo in the directory using the following command.

cargo init

Next, add the project's dependencies. To do that, update the dependencies section of the Cargo.toml file to match the following.

[dependencies]
axum = "0.7.5"
dotenvy = "0.15.7"
jsonwebtoken = "9.3.0"
md5 = "0.7.0"
rand = "0.8.5"
serde = { version = "1.0.197", features = ["derive"] }
serde_json = "1.0.115"
sqlx = { version = "0.7.4", features = ["sqlite", "runtime-tokio-native-tls"] }
tokio = { version = "1.37.0", features = ["full"] }
tower-http = { version = "0.5.2", features = ["cors"] }

Here's a quick breakdown of the dependencies:

  • axum: This library will be used to handle incoming requests and pass the appropriate response.
  • dotenvy: dotenvy helps with loading environment variables; a huge time-saver during development. It is a well-maintained version of the dotenv crate.
  • jsonwebtoken: This library will be used to create the JWTs.
  • MD5: This library will be used to generate hashes for the application.
  • Rand: This library will be used to generate random identities for the video chat rooms.
  • Serde, Serde Derive, and Serde JSON: These packages reduce the complexity of deserialising JSON responses from Twilio, so that they can be more easily used.
  • SQLx: This library will be used to interact with the database.
  • Tokio: This library provides an async runtime.
  • Tower-HTTP: This library will be used to implement a CORS layer for the API. Since the frontend and backend will be running on separate ports, CORS will need to be enabled.

Next, in the backend directory, create a new file named .env to store the environment variables for the application. In it, paste the following code.

ZOOM_VIDEO_SDK_KEY="<<ZOOM_VIDEO_SDK_KEY>>"
ZOOM_VIDEO_SDK_SECRET="<<ZOOM_VIDEO_SDK_SECRET>>"
TOKEN_TTL=3600
DATABASE_URL="sqlite://data.db"
FRONTEND_PORT="5173"
SERVER_PORT="8000"

You can modify the FRONTEND_URL or SERVER_PORT variables, should the specified ports be in use on your workstation.

Get your Zoom Video SDK credentials

To generate your Zoom Video JWT, sign into your Video SDK account, go to the Zoom App Marketplace, hover over Develop, and click Build Video SDK.

Then, scroll down to the SDK credentials section to see your SDK key and secret.

Your SDK credentials are different from your API keys.

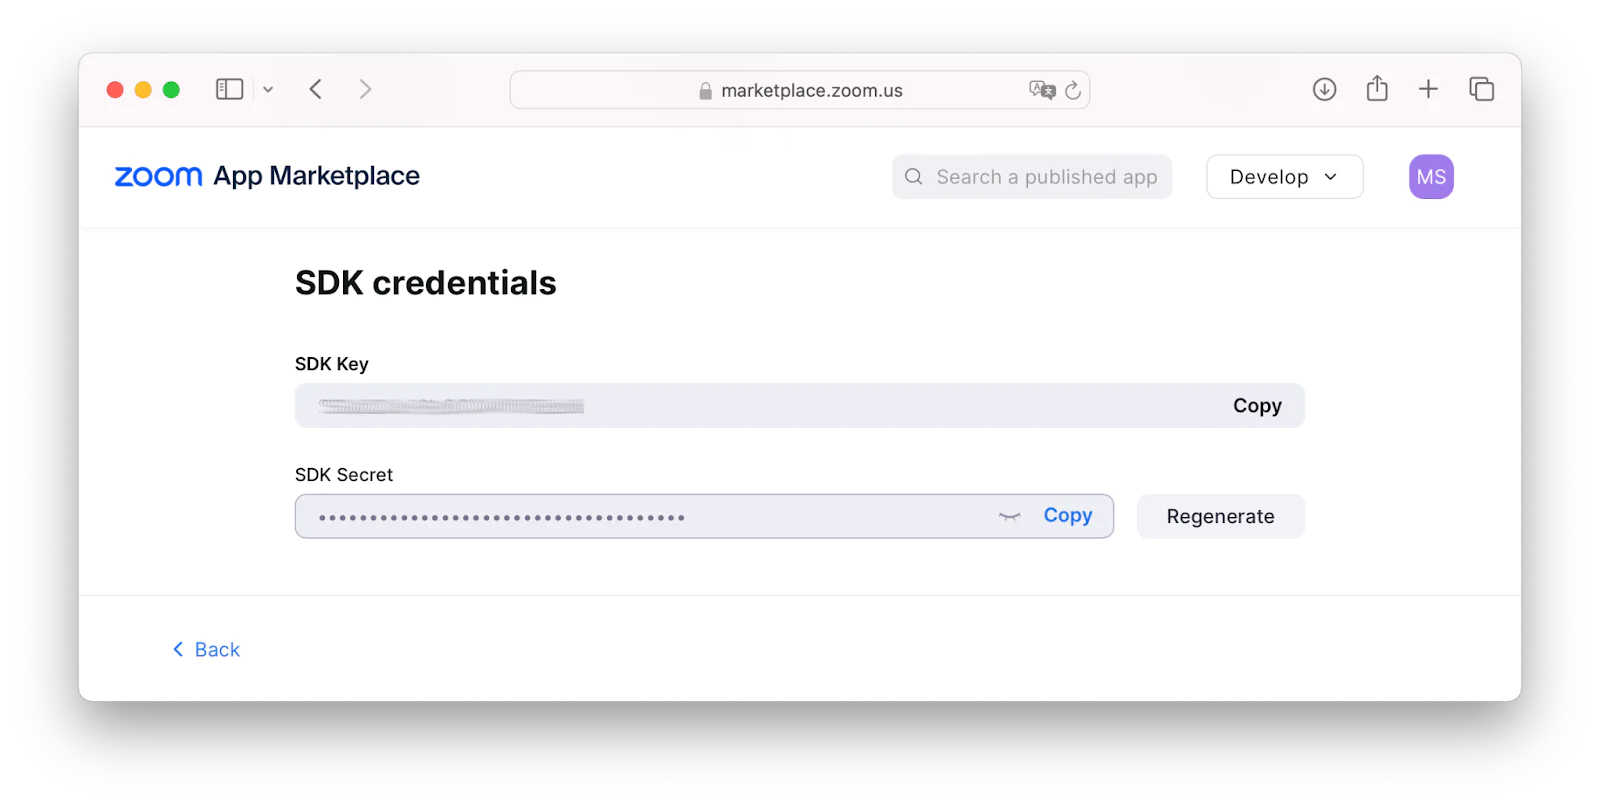
Replace the respective placeholder values in .env with the SDK Key and SDK Secret keys copied from the console.

Create helper functions

Next, add some helper functions to avoid duplicating code across the project. In the src folder, create a new file named helper.rs and add the following to it.

use md5;
use md5::Digest;
use rand::{Rng, thread_rng};
use rand::distributions::Alphanumeric;

pub fn hash(secret: String) -> Digest {
    md5::compute(secret)
}

pub fn identity() -> String {
    let rand_string: String = thread_rng()
        .sample_iter(&Alphanumeric)
        .take(15)
        .map(char::from)
        .collect();
    format!("{:x}", hash(rand_string))
}

This module has two functions namely:

  • The hash() function, which is used to encrypt a secret. For this tutorial, the MD5 algorithm is used for hashing. While this is insecure for production applications, it suffices for demonstration purposes as used in this tutorial.
  • The identity() function, which is used to generate a unique identity. This allows your application to handle rooms with the same name without any unwanted side effects.

Create data models

Next, create the models for the application. In the src folder, create a new file named model.rs and add the following code to it.

use serde::{Deserialize, Serialize};
use serde::ser::{Serialize as SerializeTrait, Serializer, SerializeStruct};
use serde_json::Value;

use crate::helper;

#[derive(Serialize, Deserialize)]
pub struct Claim<'a> {
    pub iat: i64,
    pub nbf: i64,
    pub exp: i64,
    pub app_key: String,
    pub role_type: i8,
    pub version: i8,
    pub tpc: &'a str,
    pub user_identity: &'a str,
}

#[derive(Serialize, Deserialize)]
pub struct NewRoomRequest {
    pub name: String,
    pub passcode: Option<String>,
}

#[derive(Serialize, Deserialize)]
pub struct JoinRoomRequest {
    pub identity: Option<String>,
    pub passcode: Option<String>,
}

#[derive(Serialize)]
#[serde(untagged)]
pub enum RoomResponse {
    Success(Room),
    Error(Value),
}

#[derive(sqlx::FromRow)]
pub struct Room {
    pub id: i64,
    pub name: String,
    pub passcode: Option<String>,
    pub identity: Option<String>,
}

impl Room {
    pub fn is_valid_passcode(&self, passcode: Option<String>) -> bool {
        return match &self.passcode {
            None => true,
            Some(expected_passcode) => {
                return if let Some(provided_passcode) = passcode {
                    *expected_passcode == format!("{:?}", helper::hash(provided_passcode))
                } else {
                    false
                };
            }
        };
    }
}

impl SerializeTrait for Room {
    fn serialize<S>(&self, serializer: S) -> Result<S::Ok, S::Error>
    where
        S: Serializer,
    {
        let mut has_passcode = false;
        if let Some(_) = &self.passcode {
            has_passcode = true;
        }
        let mut s = serializer.serialize_struct("Room", 3)?;
        s.serialize_field("name", &self.name)?;
        s.serialize_field("identity", &self.identity)?;
        s.serialize_field("hasPasscode", &has_passcode)?;
        s.end()
    }
}

The Claim struct is used to model the payload section of a token. This will be encoded and signed to generate an access token for the frontend.

The NewRoomRequest, JoinRoomRequest, and RoomResponse structs are used by Axum to parse incoming requests, and, where required, a response pertaining to a Room.

Finally, the Room struct specifies the fields required to manage a room. In addition, it adds an implementation function for validating room passcodes. It also provides a custom implementation for the Serialize trait. Using the custom serialisation, you avoid returning the passcode in the JSON response. The FromRow attribute indicates that this struct corresponds to a table in the database.

Set up the database

For the database, you’ll be using SQLite in conjunction with SQLx. Create a file named data.db at the root of the backend folder using a text editor or the touch command. This file will hold the application database.

To simplify managing the database, SQLx provides a CLI which you can install using the following command.

cargo install sqlx-cli

Next, create a migration file to handle creating the room table using the following command.

sqlx migrate add create_room_table

The newly created migration file will be located in the migrations folder and its name will be prepended with the timestamp when the file was created and end with create_room_table.sql. Open the newly created file and add the following SQL command to it.

CREATE TABLE IF NOT EXISTS room (
    id INTEGER PRIMARY KEY NOT NULL, 
    name VARCHAR(250) NOT NULL, 
    passcode VARCHAR(250), 
    identity VARCHAR(250) NOT NULL
);

Next, create the empty SQLite database file and then run your migration using the following commands.

touch data.db
sqlx migrate run

If you're using Microsoft Windows, create the empty SQLite database file using the following command:

copy data.db+

In the src folder, create a new file named database.rs and add the following code to it.

use sqlx::{Error, SqlitePool};
use crate::model::Room;

#[derive(Clone)]
pub struct AppState {
    pub db: Database,
}

#[derive(Clone)]
pub struct Database {
    db: SqlitePool,
}

impl Database {
    pub fn new(db_pool: SqlitePool) -> Self {
        Self { db: db_pool }
    }

    pub async fn create_room(
        &self,
        name: String,
        passcode: Option<String>,
        identity: String,
    ) -> Result<Room, Error> {
        sqlx::query_as!(
            Room,
            "INSERT INTO room (name, passcode, identity) VALUES ($1, $2, $3) returning *",
            name,
            passcode,
            identity
        )
        .fetch_one(&self.db)
        .await
    }

    pub async fn get_all_rooms(&self) -> Result<Vec<Room>, Error> {
        sqlx::query_as!(Room, "SELECT * FROM room")
            .fetch_all(&self.db)
            .await
    }

    pub async fn get_room(&self, identity: &str) -> Result<Room, Error> {
        sqlx::query_as!(Room, "SELECT * FROM room where identity = $1", identity)
            .fetch_one(&self.db)
            .await
    }
}

This module contains two structs:

  1. The AppState struct is an extractor for the Axum application state in the Axum application. This state will save the database connection pool for the application.

  2. The Database struct holds the connection pool. It also has implementation functions which simplify the processes of creating a room, getting all rooms, and getting a single room with the specified identity. 

Next, run the following command.

cargo sqlx prepare

When you use the query! or a query_as! macro, you'll need to use the above command to generate JSON files for your queries. This gives you compile-time safety, as SQLx will check your code against the generated files during compile time. If anything is wrong, it'll automatically detect and display an appropriate error message.

Add a module for token generation

In the src folder, create a new file named token.rs and add the following code to it.

use std::{ env, time::{SystemTime, UNIX_EPOCH}};
use jsonwebtoken::{EncodingKey, Header};
use jsonwebtoken::encode;
use crate::model::Claim;

pub fn generate(room_identity: &str, user_name: &str) -> String {
    let zoom_key =
        env::var("ZOOM_VIDEO_SDK_KEY").expect("Zoom video SDK key could not be retrieved.");

    let zoom_secret =
        env::var("ZOOM_VIDEO_SDK_SECRET").expect("Zoom video SDK secret could not be retrieved.");

    let token_ttl = env::var("TOKEN_TTL").expect("Token TTL could not be retrieved.");

    let current_time = SystemTime::now()
        .duration_since(UNIX_EPOCH)
        .expect("Clock may have gone backwards")
        .as_secs() as i64;

    let expiry = current_time + token_ttl.parse::<i64>().unwrap();

    let header = Header::default();

    let claim = Claim {
        iat: current_time,
        nbf: current_time,
        exp: expiry,
        app_key: zoom_key,
        role_type: 1,
        version: 1,
        tpc: room_identity,
        user_identity: user_name,
    };

    encode(
        &header,
        &claim,
        &EncodingKey::from_secret(zoom_secret.as_ref()),
    )
    .unwrap()
}

The token() function takes the room identity and a unique identifier for a user. Using these parameters, the jsonwebtoken crate and the retrieved .env variables, a JWT is created and returned.

Create handler functions

The next thing to add is a module containing handler functions for API requests. Create a new file named handler.rs in the src folder, and add the following code to it.

use std::sync::Arc;

use axum::extract::{Path, State};
use axum::http::StatusCode;
use axum::Json;
use serde_json::{json, Value};

use crate::{AppState, helper, token};
use crate::helper::hash;
use crate::model::{JoinRoomRequest, NewRoomRequest, Room, RoomResponse};

pub async fn create_room(State(state): State<Arc<AppState>>, Json(payload): Json<NewRoomRequest>) -> (StatusCode, Json<RoomResponse>) {
    let room_name = payload.name;
    if room_name == "" {
        return (StatusCode::BAD_REQUEST, Json(RoomResponse::Error(json!({"error": "Room name cannot be empty"}))));
    }
    let mut room_passcode = payload.passcode;
    if let Some(passcode) = room_passcode {
        room_passcode = Some(format!("{:?}", hash(passcode)));
    }
    let identity = helper::identity();
    return if let Ok(room) = state.db.create_room(room_name, room_passcode, identity).await {
        (StatusCode::CREATED, Json(RoomResponse::Success(room)))
    } else {
        (StatusCode::BAD_REQUEST, Json(RoomResponse::Error(json!({"error": "Could not create new room"}))))
    };
}

pub async fn get_all_rooms(State(state): State<Arc<AppState>>) -> Json<Vec<Room>> {
    return if let Ok(rooms) = state.db.get_all_rooms().await {
        Json(rooms)
    } else { Json(vec![]) };
}

pub async fn get_room(State(state): State<Arc<AppState>>, Path(id): Path<String>) -> (StatusCode, Json<RoomResponse>) {
    if let Ok(room) = state.db.get_room(&id).await {
        return (StatusCode::OK, Json(RoomResponse::Success(room)));
    }
    return (StatusCode::NOT_FOUND, Json(RoomResponse::Error(json!({"error": "Could not find room with provided identity"}))));
}

pub async fn get_room_token(State(state): State<Arc<AppState>>, Json(payload): Json<JoinRoomRequest>) -> (StatusCode, Json<Value>) {
    let Some(identity) = payload.identity else {
        return (StatusCode::BAD_REQUEST, Json(json!({"error": "room identity is required"})));
    };

    let Ok(room) = state.db.get_room(&identity).await else {
        return (StatusCode::NOT_FOUND, Json(json!({"error": "Could not find room with provided identity"})));
    };

    return if room.is_valid_passcode(payload.passcode) {
        let user_identity = format!("Anon_{}", helper::identity());
        (StatusCode::OK, Json(json!({"token": token::generate(&identity, &user_identity), "user": user_identity})))
    } else {
        (StatusCode::BAD_REQUEST, Json(json!({"error": "Invalid room passcode provided"})))
    };
}

The backend will have four endpoints to handle the following: 

  1. Create a new room. This is handled by the create_room() function

  2. Get all active rooms. This is handled by the get_all_rooms() function

  3. Get a room by the specified id. This is handled by the get_room() function

  4. Get a token for a specified room. This is handled by the get_room_token() function

Finally, update src/main.rs to match the following code.

use std::env;
use std::sync::Arc;

use axum::http::HeaderValue;
use axum::Router;
use axum::routing::{get, post};
use dotenvy::dotenv;
use sqlx::SqlitePool;

use crate::handler::{create_room, get_all_rooms, get_room, get_room_token};
use crate::database::{AppState, Database};

mod helper;
mod model;
mod database;
mod token;
mod handler;

#[tokio::main]
async fn main() {
    dotenv().ok();

    let db_url = env::var("DATABASE_URL").expect("DATABASE_URL could not be retrieved.");
    let db_pool = SqlitePool::connect(&db_url).await.unwrap();
    let shared_state = Arc::new(AppState { db: Database::new(db_pool) });
    let frontend_port = env::var("FRONTEND_PORT").expect("FRONTEND_PORT could not be retrieved.");

    let allowed_origins = [
        format!("http://127.0.0.1:{}", &frontend_port).parse::<HeaderValue>().unwrap(),
        format!("http://localhost:{}", &frontend_port).parse::<HeaderValue>().unwrap()
    ];

    let app = Router::new().route("/", get(get_all_rooms))
        .route("/room", post(create_room))
        .route("/token", post(get_room_token))
        .route("/room/:id", get(get_room))
        .with_state(shared_state)
        .layer(tower_http::cors::CorsLayer::new()
            .allow_origin(allowed_origins)
            .allow_methods([axum::http::Method::GET, axum::http::Method::POST])
            .allow_headers([axum::http::header::CONTENT_TYPE])
        );

    let server_port = env::var("SERVER_PORT").expect("SERVER_PORT could not be retrieved.");
    let address = format!("0.0.0.0:{}", server_port);
    let listener = tokio::net::TcpListener::bind(address).await.unwrap();

    axum::serve(listener, app)
        .await
        .unwrap();
}

The main() function has been updated to perform the following actions:

  1. Creates a new Axum router and bind the endpoints to the corresponding handler function

  2. Adds a CORS layer to the router to restrict the origin, methods, and headers that will be honoured by the API

  3. Binds the backend to the port specified in the .env file

Start the back end of the application

Next, start the backend of your application with the following command.

cargo run

Build the frontend

In a new terminal tab or window, change into the frontend folder and start a new project using the following commands.

yarn create vite . --template react
yarn

Next, add the project dependencies using the following command:

yarn add antd @ant-design/icons axios react-router-dom @zoom/videosdk

The dependencies are as follows:

  1. Ant Design: This is a component library which makes it simpler to build user interfaces 

  2. Ant Design Icons: This gives you access to AntD’s SVG icon collection

  3. Axios: Axios will be used to make API requests and get the appropriate response

  4. React Router: This will be used to implement client-side routing

  5. Zoom Video: This library simplifies interacting with the Zoom Video SDK, which provides video, audio, screen sharing, chat, data streams, and more, as a service 

Add functionality for making API calls

In the frontend/src folder, create a new file named Api.js and add the following code to it.

import axios from "axios";

const axiosInstance = axios.create({
  baseURL: "http://localhost:8000",
  headers: { "Content-Type": "application/json" },
});

export const getRooms = async () => {
  const { data } = await axiosInstance.get("/");
  return data;
};

const handleError = (error) => {
  const errorMessage = error.response.data.error;
  throw new Error(errorMessage);
};

export const createRoom = async (roomDetails) => {
  try {
    const response = await axiosInstance.post("room", roomDetails);
    return response.data;
  } catch (error) {
    handleError(error);
  }
};

export const getRoomToken = async (loginDetails) => {
  try {
    const response = await axiosInstance.post("token", loginDetails);
    return response.data;
  } catch (error) {
    handleError(error);
  }
};

export const getRoom = async (roomId) => {
  try {
    const response = await axiosInstance.get(`room/${roomId}`);
    return response.data;
  } catch (error) {
    handleError(error);
  }
};

The getRooms(), createRoom(), getRoomToken(), and getRoom() functions are used to make API calls to the backend, handling any errors that may be encountered, otherwise returning the requested information. 

Add hook for rendering notifications

Notifications are used to show the result of a user’s actions. Different components will require this functionality, in one way or another, making it more efficient to have the functionality implemented as a hook.

In the frontend/src folder, create a new folder named hooks, and in it a new file named useNotification.js. Add the following code to the newly created file.

import { notification } from "antd";

const useNotification = () => {
  const [api, contextHolder] = notification.useNotification();

  const showNotification = ({ type, title, message }) => {
    api[type]({
      message: title,
      description: message,
    });
  };

  const showSuccess = ({ title, message }) => {
    showNotification({ type: "success", title, message });
  };

  const showFailure = ({ title, message }) => {
    showNotification({ type: "error", title, message });
  };

  return [contextHolder, showFailure, showSuccess];
};

export default useNotification;

The useNotification hook returns an array with three components:

  • The contextHolder which is where the notification will be rendered

  • The showFailure() function which renders an error notification

  • The showSuccess() function which renders a notification for a successful action

Add a hook for Zoom functionality

Zoom will be used to handle the video and audio functionality. Create a new file in the frontend/src/hooks folder named useZoom.js, and add the following code to it.

import ZoomVideo from "@zoom/videosdk";
import { useEffect, useState } from "react";

const useZoom = (
  selfContainerID,
  otherParticipantsCanvasID,
  showVideo,
  isMuted
) => {
  const [stream, setStream] = useState(null);
  const [currentUserId, setCurrentUserId] = useState(null);
  const [participants, setParticipants] = useState([]);

  useEffect(() => {
    if (stream) {
      if (showVideo) {
        stream.startVideo({
          videoElement: document.getElementById(selfContainerID),
        });
      } else {
        stream.stopVideo();
      }
    }
  }, [showVideo, stream]);

  useEffect(() => {
    if (stream) {
      if (!isMuted) {
        stream.startAudio();
      } else {
        stream.muteAudio();
      }
    }
  }, [stream, isMuted]);

  useEffect(() => {
    if (participants.length > 0) {
      participants.forEach((participant) => {
        if (participant.bVideoOn) {
          const coordinates = { x: 0, y: 0 };
          renderParticipant(participant, coordinates);
        } else {
          stream.stopRenderVideo(
            document.getElementById(otherParticipantsCanvasID),
            participant.userId
          );
        }
      });
    }
  }, [participants, stream]);

  const renderParticipant = (participant, coordinates) => {
    stream.renderVideo(
      document.getElementById(otherParticipantsCanvasID),
      participant.userId,
      240,
      135,
      coordinates.x,
      coordinates.y,
      2
    );
  };

  const filterParticipants = (participants) =>
    participants.filter(({ userId }) => userId !== currentUserId);

  const join = async (token, roomName, userIdentity) => {
    const client = ZoomVideo.createClient();
    await client.init("en-US", "Global", { patchJsMedia: true });
    await client.join(roomName, token, userIdentity);

    setStream(client.getMediaStream());
    setCurrentUserId(client.getCurrentUserInfo().userId);
    setParticipants(filterParticipants(client.getAllUser()));

    client.on("peer-video-state-change", () => {
      setParticipants(filterParticipants(client.getAllUser()));
    });
  };

  const leave = async () => {
    if (stream) {
      stream.stopVideo();
      stream.stopAudio();
    }
    await ZoomVideo.createClient().leave();
  };

  return [join, leave];
};

export default useZoom;

This hook handles the connection to a session, rendering of video streams, and leaving of a session. To initialise it requires four parameters, namely:

  • The id of the <video> element on which the current user video will be rendered

  • The id of the <canvas> element on which the video stream of other participants will be rendered

  • A boolean named showVideo which determines whether or not the current user video should be displayed

  • A boolean named isMuted which indicates whether or not the current user’s mic is muted

Next, two useEffect hooks are declared to start or stop the current user’s video or audio stream depending on the values of showVideo() and isMuted()

The renderParticipant() function is used to render a single participant video on the canvas. It does this by calling the renderVideo() function on a Zoom Video stream. This function takes seven parameters, namely:

  • A <canvas> element on which the participant video can be rendered. You can use the same element to render multiple participants as will be done in this tutorial.

  • The identifier of the participant whose video is to be rendered

  • The width and height of the video being rendered

  • The x and y axes coordinate of the video on the canvas

  • The resolution of the video

For the application, your video will be rendered separately from that of other participants. Hence, when rendering the participants, you will need to exclude the current user from the list. This is done using the filteredParticipants() function. This function also returns a maximum of six participants as that will be the maximum number of participants to be rendered in this tutorial.

The join() function is called when a user wants to join a session. This function requires three parameters: the session name, a valid JWT, and the user identifier (whom the JWT is associated with). 

Using these parameters, a Zoom Video client is instantiated and used to start a video stream; one for the logged in user (rendered on a <video> element with id self-view-video, and one for the rest for the other participants in the video session, rendered by a call to the previously mentioned renderParticipants() function.

The leave() function is called when a user wants to leave a session. This function stops the current video and audio stream (if initialised), and calls the leave() function on the Zoom Video client. 

The join() and leave() functions are returned in the array.

Add UI components

The next step is to add the components for your frontend. Your application will have the following components:

  1. AddRoom: This component contains the UI and logic for adding a new room

  2. JoinRoom: This component contains the UI and logic for joining a room

  3. ModalForm: This component is used to render form components in a modal

  4. Rooms: This component contains the UI and logic for listing all the active rooms 

In the frontend/src folder, create a new folder named components, and in it, a new file named AddRoom.jsx and add the following code to it.

import { Form, Input } from "antd";
import { createRoom } from "../Api";
import ModalForm from "./ModalForm";

const sanitizePasscode = (input) => {
  if (input && input !== "") return input;
  return null;
};

const AddRoom = ({ onAddition, onError, isVisible, setVisibility }) => {
  const handleFormSubmission = async (form) => {
    try {
      const { name, passcode } = await form.validateFields();
      const newRoom = await createRoom({
        name,
        passcode: sanitizePasscode(passcode),
      });
      onAddition(newRoom);
      form.resetFields();
      setVisibility(false);
    } catch (error) {
      onError(error.message);
    }
  };

  return (
    <ModalForm
      title="Add new room"
      isVisible={isVisible}
      handleFormSubmission={handleFormSubmission}
      handleCancel={() => setVisibility(false)}
    >
      <Form.Item
        name="name"
        label="Name"
        rules={[
          {
            required: true,
            message: "Please provide the name of the room",
          },
        ]}
      >
        <Input />
      </Form.Item>
      <Form.Item
        name="passcode"
        label="Passcode"
        rules={[
          { type: "string", whitespace: true },
          { min: 5, message: "Passcode must be at least 5 characters" },
          { whitespace: false },
        ]}
      >
        <Input.Password />
      </Form.Item>
    </ModalForm>
  );
};

export default AddRoom;

This component has four props:

  1. onAddition(): This is a callback function triggered once a room has been added successfully

  2. onError(): This is a callback function triggered when an error is encountered while adding a room

  3. isVisible: This is a boolean which determines whether or not the form is visible

  4. setVisibility: This function toggles the form's visibility

A function named sanitizePasscode() is used to properly format the room passcode. If an empty string is provided as the room's passcode, it is converted to NULL

The handleFormSubmission() function takes a form element with which it validates the submitted data. If everything checks out, the API call is made to create a new room, and then the onAddition() callback is executed with the newly created room passed as a parameter. The form is thereafter cleared and hidden from the user. 

This component renders a ModalForm with two children, the input fields for the room name (required) and passcode (optional).

Next, in the frontend/src/components folder, create a new file named JoinRoom.jsx and add the following code to it.

import { getRoom, getRoomToken } from "../Api";
import { useEffect, useState } from "react";
import { useNavigate, useParams } from "react-router-dom";
import useNotification from "../hooks/useNotification";
import ModalForm from "./ModalForm";
import { Button, Col, Divider, Flex, Form, Input, Row } from "antd";
import {
  AudioOutlined,
  AudioMutedOutlined,
  CloseCircleOutlined,
  EyeInvisibleOutlined,
  EyeOutlined,
} from "@ant-design/icons";
import useZoom from "../hooks/useZoom";

const JoinRoom = () => {
  const { id } = useParams();
  const [showForm, setShowForm] = useState(false);
  const [room, setRoom] = useState(null);
  const [showVideo, setShowVideo] = useState(false);
  const [isMuted, setIsMuted] = useState(true);
  const [contextHolder, showFailure] = useNotification();
  const [join, leave] = useZoom(
    "self-view-video",
    "participant-videos-canvas",
    showVideo,
    isMuted
  );
  const navigate = useNavigate();

  useEffect(() => {
    const joinRoom = async () => {
      try {
        const room = await getRoom(id);
        setRoom(room);
        setShowForm(room.hasPasscode);
        if (!room.hasPasscode) {
          const { token, user } = await getRoomToken({
            name: room.name,
            identity: room.identity,
            passcode: null,
          });
          join(token, room.identity, user);
        }
      } catch (e) {
        showFailure({ title: "Failure", message: e.message });
      }
    };
    joinRoom();
  }, []);

  const toggleVideo = () => {
    setShowVideo(!showVideo);
  };

  const toggleAudio = () => {
    setIsMuted(!isMuted);
  };

  const handleFormSubmission = async (form) => {
    const { passcode } = await form.validateFields();
    try {
      const { token, user } = await getRoomToken({
        identity: room.identity,
        passcode,
      });
      form.resetFields();
      setShowForm(false);
      join(token, room.identity, user);
    } catch (e) {
      showFailure({
        title: "Failed to join room",
        message: e.message,
      });
    }
  };

  const returnHome = () => {
    navigate("/");
  };

  return (
    <>
      {contextHolder}
      <ModalForm
        title="Passcode required to join this room"
        isVisible={showForm}
        handleFormSubmission={handleFormSubmission}
        handleCancel={returnHome}
      >
        <Form.Item
          name="passcode"
          label="Passcode"
          rules={[
            {
              required: true,
              message: "Please provide the room passcode",
            },
          ]}
        >
          <Input type="password" />
        </Form.Item>
      </ModalForm>
      <Row gutter={8}>
        <Col span={12}>
          <video id="self-view-video" width="240" height="145"></video>
        </Col>
        <Col span={12}>
          <canvas
            id="participant-videos-canvas"
            width="240"
            height="145"
          ></canvas>
        </Col>
        <Col span={24}>
          <Flex justify="space-evenly" align="center" vertical>
            <Divider orientationMargin={10} />
            <Flex gap="small" wrap="wrap">
              <Button
                shape="round"
                icon={showVideo ? <EyeOutlined /> : <EyeInvisibleOutlined />}
                size="large"
                onClick={toggleVideo}
              />
              <Button
                shape="round"
                icon={isMuted ? <AudioMutedOutlined /> : <AudioOutlined />}
                size="large"
                onClick={toggleAudio}
              />
              <Button
                danger
                shape="round"
                icon={<CloseCircleOutlined />}
                size="large"
                onClick={async () => {
                  await leave();
                  returnHome();
                }}
              >
                Exit
              </Button>
            </Flex>
          </Flex>
        </Col>
      </Row>
    </>
  );
};

export default JoinRoom;

To determine which room is being joined, the useParams hook is used to get the room identity. On page load, the room details are retrieved via an API call to the backend, and saved to state. If the room does not have a passcode, a token is generated via a second API call, and with that the join() function (from useZoom.js) is called. 

If the room requires a passcode, a form is first displayed prompting the user to provide a passcode, which is then authenticated before a token is returned by the backend. Also, if at any point the user cancels the operation, the application redirects the user to the home page.

Next, in the frontend/src/components folder, create a new file named Rooms.jsx and add the following code to it.

import { useEffect, useState } from "react";
import { getRooms } from "../Api";
import { Button, Card, List, Tooltip } from "antd";
import { PlusOutlined } from "@ant-design/icons";
import AddRoom from "./AddRoom";
import { Link } from "react-router-dom";
import useNotification from "../hooks/useNotification";

const Rooms = () => {
  const [rooms, setRooms] = useState([]);
  const [formVisibility, setFormVisibility] = useState(false);
  const [contextHolder, showFailure, showSuccess] = useNotification();

  const handleError = (message) => {
    showFailure({
      title: "Failed to create room",
      message,
    });
  };

  const handleAddition = (newRoom) => {
    setRooms((rooms) => [...rooms, newRoom]);
    showSuccess({
      title: "Success",
      message: "Room created successfully",
    });
  };

  useEffect(() => {
    const loadRooms = async () => {
      const rooms = await getRooms();
      setRooms(rooms);
    };
    loadRooms();
  }, []);

  return (
    <>
      {contextHolder}
      <Card
        title="Available rooms"
        bordered={false}
        style={{ width: 400 }}
        actions={[
          <Tooltip title="Add a new room">
            <Button
              type="primary"
              icon={<PlusOutlined />}
              onClick={() => {
                setFormVisibility((showAddRoomModal) => !showAddRoomModal);
              }}
            >
              Add Room
            </Button>
          </Tooltip>,
        ]}
      >
        <List
          itemLayout="horizontal"
          dataSource={rooms}
          renderItem={(room) => (
            <List.Item>
              <List.Item.Meta
                title={<Link to={`/room/${room.identity}`}>{room.name}</Link>}
              />
            </List.Item>
          )}
        />
      </Card>
      <AddRoom
        onError={handleError}
        onAddition={handleAddition}
        isVisible={formVisibility}
        setVisibility={setFormVisibility}
      />
    </>
  );
};

export default Rooms;

On load, this component retrieves all the active rooms from the backend and renders them in a list. It also renders the AddRoom component which allows the user to add a new room immediately.

The last component is the ModalForm component. In the frontend/src/components folder, create a new file named ModalForm.jsx and add the following code to it.

import { Form, Modal } from "antd";
const ModalForm = ({
  title,
  isVisible,
  handleFormSubmission,
  handleCancel,
  children,
}) => {
  const [form] = Form.useForm();

  return (
    <Modal
      title={title}
      centered
      open={isVisible}
      onOk={() => {
        handleFormSubmission(form);
      }}
      onCancel={handleCancel}
    >
      <Form form={form} layout="vertical">
        {children}
      </Form>
    </Modal>
  );
};

export default ModalForm;

This component allows you to wrap form items in a modal while customising the title, visibility, and behaviour of the form to suit the different needs of each component.

Finally, in the frontend/src folder, update the App.jsx file to match the following.

import { Flex } from "antd";
import { createBrowserRouter, RouterProvider } from "react-router-dom";
import Rooms from "./components/Rooms.jsx";
import JoinRoom from "./components/JoinRoom.jsx";

const router = createBrowserRouter([
  { path: "/", element: <Rooms /> },
  { path: "/room/:id", element: <JoinRoom /> },
]);

const App = () => {
  const boxStyle = {
    width: "100%",
    height: "100vh",
  };

  return (
    <Flex gap="middle" align="center" vertical>
      <Flex style={boxStyle} justify="center" align="center">
        <RouterProvider router={router} />
      </Flex>
    </Flex>
  );
};

export default App;

In this component, you created a new router object which determines the component to be rendered for a given path. This object is provided as a prop to the RouterProvider component provided by React Router. 

Start the front end of the application

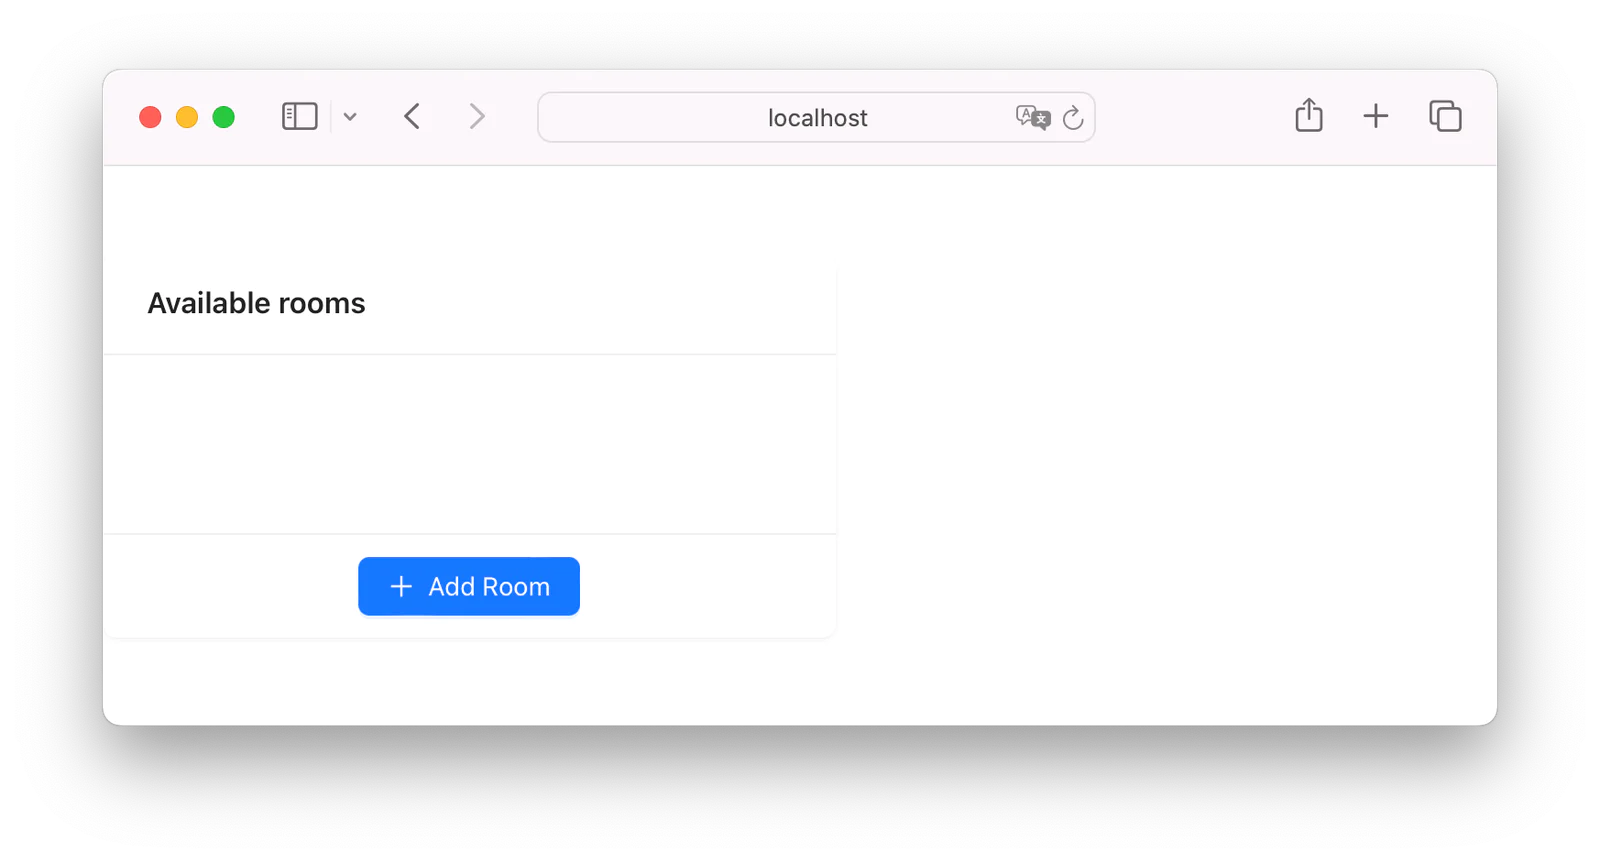
With everything in place, start your frontend using the following command.

yarn dev

Don’t forget to restart your backend if you stopped it.

The default index page shows a list of rooms that can be joined. Since you have none, it should look like this:

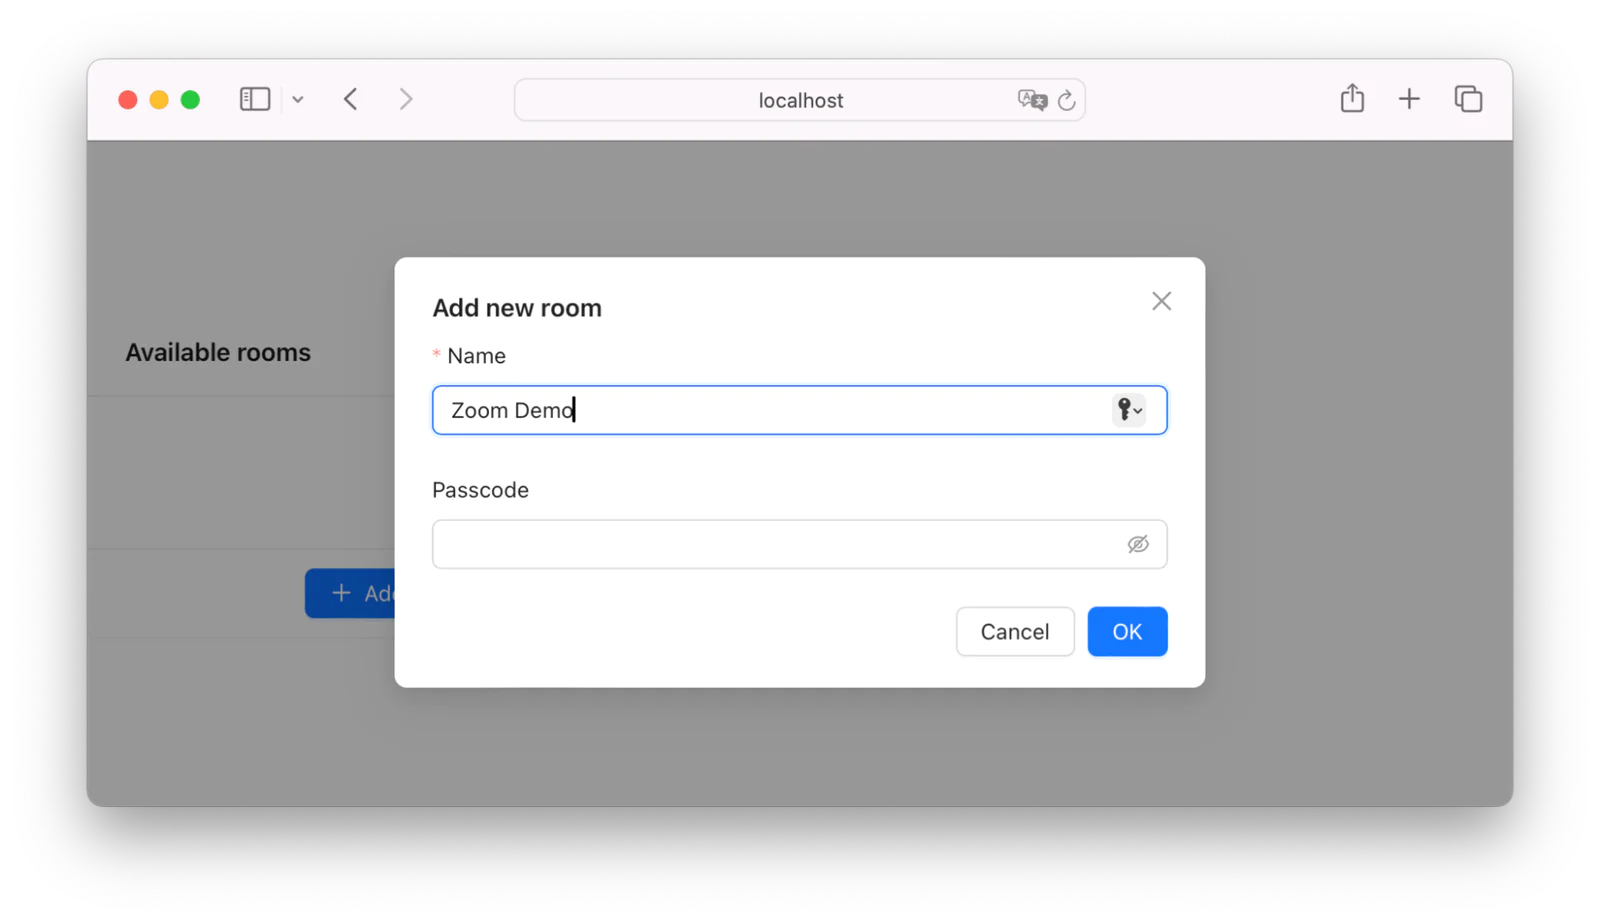
Click on the Add Room button to create a new room. Fill the form that pops up as shown below and click OK to complete the process. 

Now that you have a room, click on it from the list to start a video session. A recording of the application hosting two participants is shown below. 

That's how to use React and Rust to build a video chat app

There you have it. You have successfully integrated the Zoom Video SDK with your React frontend and Rust backend. There’s still a lot more that you can do with the SDK — for example screen sharing and chat. 

You can review the final codebase for this article on GitHub should you get stuck at any point. I’m excited to see what else you come up with. Until next time, make peace not war ✌🏾

Joseph Udonsak is a software engineer with a passion for solving challenges — be it building applications, or conquering new frontiers on Candy Crush. When he’s not staring at his screens, he enjoys a cold beer and laughs with his family and friends. Find him at LinkedIn, Medium, and Dev.to.