How to Build a Language Flashcard App with Email Reminders

August 28, 2024
Written by
Omu Inetimi
Contributor
Opinions expressed by Twilio contributors are their own
Reviewed by
Diane Phan
Twilion


In this post, you'll learn how to create an Anki app using Django and SendGrid. Anki is a popular flashcard application that helps users memorize information through spaced repetition. We'll build an app that allows users to add flashcards and receive daily email reminders to review them, leveraging SendGrid for email delivery.

Prerequisites

Before we start, make sure you have the following prerequisites ready:

  • A free SendGrid account
  • Python installed on your machine (version 3.8 or later)
  • Django installed (version 3.1 or later)

Set Up the Development Environment

Start by creating a new directory for your project and navigating to it:

mkdir anki_app
cd anki_app

It's considered best practice to work with Python projects within virtual environments, so once inside your project directory, create a virtual environment:

python3 -m venv venv

Activate your virtual environment with this command:

source venv/bin/activate

Install the required dependencies for the project. We are using Django for this project for its versatility. This framework gives us rapid tooling for our prototype while ensuring convenient management of our flashcard data. The Model-View-Template(MVT) architecture naturally separates concerns making it easy for us to organize our flashcard application into 3 parts:

  • Models for defining flashcard data structure
  • Views for handling logic (adding, editing, and deleting flashcards)
  • Templates for presenting flashcards to users

We need to install both the Django framework and SendGrid package to build an application that enables us to send emails. You can install it using the pip command:

pip install sendgrid django

Create the Django Python project with the following commands:

django-admin startproject anki_project
cd anki_project
python manage.py startapp flashcards

Obtain the SendGrid API Key

Sign up for a free SendGrid account.

After logging in, navigate to the Email API section right below the Dashboard on the menu.

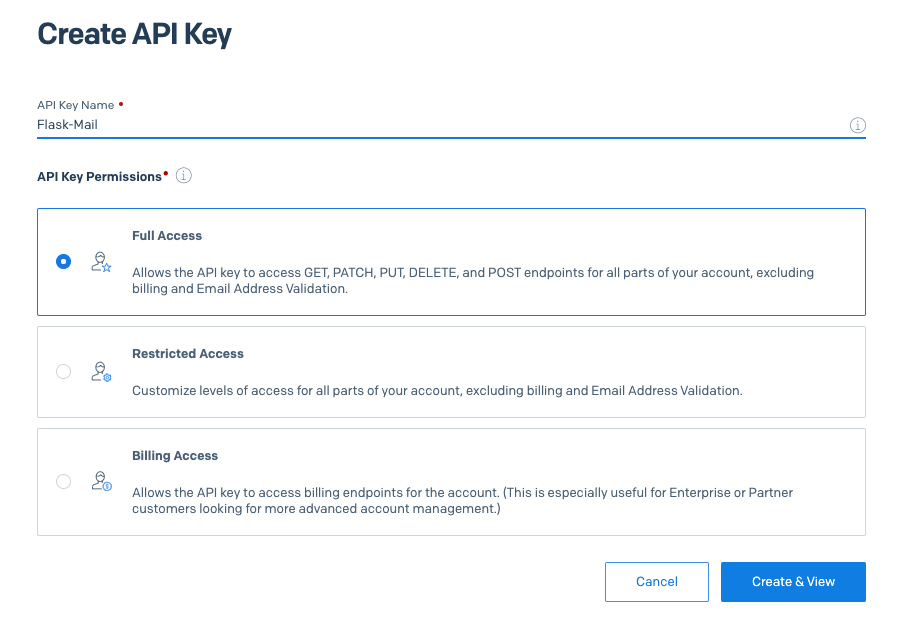
Click on Integration Guide, select Web API, choose Python, and provide a name for your API key.

Click Create key to see your new API key. Copy this key as it will be needed within your Django application.

the SendGrid webapi setup

With our development environment setup complete, we can move on to coding the application.

Create the Django Application

By now, we have all the boilerplate Django files to build our project.

Let's start by setting up the Django app to manage flashcards and send email reminders.

Configure the email settings for SendGrid

First, we need to update the settings.py file to include our new app and configure email settings for SendGrid. Open the anki_project/settings.py file and add flashcards to the INSTALLED_APPS list:

INSTALLED_APPS = [
    ...
    'flashcards',
]

This lets Django know that the flashcards app exists within our project and ensures it can work with other functions and configurations.

Next, configure the email settings to use SendGrid. Add the following configuration at the end of the settings file:

EMAIL_BACKEND = 'django.core.mail.backends.smtp.EmailBackend'
EMAIL_HOST = 'smtp.sendgrid.net'
EMAIL_PORT = 587
EMAIL_USE_TLS = True
EMAIL_HOST_USER = 'apikey'  # This is the string literal "apikey"
SENDGRID_API_KEY   = 'your_sendgrid_api_key'  # Replace with your SendGrid API key
DEFAULT_FROM_EMAIL = 'your_email@example.com'  # Replace with your email

By setting up these configurations, your Django application can now send email reminders to users through SendGrid, with your email address specified as the sender in the DEFAULT_FROM_EMAIL setting.

Create the Flashcard Models

We need to define a model for our flashcards. Models define the structure of our database and the pattern or attributes it should have.

Open flashcards/models.py and create the Flashcard model:

from django.db import models
from django.utils import timezone
class Flashcard(models.Model):
    question = models.CharField(max_length=255)
    answer = models.TextField()
    created_at = models.DateTimeField(auto_now_add=True)
    last_reviewed = models.DateTimeField(default=timezone.now)
    def __str__(self):
        return self.question

This model creates a way for us to save the question and answer for our flashcards to our database. The created_at field automatically records the timestamp when the flashcard is created, and the last_reviewed field keeps track of the last time the flashcard was reviewed, with a default value of the current time.

The question field is a character field with a maximum length of 255 characters, and the answer field is a text field that can hold longer text.

Run the migrations to create the database table for our model:

python manage.py makemigrations flashcards
python manage.py migrate

You should see the following output after running these commands.

a picture of the terminal after running migrations within your django app

This creates and updates the database using the default SQLite database that Django provides. The makemigrations command creates new migration files based on the changes made to the models, and the migrate command applies those changes to the database.

Create Views and Templates in Django

Next, we need to create views and templates for adding, listing, editing, and deleting flashcards. Open flashcards/views.py and add the following views:

from django.shortcuts import render, redirect, get_object_or_404
from .models import Flashcard
from .forms import FlashcardForm
def flashcard_list(request):
    flashcards = Flashcard.objects.all()
    return render(request, 'flashcards/flashcard_list.html', {'flashcards': flashcards})
def add_flashcard(request):
    if request.method == 'POST':
        form = FlashcardForm(request.POST)
        if form.is_valid():
            form.save()
            return redirect('flashcard_list')
    else:
        form = FlashcardForm()
    return render(request, 'flashcards/add_flashcard.html', {'form': form})
def edit_flashcard(request, pk):
    flashcard = get_object_or_404(Flashcard, pk=pk)
    if request.method == 'POST':
        form = FlashcardForm(request.POST, instance=flashcard)
        if form.is_valid():
            form.save()
            return redirect('flashcard_list')
    else:
        form = FlashcardForm(instance=flashcard)
    return render(request, 'flashcards/edit_flashcard.html', {'form': form})
def delete_flashcard(request, pk):
    flashcard = get_object_or_404(Flashcard, pk=pk)
    if request.method == 'POST':
        flashcard.delete()
        return redirect('flashcard_list')
    return render(request, 'flashcards/delete_flashcard.html', {'flashcard': flashcard})

The flashcard_list view retrieves all the flashcards from the database and renders them in the flashcard_list.html template. The add_flashcard view handles both GET and POST requests. If the request method is POST, it creates a form instance with the submitted data and saves it to the database if the form is valid. If the form is invalid, it means that there are empty fields or the maximum character length has been exceeded. In this case, the form is not saved to the database; instead, the view re-renders the template with the invalid form. If the request method is GET, the else block handles it and creates an empty form instance. In both cases, the view renders the add_flashcard.html template with the form instance.

The edit_flashcard view allows editing of existing flashcards. It retrieves the flashcard by its primary key, updates it if the form is valid on POST, or displays the current flashcard data for editing on GET.

The delete_flashcard view handles the deletion of flashcards. It shows a confirmation page on GET and deletes the flashcard on POST.

Create a forms file flashcards/forms.py to handle the Flashcard form. Copy and paste the following code below:

from django import forms
from .models import Flashcard
class FlashcardForm(forms.ModelForm):
    class Meta:
        model = Flashcard
        fields = ['question', 'answer']

This defines a FlashcardForm class that inherits from Django's ModelForm class. The form is associated with the Flashcard model, and it includes the question and answer fields from the model.

Next, we want to create the templates that the users will interact with. Create the templates subdirectory and the necessary HTML files with the command:

mkdir -p flashcards/templates/flashcards

You’ll notice that we created a templates directory and another flashcards directory within it. This is how Django structures its templates to ensure there are no mixups.

Within the templates/flashcards subdirectory create flashcard_list.html:

<!DOCTYPE html>
<html>
<head>
    <title>Flashcards</title>
</head>
<body>
    <h1>Flashcards</h1>
    <a href="{% url 'add_flashcard' %}">Add Flashcard</a>
    <ul>
        {% for flashcard in flashcards %}
            <li>
                <strong>Q:</strong> {{ flashcard.question }}<br>
                <strong>A:</strong> {{ flashcard.answer }}<br>
                <a href="{% url 'edit_flashcard' flashcard.id %}">Edit</a> | 
                <a href="{% url 'delete_flashcard' flashcard.id %}">Delete</a>
            </li>
        {% endfor %}
    </ul>
</body>
</html>

This template displays a list of flashcards, showing both questions and answers. It includes links to add, edit, and delete flashcards.

Create add_flashcard.html:

<!DOCTYPE html>
<html>
<head>
    <title>Add Flashcard</title>
</head>
<body>
    <h1>Add Flashcard</h1>
    <form method="post">
        {% csrf_token %}
        {{ form.as_p }}
        <button type="submit">Add</button>
    </form>
    <a href="{% url 'flashcard_list' %}">Back to List</a>
</body>
</html>

This template displays a form for adding a new flashcard. The {{ form.as_p }} template tag renders the form fields as HTML paragraph elements. The submit button allows the user to submit the form data.

Create edit_flashcard.html:

<!DOCTYPE html>
<html>
<head>
    <title>Edit Flashcard</title>
</head>
<body>
    <h1>Edit Flashcard</h1>
    <form method="post">
        {% csrf_token %}
        {{ form.as_p }}
        <button type="submit">Save Changes</button>
    </form>
    <a href="{% url 'flashcard_list' %}">Cancel</a>
</body>
</html>

Create delete_flashcard.html:

<!DOCTYPE html>
<html>
<head>
    <title>Delete Flashcard</title>
</head>
<body>
    <h1>Delete Flashcard</h1>
    <p>Are you sure you want to delete this flashcard?</p>
    <p><strong>Q:</strong> {{ flashcard.question }}</p>
    <p><strong>A:</strong> {{ flashcard.answer }}</p>
    <form method="post">
        {% csrf_token %}
        <button type="submit">Confirm Delete</button>
    </form>
    <a href="{% url 'flashcard_list' %}">Cancel</a>
</body>
</html>

These templates provide forms for adding and editing flashcards, a confirmation page for deleting flashcards, and a list view that displays all flashcards with options to edit or delete each one. The {% csrf_token %} template tag is included in all forms as a security measure to prevent Cross-Site Request Forgery attacks.

Configure the path URLs for the application

Open anki_project/urls.py and include the flashcards app URLs for the views:

from django.contrib import admin
from django.urls import path, include
urlpatterns = [
    path('admin/', admin.site.urls),
    path('', include('flashcards.urls')),
]

This sets up the URL patterns for the entire Django project. The first path includes the URLs for the built-in Django admin site, and the second path includes the URLs for the flashcards app. By using include('flashcards.urls'), Django will look for a urls.py file within the flashcards app to define the URL patterns for that app.

Create a new file flashcards/urls.py and define the URL patterns:

from django.urls import path
from . import views
urlpatterns = [
    path('', views.flashcard_list, name='flashcard_list'),
    path('add/', views.add_flashcard, name='add_flashcard'),
    path('edit/<int:pk>/', views.edit_flashcard, name='edit_flashcard'),
    path('delete/<int:pk>/', views.delete_flashcard, name='delete_flashcard'),
]

This defines the URL patterns for the flashcards app. The first path maps the root URL to the flashcard_list view, and the second path maps the URL /add/ to the add_flashcard view. The name parameter gives a unique name to each URL pattern, which can be used for URL reversing in templates and views. The third and fourth paths map to the edit and delete views respectively.

Send Email Reminders

We need a way to send daily email reminders to review the flashcards. We'll use Django's management commands to achieve this. Create a new subdirectory under flashcards/management/commands and add an __init__.py file in each directory. Then, create a file send_reminders.py in the commands directory. Use the following commands:

mkdir -p flashcards/management/commands
touch flashcards/management/__init__.py
touch flashcards/management/commands/__init__.py

This sets up the necessary directory structure for Django management commands. The __init__.py files are required for Python to treat the directories as packages.

Create send_reminders.py inside the commands subdirectory and paste the following code:

from django.core.management.base import BaseCommand
from django.conf import settings
from sendgrid import SendGridAPIClient
from sendgrid.helpers.mail import Mail
from flashcards.models import Flashcard
class Command(BaseCommand):
    help = 'Send daily email reminders to review flashcards'
    def handle(self, *args, **kwargs):
        flashcards = Flashcard.objects.all()
        if not flashcards.exists():
            self.stdout.write(self.style.WARNING('No flashcards found. No email sent.'))
            return
        subject = 'Daily Flashcard Review'
        message_content = 'Here are your flashcards to review:<br><br>'
        for flashcard in flashcards:
            message_content += f'<strong>Q:</strong> {flashcard.question}<br><strong>A:</strong> {flashcard.answer}<br><br>'
        message = Mail(
            from_email=settings.DEFAULT_FROM_EMAIL,
            to_emails='recipient@example.com',  # Replace with your email or recipient list
            subject=subject,
            html_content=message_content
        )
        try:
            sg = SendGridAPIClient(settings.SENDGRID_API_KEY)
            response = sg.send(message)
            self.stdout.write(self.style.SUCCESS(f'Successfully sent email reminders. Status Code: {response.status_code}'))
        except Exception as e:
            self.stdout.write(self.style.ERROR(f'An error occurred: {str(e)}'))

The handle method retrieves flashcards from the database. If no flashcards are found, it stops execution and logs a warning message, indicating that no email was sent.

If flashcards are available, it constructs an email message containing each flashcards question and answer.

The Mail object is configured with the sender's email(from_email), the recipient's email(to_emails), the subject, and the HTML content(html_content).

The SendGrid API client is initialized with the API key stored securely in the Django settings and sends the email.

Exception handling is implemented to catch and report any errors that occur during the email-sending process, providing feedback through Django's command-line interface. This setup uses Django's BaseCommand to create the send_reminders function, which can be run manually or scheduled with cron jobs or Task Scheduler to ensure timely flashcard review reminders.

Run the Flashcard Reminder Application

To run the application, use the following command:

python manage.py runserver
an image of the terminal when you start your django server

This will start the Django development server on http://localhost:8000. The development server is a lightweight web server provided by Django, usually used for local development and testing purposes. Once the server is running, you can access the application in your web browser by navigating to the provided URL.

Test the Application

To test the application, navigate to http://localhost:8000 in your web browser. You should see a list of flashcards, however it will initially be empty.

the initial empty list of flashcards

Click on "Add Flashcard" to create new flashcards. This will take you to the add_flashcard view, which renders the add_flashcard.html template. The template contains an HTML form with fields for the question and answer of the flashcard.

the add-flashcards page.

When you submit the form, the add_flashcard view is triggered with a POST request. The view instantiates the FlashcardForm with the submitted data using FlashcardForm(request.POST). If the form data is valid (form.is_valid()), the view calls form.save(), which creates a new Flashcard object and saves it to the database.

After a successful save, the view redirects back to the flashcard_list view using return redirect('flashcard_list'). The flashcard_list view retrieves all the flashcards from the database using Flashcard.objects.all() and renders the flashcard_list.html template with the list of flashcards. You can also edit and delete individual flashcards.

After adding a few flashcards, you can manually run the send_reminders command in a new terminal to receive an email with the flashcards.

On the new terminal, navigate into the directory that contains the manage.py file and run:

python manage.py send_reminders

This command executes the handle method of the Command class defined in send_reminders.py. It retrieves all the flashcards from the database, constructs an email message with the questions and answers, and sends the email using Sendgrid’s Mail() function. If no flashcards have been created, you will get a message on the console indicating that no mail was sent.

If the email was sent successfully, you should see the message "Successfully sent email reminders" printed on the console.

the console after sending the email

You can now click Verify integration on your SendGrid API key page.

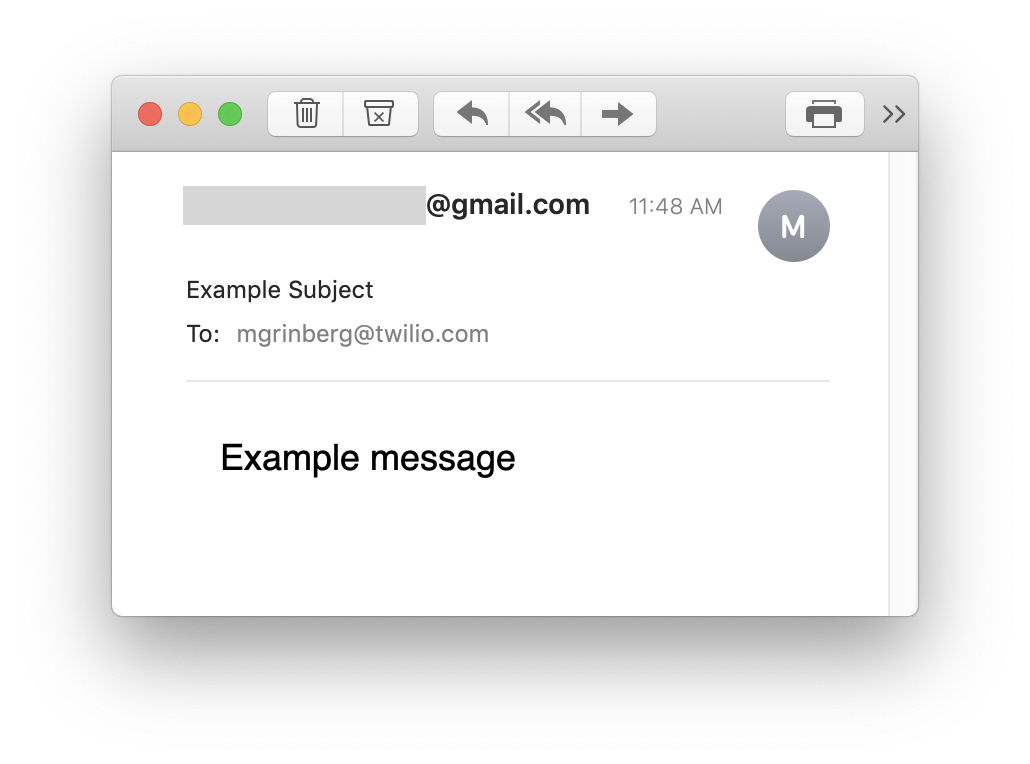
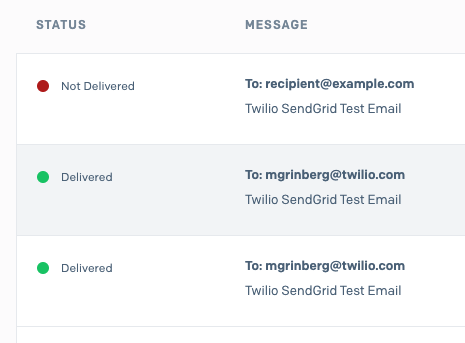
Check your email inbox to confirm that the email reminders are being sent correctly.

Ensure to check spam for emails if you don't see them in your mailbox.

email spam box

You should now be able to see the contents of your anki within the email:

If you encounter any issues, ensure that your SendGrid API key is correctly set and that the email settings in settings.py are properly configured.

You can also check the Django server logs for any error messages or debugging information. The logs are printed to the console where you run the runserver command.

What's next for flashcard reminder apps?

In this article, we explored how to build a simple Anki app using Django and SendGrid.

The source code for this project can be found on my GitHub repository.

This application allows users to add flashcards and receive daily email reminders to review them. By following this tutorial, you have learned how to set up the development environment, create a Django application, handle form submissions, and send email reminders using SendGrid. This application can be further enhanced by adding user authentication with the Verify API or Message scheduling.

Building on this foundation, you can create more complex and feature-rich applications tailored to your needs.

You can further check out the Twilio blog to see how you can add SMS notifications to your application or integrate the project onto the WhatsApp platform.

The combination of Django and SendGrid offers a powerful and scalable solution for building web applications with email functionalities.

Omu Inetimi is a software developer that specializes in Python, he’s also a startup enthusiast. He loves solving difficult problems and bringing projects and solutions to life. He can be reached at inetimimizzle@gmail.com or Twitter .