How to Make Phone Calls in Different Languages with OpenAI, Python, and Flask
Time to read:
October 17, 2024
Written by
Reviewed by
Anyone learning a foreign language knows that having a conversation can feel daunting, but phone calls are in a league of their own. Wouldn't it be great if there was an app where you could call and practice speaking German, French, or any language, without judgment or fear of misunderstandings?
If your answer is yes, this tutorial is for you. It will teach you how to use Twilio Programmable Voice, Python, Flask, and the OpenAI API to build an application that lets you practice foreign language phone calls with GPT as your conversation partner.
Prerequisites
In order to follow this tutorial, you should have the following items ready:
- A voice-capable Twilio phone number (sign up here to get one for free)
- An OpenAI account (create one here) capable of processing a few thousand tokens via API
If you are new to using the OpenAI API, you will need to set up billing.
- Python 3.7 or higher (visit python.orgto get the latest version)
- Ngrok 3.16 or higher (you can download it from the official website)
Prepare your development environment
In your terminal, create a directory you’ll be using for this project and navigate to it. Then create a new virtual environment. One of the benefits of having a dedicated virtual environment is a clear separation of dependencies between this and other applications you might have. Once created, activate the virtual environment using the appropriate command for your operating system.
Now install Flask, a lightweight and user-friendly Python framework. You’ll also need official Python helper libraries for both Twilio and OpenAI to interact with their services. Finally, install the python-dotenv package to enable configuring the application.
Your application will need an API key to authenticate against OpenAI. The application will read the key configuration from a .env file. Create it in the same directory you are using for this project and add the following line. Don’t forget to replace your_api_key with your actual API key. You can get one on the API keys page.
Since you’ll be using the Flask session in this tutorial, you also need to provide a secret key for session encryption. In the .env file you have just created, put some random value as follows.
In the same directory you are using for this project, create a new file that will hold the source code of your application (the file will be referred to as app.py throughout this tutorial). Import the modules you’ll need. In this step, also load configuration from . env and initialize the Flask application.
Collect the user’s preferences
To tailor the conversation to the user's learning goals, the application will guide them through a few choices. They'll get to pick the scenario they want to practice, like visiting the doctor, ordering food, or attending a job interview. They’ll choose the language they want to conquer: German, French, or Italian. Finally, they’ll select their comfort level: beginner, intermediate, or advanced. This information will help the application personalize the conversation to their specific needs.
Collect the user’s input
To collect the user’s preferences, copy the following code snippet into your app.py file.
When the user calls the Twilio phone number, Twilio makes a request to the /answer_call endpoint implemented in the answer_call() function. By invoking the _gather_digit_input() helper function with the parameter specifying which input you’d like to collect from the user first, you instruct Twilio to ask the user which language they want to practice today.
This is possible thanks to the Twilio built-in <Gather>verb with nested <Say>. The <Say> verb instructs Twilio to read the questions out loud while the <Gather> verb can collect the user's input in the form of speech or DTMF tones (default). Since the user will be only presented with a limited number of options to choose from (German, French, Italian), use the latter. The numDigits parameter allows you to specify the maximum number of digits the user can enter. After that, the collected input will be sent in a HTTP request stored in the Digits parameter to the URL specified in the action attribute.
Handle the user’s input
The following piece of code will take care of processing the user’s choices. Copy it into your app.py file.
The /handle_input/<input_type> endpoint extracts the digit the user entered earlier, uses the ALL_INPUT_CHOICES dictionary to map it to a particular language and then stores it in the session.
Why to use Flask’s session object and why to use the input_type path parameter, you might ask. By design, you can only have one <Gather> verb per TwiML response. Since you want to gather the user's answers to three different questions, you can use the input_type parameter to distinguish between various input types (language, level, scenario) and session to persist the user's choices across multiple requests.
Once the app knows which language the user wants to practice, it collects other user’s preferences and then starts the conversation with GPT.
Chat with GPT
As you saw in the previous step, once the app collects all the user’s preferences, it triggers three functions, which initiate a log to track the conversation (_start_conversation_log()), pass it on to OpenAI (_ask_gpt()) and then instruct Twilio to read the response to the user (_gather_chat_response()). Find the code for these functions below and add them to your app.py file.
The _start_conversation_log() function
The chat completion API request comes with the messages parameter. This parameter contains a list of all messages compromising the conversation so far and thus serves as GPT’s memory.
Since the conversation history will be dynamic and grow over time, the _start_conversation_log() function returns a list into which the application cumulatively appends the individual messages. The first message in the log is the actual system prompt where the user choices are passed in in the form of variables.
The _ask_gpt() function
This function sends an HTTP request to OpenAI with the conversation log in the messages parameter. The call returns a chat completion object containing the GPT’s response. The function stores it in the message variable and then appends it into the conversation log. Once again, it relies on the Flask session to persist the conversation history across multiple requests.
The _gather_chat_response() function
Before you instruct Twilio to read the GPT’s response to the user, there is one more thing you need to do: the session contains the name of the language the user wants to practice in a human readable form. You need to map it to a standard IETF language tag Twilio understands.
Now you can use the Twilio built-in <Gather> verb with nested <Say> to read the message and collect the user’s response as speech. The language parameter allows you to specify the language for the synthesized voice Twilio should use and recognize from the user.
Once the function collects the user’s message, it sends it as an HTTP request to the /handle_chat endpoint specified in the action parameter.
Handle the rest of the conversation
After the initial conversation turn, Twilio will call the /handle_chat endpoint. Find the code below and copy it to your app.py file.
The app checks if the request contains the user’s response and if so, it appends it to the conversation history. Then it takes the updated conversation history and just like before makes an API call to OpenAI so that GPT can act on the user’s latest utterance (_ask_gpt()). Then it instructs Twilio to read the response to the user and collect their answer (_gather_chat_response()).
Enable development server
Finally, Flask provides a lightweight integrated web server for testing and development purposes. To enable it in your application, append the following line at the end of the app.py file.
Test your app
It's time to test out the app. Before you start, make sure that you’ve followed all the steps in the Prepare your development environment section at the beginning of this tutorial.
Run your application locally
While there are many deployment platforms out there that allow you to deploy your application to the Internet, the simplest way to test your application is to run it locally on your machine.Run the server with the application from the terminal window. By default, it will listen on localhost port 5000.
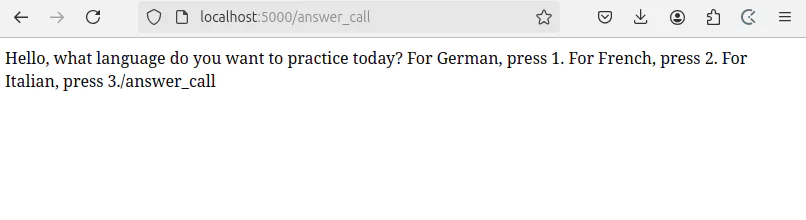
To verify whether your application is up and running, go to http://localhost:5000/answer_call in your browser. You should see the following screen:
Connect your app to Twilio
In order to enable users to interact with your application via a phone call, you need to establish a two-way connection between Twilio and your web-app. On the application’s side, make sure that it’s available on the Internet. On the Twilio’s side, make sure that its webhook points to your app.
Make your application reachable over the Internet
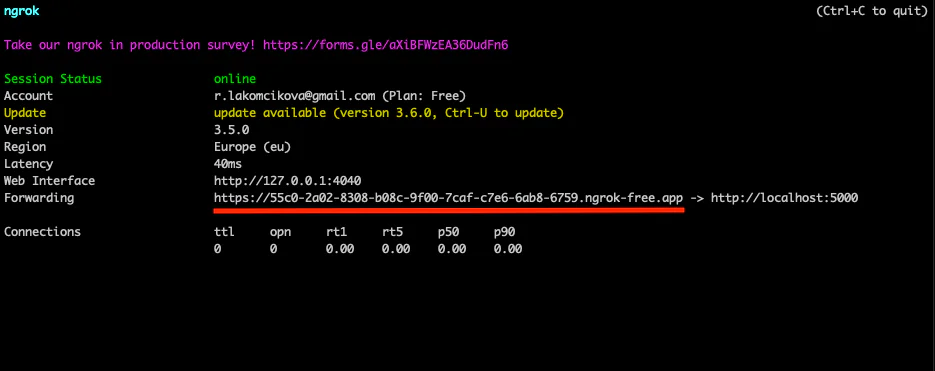
To expose your local development server to the Internet, Twilio recommends using ngrok, a free tunneling service. Follow the ngrok quick start guide to sign up for an ngrok account and generate an auth token. To start tunneling, open a new terminal window and run the following commands.
Take note of the Forwarding URL, which provides access to your web-app on the Internet.
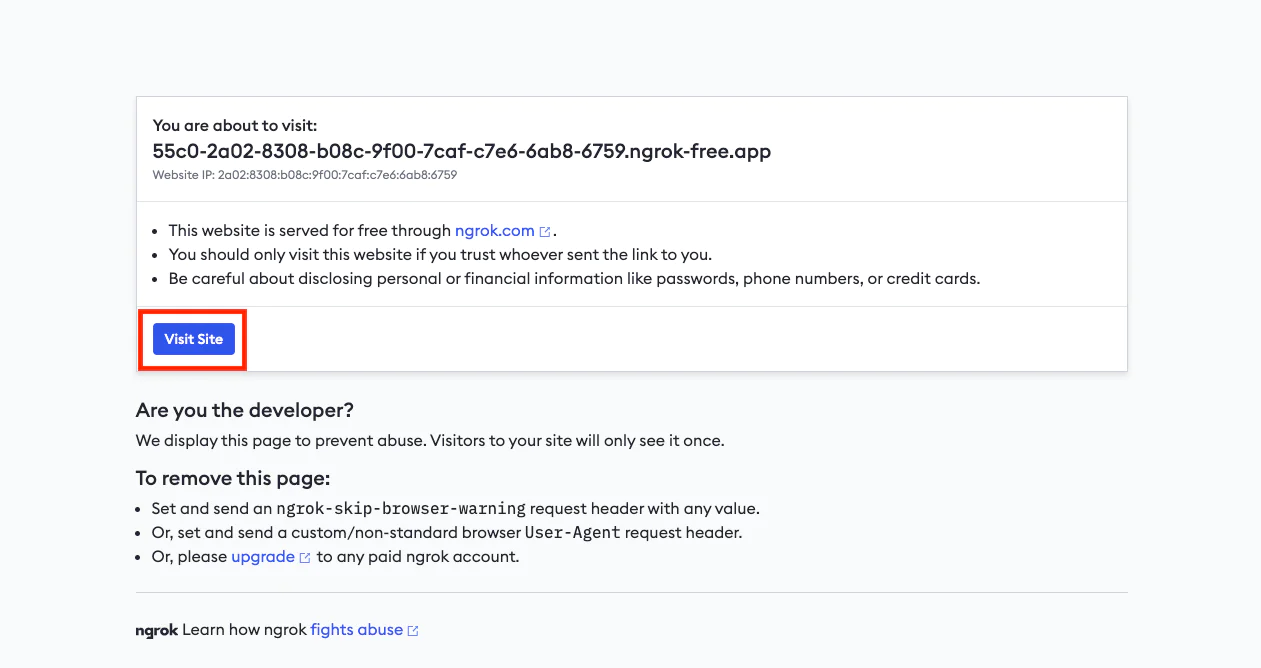
Open it in your browser and select Visit Site to activate it.
Configure the Twilio phone number to the web application
To establish a connection between your app and the phone number, Twilio uses a mechanism called a webhook. Just like APIs, webhooks use HTTP requests to transport data between two applications. Unlike APIs, webhooks are event-triggered. In this case, the trigger will be an incoming call. When the phone number receives a phone call, it will trigger an HTTP request to the URL the webhook points to. Your app will process the request and reply with instructions in TwiML– a markup language with Twilio-defined tags.
Your Twilio phone number currently points to a default URL. To change this, log in to the Twilio Console and go to Phone Numbers > Manage > Active numbers. Select your number and provide the forwarding URL you copied in the previous step together with the /answer_call endpoint name as a URL for when a call comes in.

Don’t forget to hit the Save configuration button. You're all set to make a call from your mobile phone to the Twilio phone number.
If a call to your application goes through successfully, your terminal will display a track of the requests your app is handling.
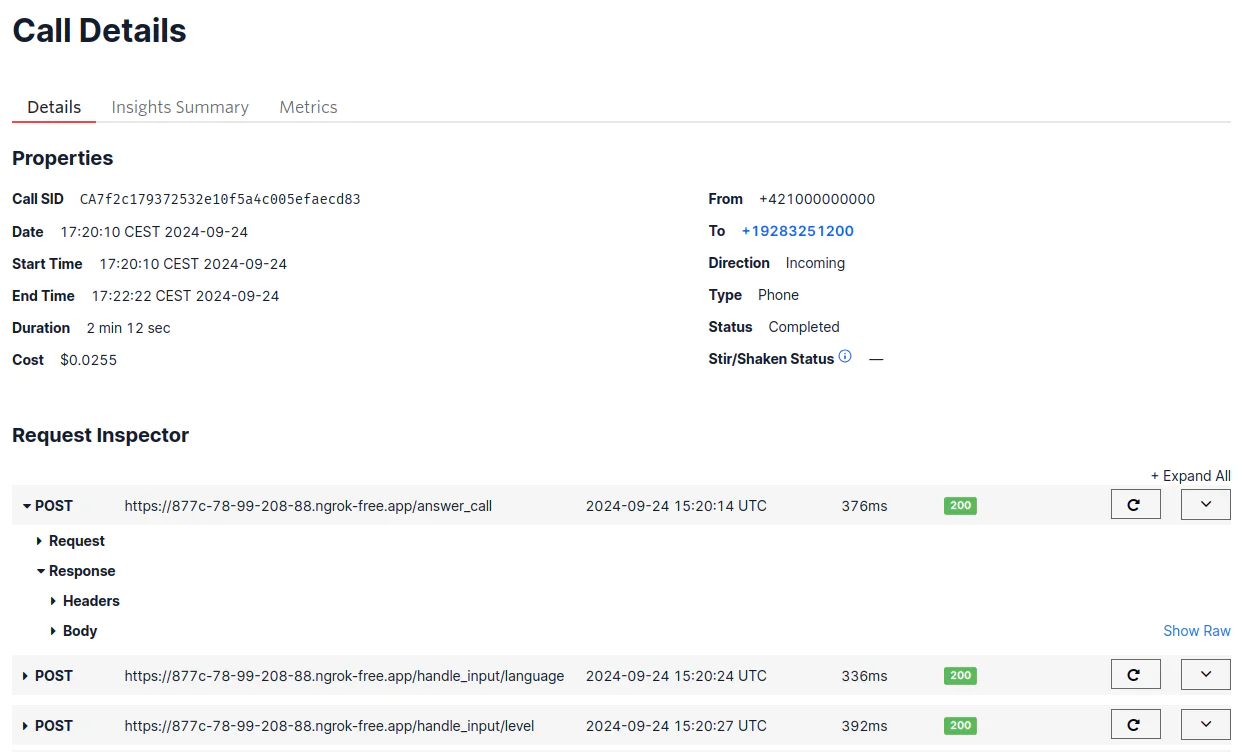
Additionally, any successful call to a Twilio phone number will be also recorded in the Twilio Console . To verify this, navigate to Monitor > Logs > Calls.
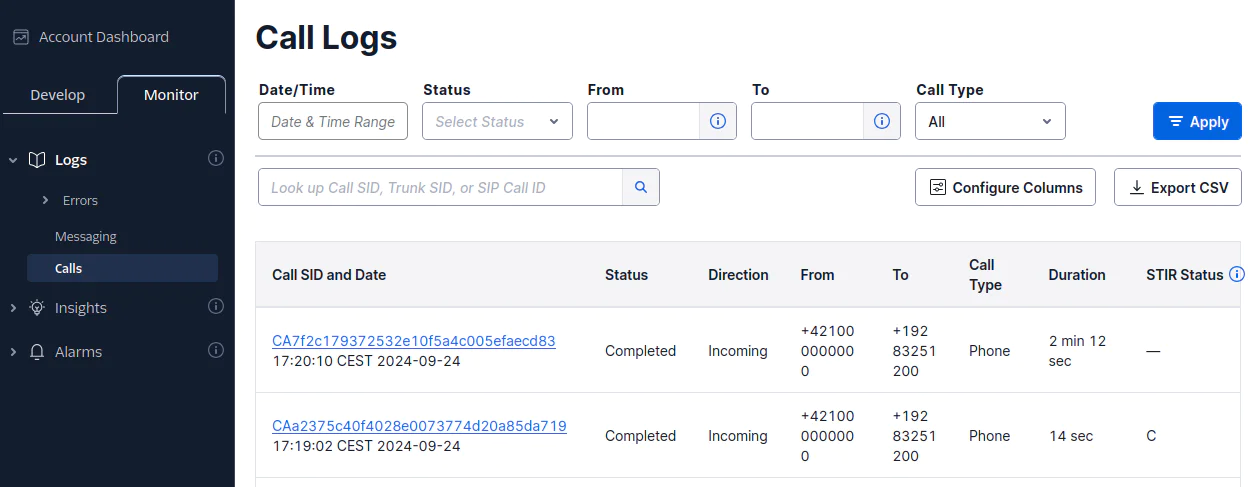
Click on the call SID to display the call details including all requests.
What's next for Flask apps with OpenAI and Programmable Voice?
Congratulations! By following this tutorial, you've just built your own multilingual chatbot, empowering language learners to practice real-world scenarios like job interviews, restaurant ordering, and doctor's appointments - all via phone calls. Well done!
Throughout this journey, you've mastered using Twilio Programmable Voice to ask users about their preferences and to collect their choices as digits.You have explored the OpenAI API and learned how to interact with GPT programmatically. Finally, you've harnessed the power of Twilio's text-to-speech and speech-to-text features to bring GPT's responses to life and capture user inputs, all seamlessly through phone calls.
If you are looking for ways to further enhance your application, check out these articles for inspiration:
- How to Transcribe a Voice Message Using Twilio, Python, and Flask
- Automating Ngrok in Python and Twilio Applications With Pyngrok
- Protect Twilio Voice Input with Encryption and Redaction
Romana Lakomcikova has 5+ years of experience translating complex technical concepts into user-friendly documentation. She can be reached on LinkedIn .


Related Resources
Twilio Docs
From APIs to SDKs to sample apps
API reference documentation, SDKs, helper libraries, quickstarts, and tutorials for your language and platform.
Resource Center
The latest ebooks, industry reports, and webinars
Learn from customer engagement experts to improve your own communication.
Ahoy
Twilio's developer community hub
Best practices, code samples, and inspiration to build communications and digital engagement experiences.