Passwordless Authentication With PHP Using Twilio Verify
Time to read:
Passwordless authentication refers to an authentication method that does not require a password or any other knowledge-based secret to log a user into a system. This method of authentication adopts the means of authorizing users by sending a unique, one-time code (OTP) or magic link to the user via email, push notification, or text message.
In this article, you'll learn how the infrastructure underlying passwordless authentication works, and create a small app that uses this authentication approach.
How it works
Most passwordless authentication implementations have a single entry point, i.e., a single page for both new users signing up and for existing users logging in to their accounts.
In a typical implementation, both new and existing users are asked to enter their mobile phone number during either registration or login. After verifying the mobile number, the system checks if the user is an existing one or a new one. If they're an existing user, they're redirected to their dashboard. If they're a new user, they're redirected to a different onboarding page to update their information.
Benefits
Some of the advantages of implementing passwordless authentication include:
- Improved user experience: This mode of authentication relieves users of the need to fill out password and confirm password fields, resulting in an increase in signup rate. It also alleviates the challenge of users having to remember complex passwords that adhere to various security policies.
- Better security: Most internet users used the same password for multiple accounts before — and even after — the introduction of password generators and password managers. Additionally, gaining access to a user's password gives an attacker access to all of their accounts. Because there is no password to hack, passwordless authentication prevents this.
Drawbacks
- A single point of failure: Because it requires a verification medium (email, push notification, or text message), the user will be unable to access the system if they do not have access to one of these mediums.
Now that you have a basic understanding of how passwordless authentication works, let's create a sample application that demonstrates how it works.
Prerequisites
The following prerequisites are required to follow along with this tutorial:
- A basic understanding of PHP
- PHP 7.4 with the mysqli extension installed and enabled
- Composer installed globally
- A MySQL database
- A Twilio accoun;. if you are new to Twilio click here to create a free account and receive a $10 credit when you upgrade to a paid account.
Create the database
The first required step is to download the sample-db.sql file from the project's GitHub repository and import it into your database. The file contains the DDL to create the database schema for the project, a table named users with fields for a user id, name, and mobile phone number.
Create the application
Next, create a project directory, named passwordless-authentication, and navigate into it by running the commands below.
Following that, you need to establish a connection to the database. To do this, in your editor or IDE create a new file named connection.php, and paste the following code into it.
Where:
- "localhost" is the database hostname or IP address.
- "root" is the database username.
- "(empty string)" is the database password.
- "sample-db" is the database name.
For the app frontend, create four new files in the project's root directory: verify.php, onboard.php, process-verify.php, and process-onboard.php. Below is a description of what each file does.
|
File |
Description |
|
|
Is responsible for the front-end of our app entry point. |
|
|
Contains the logic to process the form submitted in onboard.php. |
|
|
This contains the page for the user to enter the OTP sent to their mobile phone. |
|
|
This contains the code to verify if the OTP sent to the user is correct, as well as other database operations. |
Then, in onboard.php paste the code below.
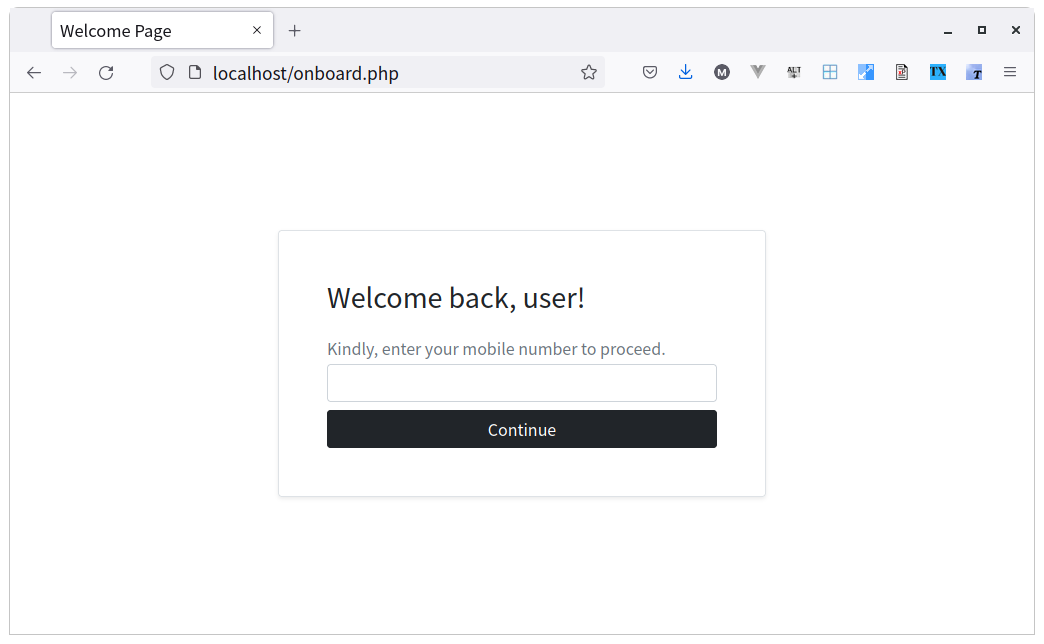
The code above is responsible for creating a basic form which will accept the user's phone number. It requires process-onboard.php, which was created earlier, as the code for processing the form and connecting to Twilio's Verify API will be added here.
With the first part of the code complete, start the application by running the command below.
Now, open http://localhost/onboard.php in your browser, where it should look like the following.
Setting up Twilio
The next step is to add code to process-onboard.php, which integrates with Twilio's Verify API. First, paste the code below into process-onboard.php.
The code triggers when the user submits the form in onboard.php. It:
- Initializes a new Twilio
Clientobject with the provided credentials. - Sends a unique code to the user’s mobile number.
- Redirects the user to verify.php where they will be able to enter the code received.
Next, retrieve your Twilio ACCOUNT SID and AUTH TOKEN from your Twilio dashboard, which you can see in the screenshot below.
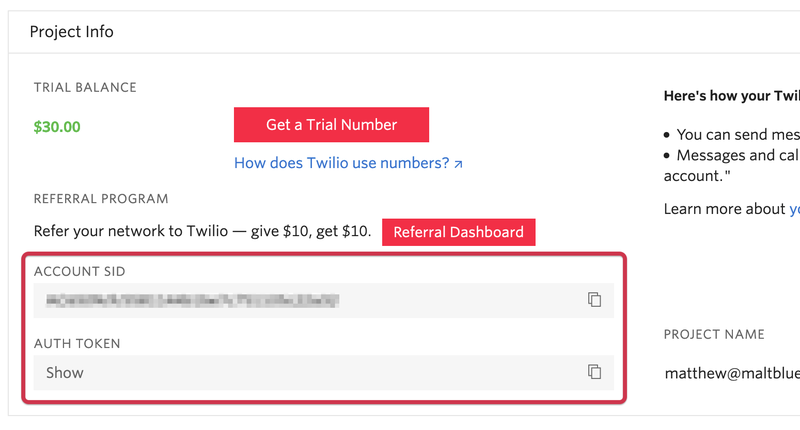
After copying them, paste them in place of ACCOUNT_SID and AUTH_TOKEN in onboard.php, respectively.
Next, you need to create a Twilio Verify service. To do that, head to the Twilio Verify Dashboard. There, click on the red plus (+) button. In the "Create new Service" popup that appears, give the service a friendly name, as in the screenshot below.
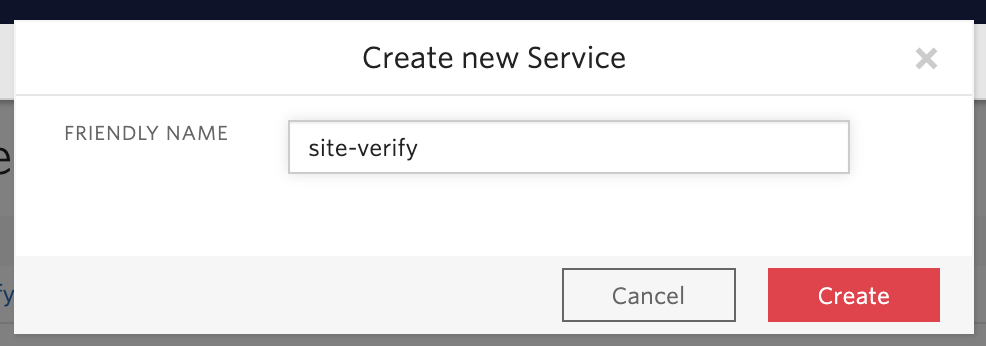
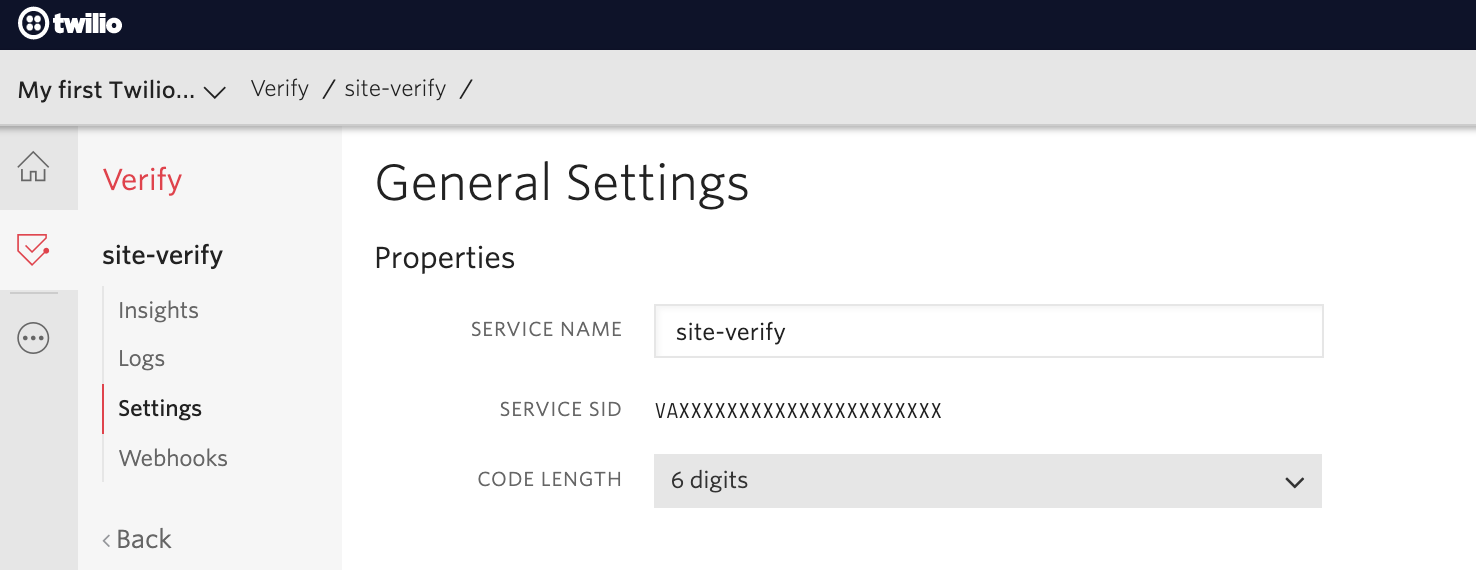
After entering the friendly name, click on the red Create button to complete creation of the new service. You'll then be on the "General Settings" page where you can see the properties associated with your new Twilio Verify service. Copy the SERVICE SID value and paste it in place of SERVICE_SID in process-onboard.php.
And finally, you need to install the Twilio SDK to use the Twilio verify API for implementing passwordless authentication. To do this, run the command below in your terminal, in the root of the project directory.
Next add the code below to verify.php, which contains a form for the user to enter the unique code they’d received earlier.
Finally, to verify the code entered by the user, update process-verify.php with the code below.
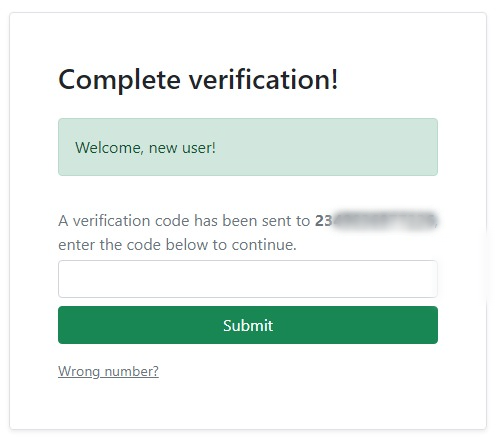
The code above checks if the code entered is correct and if a user with this mobile number already exists in the database. If so and they're a new user, then a record for them is inserted into the database and prints the message "Welcome, new user!". Alternatively, if a user with this mobile number already exists and they're an existing user, then "Welcome back to your account!" is printed.
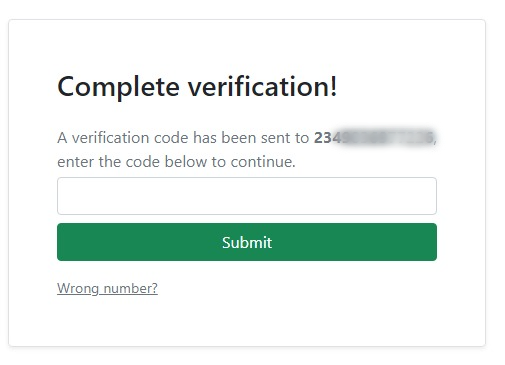
Finally, if you enter your mobile number in onboard.php, you will be redirected to the verification page, where you are required to enter the code that was sent to your phone, which you can see in the screenshot below.
And if you enter the correct code, the following message should appear.
That's how to implement passwordless authentication with PHP using Twilio Verify
Throughout this tutorial, you learned how passwordless authentication works, as well as some of the benefits and drawbacks of using it. You also created a sample app that uses this authentication method.
The complete code for this tutorial is available on Github for your convenience.
Authors Bio
I am a software engineer and technical writer. When I'm not coding, I like to share my skills and experience with other developers by writing technical articles.
Related Posts
Related Resources
Twilio Docs
From APIs to SDKs to sample apps
API reference documentation, SDKs, helper libraries, quickstarts, and tutorials for your language and platform.
Resource Center
The latest ebooks, industry reports, and webinars
Learn from customer engagement experts to improve your own communication.
Ahoy
Twilio's developer community hub
Best practices, code samples, and inspiration to build communications and digital engagement experiences.


