How to Integrate Laravel Passport with Social Authentication Providers
Time to read:
April 08, 2025
Written by
Reviewed by
How to Integrate Laravel Passport with Social Authentication Providers
Most systems today require authentication to access their resources, ensuring only authenticated users can interact with sensitive data. As security becomes a top priority, integrating strong authentication techniques like OAuth or API token-based authentication is very important.
In this tutorial, you will learn how to use Laravel Passport alongside Laravel Socialite and several common social authentication providers to enhance user authentication in Laravel. By combining Passport's token-based authentication with Socialite's integration of popular social services, you can provide a smooth login experience while maintaining strict security standards.
Prerequisite
- PHP 8.3 or higher
- Composer installed globally
- Node.js installed
- A Facebook, Google Cloud, and a Discord account
- Your preferred text editor or IDE and your preferred web browser
What is Laravel Passport?
Laravel Passport is an OAuth 2.0 server implementation that simplifies API authentication in Laravel applications. It allows you to easily set up token-based authentication, enabling secure access to APIs. With Laravel Passport, you can easily handle the issuance, management, and validation of access tokens, making it simple to authenticate API requests and manage secure communication between clients and servers.
Let’s get started!
Scaffold a basic Laravel project
We'll start by creating a new Laravel project and change into the new project directory. To do so, run the following command:
Now, check if your application was successfully installed by running the following command in your terminal to launch the development server.
Once the server is running, open your preferred web browser and visit the following URL: http://127.0.0.1:8000. You should see a page similar to the one shown below.
Integrate Laravel Passport and Laravel Socialite
This hybrid approach simplifies managing social logins and securing API access by combining Laravel Passport with Laravel Socialite.
Here’s a quick breakdown of the two packages:
- Laravel Passport: This manages secure API token generation and OAuth2 for authenticated users
- Laravel Socialite: This handles user authentication through social platforms (such as Facebook, Google, and Discord)
To install Laravel Passport, run the command below in a new terminal tab or session:
This command will set up all the necessary configurations for Passport. During the installation, you’ll be prompted with a question in the terminal asking whether you would like to use UUIDs as the primary keys. Just type "no" to proceed with the default setup.
Now, install Laravel Socialite by running the following command:
Configure the installed packages
Now, you can proceed with configuring Laravel Passport. Navigate to the app/Models directory, open the User.php file, and add the HasApiTokens trait to the class, as exemplified in the following code example
The traits in this code perform the following functions:
- HasApiTokens: This trait allows the
Usermodel to issue, manage, and authenticate API tokens for OAuth2-based API authentication - HasFactory: This trait enables the
Usermodel to easily generate fake or factory data for testing purposes using Laravel factories - Notifiable: This trait allows the
Usermodel to receive notifications, such as emails or SMS, by providing methods for routing notifications to the user
Next, navigate to the config directory, open the auth.php file, and add the following code:
This code will instruct your application to use Passport's Token Guard when authenticating incoming API requests.
Next, open your .env file and add the following configurations:
Next, configure Laravel Socialite to integrate with three social platforms: Facebook, Google, and Discord. But first, you'll need the client ID and client secret from these platforms. Follow the steps below to obtain them.
For Facebook:
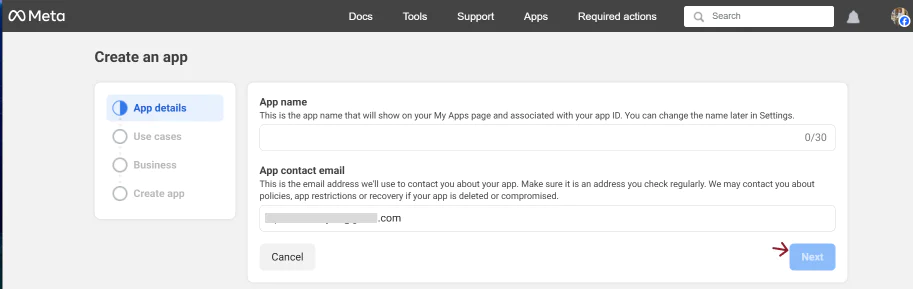
Visit Facebook Developers, login with your Facebook account, and click on My Apps button at the top-right corner of your screen. This will direct you to the dashboard. Next, click the Create App button to begin setting up your app.
Under App name, enter a name for your application, then click the Next button to continue.
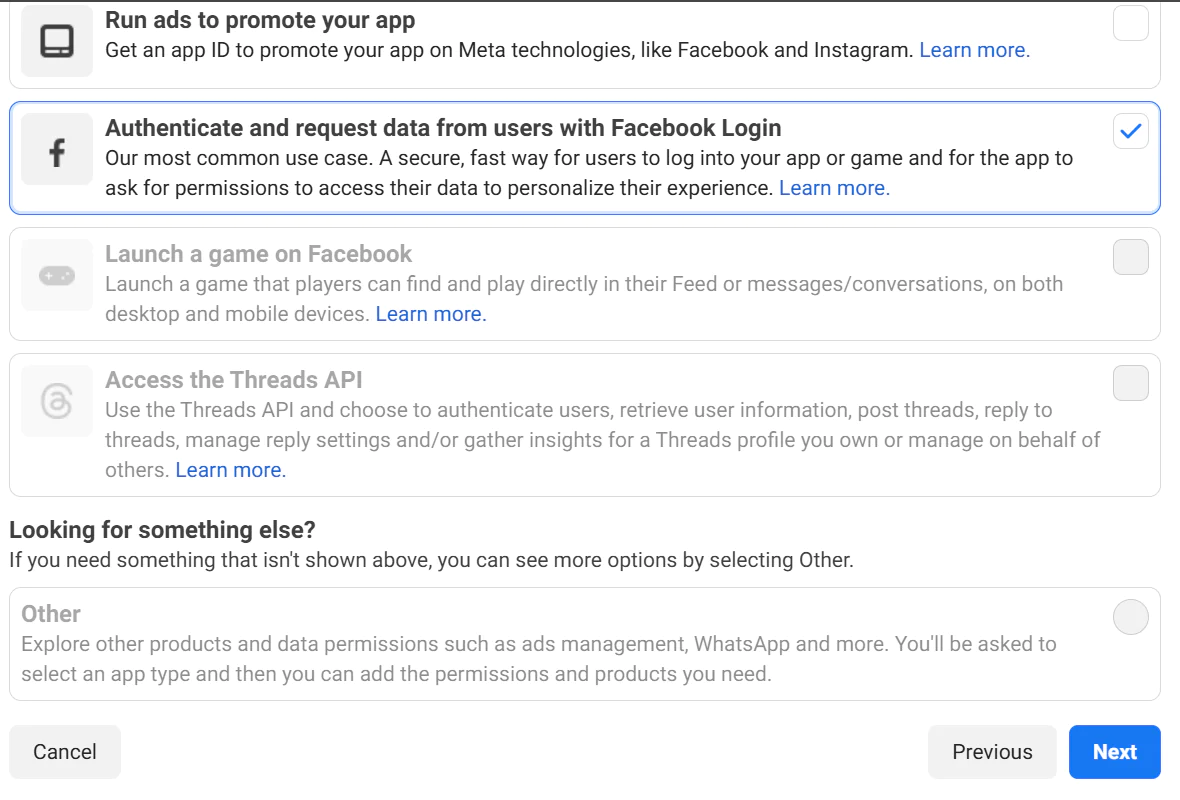
When prompted to select a use case for your application, choose Authenticate and request data from users with Facebook Login, and then click Next.
Ignore the next prompt, as this app is not intended for business purposes. Click Next to continue, and then click Go to Dashboard at the final prompt to complete the setup.
To configure valid OAuth redirect URIs, go to Use Cases on the Dashboard, and click the Customize button.

Next, go to settings, then set the redirect URI under the Valid OAuth Redirect URIs section.
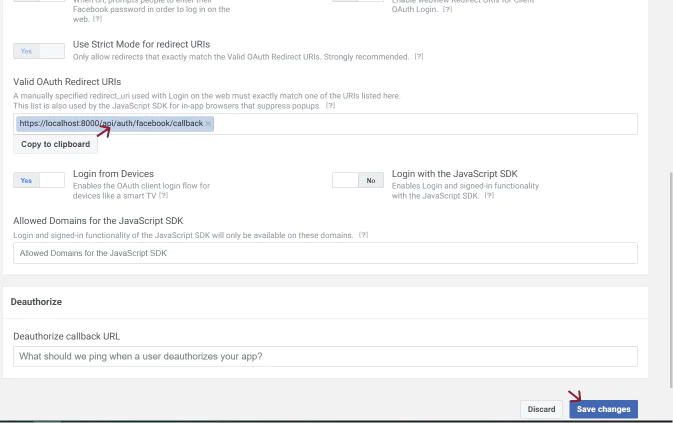
Next, click Save changes.
After configuring the redirect URI, navigate to App Settings > Basic In your dashboard to retrieve your Client ID and Client Secret.

For Google
Visit the Google Cloud Console, login, then go to Select a project.
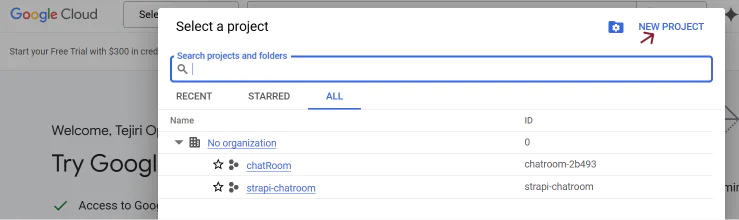
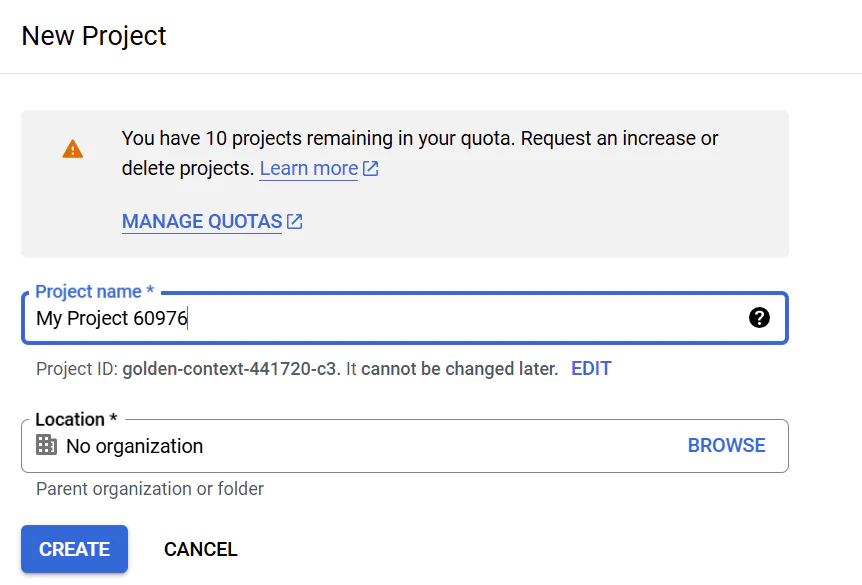
Next, click on New Project, enter a name of your choice, and then click Create.
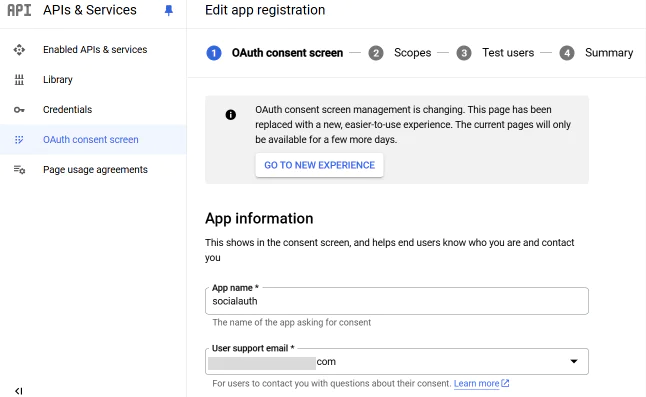
Next, click the menu icon, navigate to APIs & Services, and then select OAuth Consent Screen.

To enable the OAuth Consent Screen, select the External radio button, then click Create. Next, provide the necessary app information, which includes your App Name, User Support Email, and Developer Contact Information. then, click Save and Continue.
For the remaining sections, click Save and Continue until you reach the Back to Dashboard button. On the APIs & Services section, go to Credentials, click Create Credentials, and select OAuth Client ID.
Then, set the Application Type to Web application and add your authorized redirect URIs.
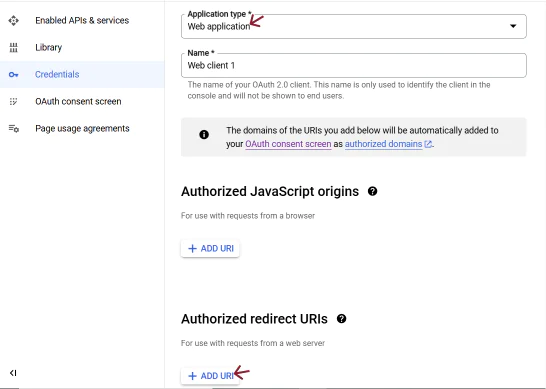
Click the CREATE button to generate your Client ID and Client Secret.
For Discord
Visit the Discord Developer Portal and login. Click New Application, enter a name for your application, and click Create.
In the sidebar, navigate to OAuth2 to view your client information.
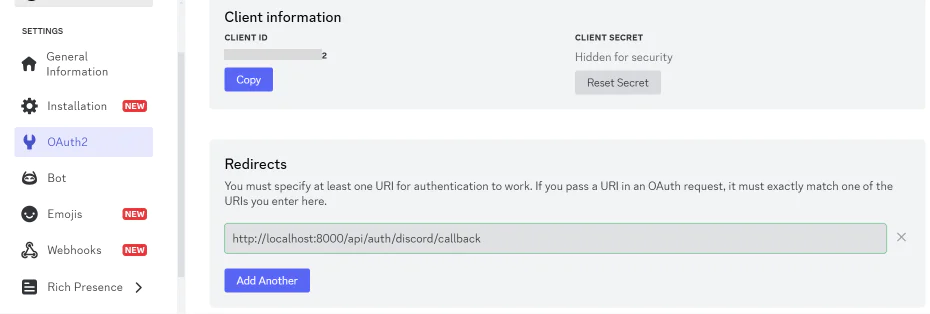
Under OAuth2 Scopes, select the identify scope. In the Redirects section, add a redirect URI that will handle the callback in your Laravel application.
Finally, click Save and retrieve the Client ID and Client Secret.
Now that you have the necessary credentials, in .env replace the placeholders with your actual client ID and client secret. Then, go to the config directory, open the services.php file, and add the following code to the array returned in the file:
Modify the authentication flow
Modifying the authentication flow involves getting the user's login request, routing it to the social provider, managing the provider's callback, and creating a Passport token for safe interaction with the backend API. This connection provides a smooth and secure experience for a simplified login process. Let’s dive into the coding aspect properly.
Run the command below to generate a controller:
Next, navigate to app/Http/Controllers directory and open the SocialAuthController.php file. Replace the existing code with the following and save the changes:
When you click the login button of any social provider, the redirectToProvider() method will redirect them to the provider's authentication page. After successfully authenticating, the provider will redirect you to your application's callback URL. The handleProviderCallback() method processes the returned social user data. If the user already exists, they are logged in; if not, a new user is created and a Passport access token is generated for them.
Add the routes
Routes are important for handling the redirection to the social provider and for managing the callback that the provider sends after successful authentication. To add the routes, navigate to the routes directory, open the api.php, and add the following code to the end of the file:
This code defines three routes:
- The first route redirects the user to the chosen social provider for authentication
- The second route handles the callback after the provider authenticates the user
- The third route returns the authenticated user's data, and allows users to retrieve their profile information after successfully logging in
Create the frontend
To simplify the frontend development, the user interface will be built using React. Run the following commands to create a new React template and change into its directory:
Add the required packages
The next thing to do is to install the required packages:
- Axios: It is used to interact with your application backend (make HTTP requests)
- React Router: It is used to handle the callback URL properly
- Font Awesome: It is used for creating icons
To install them, run the following command:
Create the social login component
Now that the React application is fully set up, navigate to the React app's src directory and create a new folder named components. Inside the components folder, create a new file called SocialLogin.js and add the following code:
The code provides a simple user interface with buttons to trigger the social login, as well as the handleSocialLogin() function, which redirects the browser to the backend URL for authentication through social providers.
Next, create a new file named SocialCallback.js inside the components folder and add the following code inside it:
This code retrieves the OAuth provider from the URL, then sends a request to the backend to obtain the OAuth token and stores the token in local storage. After it successfully authenticates, it then redirects the user back to the homepage.
Next, update the App.css file (in the top-level of the React project's directory) to modify the appearance of your frontend using the code below.
Next, update the App.js file with the following code:
To enable communication between your React app and the Laravel backend, you need to configure the CORS (Cross-Origin Resource Sharing). To do this, run the following command in the project's top-level directory:
This command will publish the cors configuration file in your Laravel application. Next, go to the config directory, open the cors.php file, and update the allowed_origins array to include your React application URL, like so:
Test the application
Since your Laravel application is already running, open a new terminal session or tab. Navigate to the social-auth-app directory where your React frontend is located, and start the application by running the following command:
Once the development server is up, the frontend should automatically open in your default browser. If it doesn't, you can manually navigate to http://localhost:3000 in your browser to access the frontend.
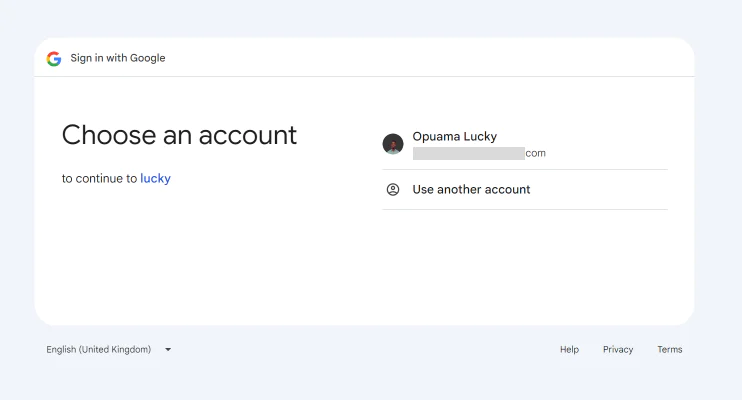
Click on any of the social platform buttons to start the login process. After successfully authenticating, you'll receive a response similar to the image shown below, when the Google button is clicked.
Attempting to log in with Discord will result in an error because Laravel Socialite only supports a limited set of social login providers, as listed below:
- GitHub
- GitLab
- Bitbucket
To enable Discord, you'll need to extend Socialite by adding the Discord provider. Follow these steps to do so:
Install the Required Packages
First, you need to install the socialiteproviders/manager package, which allows you to add custom providers. Run the following command in your terminal:
Next, install the Discord provider by running the command below:
Register the Discord Provider
To make Socialite recognize the Discord provider, you need to register it in your application. Navigate to the App\Providers directory and open the AppServiceProvider.php file. Then, update the file with the following code:
After implementing the changes, you should now be able to click on the Discord login option and authenticate successfully.
That's how to integrate Laravel Passport with social authentication providers
In this tutorial, we integrated Laravel Passport for API authentication with Laravel Socialite to implement social login in Laravel. This combination simplifies the login process while providing OAuth2-compliant, token-based authentication, which is important for securing modern web applications. With this setup, you can authenticate through social platforms, and your application can securely manage and protect access to API resources using tokens generated by Passport.
By leveraging Laravel Passport for API authentication and Laravel Socialite for social login, you can offer users a convenient way to sign in using their preferred platforms without compromising security. Happy coding!
Lucky Opuama is a software engineer and technical writer with a passion for exploring new tech stacks and writing about them. Connect with him on LinkedIn.


Related Resources
Twilio Docs
From APIs to SDKs to sample apps
API reference documentation, SDKs, helper libraries, quickstarts, and tutorials for your language and platform.
Resource Center
The latest ebooks, industry reports, and webinars
Learn from customer engagement experts to improve your own communication.
Ahoy
Twilio's developer community hub
Best practices, code samples, and inspiration to build communications and digital engagement experiences.