How to Improve Your Java Workflow with GitHub API
Time to read: 9 minutes

By now, you have probably heard about the GitHub API. Or you know what GitHub is and you know what an API is. Or you just Googled it, that’s okay too.
From automating GitHub processes to just being a command line fanatic, the GitHub API can be used in many different ways. By taking a brief look at the documentation, you can see the GitHub API can do just about everything and more.
Stay tuned to find out many cool features you probably didn’t know the GitHub API has and make your automation process a walk in the park.
Read to the end for a quick and easy tutorial!
The Convenience of GitHub API
As many enterprises use GitHub in their everyday work, it may not come as a surprise to learn the base URL can be different from those which are public repositories.
The most difficult part in the entire process is actually this - find out what the base URL of your enterprise is. Seems easy, right? The base URL of your enterprise can look something like https://<your.enterprise>.githubname.com/api/v3.
The v3 in this case stands for version 3, the current version of the GitHub API,while the public GitHub base URL is https://api.github.com.
Once you have found the base URL, keep it somewhere safe - perhaps the part of your brain where it will never be forgotten, you’ll most likely need to create a Personal Access Token (PAT). This can be done by following the official GitHub docs tutorial. If you already have a token, you can just use that one.
You’ll need this token for any kind of request that requires authorization, especially if you want to do more complex tasks than just calling a few GET requests against a public GitHub repository. For these requests, you’ll need to add a Header to the request as such:
Now you’re ready to dive into the fun world of making requests.

SHA-1 values
To make everything easier to find and understand, commits in git have their own Secure Hash Algorithm 1 (SHA-1) value. Other objects in GitHub have sha tokens that point back to the commit, so we can identify the objects using these values.
The easiest way to obtain an SHA-1 value for an object is to store the response when creating said object.
The other way is to fish out the value through a GET request against the object. This way is slightly more difficult, as you would need to know specific information such as an exact pull request number, commit number, or branch name.
Creating and deleting references
Any self-respecting software engineer will tell you to never simply push your code to the master branch. Instead you need to manually create a new branch every time run the code you’d like to automate. That seems quite upsetting.

Just as you’re wondering if there’s even hope to ever sit back and sip your coffee while your code just does its thing, the GitHub API comes to the rescue.
You can create branches with one request:
That has required 2 body parameters:
- ref (string) - the name of the branch you’d like to create (i.e refs/heads/[your_branch_name])
- sha (string) - sha token value of the branch you’d like to create a branch on
After hitting send, your new branch will appear like clockwork.
Getting tired of your new snazzy branch? Has it served its purpose? Perhaps you named it incorrectly? Fear not, you can also delete the reference without leaving a trace through the GitHub API. All you’ll need is the name of the branch you just created.
Poof, gone. Nobody will ever need to know.
Creating and updating content
Say you’re using a dependency in a project and you always want to have the latest version on hand. Why waste your valuable time on doing things manually, when you can just click one button and have a computer update the dependencies for you? I mean, that’s where we’re headed with automation, right?

Yet again, the GitHub API can create or update content with a simple request.
The request will create a commit. This time, you’ll have 2 required body parameters (3 if you’re looking to update an existing file):
- message (string) - the commit message
- content (string) - the content of the entire file in Base64 encoding. You can use the built-in Java Base64 functionality.
- sha (string) - the blob SHA of the file being replaced (necessary only if updating a file)
There are a few optional parameters, but if you feel like using your flashy new branch, you can add an extra parameter:
- branch (string) - the name of your branch
A commit will have been created and your file successfully created/updated. You can thank the GitHub API later.
Manage pull requests (PRs)
As you may have guessed by now, the GitHub API can handle PRs without you having to leave the comfort of your command line or your favourite IDE.
The GitHub API can open PRs, merge them, add reviews to them and so on, but out of the many capabilities, a favorite task has to be- checking their statuses.
Depending on where you work, the PRs may have several checks that have to pass before they can be merged to the master branch. Imagine having a process automated, but not being able to merge your branch, because it’s just not ready yet.

Our superhero of the day can and will assist you. You can use this request to check the status of your PR.
In this case, the ref would be the SHA of one of the commits in your PR.
The status of a PR can either be pending, success or failure. Adding a simple while loop and checking in every now and then will allow your code to keep running after a small wait for your PR to be in the success status.
Let’s Get Started
After all of that reading, it’s time for you to warm up your fingers with a quick exercise. We’ll create a Java project that calls the GitHub API to create a branch, create a file, create a pull request, merge the pull request and delete the branch.
Setup
If at any point you are having any trouble, you can refer to the working code on my personal GitHub.
First of all, you’ll need to create a repository in GitHub and clone it to your local machine.
In this example, I will be creating my project as a Maven project, so I could use third party libraries without having to find them, download them and add them to my classpath.
Using JetBrains IntelliJ, select New Project.
From the dropdown menu on the left, select Maven.
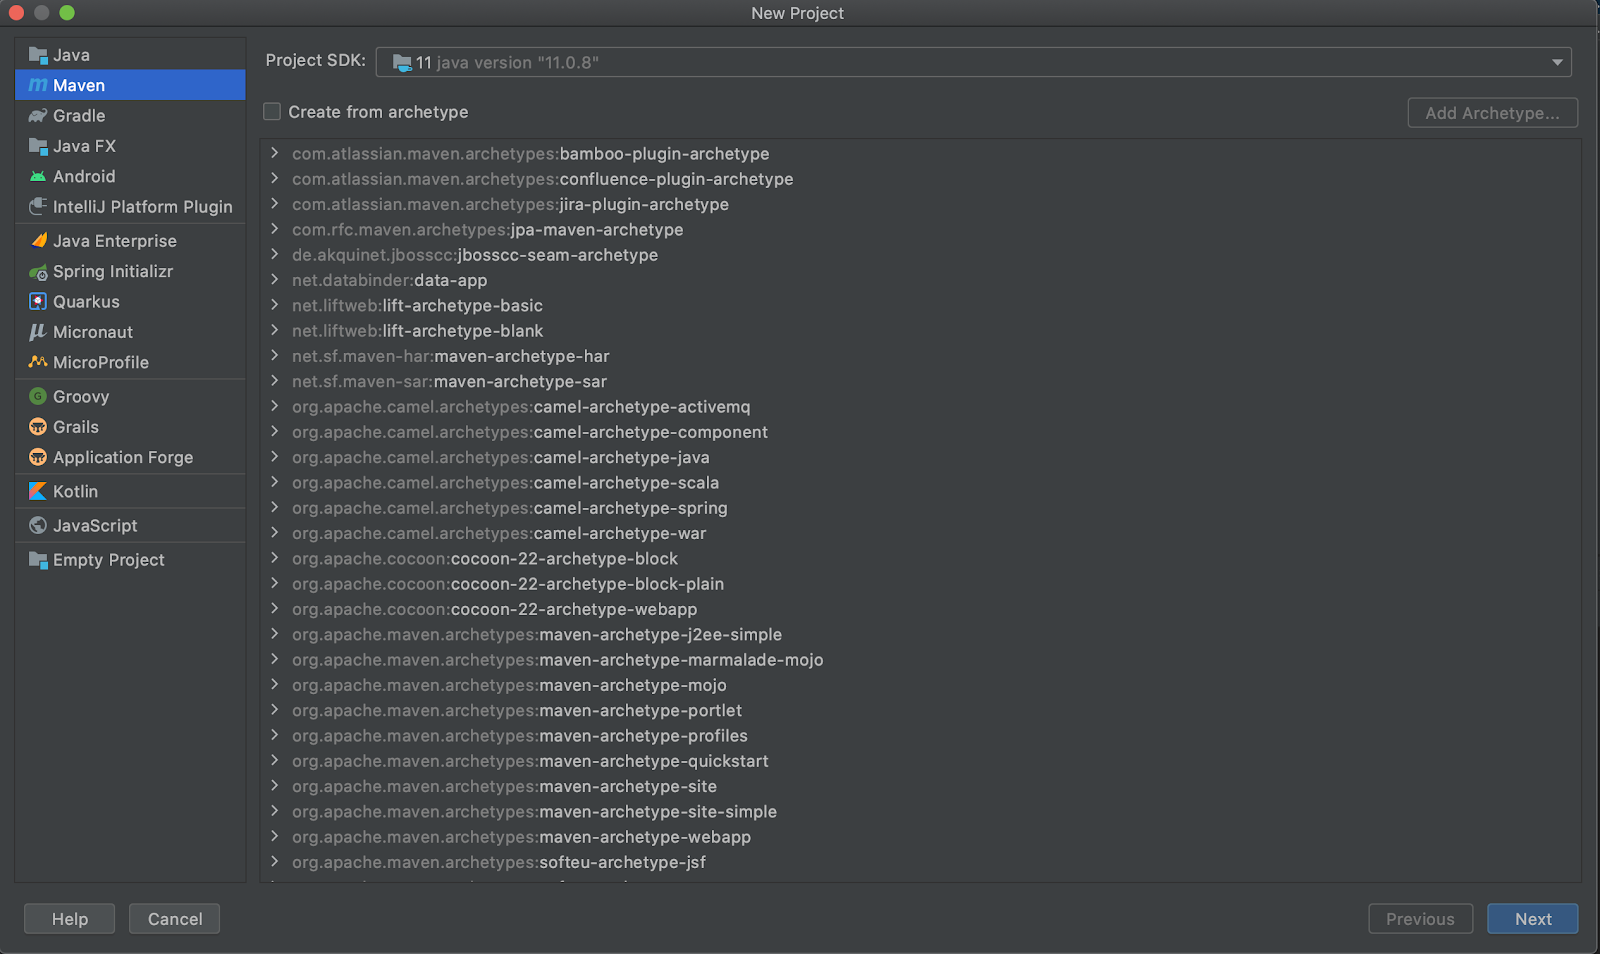
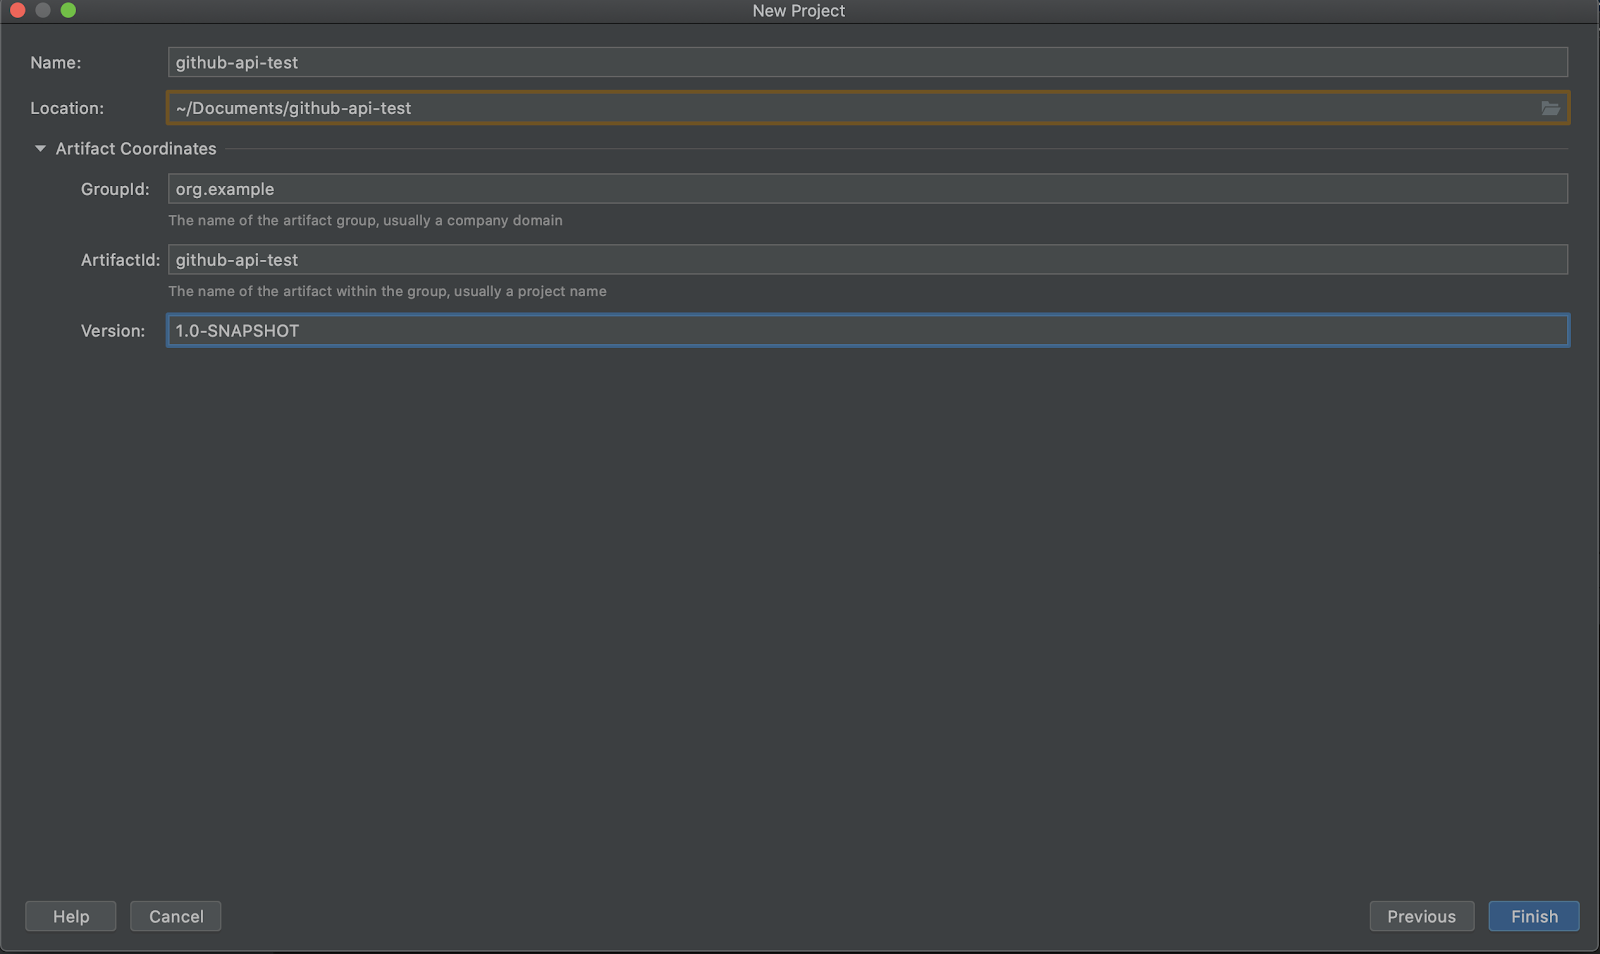
Choose your cloned repository and name the project as you wish. For the purpose of this article, I’m naming the project as “github-api-test”, as seen in the screenshot below:
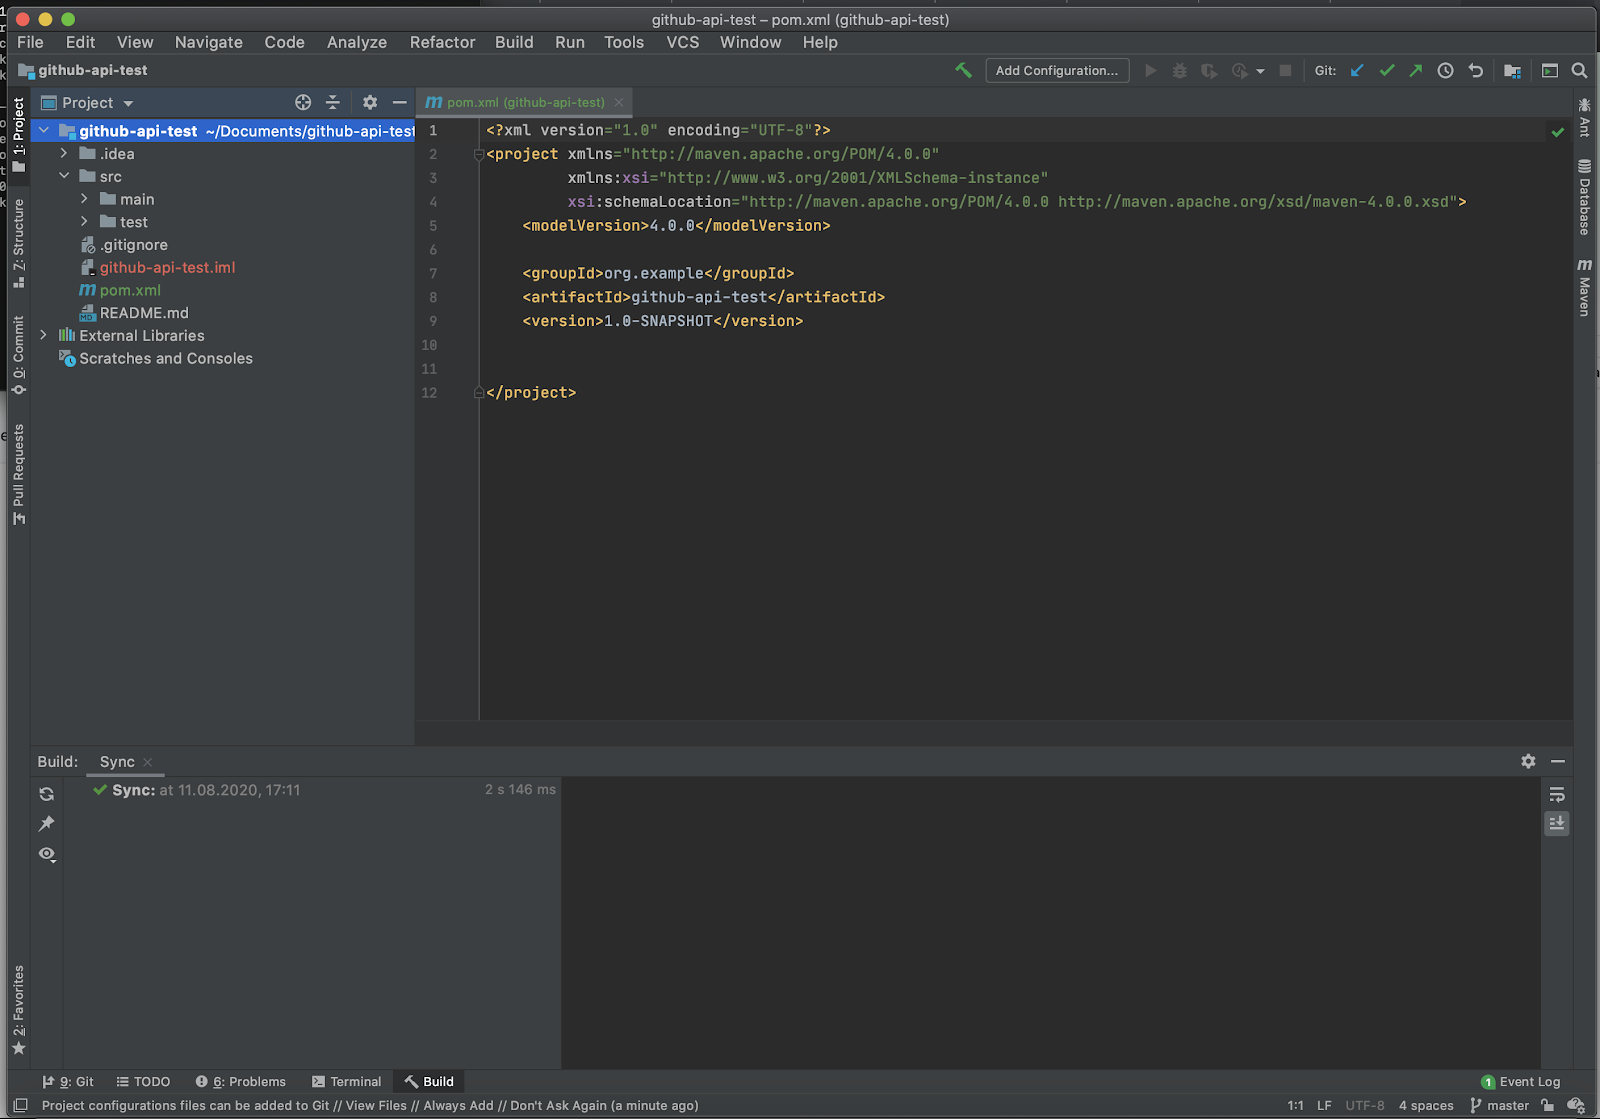
Your project structure should look like this. You can take a look at the pom.xml file and get acquainted. Also set the maven compiler version here as we will be using Java 11 features:
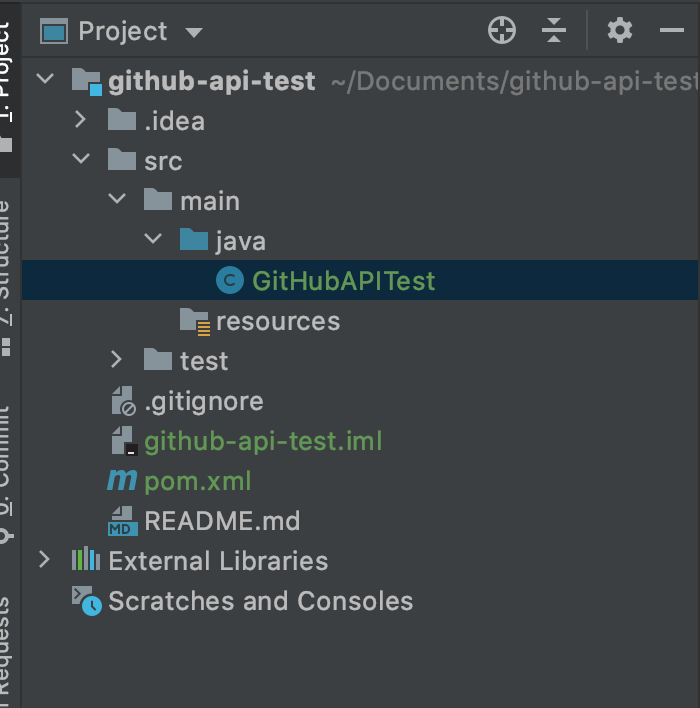
Start by creating a new Java class like so:
Before diving into everything, we can make our lives easier by preparing 4 different requests: GET, PUT, POST and DELETE - these requests will return us the response body. To get a better understanding of this, you can check out 5 ways to make HTTP requests in Java. We will be reusing these methods to avoid writing duplicate code. To keep things simple and maintainable, we’ll have a few constants - the base URL of your GitHub and your PAT. We will also be adding an object mapper, more about this in Three ways to use Jackson for JSON in Java. Add these to the very beginning of your class.
GET example:
As you can see from the example, we’ll first be preparing a new HTTP request using the Java 11 HttpClient. For this, we’re using a builder, in which you can create a URI, add headers and parameters. Finally, we will be creating a new HTTP client for each request and sending it. For this request, we’ll only have 1 parameter, which is the path after the base URL.
DELETE example:
Similarly to the GET request, we only have 1 parameter - the path.
POST example:
In the POST request, we’ll have an extra parameter - the body we would like to send with the request.
PUT example:
This one is similar to the POST request, having 2 parameters.
In order to use the dependencies I have used in this project, open the pom.xml file and add the following right before the </project> tag:
This is a JSON library, which we can use for parsing JSON (all HTTP responses are in JSON form, so anything you would like to read out, you need to parse.
After adding these to the pom.xml file, you should see a small m symbol and a refresh button in the right corner - you should click that. It will look like this:
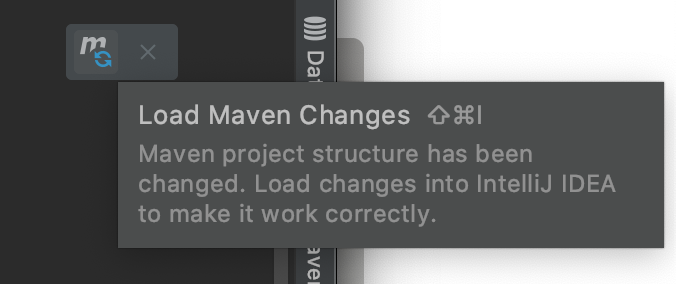
Two small steps before diving in, you’ll want to create a resource file (you can chose the content and filetype you desire):
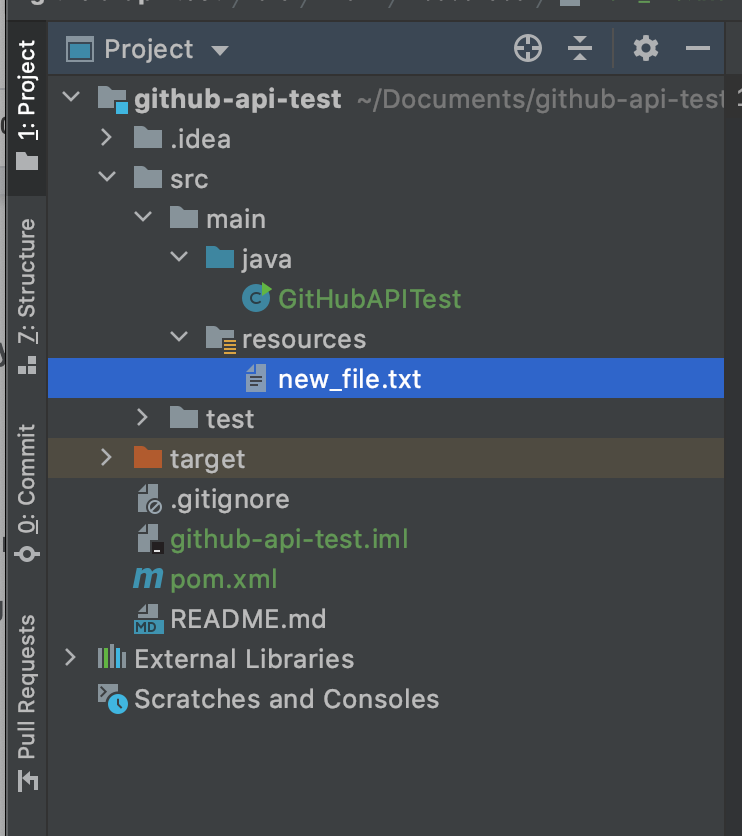
Now we’ll add an extra method for reading the contents of this file to a string.
If this method seems confusing at the moment, don’t worry about it. The tutorial isn’t about this complicated step and everything else will be easier to understand. The main point - it takes in the resource file, reads the content and returns a String of the content.
Make Requests with GitHub API

It’s finally time to start making those requests! Let’s start off by finding out what the SHA value of our master branch is.
Here we will be using our own GET method we created earlier by using the path /git/refs/heads. GitHub API responses vary from JSON objects to JSON arrays, it’s kind of a trial and error in the beginning. In this case, we have received a JSON array and will be parsing it accordingly. Lastly, we will return the SHA value as a String.
Next, let’s create that snazzy new branch I know you’ve been dreaming about for a while now.
In the beginning we will be creating a Map and adding the values we would like to add to the request body - in this case they are ref (the name of the new branch, i.e refs/heads/{your_desired_branch_name}) and sha, which is the same SHA value we just found with the getMasterBranchSHA method.
After that’s written, we can create the file we wish to upload.
Here we will be using the method we created earlier - getResourceFile. We will be encoding the String contents of the file through Base64. After that, we create the request body, where message will be the commit message, content will be the encoded file content and branch will be our new branch name. We use the PUT request we created earlier and send the request.
Now we can create a pull request.
As per prior methods, here we will create the request body, where title will be the PR title, the head will be the branch we would like to make a PR from and the base will be the branch we would like to merge into.
When the pull request is ready, we can merge the branch.
To merge the PR, we will need the PR number, which we can get by parsing the JSON response of the PR creation response. To merge the branch, we will create a request body, where commit_message will be details about the merge.
After our branch has served its purpose, we can just go ahead and get rid of it.
This one is pretty straightforward - all we do is send a DELETE request with the branch name.
Now that we have all the necessary pieces of the puzzle, we can put it together so it could run with just one push of a button.
Now we can create the main method and reap the rewards of our hard work. Add this straight under the constants and straight above all the other methods.
After you compile and run the code, you can head to your GitHub repo and look at the commit history. It should look like this:

As you can see, the file we wanted to add has been added and the branch deleted.

You’re done!

What else can I do?
The GitHub API is capable of so much more than we did today. If you’re interested in what else you can accomplish using this undemanding tool, go ahead and read the GitHub API documentation.
Overall, I feel it’s needless to say the GitHub API deserves a cape and a cool superhero pose.
Emily Joy Krohn is an intern on Twilio’s messaging team. She is in her third year of software engineering at the Tallinn University of Technology. You can take a look at her LinkedIn profile to get to know her better. You can also send an email with any questions or comments you’d like to share to emilyjkrohn@gmail.com.
Related Posts
Related Resources
Twilio Docs
From APIs to SDKs to sample apps
API reference documentation, SDKs, helper libraries, quickstarts, and tutorials for your language and platform.
Resource Center
The latest ebooks, industry reports, and webinars
Learn from customer engagement experts to improve your own communication.
Ahoy
Twilio's developer community hub
Best practices, code samples, and inspiration to build communications and digital engagement experiences.


