Build a File Manager App with .NET, Azure Blob Containers and Twilio SendGrid
Time to read:
October 16, 2024
Written by
Reviewed by
Build a File Manager App with .NET, Azure Blob Containers and Twilio SendGrid
Introduction
File management is one of the most common use cases in most modern applications, so it is important to learn how you can build simple file management features. In this tutorial, you'll learn how to create a web-based File Manager application using .NET. This application will integrate Azure Blob Storage for file handling, and Twilio SendGrid for email notifications. By the end, you'll have a functional app that allows users to upload, list, download, and delete files, with email notifications sent upon specific actions.
Prerequisites
In order to be successful in this tutorial, you will need the following:
- A free Twilio SendGrid account
- Visual Studio free Community Edition or Visual Studio Code
- Free Azure account
Building the app
You will create a .NET web application that uploads and downloads files from an Azure Blob Container and sends email notifications when a file action occurs.
Setting up the application
If you are using Visual Studio Code, open terminal and run the following command to create your new project:
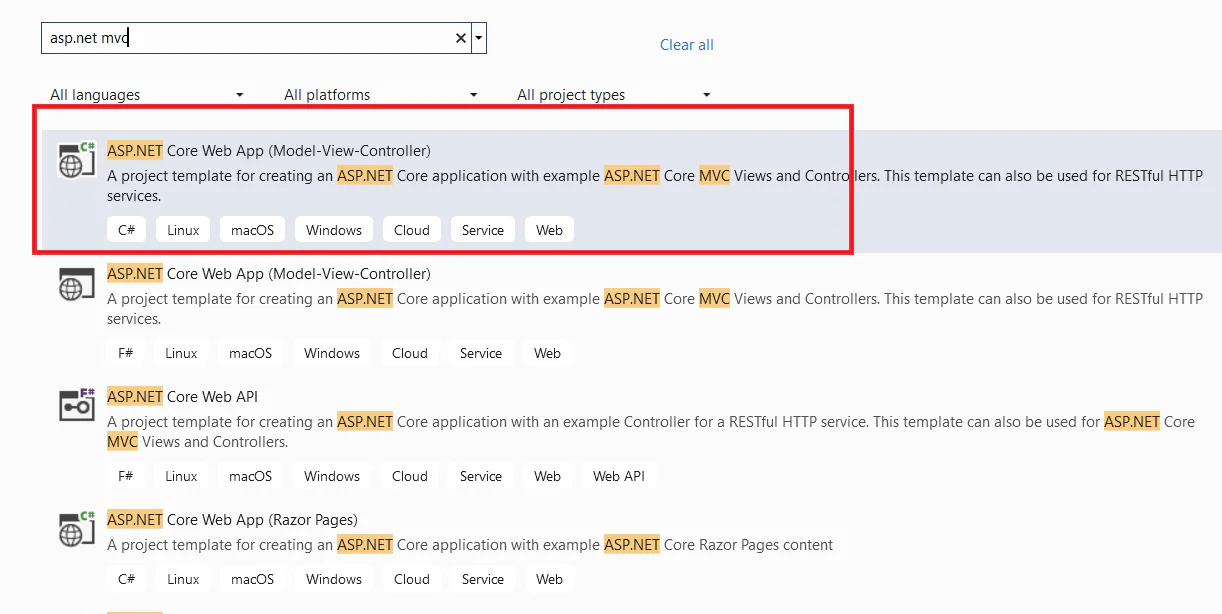
If you are using Visual Studio,click Create a new project. Search for asp.net mvc then select ASP.NET Core Web App (Model-View-Controller) as shown below. Click Next.
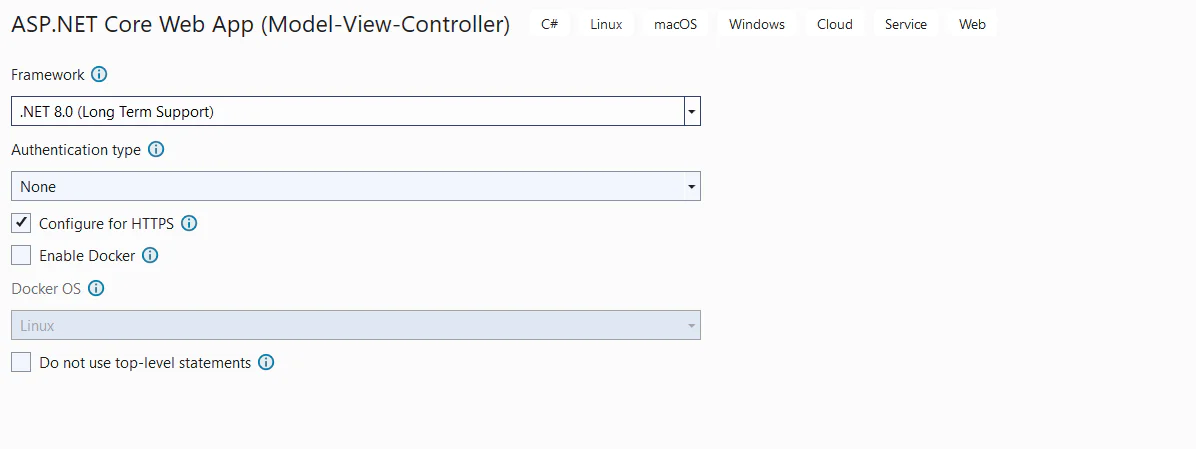
Enter the name “FileManager” for your project, then click Next. Select the latest .NET version. Keep the rest as defaults, then click Create.
Creating an Azure Blob storage account
Sign in to the Azure portal, and click on Create a resource as shown below.

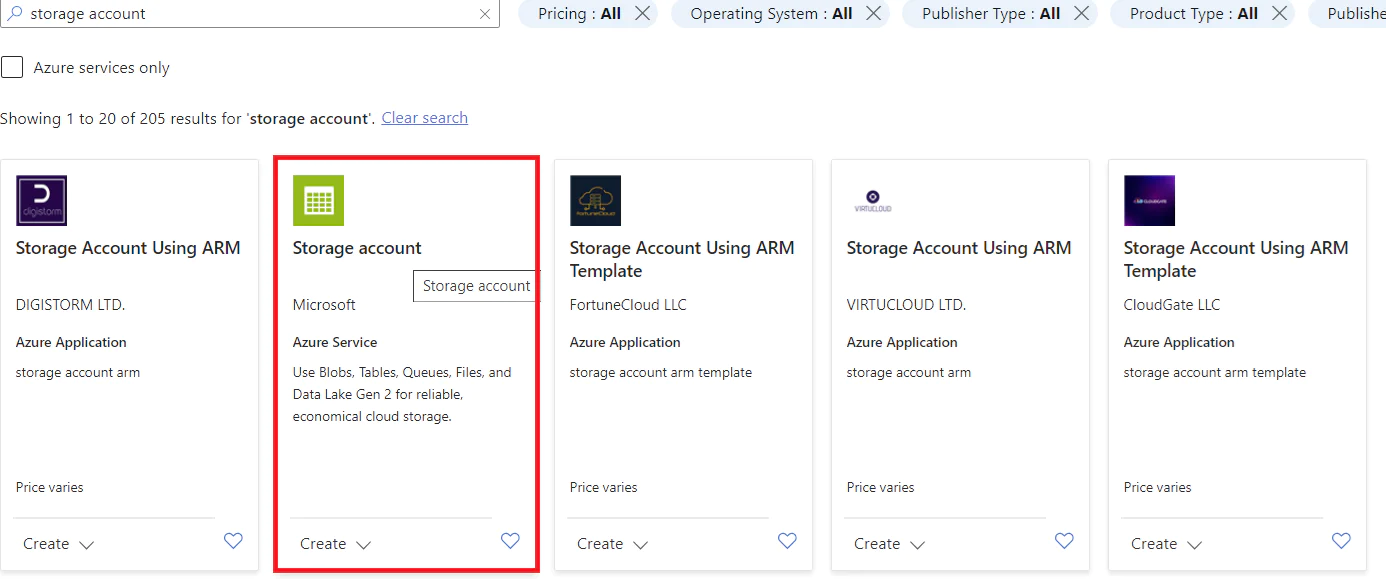
Search for “Storage account.” Select Microsoft’s storage account as shown below.
Enter a name for your resource group and storage account. The name for your new storage account must be globally unique, but you can choose any name that fits the naming requirements in Azure. Keep the rest as defaults. Click Review + Create at the bottom, then click Create. It may take a few minutes for your new resource to deploy.
Create a blob container
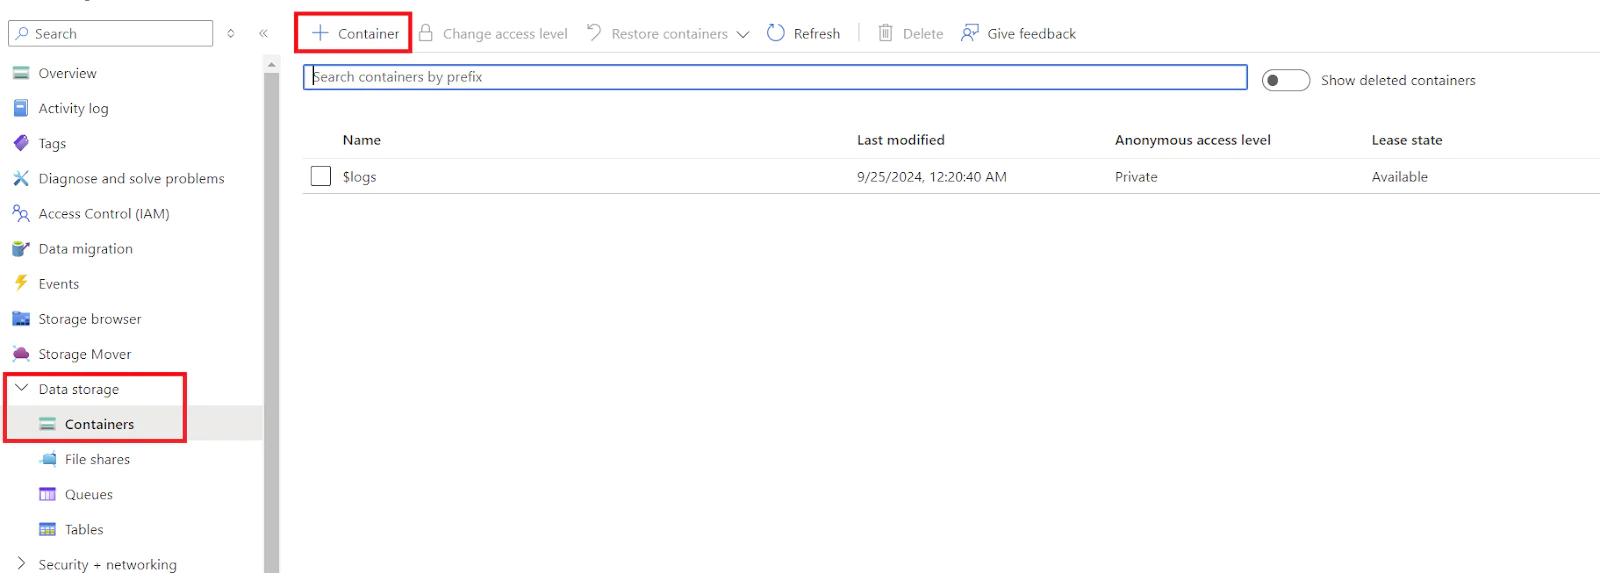
Once your storage account has deployed successfully, access the storage account and navigate to Data Storage > Containers. Click the plus sign at the top as shown below to add a new blob container.
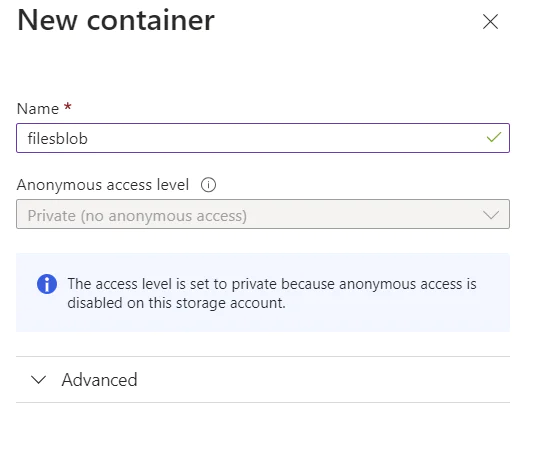
Give a name to the container, then click Create.
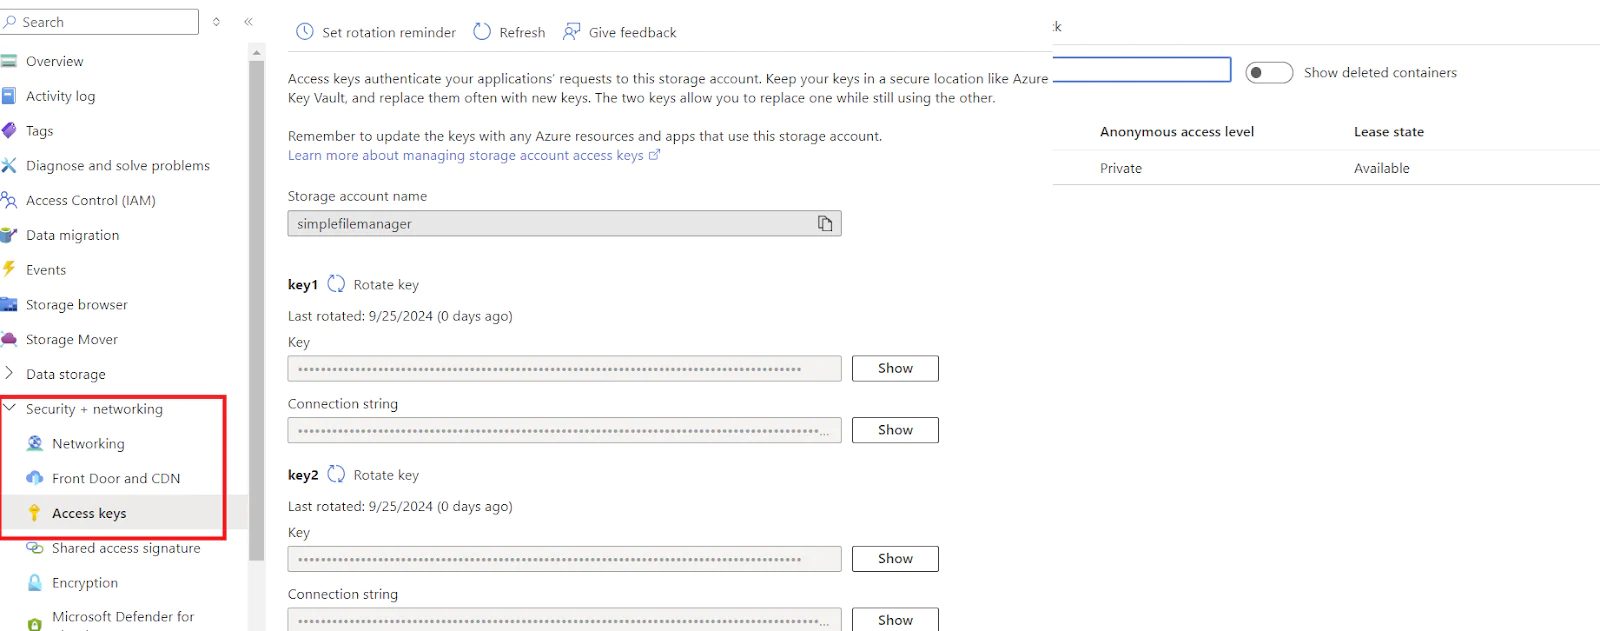
Navigate to Security + Networking > Access keys. Look for Key1, and copy the Connection string. You will need this for your application.
Integrating Azure Blob Storage into the .NET App
If you are using Visual Studio Code, run the following command in the terminal to install the Azure Blob Storage package.
If you are using Visual Studio, go to the top menu. Click on Tools > NuGet Package Manager > Manage NuGet Packages for Solution as shown below.

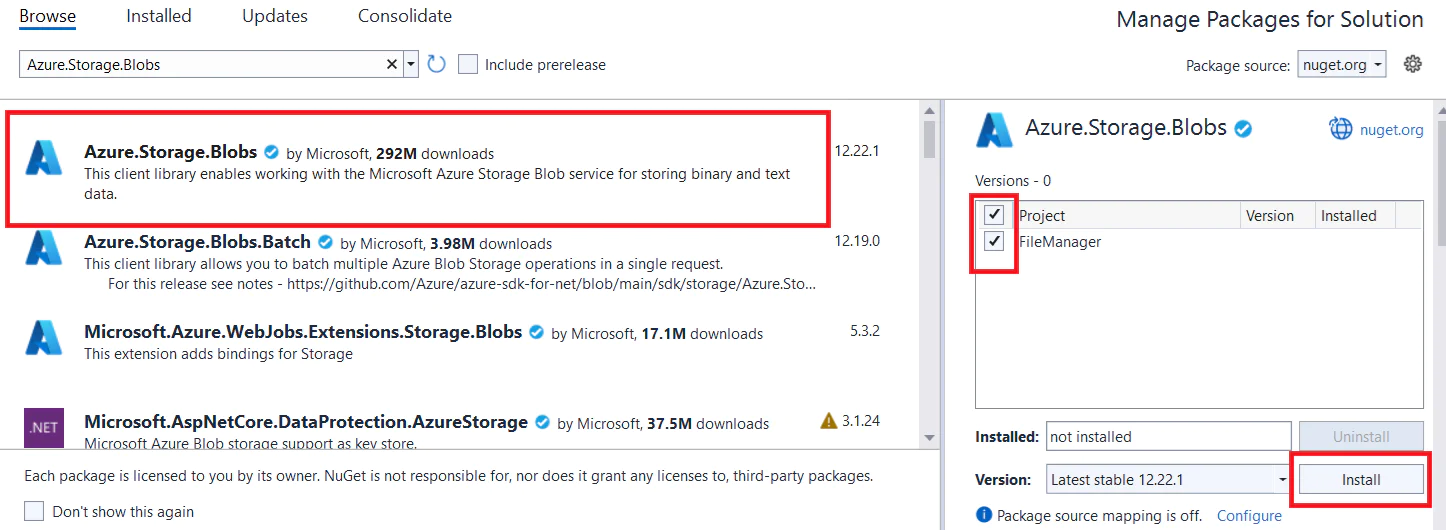
Search for “Azure.Storage.Blobs” and install it to the project.by clicking Install. Small pop ups will show to apply dependencies and accept licenses. Click Apply, then Accept to install the package.
Open the file appSettings.json and add the connection string for the blob storage you created in Azure. Replace the placeholder with your connection string you copied earlier.
Create a service to access your blob storage container
In Visual Studio, right click the project then click Add > New Folder. Add a folder named Services. Right click the Services folder and click Add > Class. Name your new class BlobService.cs.
Add the following code to the BlobService class for handling upload, list, download and delete operations with the Azure Blob Storage. Be sure the value in _containerName matches the name you gave your blob container.
Register the BlobService in the Program.cs file by adding the following code under the first two lines of code in the file.
Setting Up Twilio SendGrid
There are a few more mandatory steps you’ll need to complete in your Twilio SendGrid’s account:
- Verifying your Email
- Setting up 2-Factor Authentication
- Verifying your Domain
Once you’ve completed the above steps, you’ll need to create a new API Key with restricted access. On the Restricted Access tab, be sure your API Key is set to allow Email Sending access. Give your API key a name, and click Create + View. Keep this key somewhere safe as you will need it in the subsequent steps, and SendGrid will not show it again.
Add the API key, sender email and sender name in your appSettings.json file as shown below. and Replace the placeholders with your actual API key and verified sender information.
Integrating Twilio SendGrid into the .NET App
If you are using Visual Studio Code, run the following command in the terminal to install the SendGrid package.
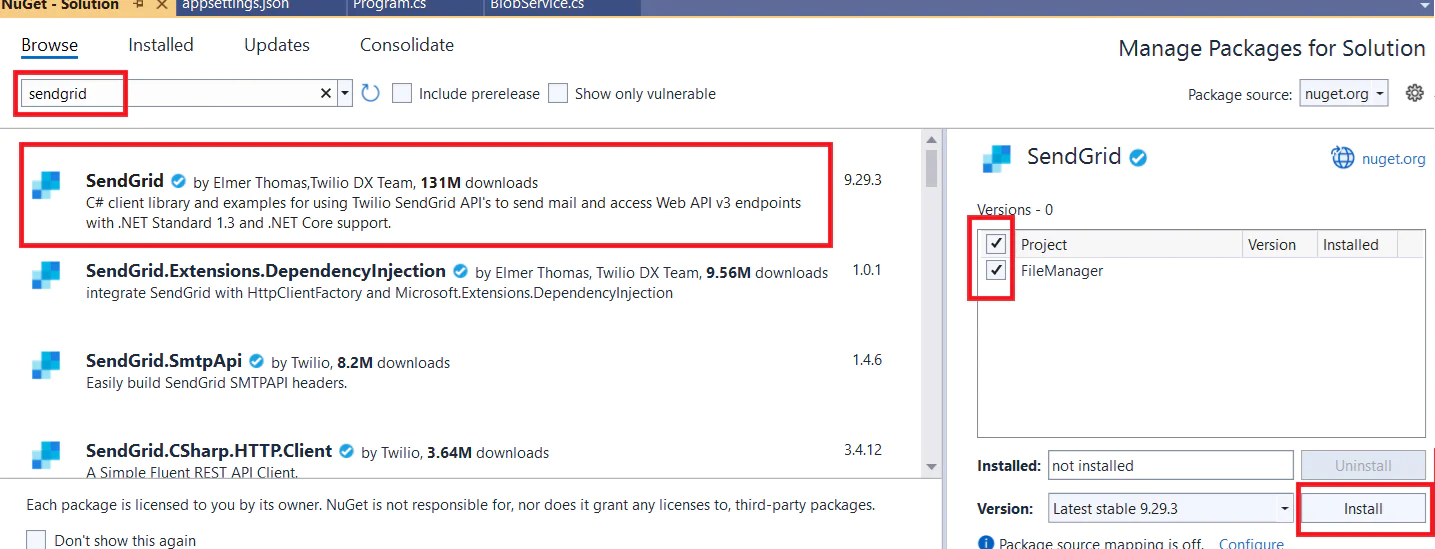
If you are using Visual Studio, open the NuGet Package Manager and install “SendGrid.” Apply and accept dependencies and license when prompted.
In the Services folder, add a new class called EmailService.cs. Replace the code in this file with the following code.
Register the EmailService by adding the following code to the Program.cs file under the top 3 lines of code.
Building the File Manager UI
Right click the Controller folder then click Add > Controller > MVC Controller - Empty. Give your new file the name FilesController.cs. Replace the code with the following code adding the index page action and the file operations actions. Replace recipient@example.com with the email address you want to send notifications to. You will have to do this for both the upload and delete tasks in the code.
Create UI Views
In the Views folder, create a new folder named Files. Right click the Files folder, then click Add > View > Empty view. Name your file Index.cshtml, then replace the code with the following code:
In Program.cs find the app.MapControllerRoute code. Replace it with the following code to configure the default page to the file manager’s page.
Testing the C# application
If you are using Visual Studio Code, run the following command in the terminal to run the application then navigate to the localhost specified in the run output.
If you are using Visual Studio, run the application by clicking on the green play button in the top of the Visual Studio window as shown below.

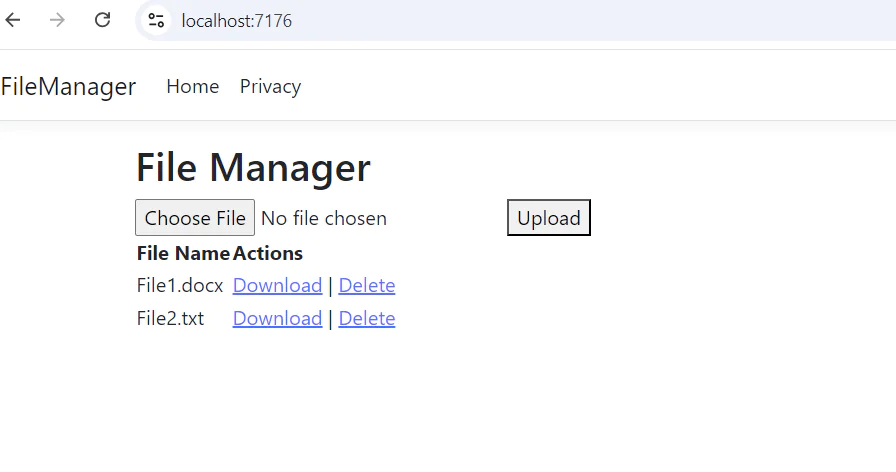
Then browse the localhost port shown in the popup debug window. You will see a web interface that allows you to upload and download files from Azure.
Try uploading and downloading files, then check to see if you received an email.
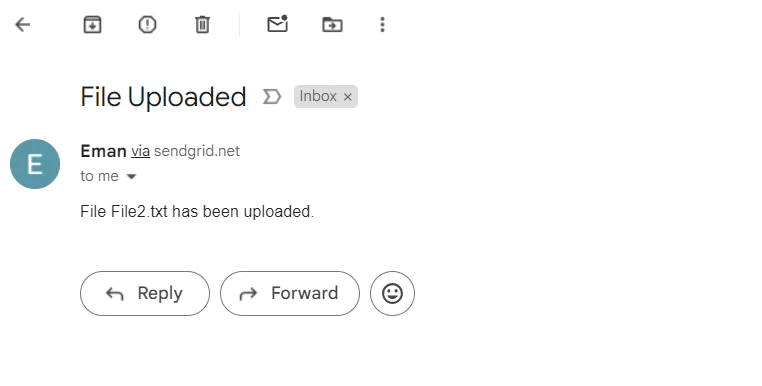
Check the email specified in your code. The email you receive should look like the one shown below.
Extending your C# SendGrid application
You've successfully built a File Manager application using .NET, integrated with Azure Blob Storage for file handling and Twilio SendGrid for email notifications. This application serves as a solid foundation for more complex file management systems, and you can extend it by adding features like user authentication, file sharing, and more.
If you want to continue to build out this application, here are a few options to consider:
- Enhance Security: Implement authentication and authorization.
- Add Logging: Use logging frameworks to track application behavior.
- Improve UI: Enhance the user interface with Bootstrap or other CSS frameworks.
- Handle Errors: Add proper error handling and validation.
You can find the entire code for the finished application here.
Eman Hassan, a dedicated software engineer, prioritizes innovation, cutting-edge technologies, leadership, and mentorship. By providing AI tools for text processing in regexmy.com and developer advocate as a service in advocatek.com, she finds joy in both learning and sharing expertise with the community. Explore more on her Medium profile: https://emhassan.medium.com.


Related Resources
Twilio Docs
From APIs to SDKs to sample apps
API reference documentation, SDKs, helper libraries, quickstarts, and tutorials for your language and platform.
Resource Center
The latest ebooks, industry reports, and webinars
Learn from customer engagement experts to improve your own communication.
Ahoy
Twilio's developer community hub
Best practices, code samples, and inspiration to build communications and digital engagement experiences.