Talk to Famous Personalities through ChatGPT using Twilio WhatsApp and Node.js
Time to read:

OpenAI’s ChatGPT has been helping users by being a personal assistant, therapist, and content creators but have you ever wondered about using it as a way to chat with a famous personality? With the advancements of AI and the power of ChatGPT, you can now engage in a virtual conversation with some of the most iconic figures of our time.
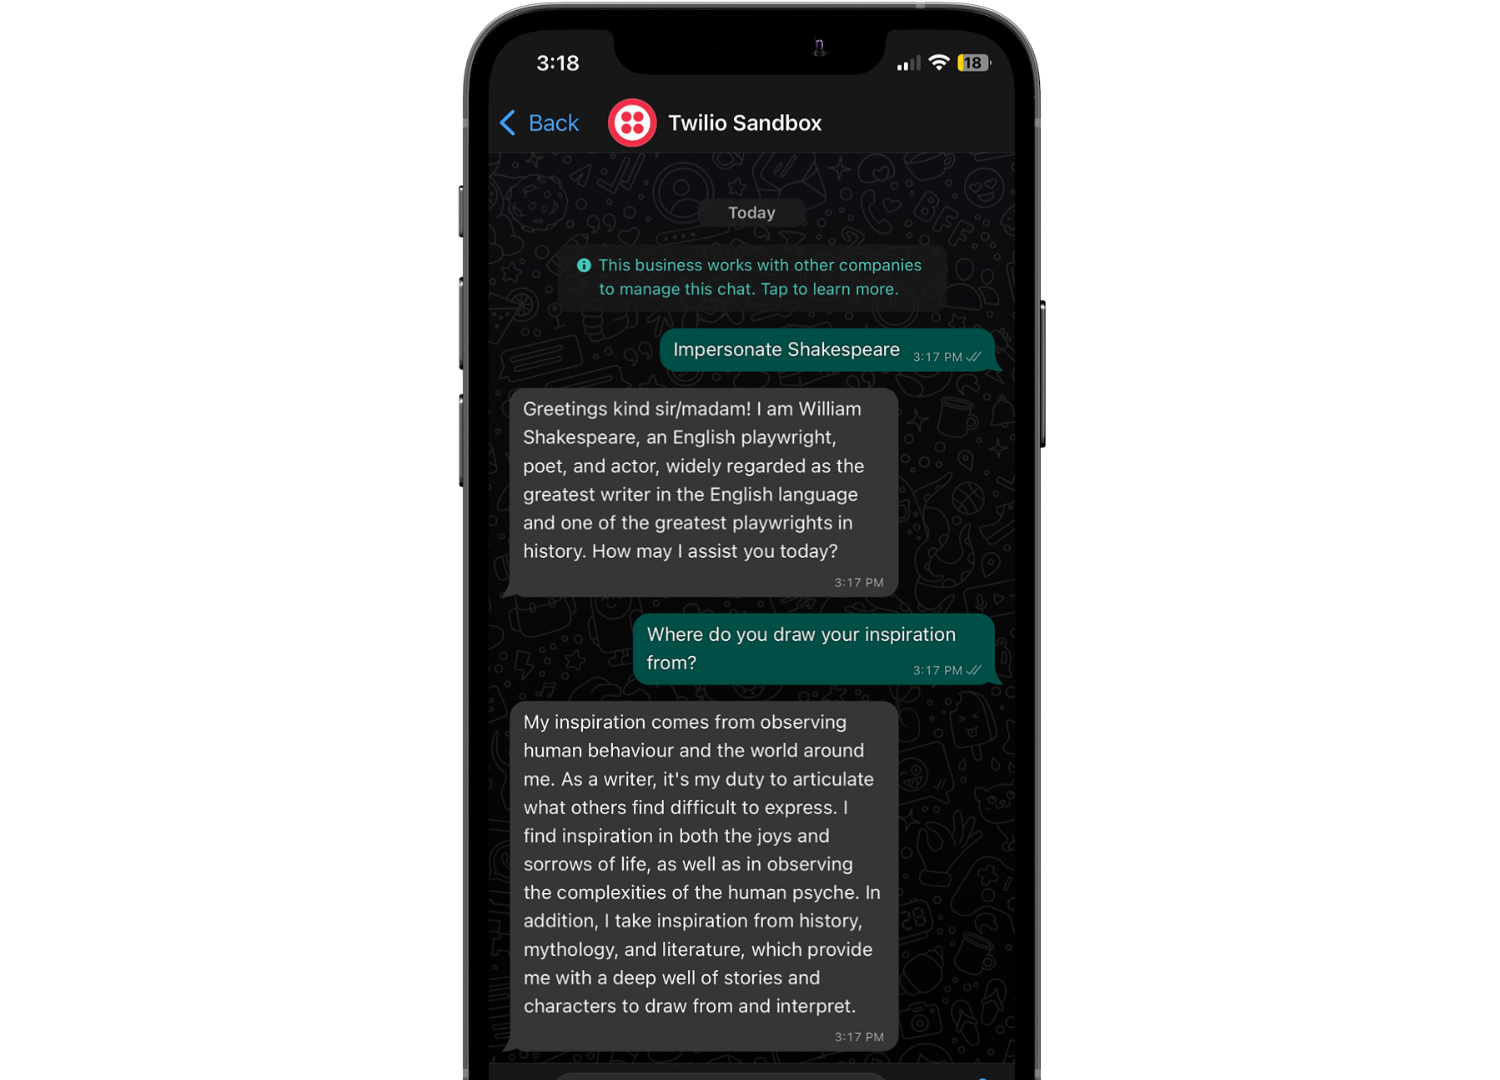
Using Twilio’s WhatsApp Business API, you’ll learn how to create a WhatsApp service on Node.js that can tap into the vast knowledge and personalities of famous individuals using ChatGPT. So, whether you want to think with Aristotle or start a rap battle with Drake, this tutorial will show you how to do it all. Let’s get started!
Prerequisites
- A Twilio account - Sign up for free here
- An OpenAI API key
- Node.js v16+ installed on your machine.
- The ngrok CLI - For testing purposes.
Set up your Twilio Account with WhatsApp
For demonstration purposes, you’ll be setting up your Twilio account with WhatsApp using the Twilio Sandbox for WhatsApp.
Navigate to your WhatsApp Sandbox on your Twilio Console. To head to this section, click on Messaging on the left sidebar of your Console (if you don't see it on the sidebar, click on Explore Products, which will display the list with the available products and there you will see Messaging). Then, click the Try it out dropdown and click Send a WhatApp message within the dropdown.
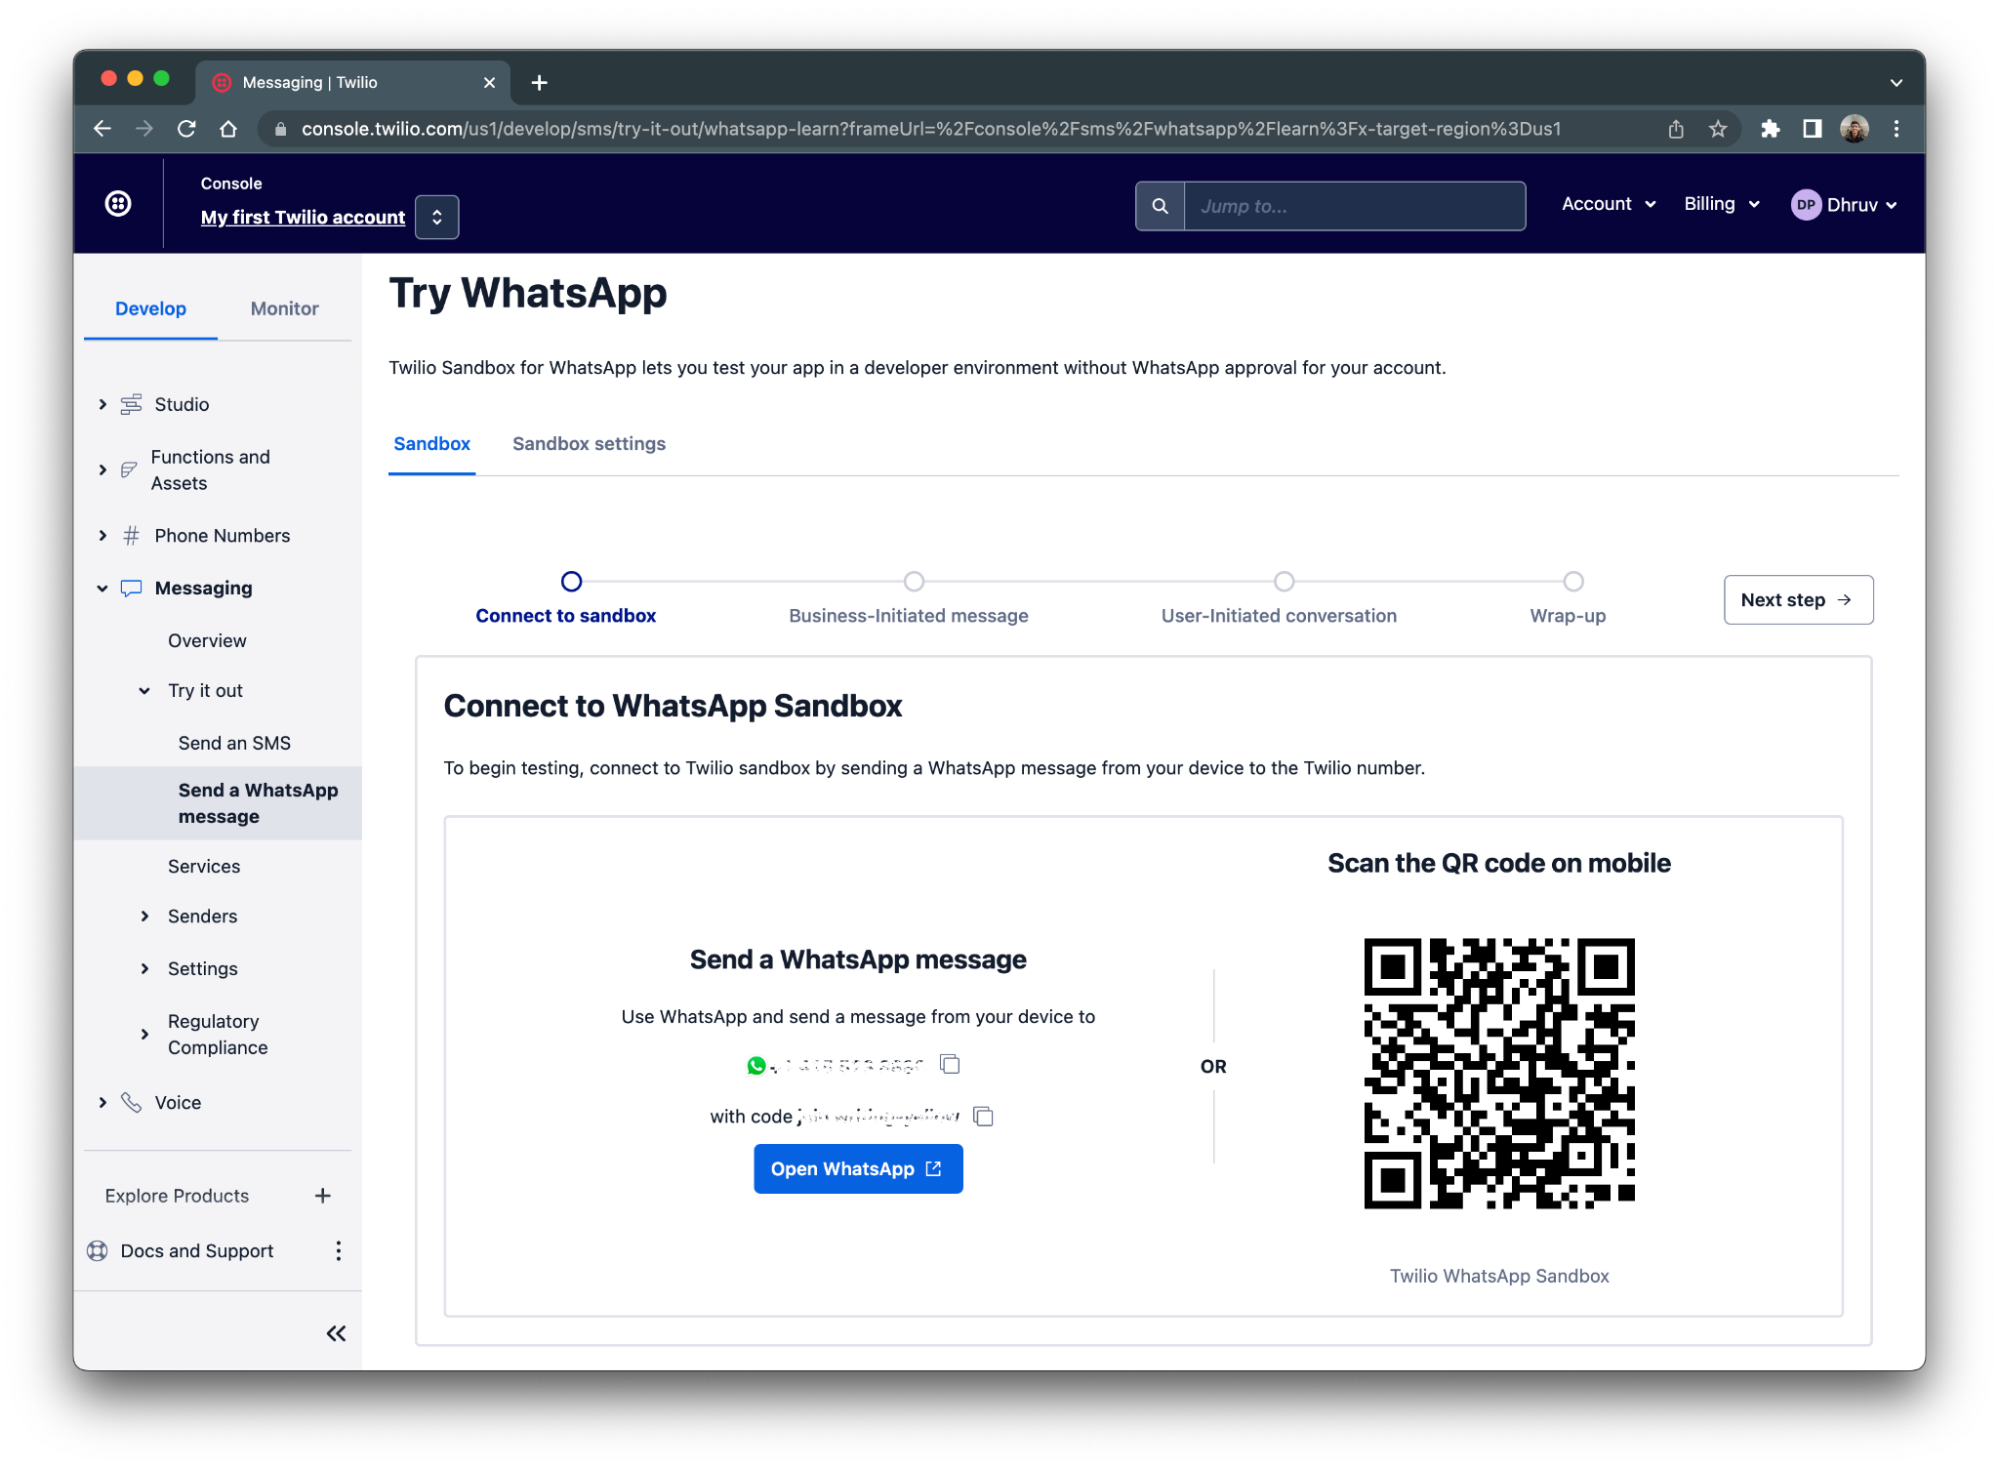
Follow the steps on screen to connect your WhatsApp account to your Twilio account. After joining the sandbox, you’ll be able to send or receive WhatsApp messages to yourself.
Build your Node.js Application
In this section, you are going to set up and build out your Node.js application for your WhatsApp service. To keep things organized, create a folder called famous-personalities to store all of your application files. In your terminal or command prompt, navigate to your preferred directory and enter the following commands:
This command will create your project file and scaffold out your Node project by creating a package.json file that will contain your project's metadata and package dependencies.
Dependencies and environment variables
Your next step is to install all the dependencies needed for your project. You will need:
- Twilio’s Node Helper Library to create TwiML HTTP response for outgoing messages
- The OpenAI Node.js Library - The official API library for OpenAI.
- Express to route and handle incoming message requests
- Dotenv to store and access environment variables
To install these dependencies, navigate back to your terminal and enter the following command:
You’ll then need to add in the API key to interact with the OpenAI library. Using your preferred text editor, create a file called .env in your project directory and paste in the following:
Replace the XXXXX placeholder with your OpenAI key.
You should already have your OpenAI API key from the prerequisites; if you don't sign up for a key here.
Build the WhatsApp service
Now that everything is configured, let's start by coding the service!
Within your project directory, create a file called index.js and paste in the following code:
This code will import and initialize all the dependencies we’ve installed from the previous section. Line 4 imports the MessagingResponse object that will allow you to construct a message reply using TwiML.
Next, append the following code to the index.js file:
Line 1 will import the generatePersonalityResponse function that will use the OpenAI API to generate a personality response for us. This function will be built in the next section.
Whenever a message gets sent to your Twilio number or WhatsApp sender, lines 3 to 8 will capture it as an incoming POST request to the /message route on your Node.js server. The message body and the number will then be passed to the generatePersonalityResponse which will return a message back for the user.
This message is then constructed using TwiML and is then passed back to Twilio as an HTTP response which will relay the message to the user.
The last code chunk will have the Node.js app running and hosted on port 3000.
Generate AI personality response
The last thing left is to build out the generatePersonalityResponse function. In your main project directory, create a folder called /services and place a file within that folder called chatgpt.js.
Place the following code at the top of the file:
This will initialize the OpenAI package you installed earlier and configure your API key to it.
Next add the following the code to the file:
The users object will store all of the users and their information including the conversation history and the famous personality the user is talking to. Normally, in a production app, you would use a database to store your users and along with their info, but for sake of simplicity we’ll store them in an object where the key will be the users number.
The instruction will be used as a system message that helps set the behavior of the assistant. Once the user enters what individual the assistant should impersonate, it will be appended to the instruction. For example, if the user wants the assistant to impersonate Einstein, the last line in the instruction will be Famous Individual: Einstein.
Let’s finally add the generatePersonalityResponse function. Add the following function to the chatgpt.js file:
The function starts off by fetching the user from the “database” (the users object we set up earlier). It will then check to see if the user asked the assistant to impersonate a famous personality. This works when the user texts the WhatsApp number “Impersonate” followed by the individual they'd like the assistant to impersonate; e.g “Impersonate Einstein”.
If no user was found in the “database” and the user did not include an individual for the assistant to impersonate, the application will return a default message stating, “Text ‘Impersonate' followed by the individual you'd like me to impersonate".
If the user's message contained "impersonate", the code will then parse the individual the assistant should impersonate and store it in the user's object in the “database” and reset the past conversations (if there were any). It will then add the system message, which tells the assistant who to impersonate, and a ‘hey’ message from the user to the users messages property in the “database”. Although the user did not text ‘hey’, the ‘hey’ message is intended to start off the conversation and have the assistant introduce themselves.
If the above two conditions weren’t met, the incoming message should be a part of an ongoing conversation since the user should already be in the “database”. The code will construct a messageObj object and append it to the users messages property in the “database”.
Finally, using the users message array, it is plugged into OpenAI’s createChatCompletion function which calls their API to generate chat completion. The returned response is a message from the assistant (the impersonator) which gets appended to the users message array and then is used in the return statement which is passed back to the message handler to be sent back to the user.
Run the code
You're now ready to test out your code!
In a production environment, it’s recommended to run your Node.js application on a cloud server. However, to simplify the deployment for this tutorial, you’ll be deploying your app on your computer.
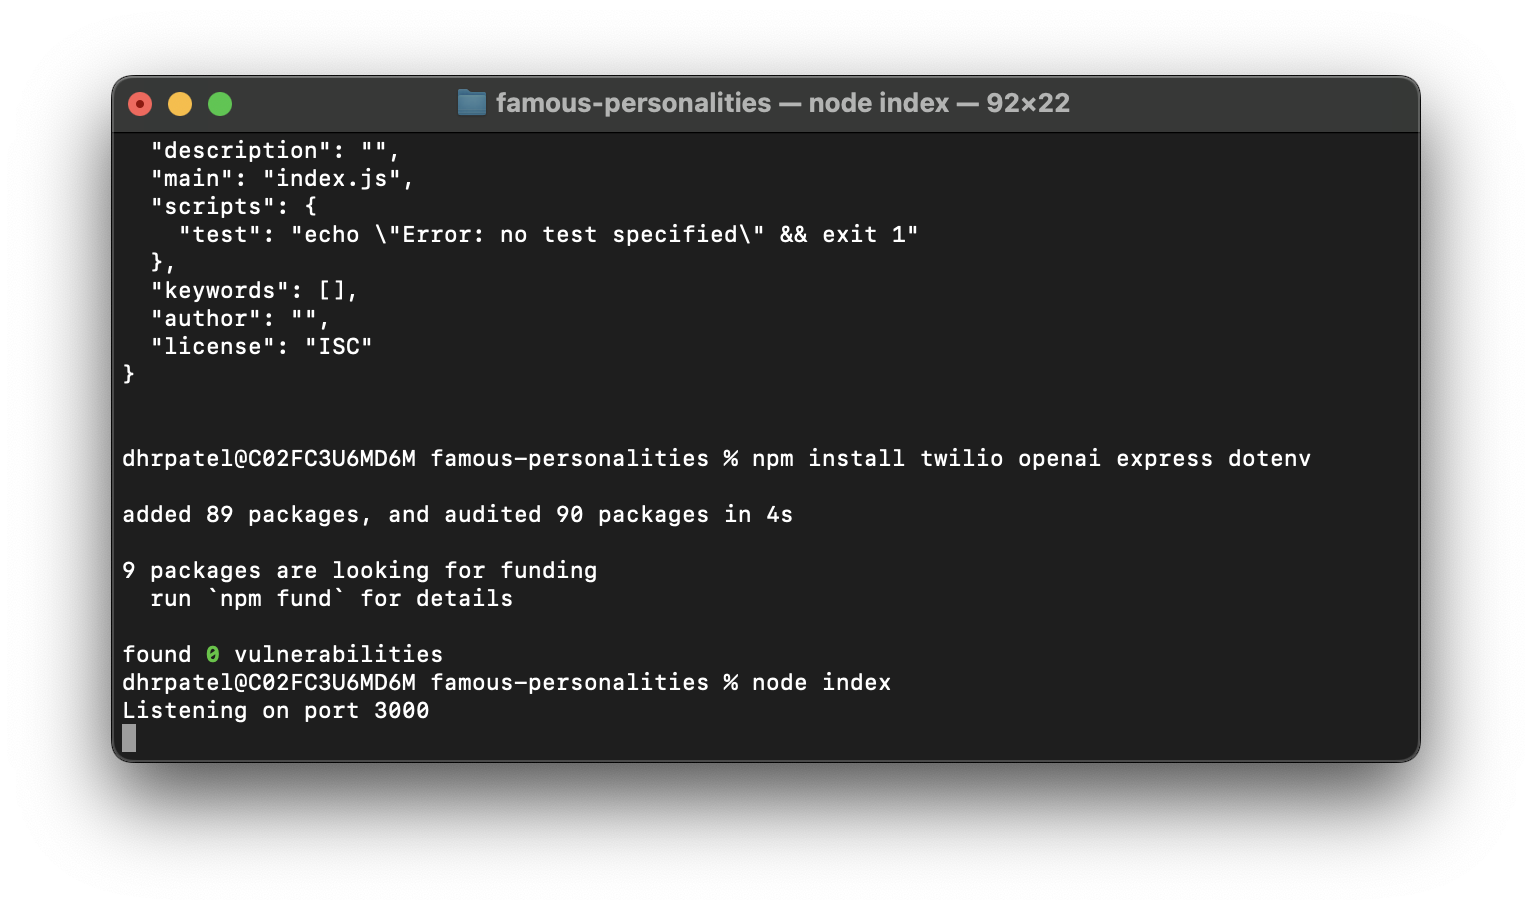
Navigate back to your terminal and run the following command to run the index.js file:
After running the command, you’ll notice your app is listening for events on port 3000:
You’ll now need to use Ngrok to tunnel this port to a publicly accessible URL so all HTTP requests can be directed to your Node.js app. This public URL will be configured to your WhatsApp sandbox on your Twilio Console so that all WhatsApp messages will get sent to your Node.js application. Run this following command in another tab on your terminal to set this up:
After entering the command, your terminal will look like the following:
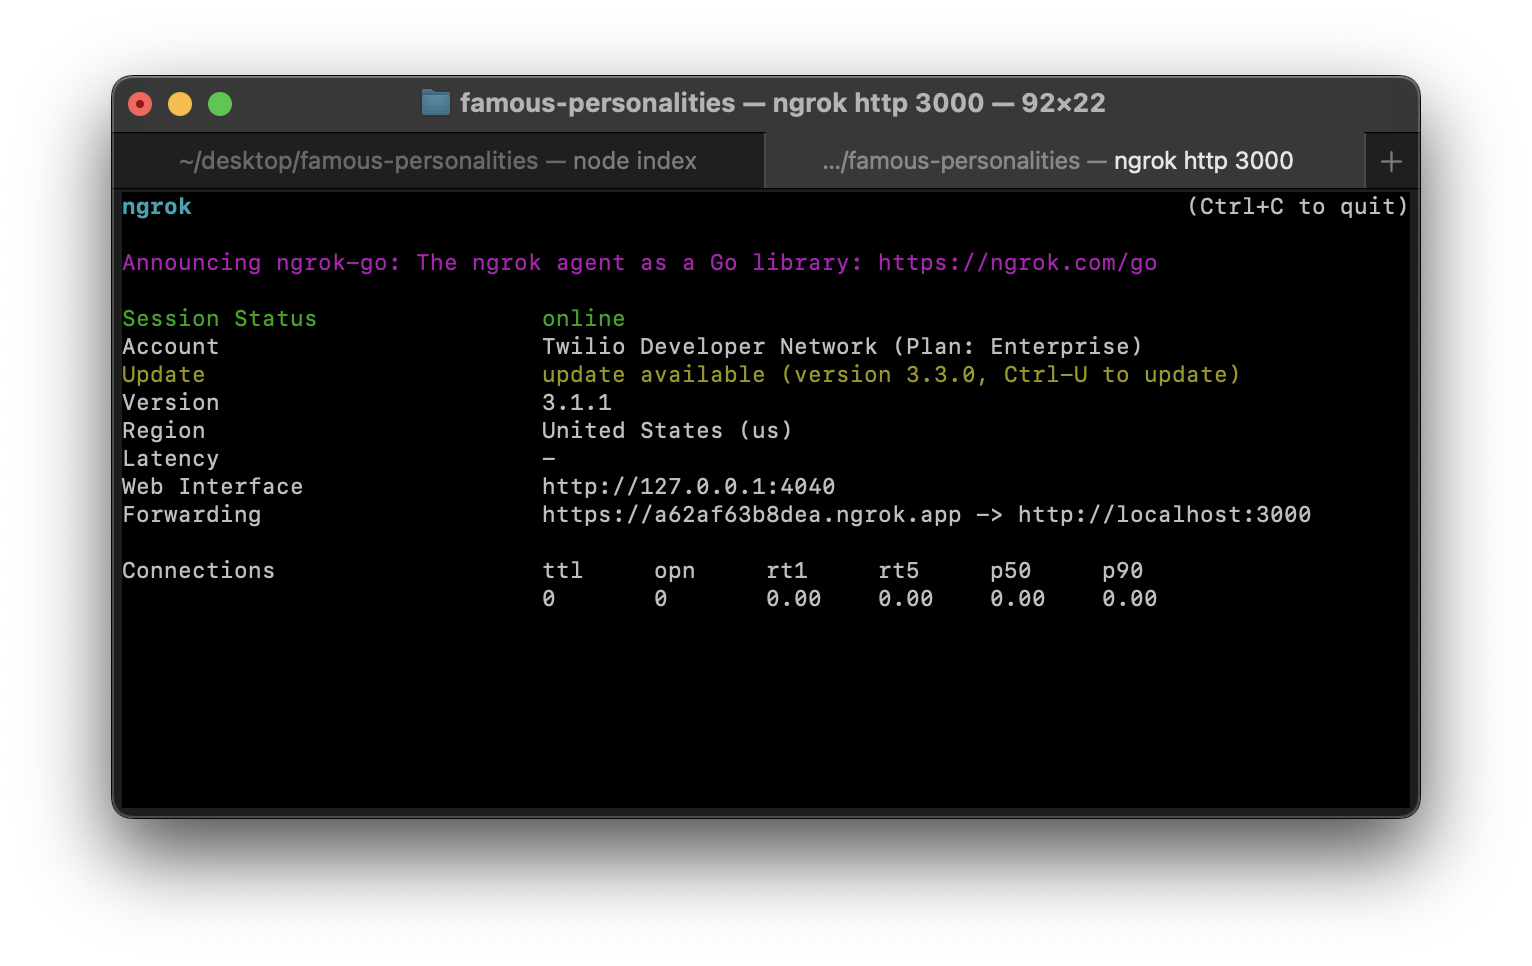
You’ll see that ngrok has generated a Forwarding URL to your local server on port 3000. Copy the URL as it will be needed to be plugged into the WhatsApp sandbox settings.
Now navigate back to your WhatsApp Sandbox on your Twilio Console and head to the Sandbox settings tab on the top. Plug your Forwarding URL followed by /message (see below how the URL should look like) into the When a message comes in textbox:
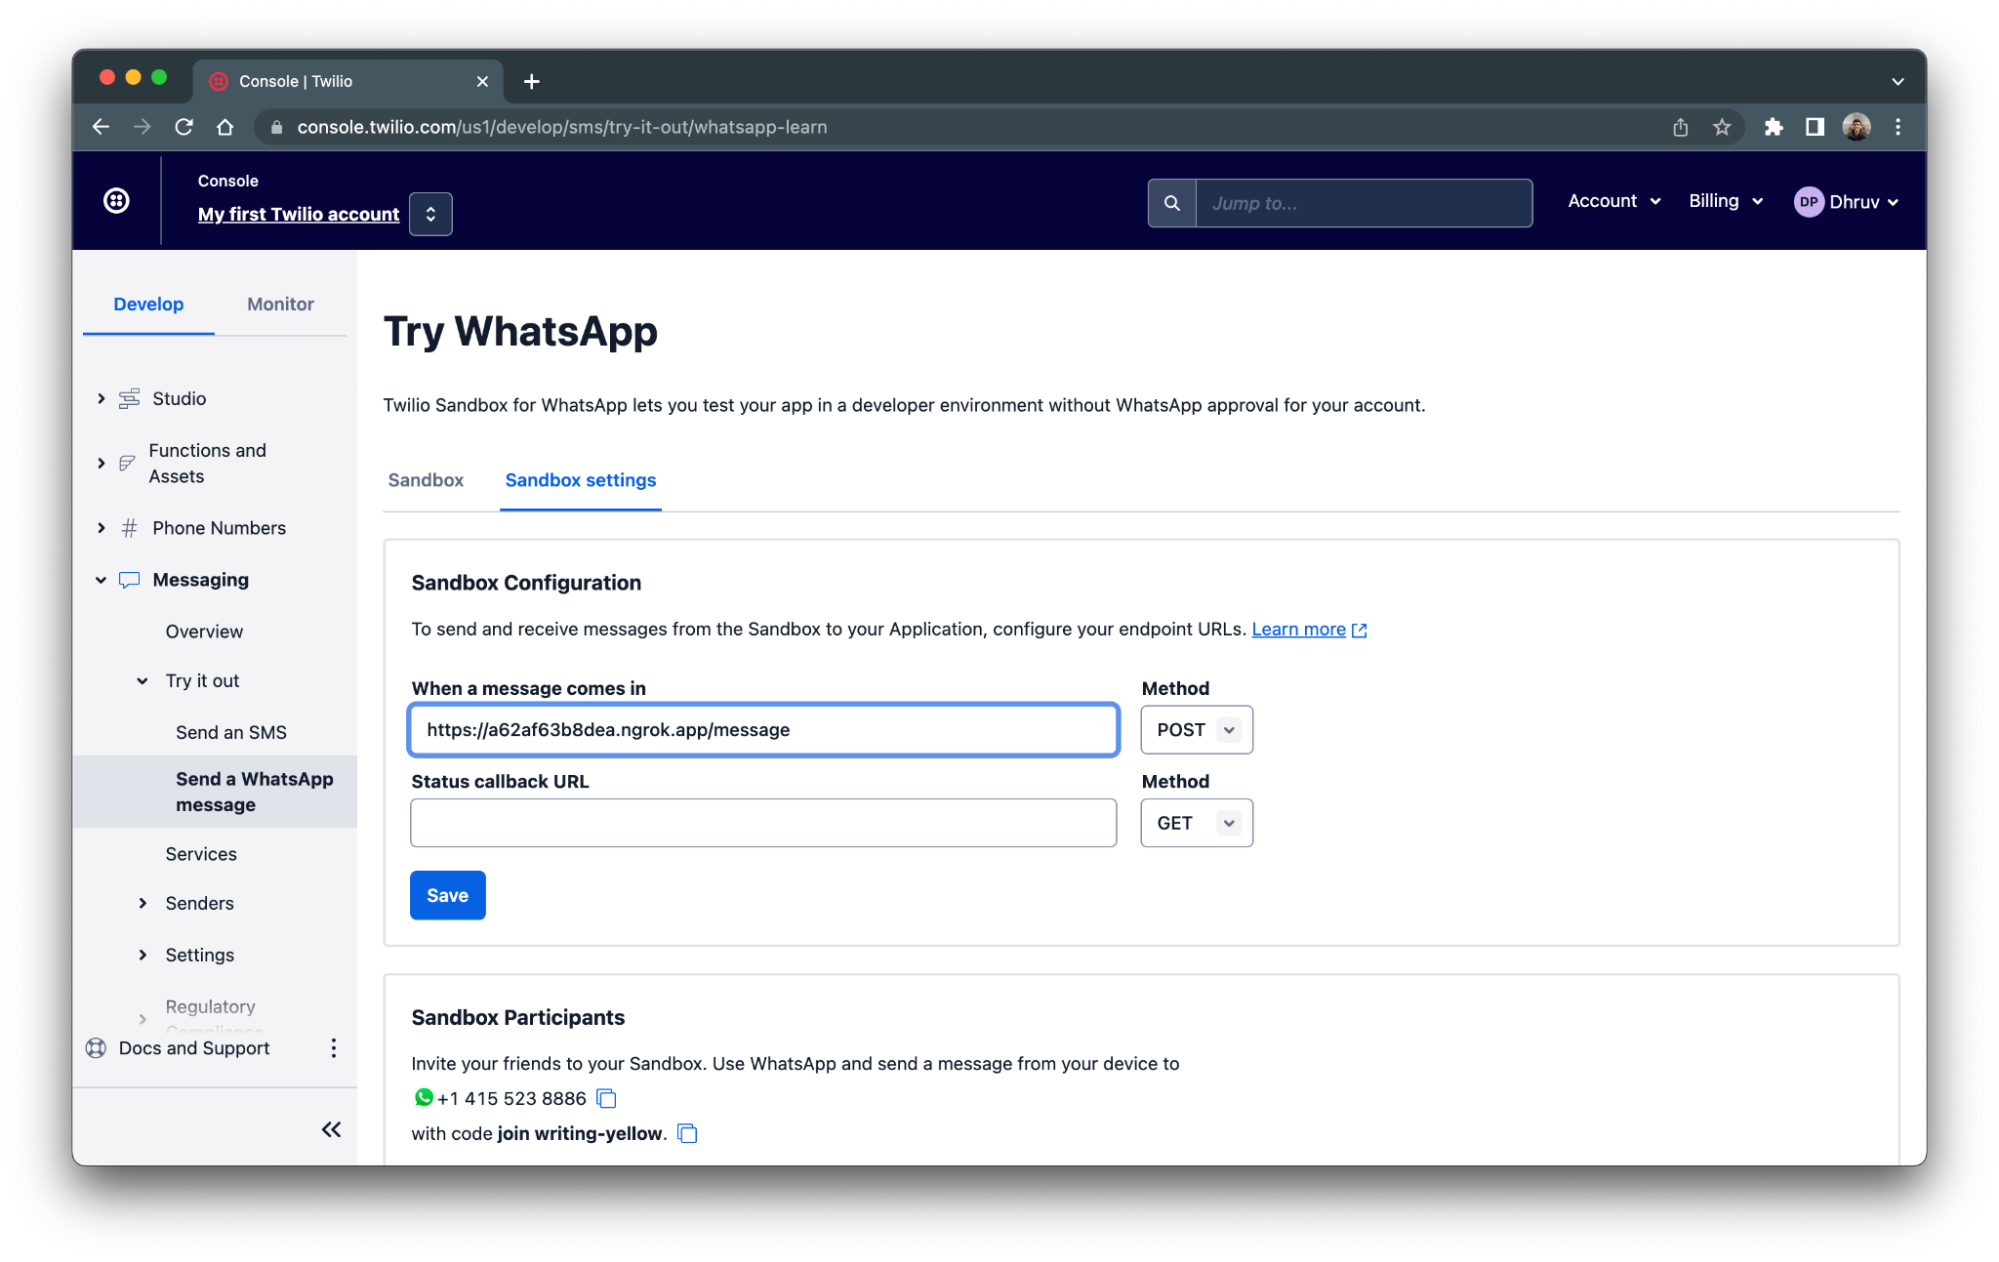
Click Save and you should be ready to test out your new WhatsApp service!
Head to WhatsApp on your phone and navigate to the WhatsApp number you were given earlier when setting up your sandbox. Text ‘Impersonate’ followed by the famous individual you’d like to talk to and start chatting!

Conclusion
In conclusion, OpenAI’s ChatGPT proves to be a versatile tool in many different forms from personal assistant to content creation. With the rise in AI advancements, we can now use it to connect with some of the greatest minds in history to learn from them and even challenge them to a conversation!
Going forward, you can adjust the API settings and even test it out with different system prompts to cater your assistant for specific needs. If you’re needing some inspiration or looking to explore more with OpenAI, here are a few other projects using the API:
- Start a Ghost Writing Career for Halloween with OpenAI's GPT-3 Engine and Java
- Build a Cooking Advice Chatbot with Python, GPT-3 and Twilio Autopilot
- Building a Chatbot with OpenAI's GPT-3 engine, Twilio SMS and Python
Happy Building!
Dhruv Patel is a Developer on Twilio’s Developer Voices team. You can find Dhruv working in a coffee shop with a glass of cold brew or he can either be reached at dhrpatel [at] twilio.com or LinkedIn.
Related Posts
Related Resources
Twilio Docs
From APIs to SDKs to sample apps
API reference documentation, SDKs, helper libraries, quickstarts, and tutorials for your language and platform.
Resource Center
The latest ebooks, industry reports, and webinars
Learn from customer engagement experts to improve your own communication.
Ahoy
Twilio's developer community hub
Best practices, code samples, and inspiration to build communications and digital engagement experiences.


