Building Expedited Two-Factor Authentication into Angular Apps with Authy
Time to read:
February 27, 2019
Written by
This post is part of Twilio’s archive and may contain outdated information. We’re always building something new, so be sure to check out our latest posts for the most up-to-date insights.

Two-Factor Authentication (2FA) provides web applications with an important additional layer of security, but 2FA requires the user to perform an additional action each time they log in. This extra step can be wearying for users who sign into an application frequently. Is it possible to maintain the security provided by a second factor while making an application convenient for repeat visitors? It is with Angular, Node.js, and Twilio Authy.
Implementing a “remember me” checkbox on the login page is a convenient way for a user to indicate they are going to be a repeat visitor. Behind the scenes, an encrypted security cookie is a convenient mechanism for identifying a user who has previously checked the “remember me” box and logged in successfully from a specific machine.
With Twilio Authy and an encrypted cookie, such as a JSON Web Token (JWT), you can make the sign-in process fast and convenient while maintaining the added security provided by two-factor authentication. Your returning users will be able to access your app quickly while your app will still be protected from unauthorized access with 2FA. A JWT can offer the additional advantage of third party verification, adding an additional element of security.
Although an encrypted cookie is a great place to store securely store data on the client, the range of data should be restricted to information the user knows, like their user ID and password, or data associated with the user, like their account number and most recent order date. The security cookie is not an appropriate place for API keys or other sensitive data beyond the scope of the user’s interaction with the app.
Understanding the process
There are two common approaches shortening the sign-in process for returning users: the user can skip entering their credentials (user ID and password) or they can skip the second factor authentication. Of the two, skipping credential entry is a more secure approach because it requires the user to still be in possession of both the machine bearing the encrypted security cookie and the 2FA device, typically a smartphone. The second, more secure, technique is the one demonstrated in this post.
The process of determining a user’s login and authentication status involves both the client and the server. For new users, or users who have not previously checked the “remember me” checkbox, the app needs to create the encrypted cookie. For returning users who have a valid cookie on their current machine, the client code needs to pass data from the cookie back to the server so the server code can determine the user ID and password without requiring the user to enter them. With the user’s ID, the server can then lookup the user’s Authy ID and call the API to start the 2FA process. When the user completes the 2FA process successfully a security cookie can be created or updated.
What you’ll learn in this post
By building the project in this post you’ll learn how to add “remember me” functionality to an Angular Universal + Node.js website. The “remember me” functionality will enable returning users to log into the application by approving the authentication request on their device; they won’t need to re-enter their user ID and password, so they’ll be logged in with just one tap.
You’ll also learn how to use a cookie to transfer the data needed to implement “remember me” along with 2FA. To make this case study project less complex and easier to understand, the code in this project creates a plaintext cookie. Cookie encryption and JWT implementation will be covered in another post.
Prerequisites
To accomplish the tasks in this post you will need:
- Node.js and npm (The Node.js installation will also install npm.)
- Angular CLI
- Git
- A Twilio account (Sign up for a free Twilio account.)
- A Twilio Authy API Key and one registered user (also free, instructions below)
To learn most effectively from this post you should have:
- A working knowledge of TypeScript and the Angular framework
- Familiarity with Angular observables, dependency injection, routing, and pipes
Set up the baseline Angular 2FA project
This post uses the Angular + Node.js project from the previous post in this series: Build Two-factor Authentication in Angular with Twilio Authy. You can continue with your existing code if you have successfully built the project from the previous post,.
If you haven’t built that project, or you want to start fresh one, you can clone the code from the GitHub repo for this post.
Clone it by executing the following commands in the directory where you would like to create the project directory:
Set up Authy and an Authy user
If you’ve already completed building the project from the previous post you can use the Authy application Production API Key and Authy ID for the user you set up as part of that exercise.
If you’re starting fresh you’ll need to get Authy and a user set up. Follow these instructions:
Once you have a Twilio account, sign in and navigate to the Authy section of the Twilio Console and complete the following steps:
- In the Authy section of the Twilio console, create a new application.
- Copy the Production API Key for the application to a safe place. (You can find the key in the Settings for the application if you misplace it.)
- In the application you created, register yourself as a new user using your preferred email address and mobile phone number.
- Copy the Authy ID for the user you just created to a safe place.
- Install the Authy app on your mobile phone. You should have received a text notification with a link to get the codes to complete the installation.
Add the Twilio securables to the server code
Open the angular-authy-twilio/server.ts and replace the placeholder with your Production API Key in the following constant declaration:
Replace the authy_id placeholder with the Authy ID for the user you created:
Once you have added your Production API Key and Authy ID to the server.ts file, do not check it into a publicly accessible place, like a GitHub repository.
Build and test the application
Run the following instructions at the command line in the angular-twilio-authy directory:
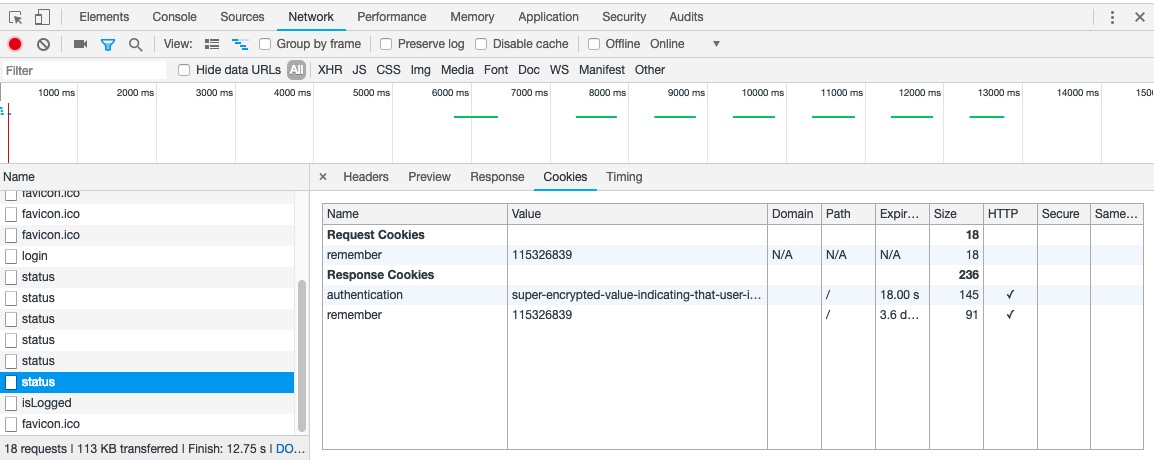
Open a browser window, open the browser’s developer tools (F12), and select the Network tab.
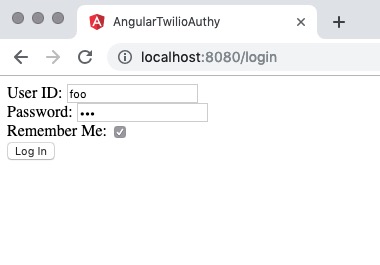
Navigate to http://localhost:8080 (or https://localhost:8080 if you’ve implemented SSL/TLS). You should see the /login page, as shown below:

Enter the credentials User ID: foo and Password: bar. Click Log In.
You should receive an authorization request in the Authy app on the device associated with the phone number you provided for the user you registered in the Authy section of the Twilio console.
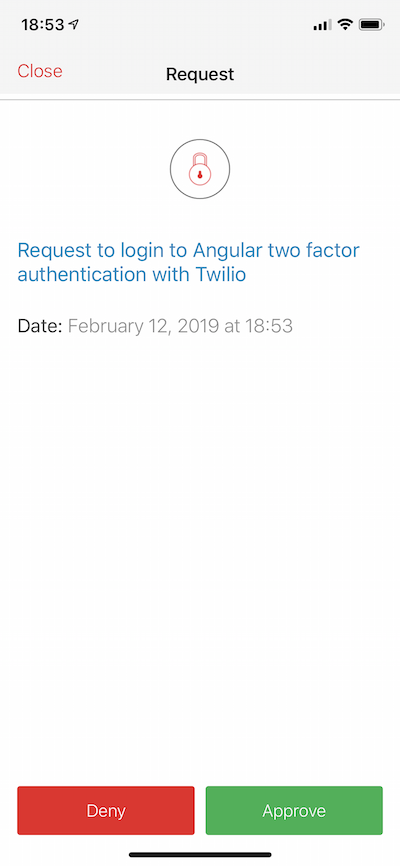
Approve the request.
After authorization you should be redirected to the /home route, which is protected by the authorization guard in the application. (See the post Build Two-factor Authentication in Angular with Twilio Authy for more information on how this works.)
If this process worked as described, two-factor authentication is working in your Angular application.
Implement returning user recognition
The authorization service AuthService needs to respond differently depending on the value of the remember field. If the value is true and the user passes the second authentication factor, the service tells the server to include the value of the remember field in the cookie.
Open the src/app/auth.service.ts file and replace the auth and secondFactor methods with the following TypeScript code:
Encrypted cookies are created by the /auth/status endpoint on the server, so the endpoint code needs to be updated to generate the cookie and set an expiration age, maxAge, which is measured in seconds.
Open the server.ts file and replace the TypeScript code for the /auth/status endpoint with the following:
Note that the cookie timeout set in the maxAge parameter is relatively short, 1 minute for the second-factor cookie and 5 minutes for the remember cookie. This is so the cookie persists long enough that you can see the expedited 2FA login working even when a user is signed out, but not so long there’s an old cookie sticking around and getting in the way of your end-to-end testing. If you’re building this project quickly, you may need to remove the cookie on your own to reset your browser for end-to-end testing.
Add a Remember Me control to the login page
To begin recognizing returning users the app needs a way for the user to indicate they want to be remembered. In addition to making the login process more convenient for returning users, adding a “Remember Me” control can also help build compliance with the EU General Data Protection Regulation.
The existing code has a LoginPageComponent, so it’s easy to add another control.
Replace the code in src/app/login-page/login-page.component.html with the following HTML markup:
Open the src/app/login-page/login-page.component.ts file and make the following TypeScript modifications.
Add the newly created field to the loginForm FormGroup class initialization:
Add the value of the remember control to the arguments of the AuthService.auth() call in the onSubmit() method:
Test the remember cookie functionality
At this point it’s a good idea to be sure the application is correctly handling input using the new user interface element and generating the new cookie correctly.
Execute the following command line instructions in the angular-twilio-authy directory:
Open a browser tab. Open the developer tools (F12) for the tab and switch to the Network tab so you can see the communication between the browser and the Node.js server.
Navigate to http://localhost:8080 (or https if you’ve implemented SSL/TLS).
You should see the /login page, like the one shown below.
Enter the login credentials User ID: foo and Password: bar. Check the Remember Me checkbox. Click the Log In button and watch the Network tab in your browser. You should see a series of status messages as the /auth/status endpoint returns a HTTP 200 reply and the value of authResponse.approval_request.status.
Approve the Twilio Authy authentication request on your mobile device. In the Network tab of your browser’s developer tools you should see that the last status response contains a cookie which contains an authentication field and a remember field.
In a production application the cookie and these fields would be encrypted. They are plain text in this project so you can more easily follow the behavior of the code.
The value for the remember field is the Authy ID for the user who is logging in. Although this value is hard-coded in the server.ts file to simplify this demonstration project, in a production application you would typically retrieve it from a persistent data store by querying with the user’s ID after the user’s ID and password have been validated. This prevents an Authy ID from being set in a cookie unless a valid user ID and password pair are entered.
Because the cookie is httpOnly it is not accessible from JavaScript running in the browser. And because it would be encrypted in a production app it would be difficult to access the Authy ID on a client machine. The client-side code only needs to know that the remember field in the cookie is set, not its value.
If you want to catch up to this step using the code from the GitHub repository, execute the following commands in the directory where you’d like to create the project directory:
Add the Authy Production API Key and the Authy ID for the user you created to the code by following the instructions in the section above, Add the Twilio securables to the server code.
Execute the following npm command line instruction in the angular-authy-remember directory:
Follow the instructions at the beginning of this section to try out the Remember Me checkbox functionality.
Transferring values to the server-side rendered Angular code
Your applications should never expose production secrets such as API keys to the client-side code. To avoid hardcoding the Authy Production API Key in our application TypeScript you can use same technique as in the post How to Transfer Files and Data in JavaScript Applications Between Angular and Node.js.
Open the server.ts file and locate the following TypeScript code:
Add the API_KEY constant to the list of providers in the app.engine method call it looks like the following:
Now you can make use of the cookie set by Node.js in the part of the Angular application responsible for rendering content on the server-side. Because the cookie is httpOnly, it is not accessible to JavaScript executed in the browser. The app is going to retrieve the Authy ID of the remembered user, issue an authentication request with Twilio Authy, and provide the retrieved Authy ID to the browser by using TransferState technique. (You can learn more about using the TransferState object in the post: How to Transfer Files and Data in JavaScript Applications Between Angular and Node.js.)
Open the src/app/auth.service.ts file and add the following code to the list of ìmport directives:
Modify the AuthService constructor to inject the TransferState object with the Authy Production API Key, which is provided by Node.js.
Replace the existing constructor code in the auth.service.ts file with the following code:
The AuthService needs a way to determine if a remembered user has passed the second-factor validation with Twilio Authy. This process involves code for both the server and the client in an AuthService method called getRememberedToken().
The code that executes on the server calls the Twilio Authy API and invokes the Authy authentication process. If the user accepts the authentication request in the Authy app on their device, the value of the authyToken in the TransferState object is set to the user’s Authy ID.
If the code is running on the client, the Authy ID is retrieved from the TransferState object.
Add the getRememberedToken() method to the auth.service.ts file by inserting the following TypeScript code at the bottom of the class definition (before the final }):
The application will need a resolver that implements the Angular Resolve interface. The resolver intercepts a link click and returns a value or observable which can be used in the calling method’s code.
In this application the LoginResolverService class will provide the the value returned by the getRememberedToken() method as an observable.
Generate the login resolver files by executing the following Angular CLI command at in the angular-authy-remember directory:
Implement the LoginResolverService class by replacing the contents of the src/app/login-resolver.ts file with the following code:
The resolver will be used when users navigate to the /login page.
Open the src/app-routing.module.ts file and add the following code to the existing list of import directives:
Modify the route definition for the /login path by replacing the existing line with the following code:
Now you can refactor the LoginPageComponent class to use the resolver and second-factor authentication.
Replace the contents of the src/app/login-page.component.ts file with the following TypeScript code:
The revisions to the LoginPageComponent class accomplish a number of tasks:
The OnInit interface is implemented in the LoginPageComponent class to enable use of the resolver.
An ActivatedRoute object is injected into the LoginPageComponent class so the value of authToken can be obtained from the router data.
Handling of the second authentication factor is moved to a private method, handleSecondFactor().
handleSecondFactor() receives the results of the authService.auth() method as an observable that indicates if the second factor request was authorized (true), rejected (false), or timed out (null).
handleSecondFactor() is called in two places:
onSubmit()performs the initial first-factor check (user ID and password).ngOnInit()checks for the status of the second factor by using theTransferStateobject provided by the resolver,LoginResolverService.
The final step in building the application is refactoring the AuthorizationService class.
Replace the code in the src/app/auth.service.ts file with the following TypeScript code:
The new code above added the pollStatus() method and refactored secondFactor() method.
Examine the secondFactor method line-by-line:
The method returns an observable.
The observable is initialized with the timer() method: it will emit a value every second for up to 5 minutes The 5-minute limit is set by take(5 * 60).
The concatMap() changes the return value of the observable to the pollStatus() method output.
The pollStatus() output is filtered to remove the pending status.
The map() operator returns a boolean based on the status of authentication.
The process continues through a takeWhile() loop while the value of status is not true (approved) or until the iteration times-out.
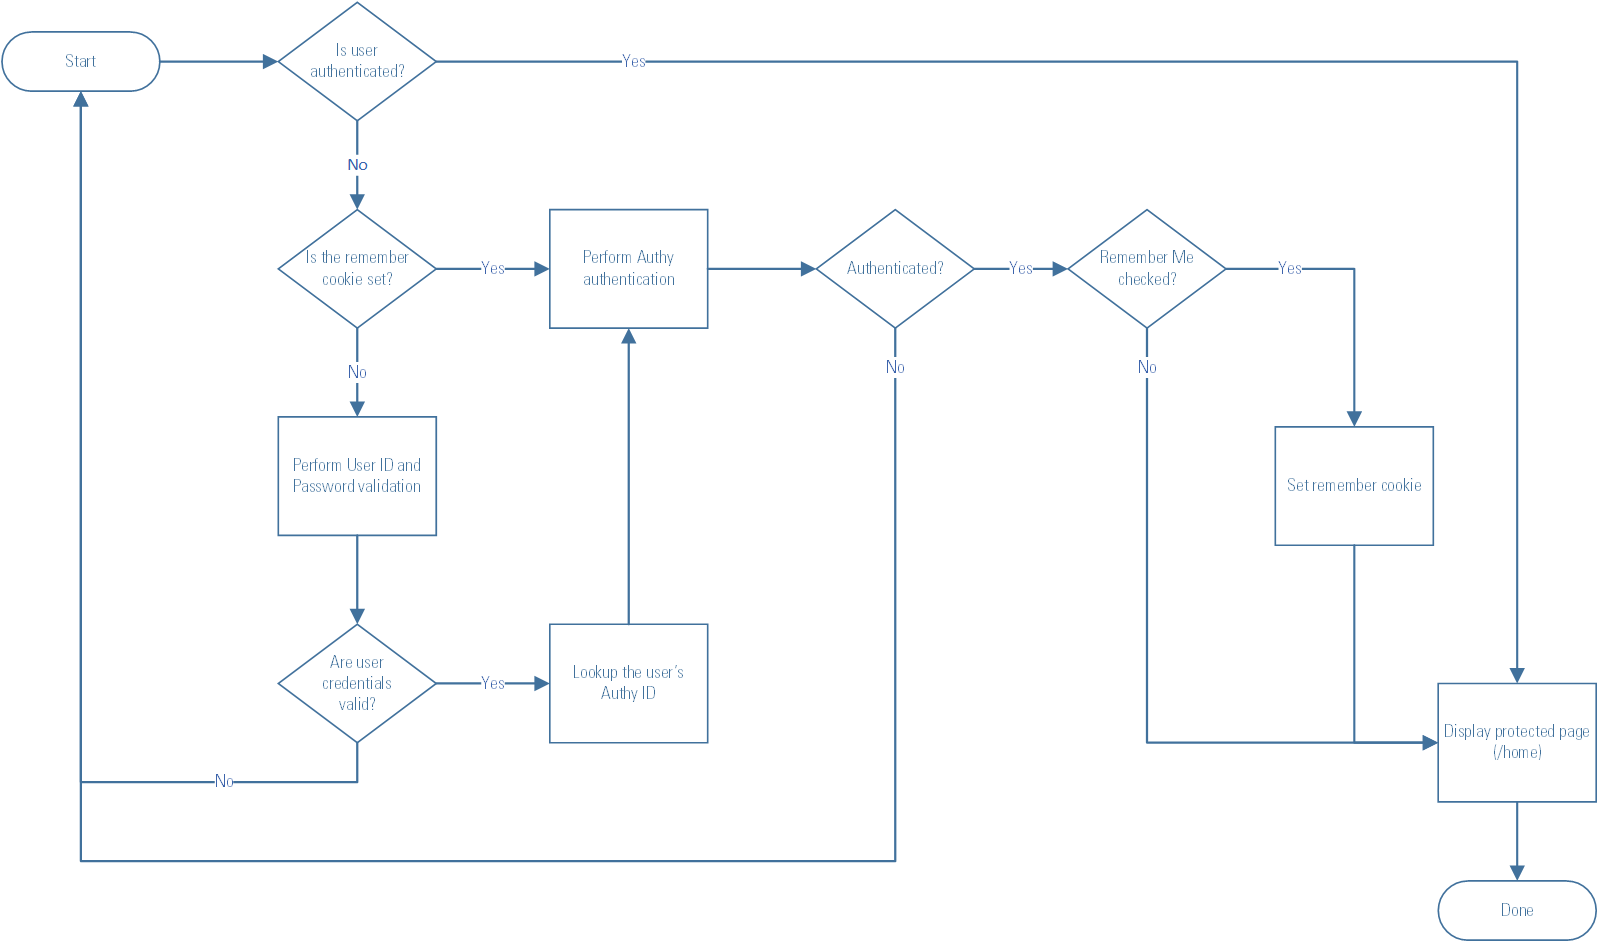
And that completes the code for the application. The application flow can be seen in the following diagram:
Test the completed application
You should be able to see the complete functionality of the application if you have applied all the code changes successfully.
Build and run the application by executing the following npm commands in the angular-authy-remember directory:
Open a new browser tab and open the browser’s developer tools (F12). Select the Network tab in the developer tools.
Go to http://localhost:8080. Enter the login credentials you used previously and check the Remember me checkbox. Click the Login button.
You will see “Waiting for second factor” on the /login page and you should begin to see status events in the Network tab.
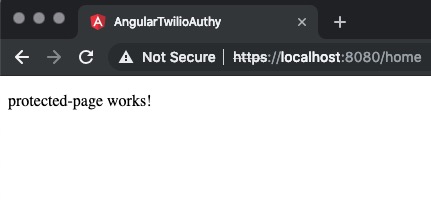
When you receive the Authy authentication request on your device, accept it. You’ll see the status events end, followed by an islogged event, and the application will redirect you to the /home route, where you will see the “protected-page works!” message.
Refresh the browser tab. Because you have previously logged in successfully, the authentication cookie has been set, so the /login page will immediately begin displaying “Waiting for second factor” and the Network tab will begin displaying status messages.
You do not need to enter the User ID or Password, you do not need to to check the Remember me checkbox, and you do not need to click the Login button.
You should have also received an authentication request from the Authy app on your device. Approve it to complete the login sequence.
Just like that, you have logged into the application with a single tap! The login process is secure because it will only work if you are logging in on the device from which you have previously logged in successfully and authenticated yourself with the Authy app on your device.
If you want to catch up to this step, or compare your work to the code in the project repo, follow these steps:
Execute the following command line instructions in the directory where you would like to create the project:
Add your Authy Production API Key and user Authy ID in the server.ts file, as described above.
Execute the following npm command line instructions in the angular-authy-remember directory:
Perform the steps in the Test the completed application section.
Summary of expedited two-factor authentication with Angular and Twilio Authy
In this post you learned how to add “remember me” functionality to an Angular Universal + Node.js application. You also learned how to use the Angular TransferState object and a security cookie to identify returning users. You made it possible for returning users to log into an application with one tap on the Authy app, bypassing the step of re-entering their credentials while maintaining the added security of two-factor authentication. Cool beans!
Additional resources
@angular/router API documentation, including the Resolve interface.
Authy API for the complete API documentation for Twilio Authy.
jwt.io to learn more about the JSON Web Token and its capacity to carry data in a standard format and add additional security to web apps.
Maciej Treder is a Senior Software Development Engineer at Akamai Technologies. He is also an international conference speaker and the author of @ng-toolkit, an open source toolkit for building Angular progressive web apps (PWAs), serverless apps, and Angular Universal apps. Check out the repo to learn more about the toolkit, contribute, and support the project. You can learn more about the author on his website. You can also contact him at: contact@maciejtreder.com or @maciejtreder on GitHub, Twitter, StackOverflow, and LinkedIn.

Related Resources
Twilio Docs
From APIs to SDKs to sample apps
API reference documentation, SDKs, helper libraries, quickstarts, and tutorials for your language and platform.
Resource Center
The latest ebooks, industry reports, and webinars
Learn from customer engagement experts to improve your own communication.
Ahoy
Twilio's developer community hub
Best practices, code samples, and inspiration to build communications and digital engagement experiences.