Email Notifications with Twilio SendGrid and Firebase Functions
Time to read:
In this article, we're sending an email notification to all the registered users of our demonstration knowledge base, Twiliog. This is the second step in our build process for the broader app. (You can read more here.)
Here, you'll learn how to build, deploy and connect Twilio APIs through Cloud Functions for Firebase using react-redux libraries.
Prerequisites
If you haven’t followed the build from the beginning and are interested in setting up notifications, you’ll need to set up a few accounts (and change a few settings) before we begin.
- Set up a Firebase Account
- Note you need to sign up for Firebase Blaze pricing, if you haven’t yet
- We're using a Firebase account to store all the blog author's information.
- Create a new Project
- Set up a Sendgrid Account
- We use SendGrid to send emails notifying new authors that their 2FA account is verified and they're ready to publish articles on our Twiliog site.
- Set up a Twilio account and buy a number.
- If you haven't yet, sign up for a free Twilio Account
- Purchase a phone number from the Console if you don't yet have one (you'll need one with SMS capability).
- Deploy Firebase functions
- Google Cloud Functions is Google's serverless computing solution for creating event-driven applications. Cloud Functions serve as a connective layer allowing you to weave logic between Google Cloud Platform (GCP) services by listening for and responding to events.
- Follow the instructions specified in the previous article.
Set up your dev environment
Clone the git repo or download it.
Navigate to the project folder and install the dependencies.
Start up the frontend with:
Set up Firebase
Next, we will install the Firebase CLI.
Navigate to the ‘functions’ folder and install the dependencies:
Install Firebase CLI in the functions folder:
Now, log into Firebase:
Select the project you want to use:
Switch to your new project with:
Update the Twilio config information
In twiliog > functions > src > .env, update the environment variables with your Twilio credentials:
Update the Firebase config information
In twiliog > src > config > fbConfig.js. Update the firebaseConfig settings with your own project info:
Deploy the functions
Navigate back to your project folder from the functions folder.
To deploy the functions to Firebase functions:
If there are any errors, you can display Firebase logs with:
Firebase Rules
Next, you’ll need to set your Firebase rules. You can use the following settings:
SendGrid setup
Now, we’ll move on to our SendGrid setup, which is how we’ll be sending the notifications. You can also see our Node.js Quickstart here.
Start by npm installing the sendgrid package:
Create a config.js file under function with:
Create an .env file under functions with the SendGrid API key:
Finally, install dotenv:
Next, we’ll move into the SendGrid console.
Steps in the SendGrid console
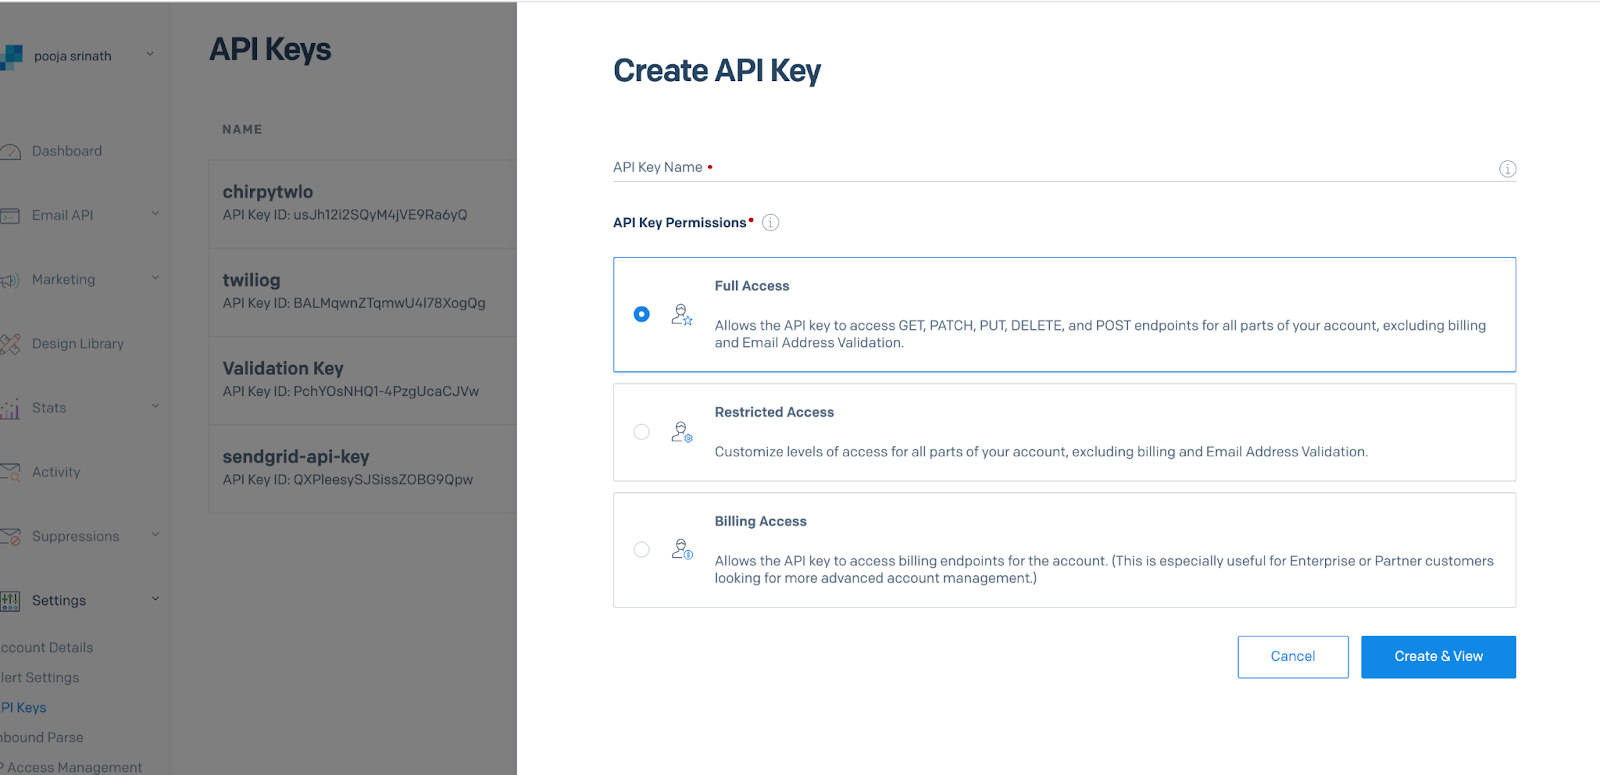
Create an API key under the API Keys section of the SendGrid console. Create a new API Key with Full Access.
Next, create an email template for your notifications through the design library:
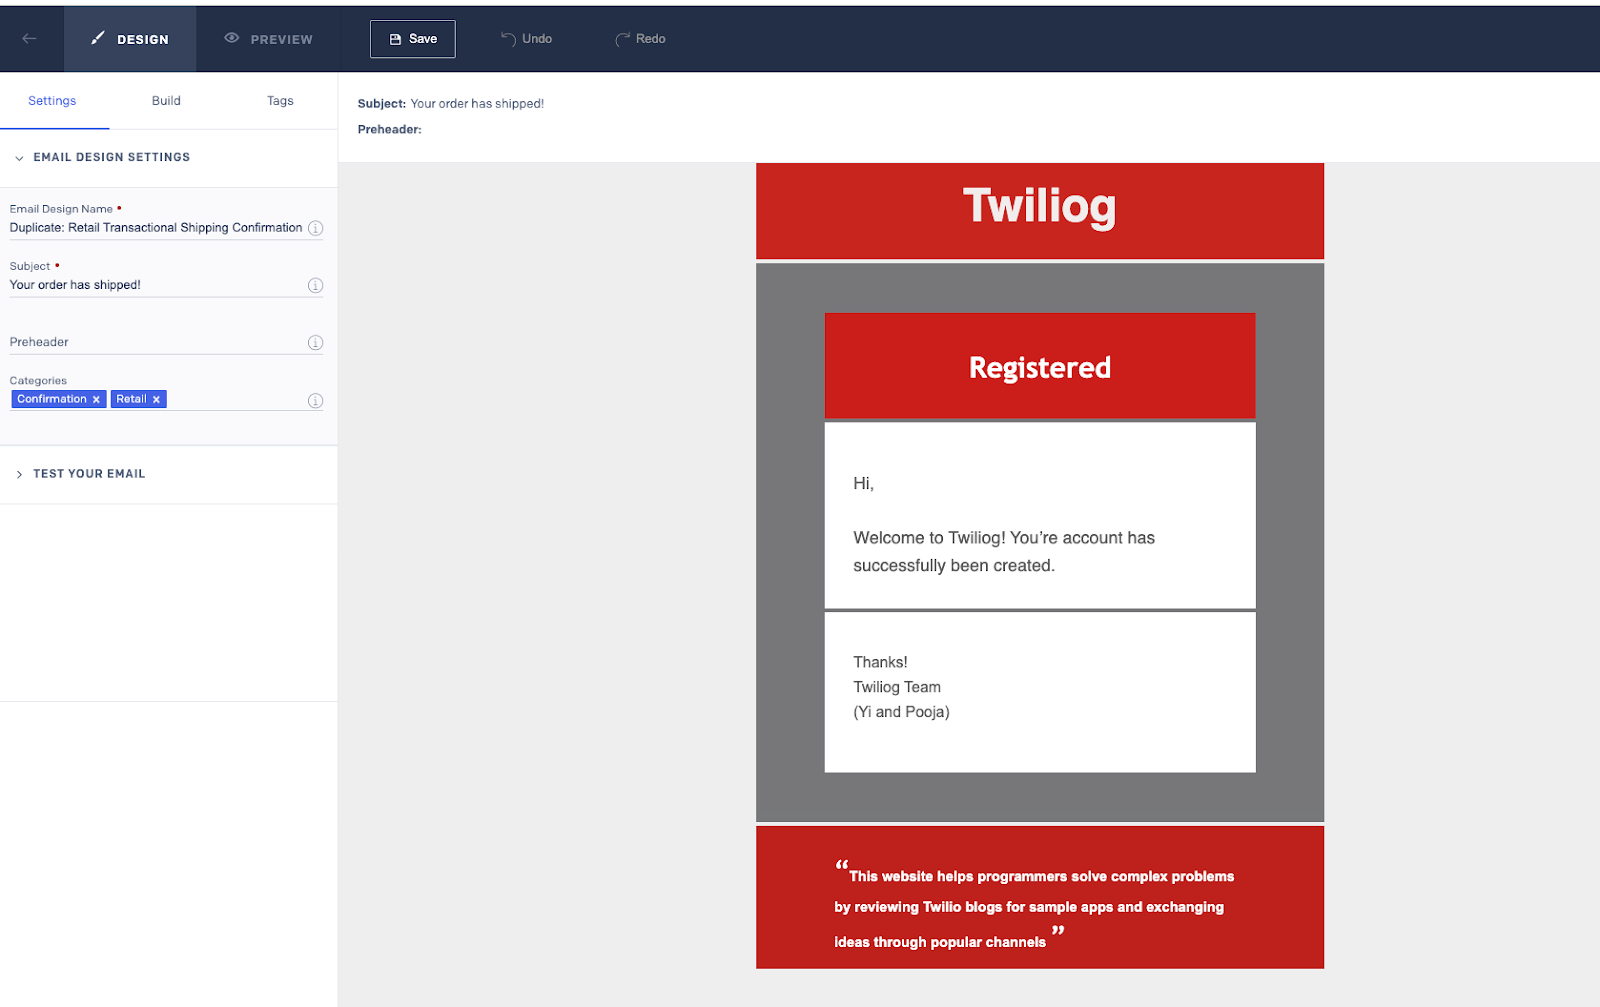
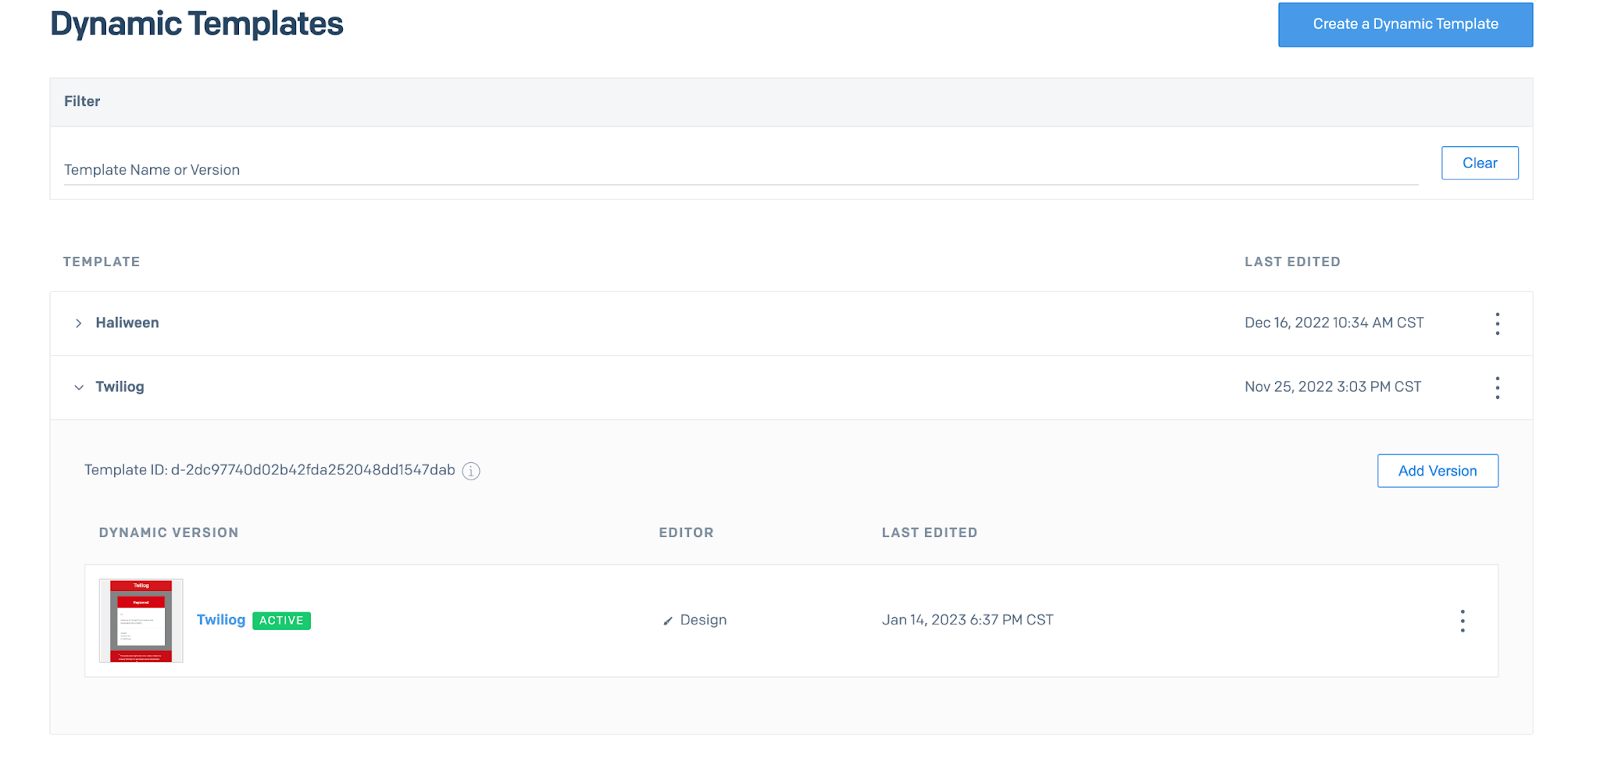
Once you’re happy with the mail, publish it and save the resulting template ID. We will be using it in a few steps.
Steps in the Firebase console
Deploy the function using the following code snippet:
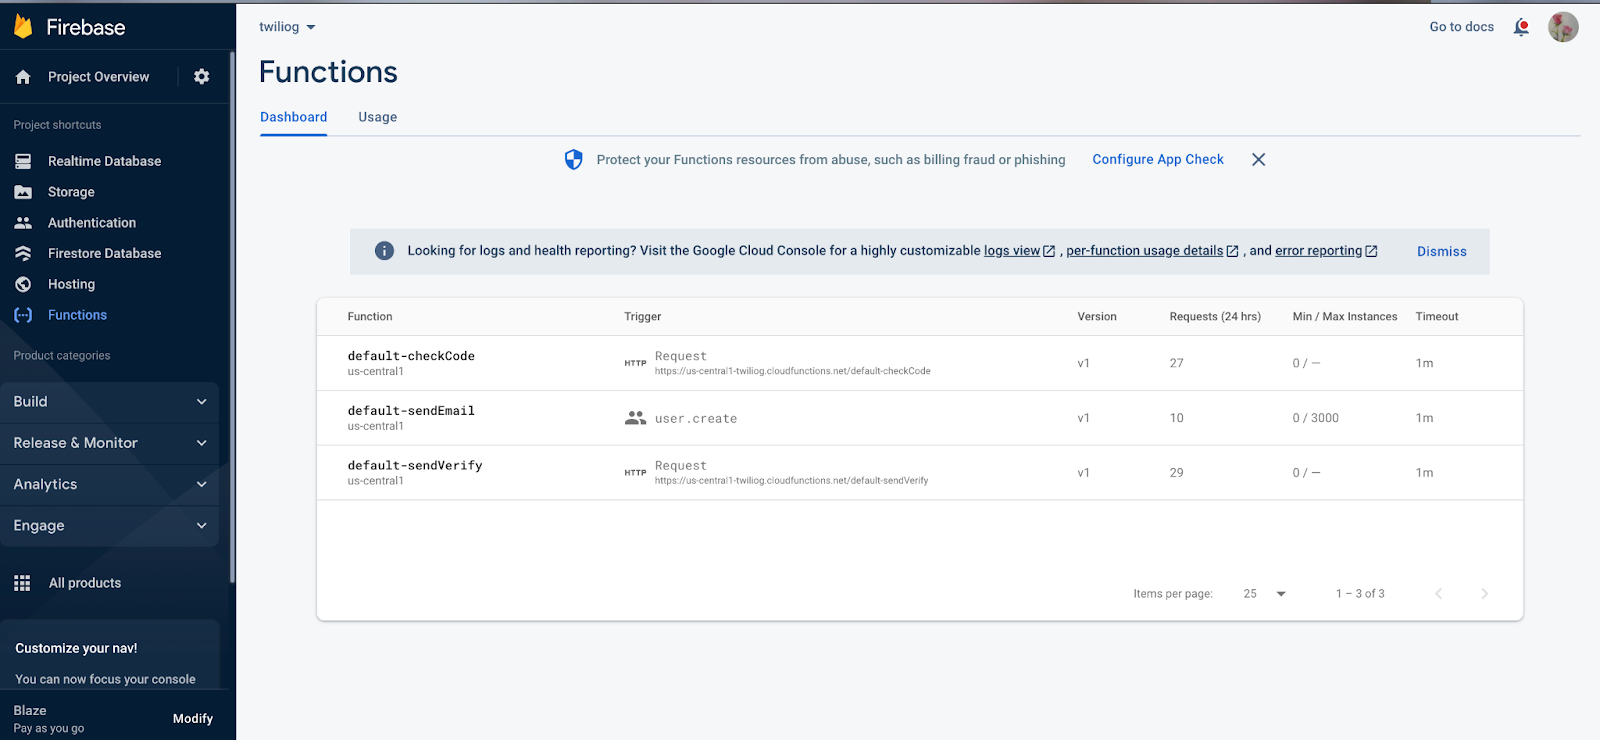
Let that command complete, then check if the Function is deployed in your GCP console. In your Functions Dashboard, you should see a list of your deployed functions.
Architecture diagrams
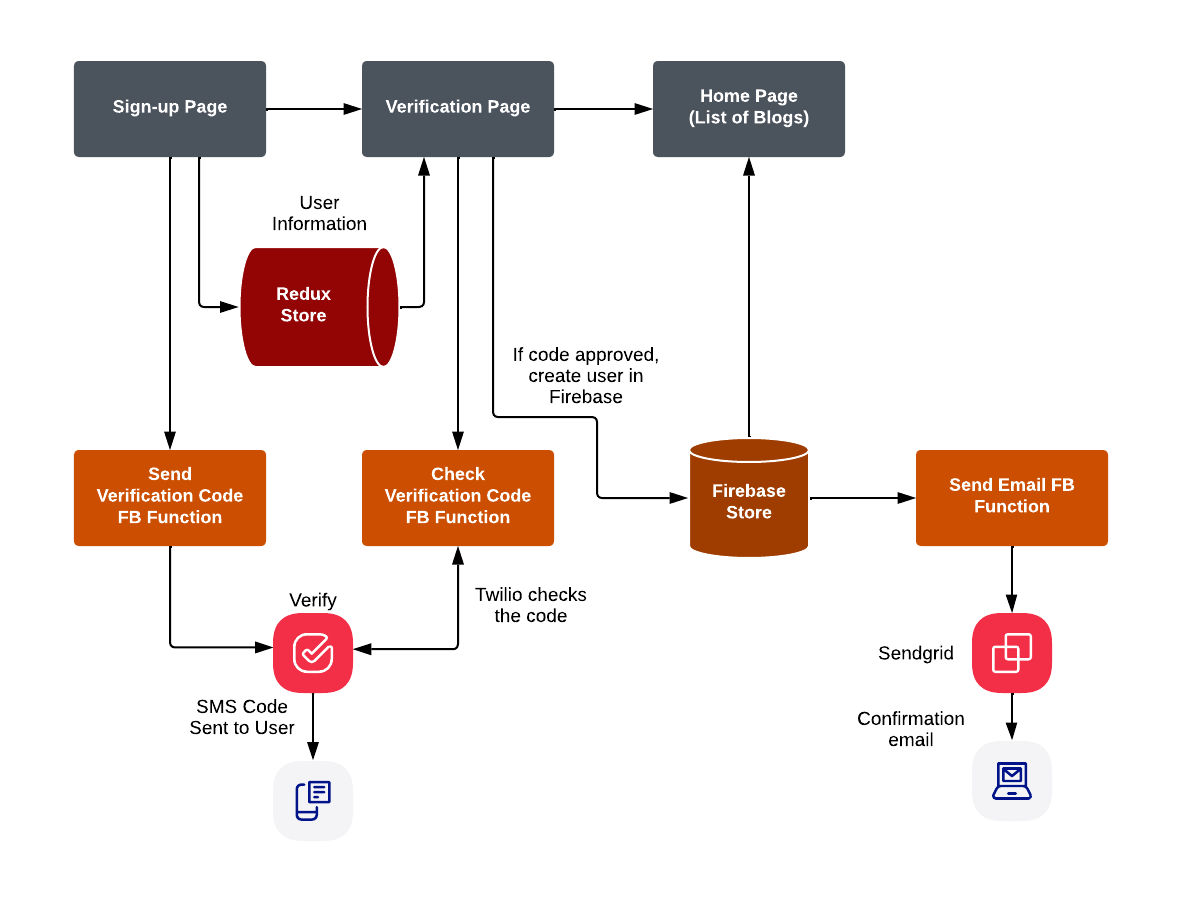
Here’s the architecture of the feature that we built using this methodology.
Code Explanation
Twiliog is built using the react-redux programming methodology.
We have a store to keep track of users, we dispatch actions to create entries in the Firebase store, and finally, upon creation of the user, we run a Firestore Function to send out an email to the new author upon account creation.
We recommend storing the SG keys in the .env files. The keys start with SG. These keys are accessed through the config file as shown below:
Which, in order, accesses the Sendgrid API key, Twilio Account SID, and Auth Token.
The following code is called whenever there is a new entry in the Firestore user collection. From the collection we grab the to email address and send the mail from the id yitpoojas@gmail.com. The body of the email is created through the dynamic templates that are available in the SendGrid portal. We just attach the template id – which we copied in an above step – in our code below:
And there you have it – you now have a notification email sent out when a blog author registers.
Link to Github
Here is the link to the GitHub repo, a work-in-progress website to include more Twilio modules.
Conclusion:
Through this article, you learned how straightforward it is to connect Firebase with SendGrid APIs and send out email notifications to new blog authors with just a few lines of code. Read more about the full Twiliog project, here.
About Authors
Pooja Srinath is a Principal Solutions Engineer at Twilio. She's focused on learning new software technologies that help create solutions, address use cases, and build apps to solve some of the industry's most challenging requirements. Pooja uses Twilio's powerful communication tools & APIs to build these ideas. She can be found at psrinath [at] twilio.com.
Yi Tang is a Senior Solutions Engineer at Twilio. She loves helping Twilio's customers achieve their business goals and is always looking for ways to improve and optimize their use of Twilio products. She can be found at ytang [at] twilio.com
Related Posts
Related Resources
Twilio Docs
From APIs to SDKs to sample apps
API reference documentation, SDKs, helper libraries, quickstarts, and tutorials for your language and platform.
Resource Center
The latest ebooks, industry reports, and webinars
Learn from customer engagement experts to improve your own communication.
Ahoy
Twilio's developer community hub
Best practices, code samples, and inspiration to build communications and digital engagement experiences.


