Create a Daily Inspirational Quote App Using Laravel, Twilio, and OpenAI
Time to read:
July 02, 2024
Written by
Reviewed by
Create a Daily Inspirational Quote App Using Laravel, Twilio, and OpenAI
In our fast-paced lives, staying motivated and inspired can sometimes be challenging. Yet, it's essential for our mental health and for maintaining our overall productivity. Whether you're a budding entrepreneur, developer, or simply interested in personal development, the app we'll develop in this tutorial aims to bring a splash of inspiration to your daily routine.
The idea behind receiving a daily inspirational quote is simple, yet profound. These small nuggets of wisdom can set a positive tone for your day, boost your motivation, and help you navigate through the challenges with a better mindset.
To bring this idea to life, the following technologies will be used in this tutorial.
- Laravel 11.X
- Twilio's Programmable Messaging API
- ChatGPT's API (version: gpt-3.5-turbo)
Prerequisites
The following prerequisites are required to follow along with the tutorial:
- PHP version 8.2 or higher
- Access to a MySQL database; You can use Laravel Sail to manage one locally, if you prefer
- Composer installed globally
- A Twilio account. If you don't have one, you create a free one
- An OpenAI account and API key
The application will have two major features. The first will enable users to add their phone numbers to the list of numbers to receive daily quotes. The second will be a cron job to send out the ChatGPT-generated quotes to users' phone numbers.
To achieve this, we will create a custom Laravel command to get phone numbers, send chat GPT-generated inspirational quotes to them, and create a scheduler task to run this command at regular intervals.
Project setup and configuration
Let's dive right into and build this application. To get started, we need to create a fresh Laravel application and configure the database. Create a new Laravel project and change into the new project directory using the commands below.
Database setup and configuration
We next need to set up and configure our database. First, create a new database on your MySQL server. Then, modify the default database configuration, which can be found in the .env file, to match corresponding values of your MySQL server.
Assuming the example configuration above, make sure you replace <<DB_NAME>>, <<DB_USER_NAME>>, <<DB_PASSWORD>> with.
Add phone numbers to the list
Let's proceed to create the first section of the application that allows users to register their phone numbers, and receive our AI-generated daily inspirational quotes. To get started, let's create a controller, model, and migration using the command below.
The command above will create a Subscribe.php file in app/Models directory, SubscribeController.php file in app/Http/Controllers and _create_subscribes_table.php in database/migrations. Let's proceed to update the contents of these files.
Open the newly created migration file above and replace the contents with the following.
The next thing to do is to open app/Http/Controllers/SubscribeController.php and replace the content with the following.
In the controller class above, we created two methods: index() and save(). The index() method returns a Blade template, subscribe.blade.php, (which will be created shortly) that contains the HTML for the form users need to register new phone numbers.
The save() method validates the request, stores the request data in the database, and redirects the user back to the page with a success message or error in the case of a validation error.
There's one more step before the request data can be stored in the database. We need to add the name and phone values to the protected $fillable = [''] property. In app/Models/Subscribe.php, replace the contents with the code below.
We also need to run our migration to ensure the DB schema is created. Run migration using the command below
Let's create a Blade template to display the form for adding new phone numbers to the recipient list. To keep things a bit organized, let's create a layout file. This will be a Blade component. with the command below.
The command above will create two files: app/View/Components/layout.php and resources/views/components/layout.blade.php. app/View/Components/layout.php contains a render() function that returns the view to the resources/views/components/layout.blade.php.
Replace the contents of resources/views/components/layout.blade.php with the code below.
In the code above, we added the HTML elements needed for every page. We also imported the Tailwind CSS library using the Tailwind CSS CDN. This way, Tailwind CSS becomes available on every page. To use the layout file, we need to add it as a Blade component to the rest of the pages.
Let's proceed to build the form. Create a new file named subscribe.blade.php in the resource/views directory. Then, replace the content of the newly created file with the code below.
We now need two routes; one to display the form, and the other to handle the submit request. To define them, in routes/web.php add the following.
Then, add the following use statement at the top of the file:
At this point, we can serve our application and make sure the form submission works before proceeding, by using the command below.
In a different terminal run these commands also.
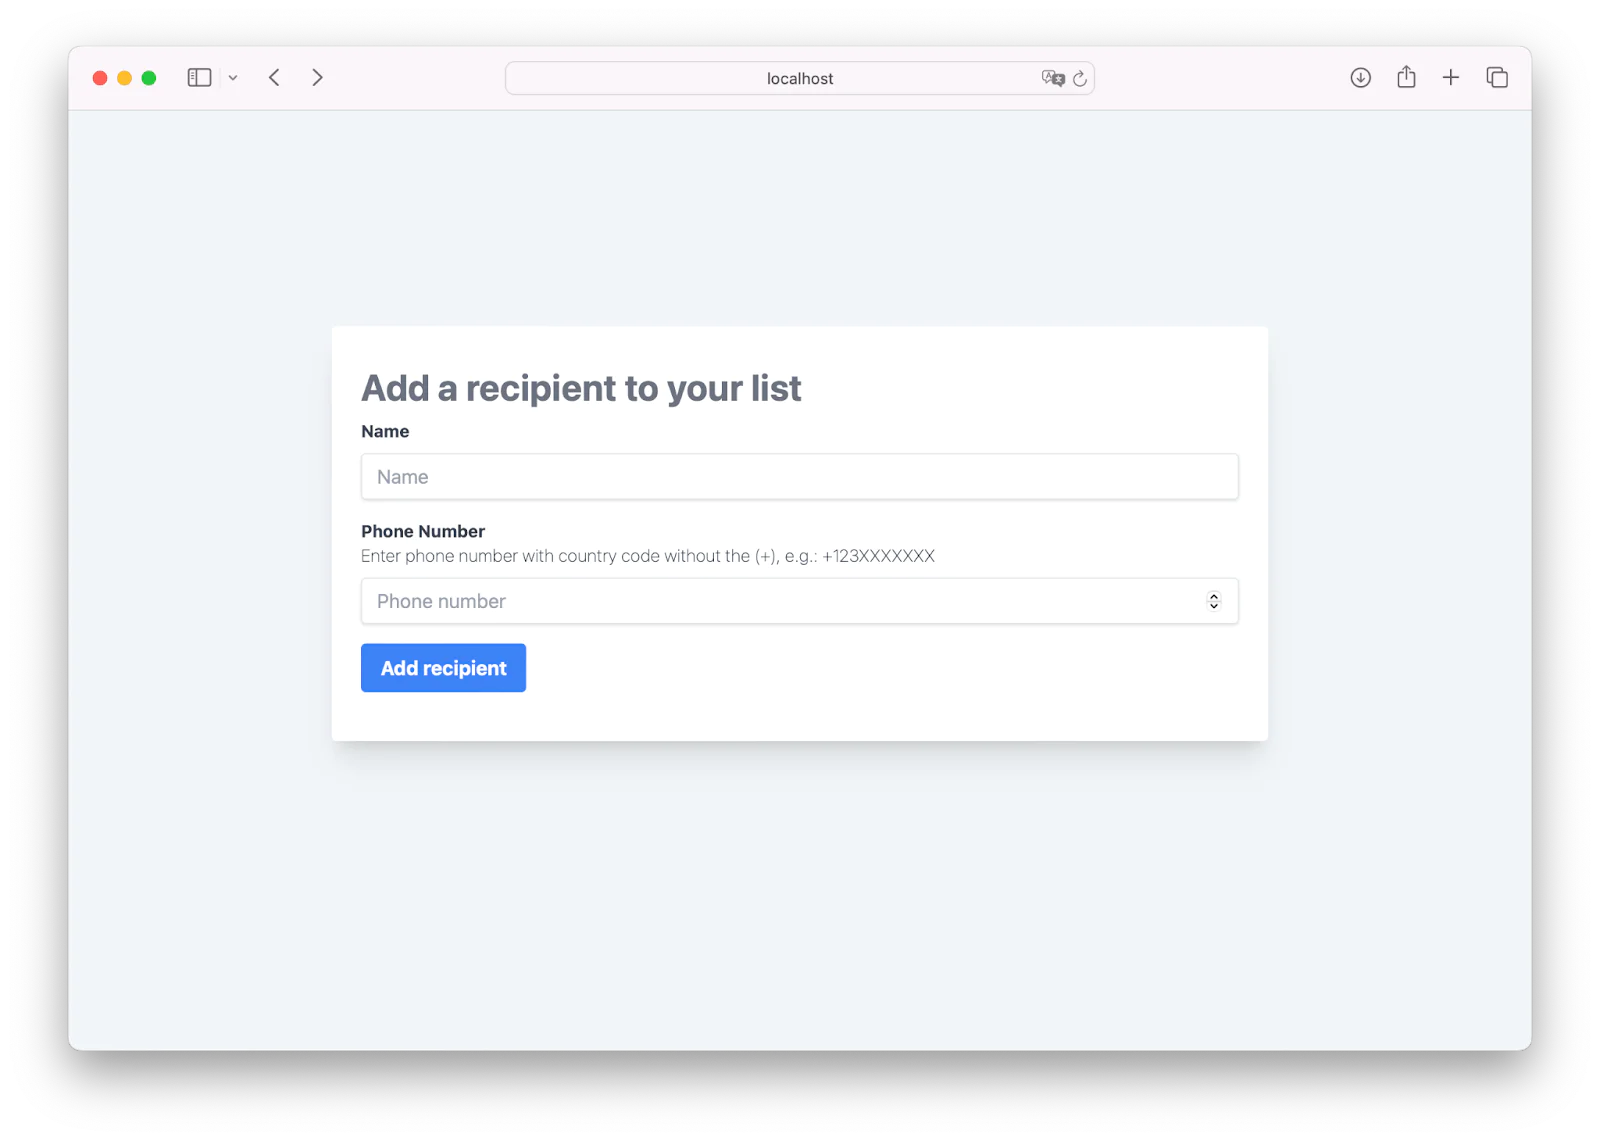
If you have done everything right, if you open http://localhost:8000, it should look just like the image below.
Integrate with Twilio for SMS functionality
Now, we can add users to receive daily inspirational quotes in our application. With that out of the way, let's proceed to implement the SMS sending feature using Twilio Programmable Messaging.
First, we need to install the Twilio PHP Helper Library. Do that with the Composer command below.
Let's create a service class for our Twilio implementation. Create a new Services folder in the app directory. Then, create a new file named TwilioSms.php in the Services folder. After that, copy and paste the code below into app/Services/TwilioSms.php.
The class' constructor uses your Twilio Account SID and Auth Token to create an authenticated connection to Twilio. The sendSms() method accepts the AI-generated inspirational quote as an argument, fetches all the phone numbers from the database, and sends the quote to them one after the other using a for-each loop.
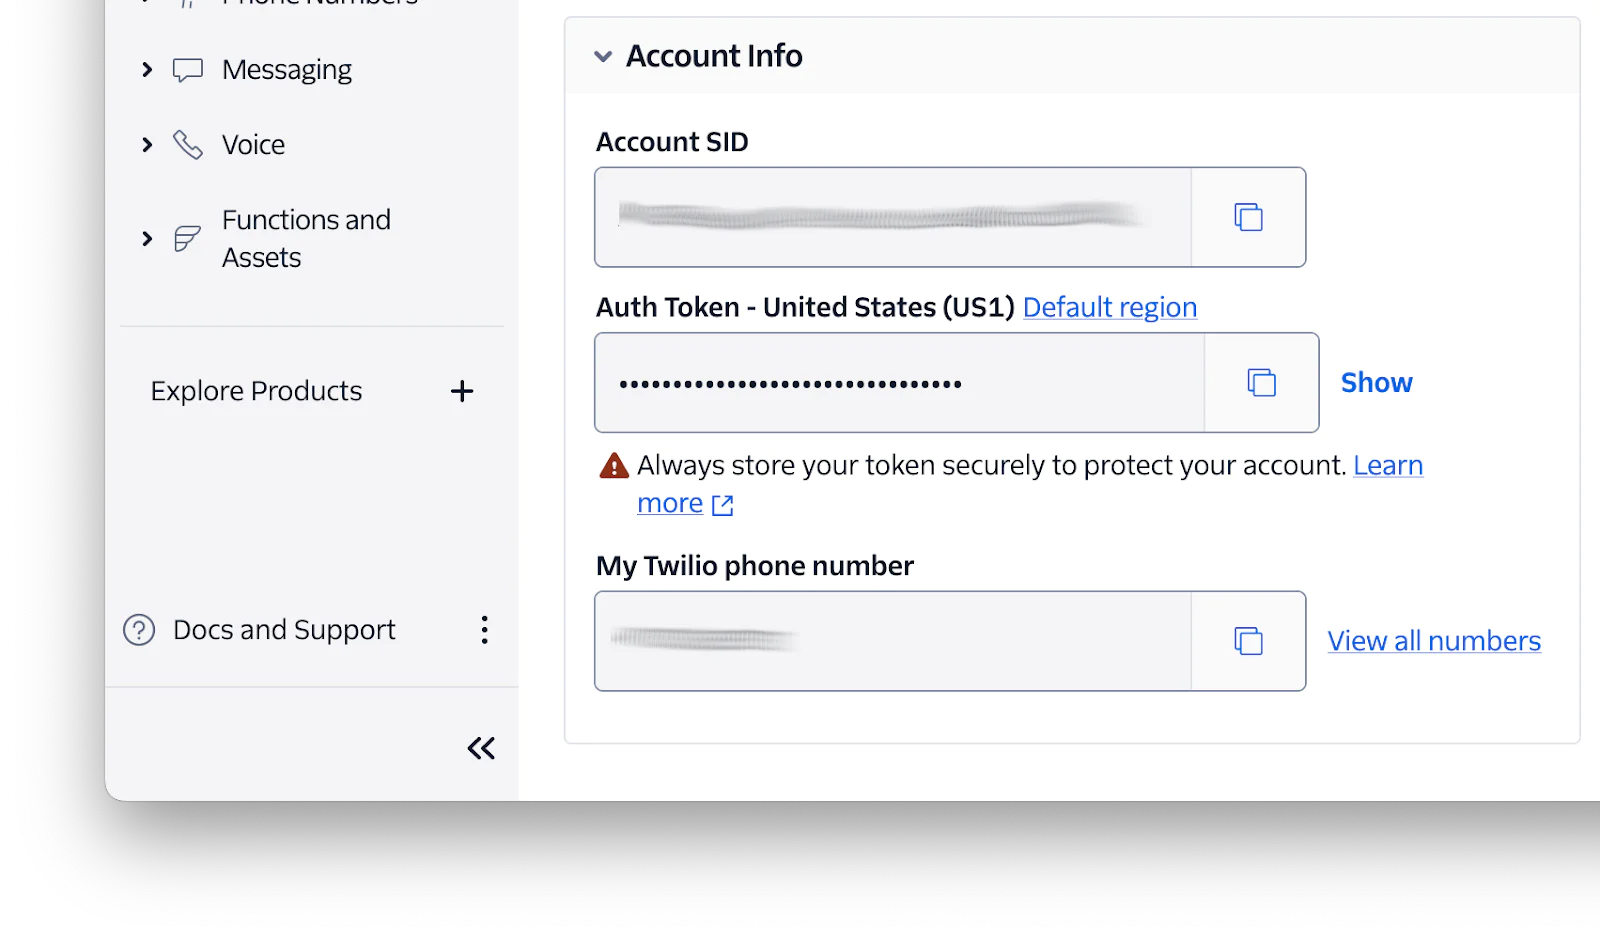
The code above pulls in our Twilio credentials from the .env file. Let's add these details to thefile by adding the following lines of code, then replacing the three placeholders with our actual Twilio credentials.
You can find these details on your Twilio Console dashboard, as shown in the image below.
Integrate OpenAI for content generation
Just like the Twilio service class above, let's create one for the OpenAI API call. In the app/Services directory create a new file named AiQuote.php and add the code below to the class.
Then, add the OpenAI credentials, below, to your .env file, and replace `<>` with your OpenAI API key.
Then, <<REPLACE WITH YOUR PROMPT>> should be replaced with your prompt.
In the AiQuote.php service, we connected to the OpenAI API from the __controller() method using the API key and URL from the .env file. In the generateMotivationalQuote() method, we made the actual API call with the API key passed along in the header to generate a motivational quote.
Schedule the daily inspirational messages
Now we have our services for generating inspirational quotes and sending SMS to registered phone numbers. The final two steps would be to create an Artisan Console command to fire off the quote generation, SMS sending, and schedule that command to run at a scheduled interval.
Let's start by creating the Artisan command using the command below.
The command will create a new command class name SendAiQuote.php in the app/Console/Commands directory. Open this file; we are mostly concerned about the handle() method. Then, replace the handle() method with the code below.
We passed the AiQuote and TwilioSms service classes as arguments to the `handle()` method. Then, we generated a quote by calling the generateMotivationalQuote() method on $AiQuote. The return value is passed to the sendSms() method of the $twilioSms service, which loops through the phone numbers and sends the quotes as an SMS.
Now, we need to schedule this command to run daily. To do this, replace the content of app/Console/Kernel.php with the code below.
Then, in routes/console.php, add the following to the bottom of the file:
These changes fire our Artisan command every 24 hours (daily). Each time, the request's result will be stored in a log file named task-output.log located in the storage directory directory.
Before testing, we need to reconfigure the frequency of the scheduled task from daily to everyMinute so that we won't have to wait for a whole day before we can see the result. In routes/console.php, update the call to Schedule::command with this:
Test that the application works as expected
After reconfiguring our cron job to fire every minute, run the following command to run the scheduled code in the foreground until the command is canceled.
This command works for testing on a local machine. Check the Laravel documentation for a detailed explanation of how to configure this for a production environment.
You should receive the SMS in the test phone number in less than no time.
That's how to create a daily inspirational quote app using Laravel, Twilio, and OpenAI's API
We've successfully developed a daily inspirational quote app leveraging Laravel, Twilio, and the OpenAI API. This guide walked you through several key steps:
- Setting up a new Laravel application and configuring its database
- Implementing a functionality that allows users to register their phone numbers
- Utilizing OpenAI to generate motivational quotes and dispatching them as SMS messages through Twilio's programmable voice service
- Crafting an artisan command to automate the task, which is programmed to execute daily
This project not only demonstrates the practical integration of Laravel, Twilio, and OpenAI to create a meaningful application but also lays the groundwork for further innovation. Feel free to delve deeper into the capabilities of these technologies.
Moses Anumadu is a software developer and online educator who loves to write clean, maintainable code. He's creating something awesome for Laravel developers with Laravel.


Related Resources
Twilio Docs
From APIs to SDKs to sample apps
API reference documentation, SDKs, helper libraries, quickstarts, and tutorials for your language and platform.
Resource Center
The latest ebooks, industry reports, and webinars
Learn from customer engagement experts to improve your own communication.
Ahoy
Twilio's developer community hub
Best practices, code samples, and inspiration to build communications and digital engagement experiences.