Building a WhatsApp Image Editor with Twilio, Replicate, and Ngrok
Time to read:
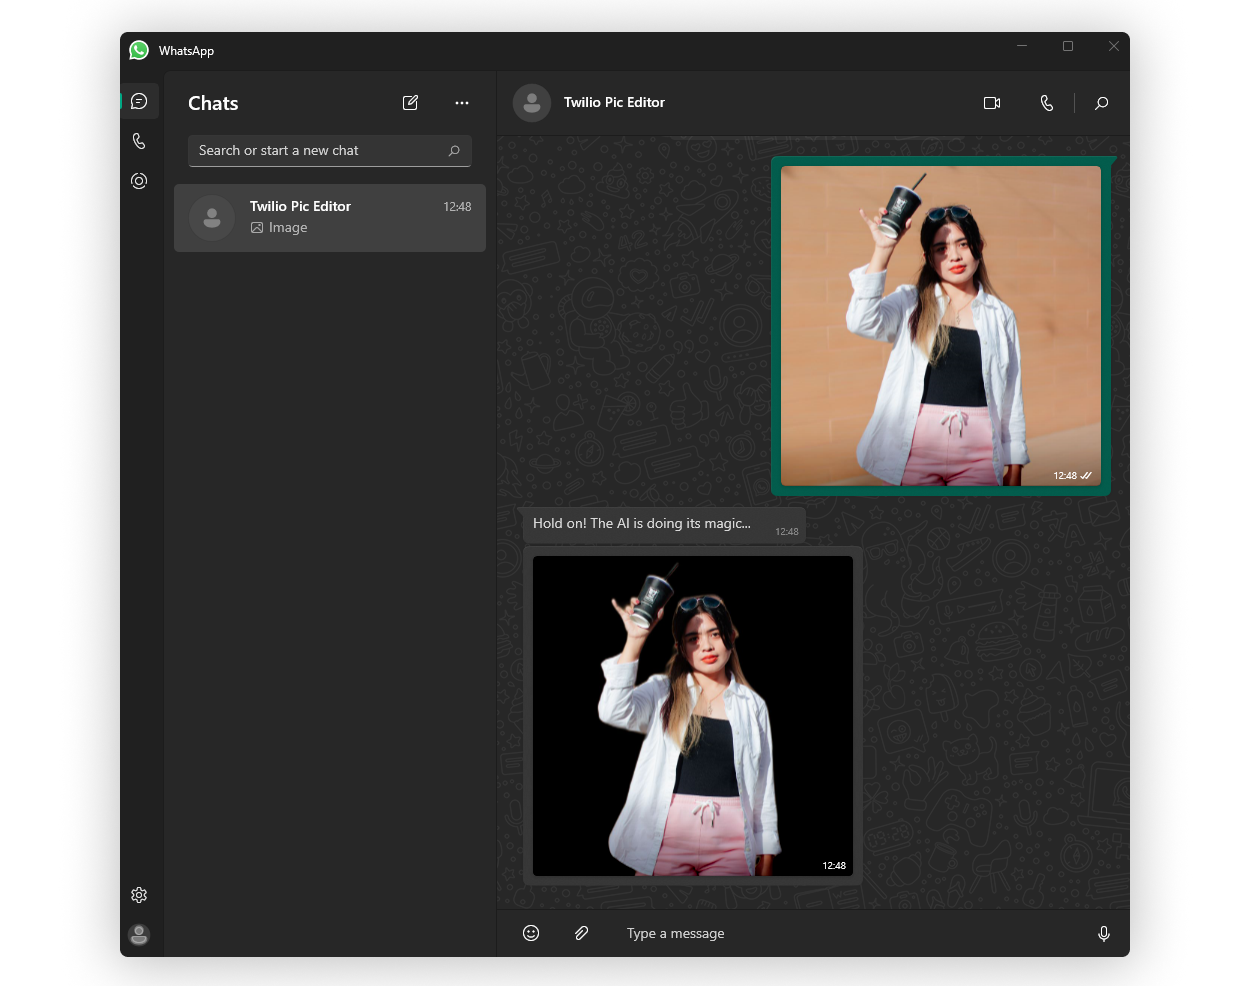
Have you ever wanted to create a cool image editing service accessible through WhatsApp? Well, you're in luck! In this tutorial, we'll walk you through the process of building a WhatsApp image editor using Twilio’s WhatsApp API, Replicate, and Ngrok. So buckle up and get ready to dive into the exciting world of AI image editing!
Prerequisites
Make sure you have these prerequisites in place before proceeding with the tutorial.
- Node.js v18+ installed on your machine.
- VS Code or another IDE of choice.
- A Twilio account. If you don't have one, sign up for a free account.
- The ngrok CLI - For testing purposes. Ngrok creates a secure tunnel to expose your local server to the internet.
- A Replicate account (you’ll need to sign in with Github) - Replicate is an AI platform that we'll use for image editing.
Now, let's dive into building the WhatsApp image editor!
Setting up the Project
First things first, let's set up your project. Open your terminal and follow these commands:
This will create a new directory for your project, initialize a new Node.js project, and install the necessary dependencies.
Great! Now, let's create a file called index.js and write the following code:
In this code, we're requiring the necessary dependencies, setting up an Express server, and creating a POST route for handling your incoming messages. When a message is received, we simply send back an HTTP 200 status code to acknowledge the receipt. Don't worry, we'll add more functionality to this route as we go along.
Twilio Setup
To make your WhatsApp image editor work, we need to set up Twilio and connect it to your WhatsApp account using the Twilio Sandbox for WhatsApp. If you haven't done so already, sign up for a Twilio account and follow the instructions in the Twilio Sandbox for WhatsApp documentation to enable your Twilio numbers for WhatsApp.
Once you have your WhatsApp account connected, head over to the WhatsApp Sandbox in your Twilio Console. If you can't find it, click on Messaging in the left sidebar or Explore Products to display the available products. Then, click on Try it out and select Send a WhatsApp message from the dropdown.
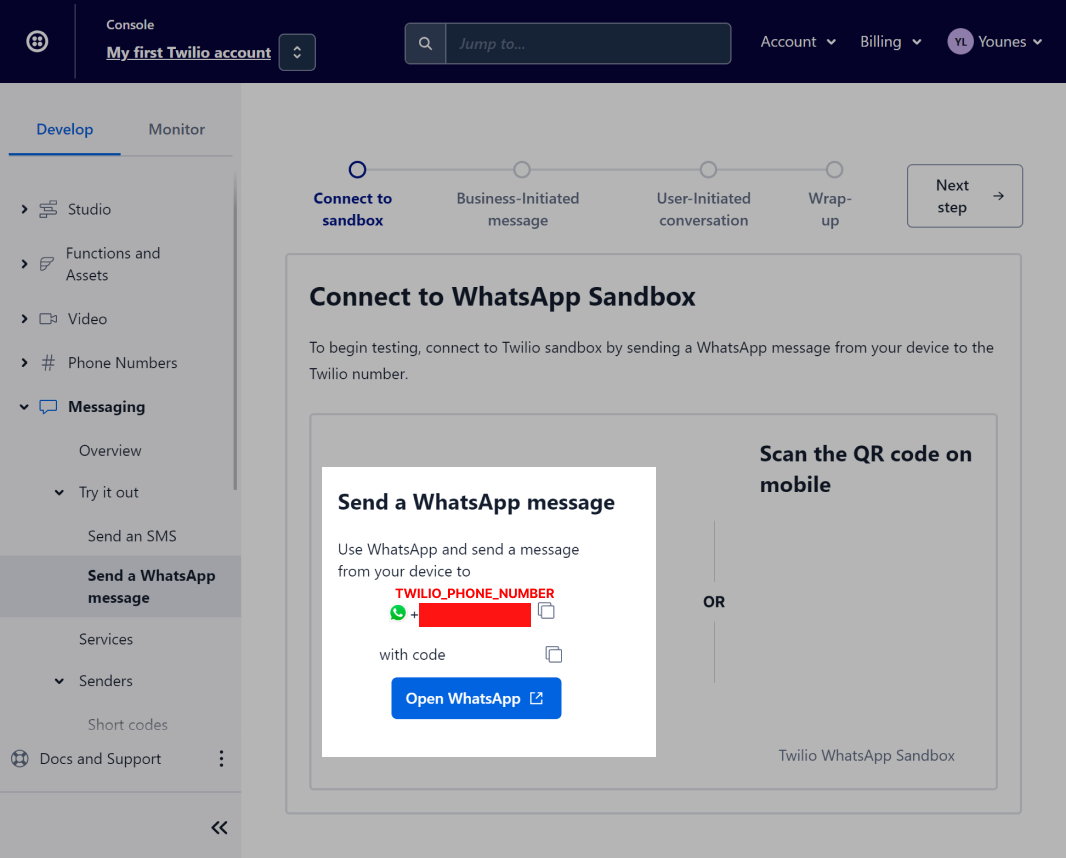
Now, let's put your Twilio phone number given to you from the sandbox in the TWILIO_PHONE_NUMBER environment variable. Make sure to remove the whatsapp: text before the number. Create a file called .env in the project directory and add the following line:
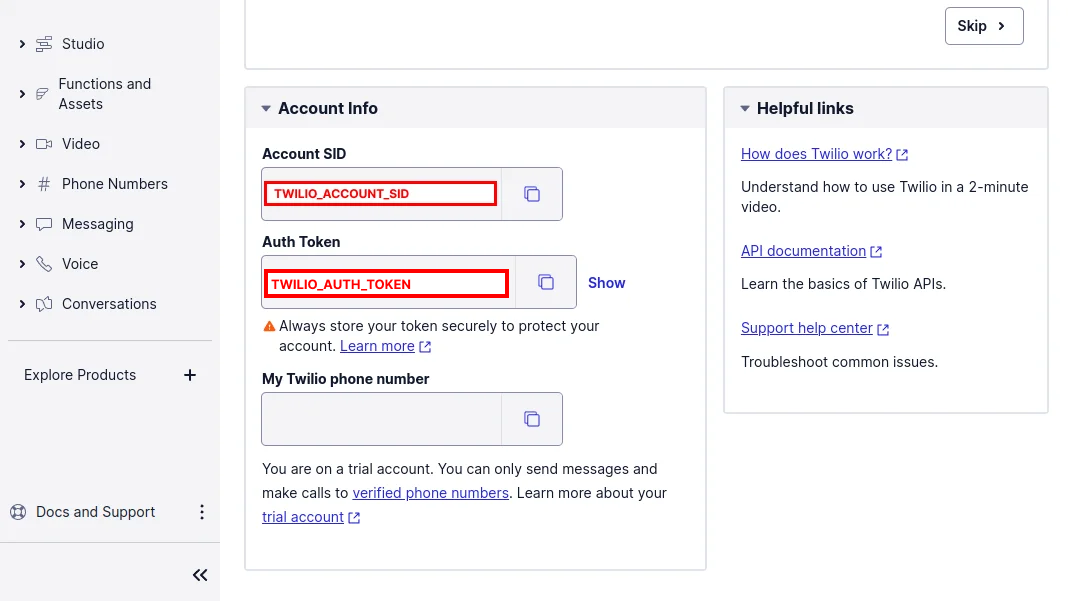
Next, go to your Twilio dashboard and grab your account SID and auth token. Add the following lines of code to the .env file:
We'll need these values to interact with the Twilio API so don’t forget to replace the placeholders with their actual values. Now run this command so we can interact with the Twilio API with their Node.js helper library:
Add the following code to index.js:
In this code, we're importing the MessagingResponse class from the Twilio library, retrieving the Twilio account SID and auth token from the environment variables, and creating a Twilio client instance that we'll use to send messages later on.
Replicate Setup
To perform the image editing magic, we'll be using Replicate, a powerful AI platform.
To get started with Replicate, follow these steps:
1. Create a Replicate account and sign in with your GitHub credentials.
2. Grab your API token from the Replicate dashboard, and add it to the .env file:
Now, let's add the Replicate setup to your project.
Run this command to install the Replicate npm package:
In the project directory, create a new directory called services. Inside the services directory, create a file called bgErase.js. This file will handle the background removal process.
Add the following code to bgErase.js:
In this code, we're importing the Replicate library and creating a new instance of the Replicate class with our API token obtained from the Replicate dashboard.
Ngrok Setup
To make your local server accessible to Twilio and receive messages from WhatsApp, we'll use Ngrok. Ngrok creates a secure tunnel to expose your local server to the internet. Let's set it up:
1. Install the Ngrok CLI.
2. Create a Ngrok account and sign in with your GitHub credentials. This step is important because the default 2-hour sessions won't work in this project.
3. Run the authentication command provided by Ngrok in your terminal. This command will authenticate your account.
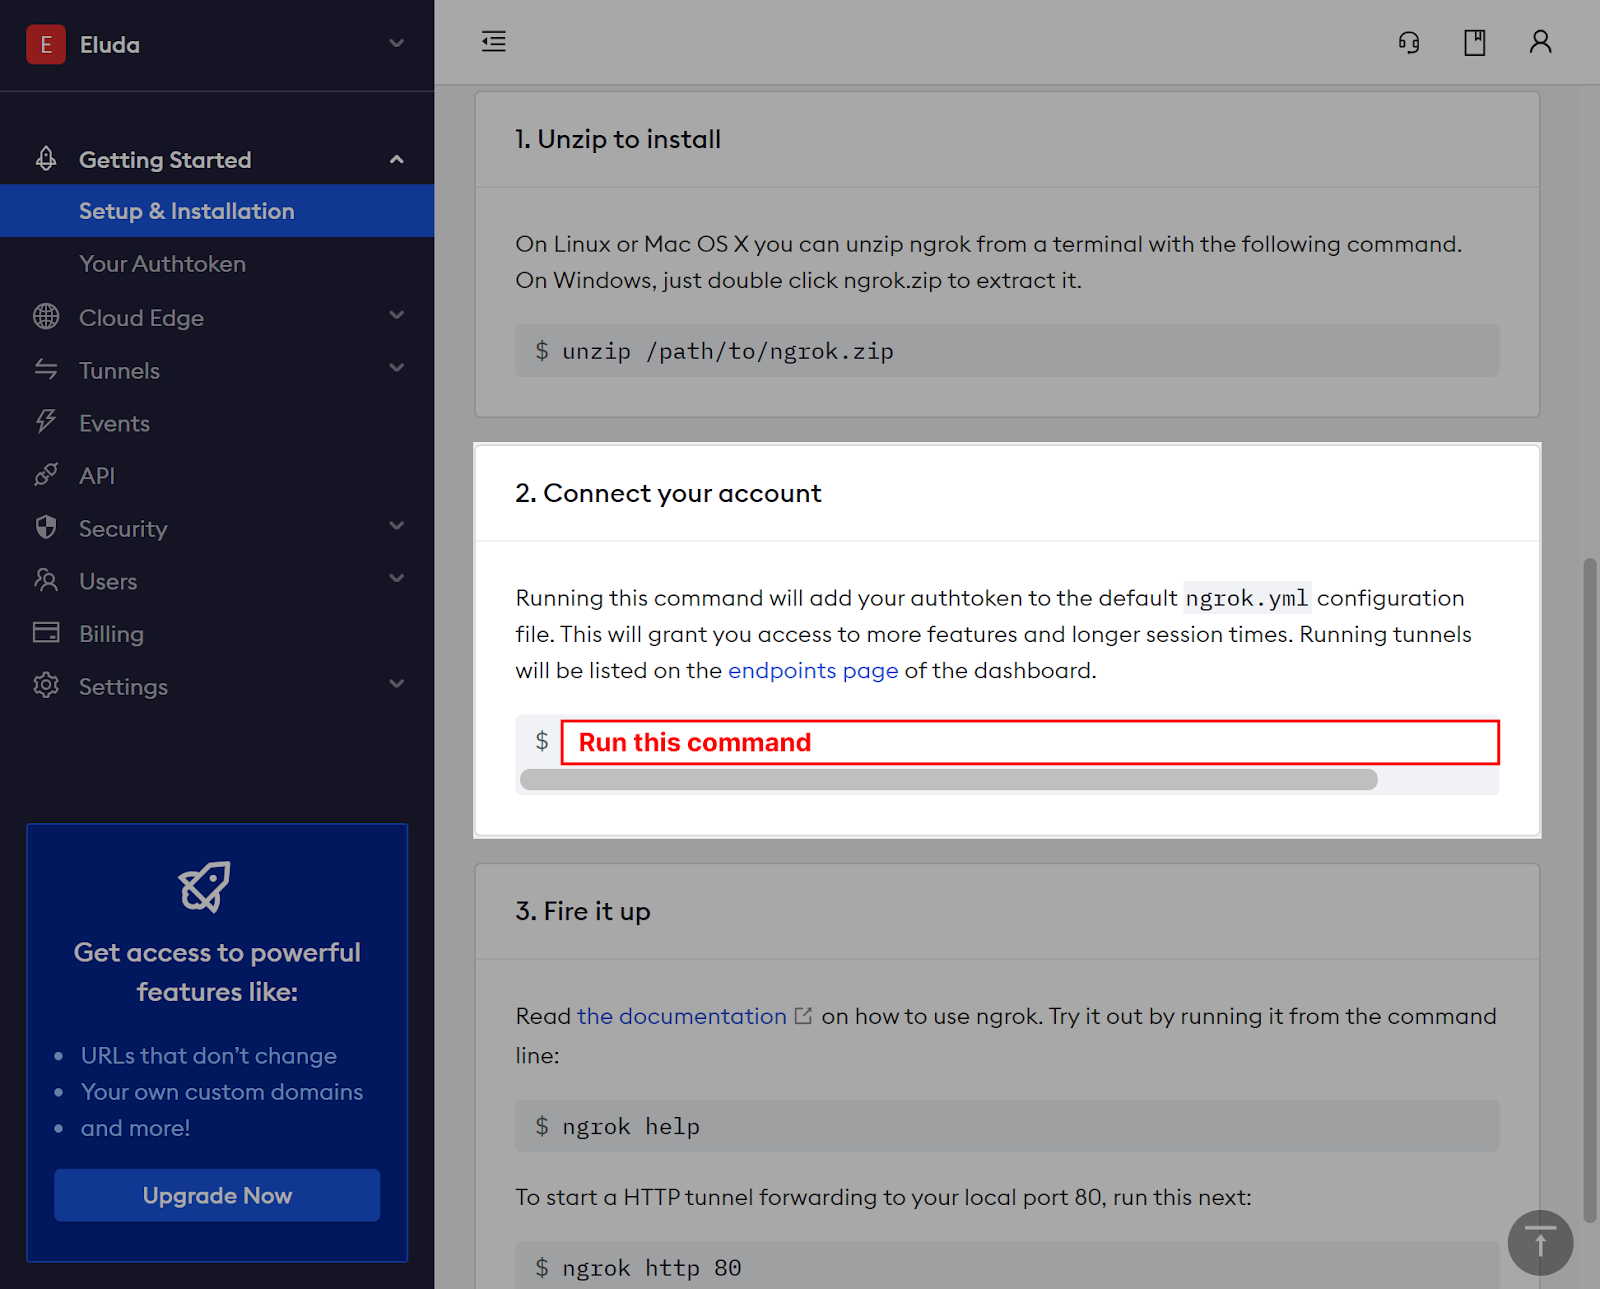
4. Install Ngrok in your project:
5. Add the following code to the end of index.js:
In this code, we're importing the Ngrok library, starting the server on port 3000, and using Ngrok to create a tunnel to your local server. The Ngrok URL will be stored in the NGROK_URL environment variable, which we'll use later.
Building the WhatsApp Service
Now it's time to add some functionality to your WhatsApp image editor. Let's handle the incoming messages and process the images. Add the following code to index.js, replacing the existing /message route:
In this code, we're extracting the URL of the sent image and the sender's phone number from the incoming request. If no image is sent, we'll reply with a message saying "No image sent." Otherwise, we'll proceed with image processing.
Editing the Image
To perform the background removal on the image, we'll use Replicate's powerful AI capabilities. Let's add the code to bgErase.js:
This code exports a function called bgErase that takes the URL of the image to process and the recipient's phone number. Inside the function, we use the Replicate instance to make a prediction for background removal.
We specify that we want to use the rembg model, which corresponds to the aforementioned version.
We also pass the image URL as the input and provide a webhook URL that Replicate will send the results to. We also specify that we only want to receive the results when the prediction is completed.
Now, let's go back to index.js and use the bgErase function we just created. Replace the existing code inside the /message route with the following code:
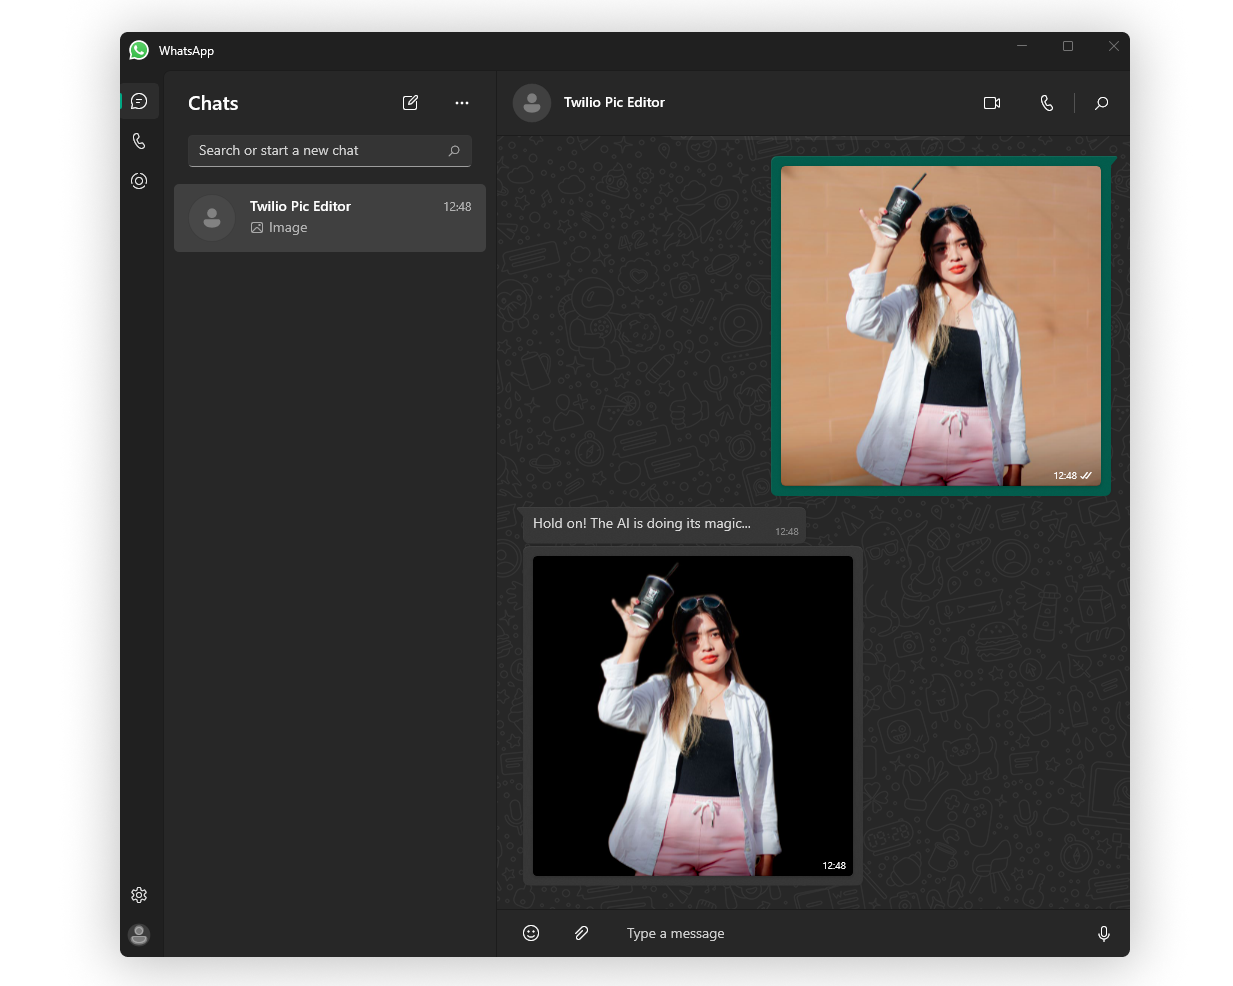
In this updated code, we're importing the bgErase function from the bgErase.js file. After checking if an image was sent, we call bgErase with the image URL and the sender's phone number. We then reply with a message saying "Hold on! The AI is doing its magic..." to let the user know that the background removal process is in progress.
Sending the Edited Image Back to the User
Finally, we need to handle the webhook from Replicate and send the edited image back to the user. Add the following code to index.js right below the /message route:
In this code, we define a new route /messageEnd/:to to handle the webhook from Replicate. We extract the recipient's phone number from the URL parameters and the edited image URL from the request body. We use Twilio's MessagingResponse to create a response with the edited image as media. Then, we send a WhatsApp message with the edited image to the recipient using the Twilio client.
Running the Code
Congratulations! You've completed the setup and coding part. Now it's time to test your code.
In a production environment, it's recommended to run your Node.js application on a cloud server. However, for simplicity, we'll deploy the app on your local machine.
1. Navigate to your project directory in the terminal.
2. Run the following command to start the application:
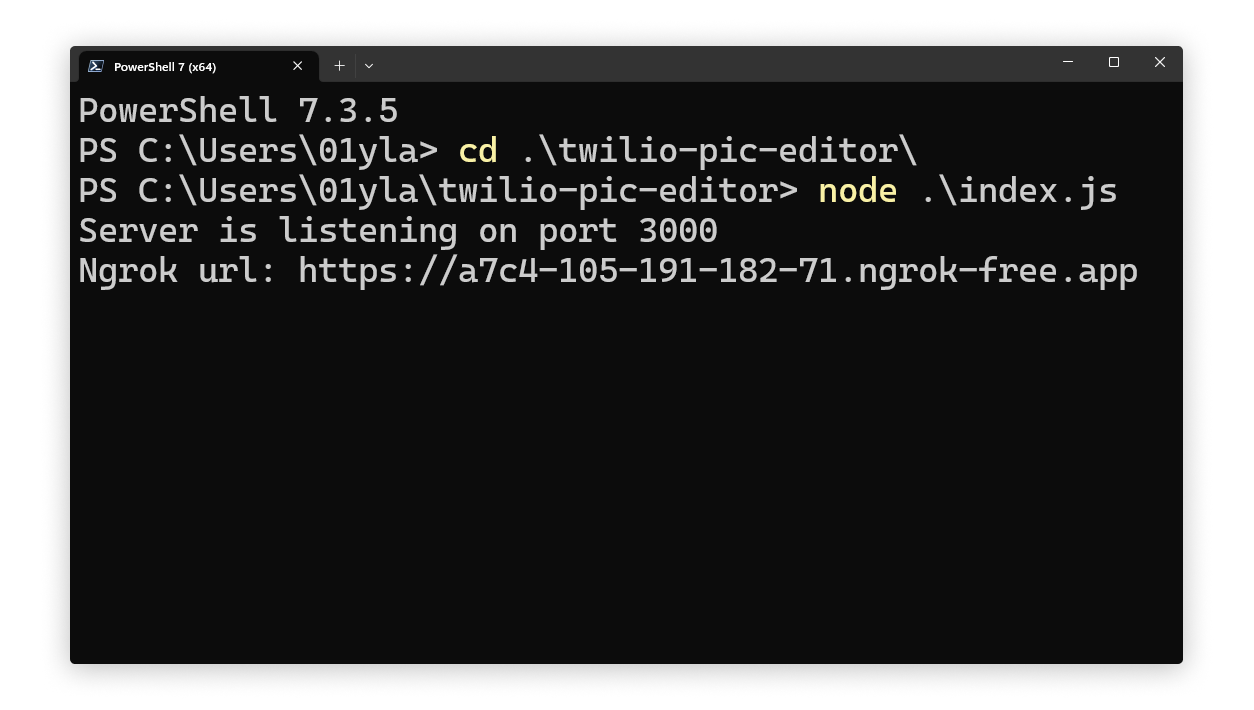
You'll see a message indicating that the server is listening on port 3000.
At the same time, Ngrok will generate a Forwarding URL that points to your local server on port 3000
Copy the Ngrok URL that starts with https:// and ends with .ngrok.io.
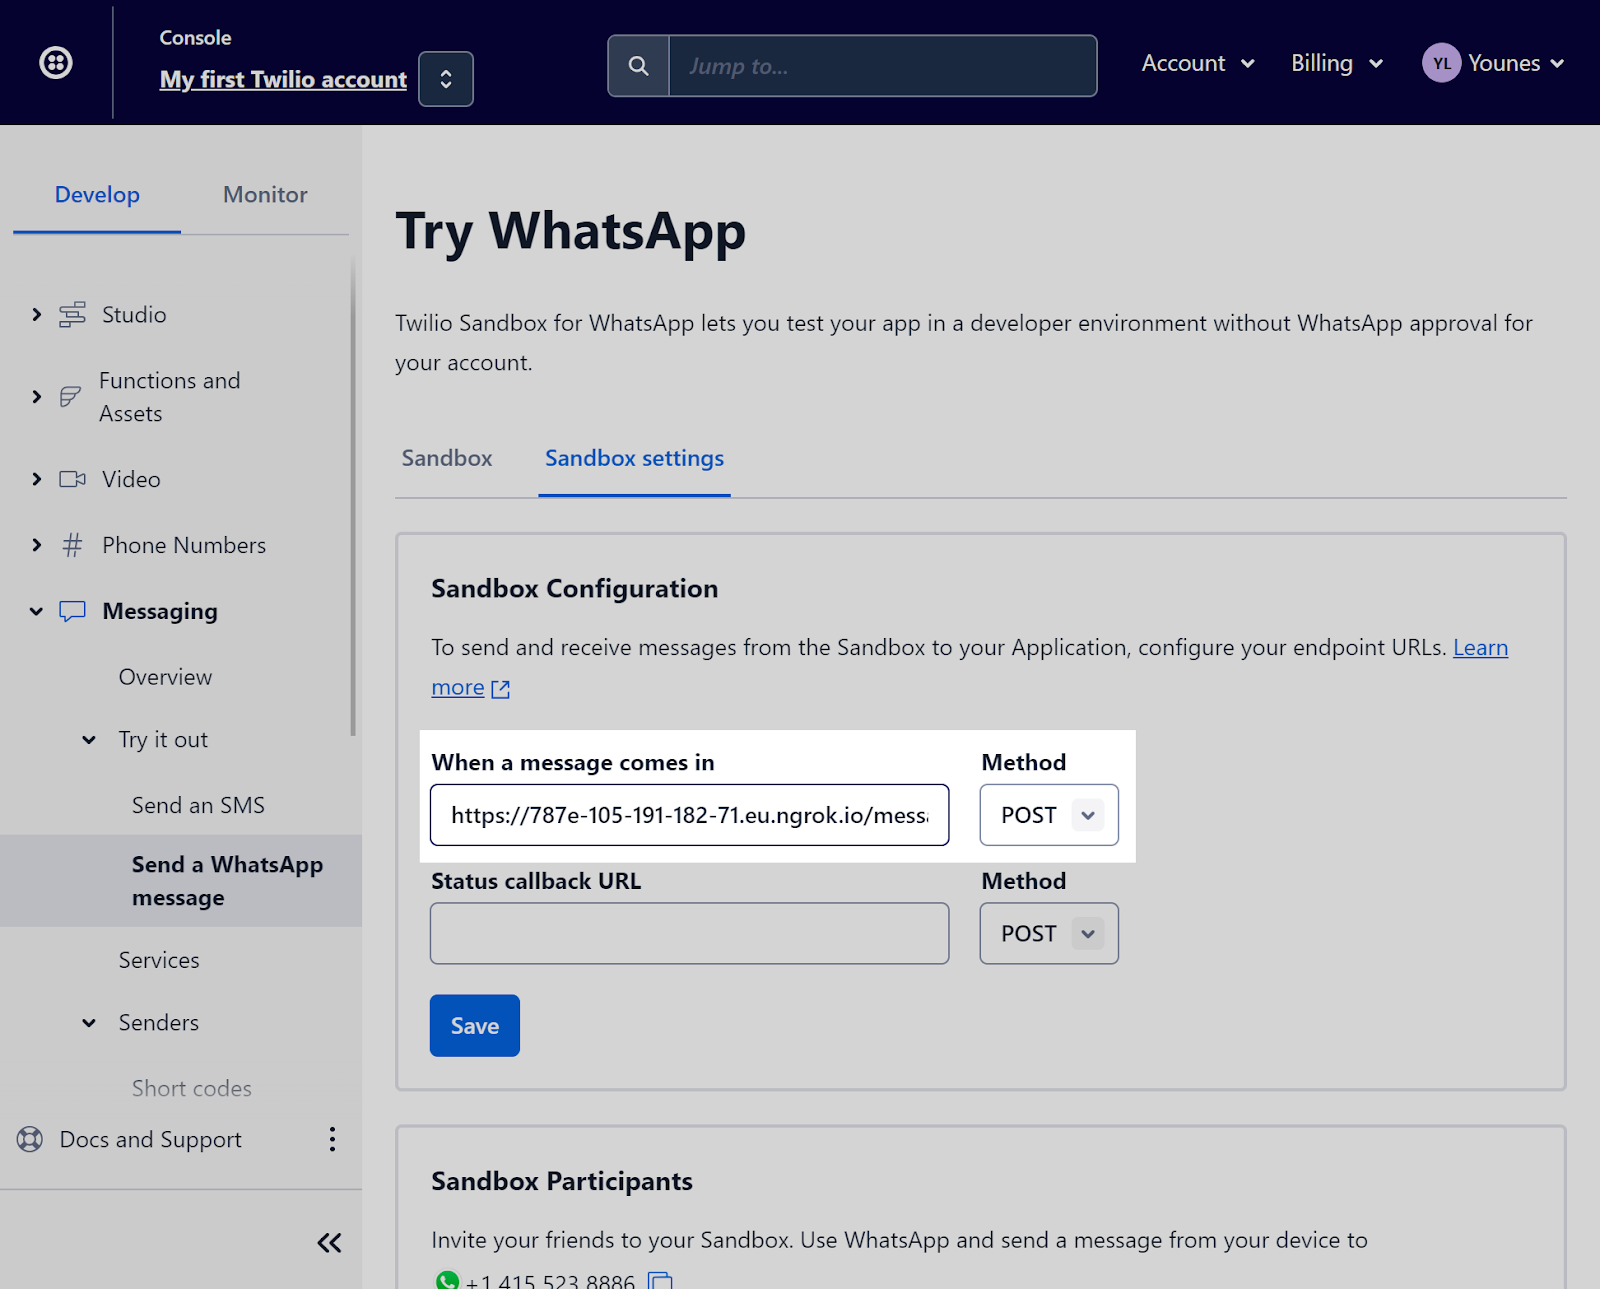
Now, go back to your Twilio Console and navigate to the WhatsApp Sandbox. Click on Sandbox Settings at the top and in the When a message comes in field, paste the Ngrok URL followed by /message. For example, https://abc123.ngrok.io/message. Save the changes.
You're all set! Send an image to your Twilio WhatsApp number, and you should receive a response with the edited image. Enjoy your WhatsApp image editor powered by AI!
Conclusion
Please note that the code provided is a simplified example to get you started. In a production environment, you'll need to handle errors, validate inputs, and add more features based on your requirements.
Congratulations! You've successfully built a WhatsApp image editor using Twilio, Replicate, and Ngrok. You can further enhance this project by adding more image editing features, such as quality enhancement and even object replacement. Enjoy exploring and expanding the capabilities of your WhatsApp image editor!
Related Posts
Related Resources
Twilio Docs
From APIs to SDKs to sample apps
API reference documentation, SDKs, helper libraries, quickstarts, and tutorials for your language and platform.
Resource Center
The latest ebooks, industry reports, and webinars
Learn from customer engagement experts to improve your own communication.
Ahoy
Twilio's developer community hub
Best practices, code samples, and inspiration to build communications and digital engagement experiences.


