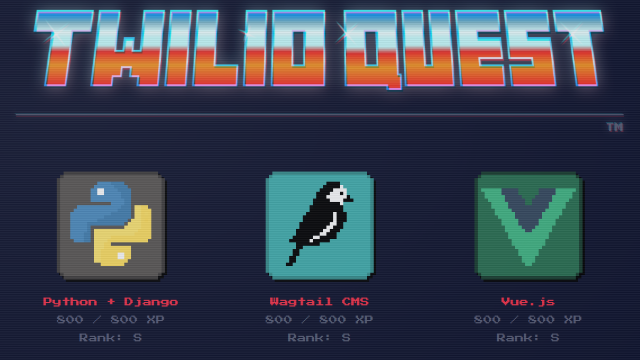
Building TwilioQuest with Twilio Sync, Django, and Vue.js
Time to read: 7 minutes

TwilioQuest is our developer training curriculum disguised as a retro-style video game. While you learn valuable skills for your day job, you get to earn XP and wacky loot to equip on your 8-bit avatar.
Today we’ll pull back the curtain and show the code that the Developer Education team wrote to create TwilioQuest.
Meet Wagtail, a Python & Django Based CMS
TwilioQuest is full of content. A lot of content.
There are missions for nearly all of Twilio’s products, with each mission containing many different objectives. To manage all this content, we needed a content management system (CMS). Luckily, the Twilio documentation site is built on a Python & Django-based CMS called Wagtail, so we already had a tool we were familiar with and ready to build on.
We did have a few experienced Python & Django developers on the team, but others were completely new to the stack (such as your humble author, a .NET developer for 15 years). Wagtail looks like a fairly typical CMS on the surface, complete with all the user-friendly content editing features one comes to expect from a professional grade CMS. However, underneath the hood, it is a developer’s delight.
In Wagtail, you expose your content types via standard Django models. The killer feature, however, is streamfields, which allow you to compose various “blocks” of content in any conceivable combination. Blocks can be baked-in things such as a rich text editor, or you can build your own blocks (like we did!) for things like code samples or standard design elements.
Here’s an example block we use for adding a “warning” or “danger” box to any page.
Sprinkle in Some Django REST Framework
We wanted to build TwilioQuest as a single page application (SPA) to enhance the game’s responsiveness. Our team knew we needed a flexible, JSON-based REST API to pair with the SPA that would work with our Django models on the backend.
We selected the popular Django REST Framework (DRF). DRF is built to work with Django and uses Django models and views to expose API endpoints. Below is an example view.
Notice the reference to a serializer_class. Think of DRF’s serializers as similar to Django’s forms. The serializer is responsible for creating a JSON representation of your model as well as for validating incoming data. Here’s what a serializer looks like.
DRF can handle automatic serialization of most data types that are part of your model, but you can override this handling as well as provide computed data elements.
Working with DRF isn’t all roses, however. You have to do some spelunking in the DRF docs to figure out how to implement some tasks that appear like they’d be straightforward. However, there was never a scenario that DRF couldn’t handle after some digging into their docs and tweaking our code.
Build an 8-bit Game Frontend with Vue.js
We selected Vue.js for the frontend of the Single Page App. There are a lot of great frameworks out there, and we had some on-team experience with Angular and React, but we selected Vue.js after prototyping a few versions of the game.
Vue.js has been billed as a lighter weight SPA framework and we mostly found that to be true. It is simple to get started with and there are many concepts that will translate for developers coming from other frameworks.
Putting together a frontend toolchain is always challenging. (Yak shaving, anyone?) This has given rise to many of the frameworks providing a CLI tool to help you scaffold new apps. Vue.js has a CLI but we ended up not using it as we wanted to use some of the same tools that we were familiar with in building the frontend for the Twilio docs.
For our toolchain, we landed with grunt, browserify, babel, karma and jshint. We use Vue.js’s single file components. Within each .vue file, we use pug for our templates and ES2015 for the JavaScript code. Below is an example of one of these component files.
We also initially placed SCSS in the component files but soon pulled out the SCSS into multiple files in order to facilitate our theming feature. You can choose between a dark and a light theme in-game. Spoiler alert: soon we’ll add a “boss mode” to make TQ look like a regular productivity app.
We’ve been quite happy with Vue.js and the stack we chose. Our team has yet to run into something that was too awkward to implement within Vue’s recommended practices.
Sync Those Real-Time Events
A lot of actions in TwilioQuest happen asynchronously. For example, when you provide a phone number to check the TwiML for a mission objective, TwilioQuest has to:
- look up the phone number in Twilio’s internal service called “yellow pages” to find your webhook URL,
- invoke another Twilio service to make a call to your webhook handler
- analyze the response from your webhook to ensure it matches the victory conditions for the mission objective.
The phone number is sent via AJAX call to the TwilioQuest REST API, but the API returns a 204 response (OK with no content) immediately and the verification process happens asynchronously in the background. How does the Vue.js app know when the verification is complete? How does it know if it succeeded or failed (and, if it failed, why)?
These situations are where having a real-time state synchronization service in our product suite comes in handy. Twilio Sync allows us to have a single JSON document object per player that we can use to push data from the server to the browser in real-time over WebSocket connection.
In addition, we use a global Sync list object for our TwilioQuest Scoreboard that we use at events such as hackathons and Superclass. We can update the scoreboard from the Python server code like so:
Our scoreboard HTML page uses JavaScript to monitor this list to update the scoreboard.
All instances of the scoreboard web page are instantly notified whenever someone completes a mission objective.
Going Serverless with Twilio Functions
Our Developer Education team also wanted to figure out how to incorporate Twilio Functions because serverless is what all the cool kids are doing.
We added the ability for anyone in Twilio to extend TwilioQuest via webhooks (using the same Twilio infrastructure that invokes your webhooks for phone calls and SMS messages). This provided flexibility to do some interesting things down the road by just writing a few lines of JavaScript in the Twilio Console.
One interesting integration we added was our @TwilioQuest Twitter feed (Editor: now disabled). Every time someone (with a public profile) completes a mission objective, the Django app fires the webhooks. We wrote the Twilio Function below to automatically send out a congratulatory tweet.
Those items we’re pulling out of the context variable are secrets that we configure in the Environmental Variables for our functions. On the same configuration page, we also added the twitter v1.7.1 npm package.
What’s Next for TwilioQuest
We are incorporating Behave with Selenium and Sauce Labs to build up a comprehensive integration test suite. The hope for this is to eliminate the rounds of manual testing that are normally required after refactoring the code or introducing other impactful changes.
We are anxiously looking forward to feedback from the community to learn what we should build next!
The Team
TwilioQuest began as the vision of Kevin Whinnery, who now works with the Twilio.org team helping to pair nonprofits with developers. Kevin’s vision was furthered by the Developer Education team at Twilio, consisting of Developer Educators Andrew Baker, Paul Kamp, Kat King, Jen Aprahamian, and, yours truly, David Prothero. Supporting our development efforts was our extended engineering team, based in Quito, Ecuador, Wellington Mendoza, Hector Ortega, Samuel Mendes, Jose Oliveros, Agustin Camino, and Orlando Hidalgo.
It’s an amazing team and I am fortunate to be a part of it. Beyond the team, so many colleagues within Twilio (Twilions) helped out with TwilioQuest. From the Platform team (the team that brings you 5 9’s of Twilio API availability) who helped us find all the right internal services where we needed to interface, to the product managers who tested out the various missions for their products, to the devangelists who brought TwilioQuest to meetups, hackathons, and conferences to get valuable community feedback, we are indebted to so many amazing people.
Of course, we have to also call out the retro artwork. Credit for the amazing pixel art for the avatars and loot goes to Kevin Whinnery and Luiggi Hidalgo. The retro design and TwilioQuest logo were designed by Jamie Wilson, Sean McBride, and Nathan Sharp.
Start Your Epic Journey
TwilioQuest has been a labor of love for us and, honestly, such a joy to work on. None of us ever thought we’d ship a video game when we started working here. It’s been our epic journey and now it’s time to begin yours.
Sign up and start playing TwilioQuest. You’ll be having so much fun, you’ll forget you’re learning something new!
Related Posts
Related Resources
Twilio Docs
From APIs to SDKs to sample apps
API reference documentation, SDKs, helper libraries, quickstarts, and tutorials for your language and platform.
Resource Center
The latest ebooks, industry reports, and webinars
Learn from customer engagement experts to improve your own communication.
Ahoy
Twilio's developer community hub
Best practices, code samples, and inspiration to build communications and digital engagement experiences.

