Build a Single Page Application in PHP with CodeIgniter and React

November 19, 2020
Written by
Oluyemi Olususi
Contributor
Opinions expressed by Twilio contributors are their own
Reviewed by
Diane Phan
Twilion

Having a clear dichotomy between client-side and server-side applications comes with many advantages such as separation of concerns and loose coupling, which allows teams to work independently. However this might be overkill for smaller teams or projects managed by the same person. In such situations, a better approach might be to have relevant code for both the front-end and back-end reside in the same project. In this tutorial, I’ll show you how to build a web application with React and CodeIgniter.

According to the official documentation, React is a JavaScript library for building user interfaces. My favorite feature of React is that it allows me to structure my web applications by breaking the interface into components and building accordingly. I’ve found this to add reusability and consistency to my applications.

CodeIgniter, on the other hand, is a lightweight open source PHP framework that allows developers to build web applications in a flexible manner. While its MVC (Model-View-Controller) architecture provides a cleaner design when building web applications, it is also considered as a great tool for building RESTful APIs.

To allow us focus on the integration and front-end aspects of this tutorial, we’ll be building on a previous tutorial where CodeIgniter was used to build a secure RESTful API. Hence you can clone the source code for the repo here to start things off. However, you’re free to use another CodeIgniter project if you have one.

Prerequisites

A basic understanding of CodeIgniter and React will be of help in this tutorial. However, I will provide brief explanations and links to official documentation throughout the tutorial. If you’re unclear on any concept, you can review the linked material before continuing with the tutorial. I will also be making mention of Webpack in this tutorial, however you do not need previous experience with this as I will provide an introduction and guide you through the process of setting it up in your project.

Additionally, you need to have the following installed on your system:

  • Composer. Composer will be used for dependency management in your CodeIgniter project.
  • A local database instance. While MySQL will be used in this tutorial, you are free to select your preferred database service.
  • Yarn: Yarn will be used to manage Javascript packages in your React project. Alternatively you can use npm.

What We’ll Build

In this tutorial, we’ll build a React application to consume the RESTful API that was built in our previous tutorial. This application will allow authenticated users to manage a company’s clientele. It will have the following features:

  • A registration form to add new users.
  • A login form to authenticate new users.
  • A table view showing all the clients.
  • A form to add/edit a new/existing client.
  • A button which will allow authenticated users to delete an existing client.
  • A button to log out an authenticated user.

Getting Started

To get started, you can clone the code for the API as follows:

$ git clone https://github.com/yemiwebby/ci-secure-api.git

If you already have an API you intend to use, then feel free to skip to the next section.

The preceding command will download the starter project into the ci-secure-api folder. Move into the project’s folder, install all its required dependencies using Composer and run the application to be sure that it works accordingly:

// move into the project
$ cd ci-secure-api

//install the application dependencies
$ composer install

// run the application
$ php spark serve

 Navigate to http://localhost:8080/ from your browser to view the welcome page.
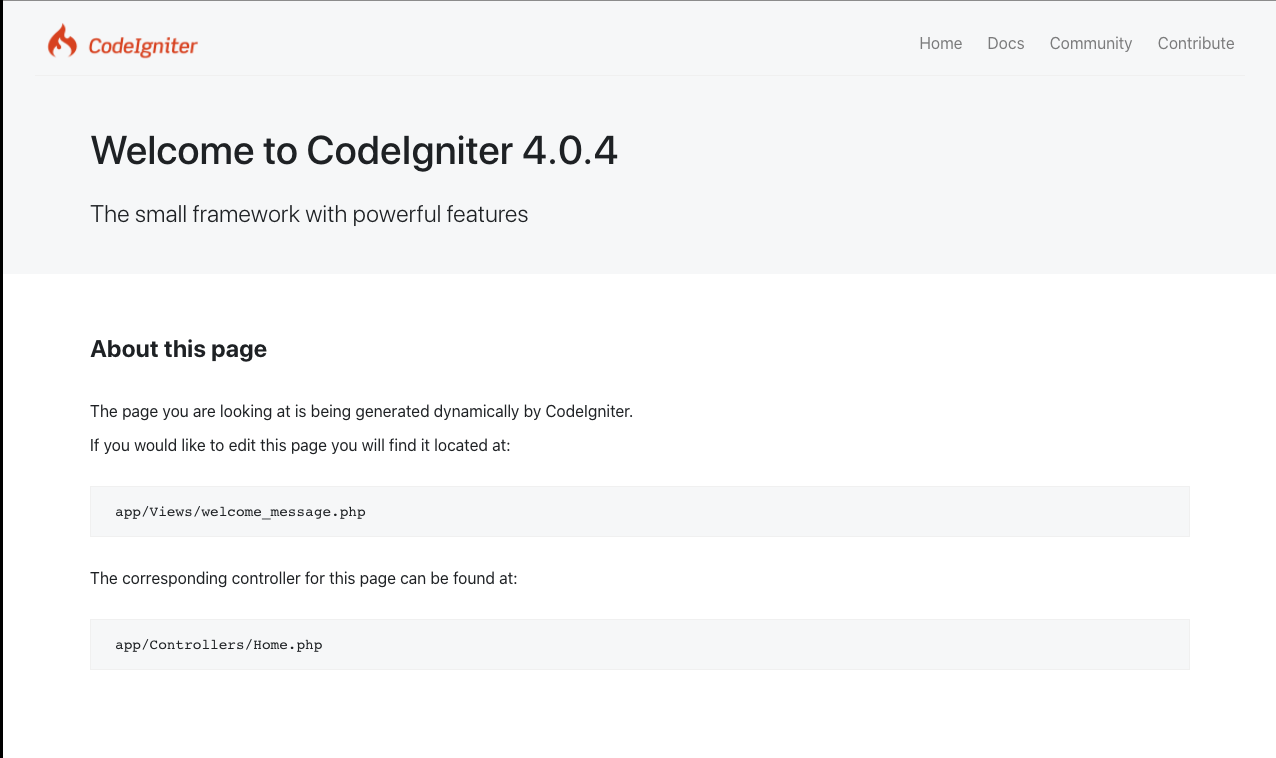
CodeIgniter Homepage

Next, provide environment variables that will be used by our application. To do that, stop the application from running using the CTRL + C keys on your keyboard and proceed to make a copy of the env file named .env using the command below:

$ cp env .env

CodeIgniter starts up in production mode by default, but for the sake of this tutorial, we will change it to development. To achieve that, uncomment the line shown below and set it to development:

CI_ENVIRONMENT = development

Next, create a database within your local environment and uncomment the following variables to update each values to set up a successful connection to the database:

database.default.hostname = localhost
database.default.database = YOUR_DATABASE
database.default.username = YOUR_DATABASE_USERNAME
database.default.password = YOUR_DATABASE_PASSWORD
database.default.DBDriver = MySQLi # this is the driver for a MySQL connection. There are also drivers available for postgres & sqlite3.

Replace the YOUR_DATABASE, YOUR_DATABASE_USERNAME and YOUR_DATABASE_PASSWORD placeholders with your values.

Next, run the migration file and seed your database with some default clients.

// Run migrations to create tables
$ php spark migrate

// seed tables with default values
$ php spark db:seed ClientSeeder

At this point, the database should have a similar structure to the screenshot below:

Database sample data

In our application, we will take advantage of client-side routing. Only the index page will be rendered server-side while our React application will handle everything else. However by default, if we specify a route that is not registered on our API, CodeIgniter will throw a PageNotFoundException. This exception is handled by rendering the view at /app/views/errors/html/error_404.php. Since, we want all views to be handled by React, we can override this behaviour using the set404Override function.

To achieve that, Open your app/Config/Routes.php file and search for the function. Update it as follows:

$routes->set404Override(function () {
    echo view('welcome_message');
});

This means that when an unknown route is encountered, instead of rendering the error_404 view, our API will render the index page and allow React to determine what should be displayed - be it a corresponding view or a 404 page.

At this stage, we have an API to handle the requests our React application will be making. Before setting up the React application, we need to create an entry point for the React application. To do this, we will modify the view served by our index controller. Currently, the index function (located in app/Controllers/Home.php returns a view named welcome_message. You can find this file in the app/Views directory. Open up the file and replace it’s content as follows:

<!DOCTYPE html>
<html lang="en">
<head>
    <meta charset="UTF-8">
    <title>Welcome to CodeIgniter 4!</title>
    <meta name="description" content="The small framework with powerful features">
    <meta name="viewport" content="width=device-width, initial-scale=1.0">
    <link rel="shortcut icon" type="image/png" href="/favicon.ico"/>
    <base href="/"/>
    <style>
        #app {
            margin: 50px;
        }
    </style>
</head>
<body>
<div id="app">

</div>

<!-- SCRIPTS -->
<script src="dist/main.js" charset="utf-8"></script>
<!-- --> 

</body>
</html>

We have taken out the CodeIgniter styling and boilerplate body text. The only thing in the body element is a div with an id app. This div is targeted by our React app to render our components accordingly. We also added a <script> tag to load our bundled JavaScript file.  

Note the <base> tag. This is important because it allows our application to properly handle nested URLs (for example http://localhost:8080/client/edit/3) when the page is refreshed. You can read more on this here. If you tried to serve your application at this point, nothing will be displayed as we haven’t started building our React components.

In the next section, we’ll set up our JavaScript dependencies and install the relevant packages that will allow for the development and bundling of our React components.

Installing JavaScript Dependencies

Before building our components, we will need to install some application dependencies which will aid processes ranging from bundling our application to styling our components.

To start things off, use the following command to create a new package.json file:

$ yarn init

This is an interactive command and you will be asked a few questions. You may use the default values by pressing Enter or provide whichever value suits you.

Next, install the React library. The React router will be used for client-side routing and can be installed at this point using this command.

$ yarn add react react-dom react-router-dom

For the styling of our components, we’ll use ReactStrap which provides easy to use React Bootstrap 4 components. This library also depends on Bootstrap, JQuery and Popper so we’ll install that as well.

$ yarn add reactstrap bootstrap jquery popper

Because we’re also going to be building forms in our application, we’ll take advantage of Formik and Yup for form management and validation. Let’s install them now using:

$ yarn add formik yup

Install Axios to allow us to make requests to the API from our React application and Luxon for easier manipulation of our date objects.

$ yarn add axios luxon

We’ll also add some dev dependencies which will only be applied in the development environment. Babel is used to compile our React code into browser-compatible code. Add the dependencies using the following command:

$ yarn add --dev @babel/core @babel/preset-react babel-loader

Because we’ll be using Optional Chaining and Nullish Coalescing we need to install some Babel plugins.

yarn add --dev @babel/plugin-proposal-optional-chaining @babel/plugin-proposal-nullish-coalescing-operator  

Next, install Webpack which will be used to bundle the React application into a single JS file for use in our CodeIgniter view. We’ll also be adding the path module which will be used by webpack during the bundling of our application.

$ yarn add --dev webpack webpack-cli path

In this tutorial, we’ll be importing CSS files in our React application. To aid Webpack in properly bundling our React application, we’ll add two dev dependencies css-loader and style-loader.

$ yarn add --dev css-loader style-loader

Webpack Setup

With all our dependencies installed, the last thing to do before we start building the React components is to declare our webpack configuration. Create a new file at the root of the project directory called webpack.config.js with this command:

$ touch webpack.config.js

Open your webpack.config.js file and add the following:

const path = require('path');

module.exports = {
    entry: './react/src/App.js',
    output: {
        path: path.resolve(__dirname, 'public/dist'),
        filename: 'main.js'
    },
    module: {
        rules: [
            {
                exclude: /node_modules/,
                use: {
                    loader: 'babel-loader',
                    options: {
                        presets: ['@babel/preset-react'],
                        plugins: [
                            '@babel/plugin-proposal-optional-chaining',
                            '@babel/plugin-proposal-nullish-coalescing-operator'
                        ]
                    }
                }
            },
            {
                test: /\.css$/i,
                use: ['style-loader', 'css-loader'],
            }
        ]
    },
    mode: 'development'
}

The above configuration specifies that our bundle entry point will be a file named App.js in the react/src/ directory. We also specify the output path and file name. This means that our React application will be bundled into a single Javascript file named main.js which will be located in the public/dist folder.

Next, create a directory named react/src. In that directory, create a file named App.js by using the following commands:

//create react/src directory
$ mkdir -p react/src

//create App.js file in react/src directory
$ touch react/src/App.js

Open up react/src/App.js. For now we’re going to just add a simple functional component with a simple "Hello World" message. Do the following:

import React from 'react';
import ReactDOM from 'react-dom';

const Root = () => <h1>Hello World from React</h1>;

let container = document.getElementById('app');
let component = <Root/>;

ReactDOM.render(component, container);

To generate a bundled js file run the following command in your terminal:

$ npx webpack

This will create a new file in the public/dist directory named main.js. We will need to run this command every time we make changes to our React application. To avoid having to re-run the command we could add an extra option to make the webpack watch our files and re-bundle our React application when we make changes. To do this, use the following command:

$ npx webpack --watch

Open a new terminal window and fire up your application using this line:

$ php spark serve

Navigate again to http://localhost:8080/ from your browser to view the updated welcome page:
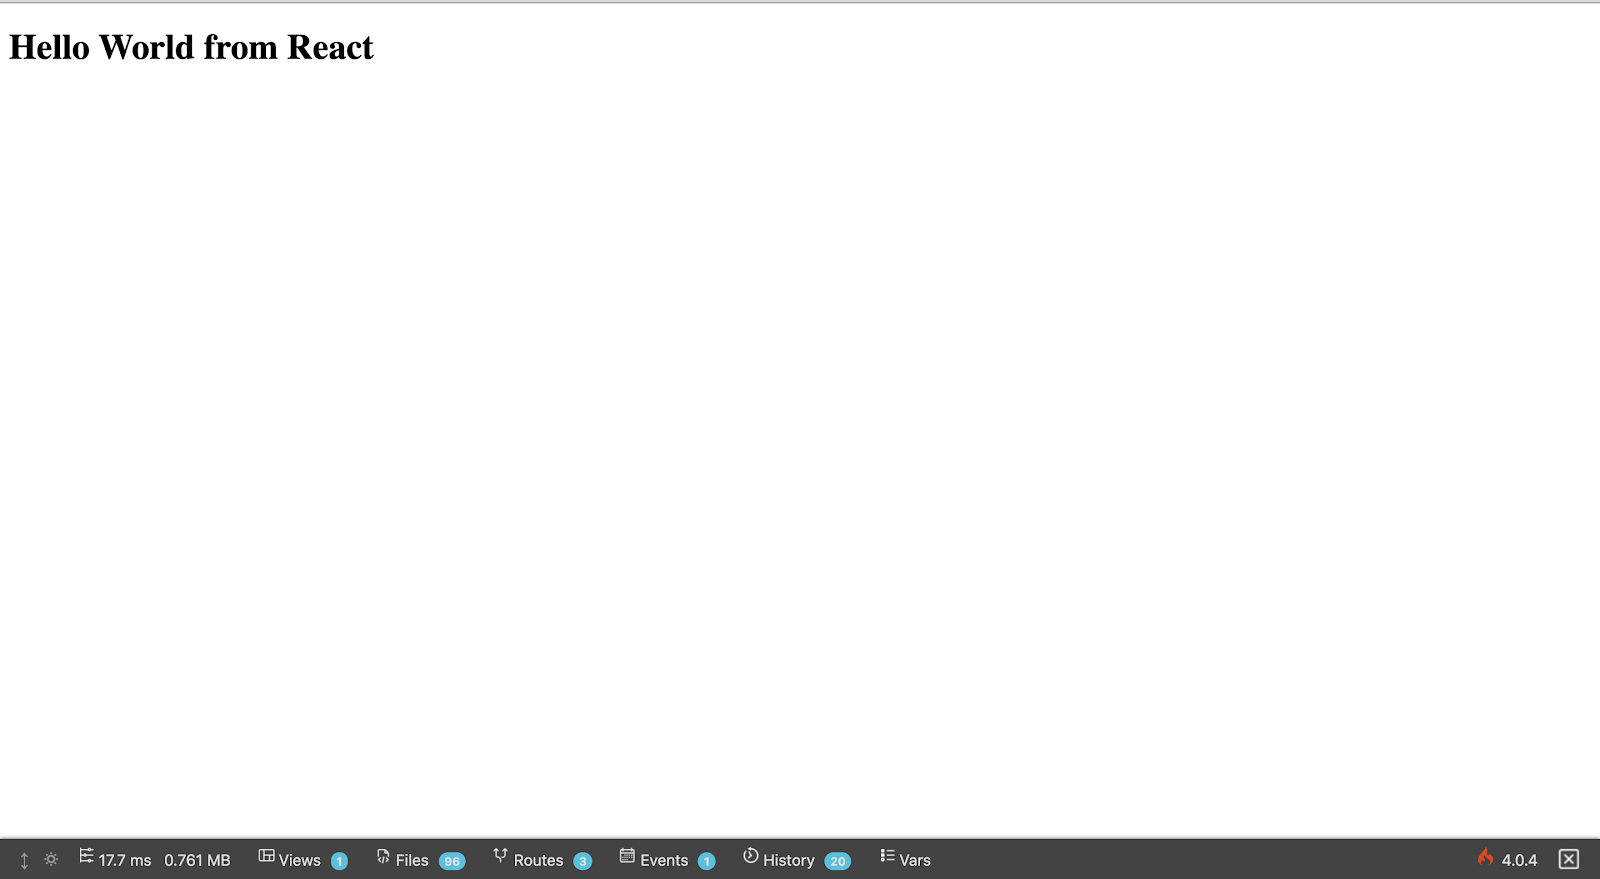
Homepage served by React

 With these in place, we can start building our React application.

Building the React Application

All the code for the React application will be stored in the react/src directory. At the root of the directory we will have the following:

  • components: This is a directory that will contain all the components that will be used in this application.
  • utility: This is a directory that will contain all the utility functions needed by our components.
  • App.css: This contains our application styling.
  • App.js: This is the entry point for our React application.

In this tutorial, we’ll build our application from the bottom up. We’ll start off with the utility directory and work our way up to the components before we round off with the App.* files.

Application Utilities

We’ll start by building the ‘utilities’ of the application. In the react/src directory, create a directory named utility. This directory will have four files as follows:

  • Api.js : This contains a helper function for making requests to the API.
  • Authentication.js: This contains a helper function for handling successful authentication operations.
  • Formatter.js: This contains helper functions for formatting dates and currencies in our application.
  • LocalStorage.js: This contains helper functions for retrieving and saving data via LocalStorage.

NOTE: For the sake of brevity, we use LocalStorage for Global State Management. This may not be in line with global best practices. Please consider alternatives like ReduxMobx or using the useContext and useReducer React Hooks. These will add considerable complexity to the tutorial hence the oversimplification.

Open the Api.js file and add the following:

import axios from 'axios';

const API = axios.create({
    baseURL: 'http://localhost:8080',
    responseType: 'json',
});

const getRequestConfiguration = (authorization) => {
    const headers = {
        'Content-Type': 'application/json',
    };
    if (authorization) headers.Authorization = `Bearer ${authorization}`;
    return { headers };
};

export const makeRequest = ({
                                url,
                                values,
                                successCallback,
                                failureCallback,
                                requestType = 'POST',
                                authorization = null,
                            }) => {
    
    const requestConfiguration = getRequestConfiguration(authorization);
    let promise;
   
    switch (requestType) {
        case 'GET':
            promise = API.get(url, requestConfiguration);
            break;
        case 'POST':
            promise = API.post(url, values, requestConfiguration);
            break;
        case 'DELETE':
            promise = API.delete(url, requestConfiguration);
            break;
        default:
            return;
    }
   
    promise
        .then((response) => {
            const { data } = response;
            successCallback(data);
        })
        .catch((error) => {
            if (error.response) {
                failureCallback(error.response.data);
            }
        });
};

NOTEhttp://localhost:8080 is the default URL for a served CodeIgniter application. If your application is running on a different port, please update the baseURL variable accordingly.

In your Authentication.js file add the following:

import {saveJWT, saveUser} from './LocalStorage';

const successfulAuthenticationCallback = (data) => {
    const {user, access_token} = data;
    saveUser(user);
    saveJWT(access_token);
};

export default successfulAuthenticationCallback;

This callback is used when the API successfully authenticates a registered user. It simply saves the data returned by the API (the authenticated user details and the JWT).

In Formatter.js add the following:

import {DateTime} from 'luxon';

export const formatDate = (dateString) => {
    const dateISOString = new Date(dateString).toISOString();
    const formattedDateTime = DateTime.fromISO(dateISOString);
    return formattedDateTime.setLocale('en').toLocaleString(DateTime.DATE_FULL);
}

export const formatCurrency = (amount) => `₦${new Intl.NumberFormat('en-GB').format(amount)}`;

The formatDate uses Luxon to present a more readable date string to the user. The formatCurrency returns a properly formatted currency value (with the Naira symbol included).

Add the following to LocalStorage.js:

const getItem = (itemName) => localStorage.getItem(itemName);

const saveItem = (itemName, itemValue) => {
    localStorage.setItem(itemName, itemValue);
};

const getFilteredClients = clientId => {
    return loadClients().filter(({id}) => clientId !== id);
};

export const loadUser = () => JSON.parse(getItem('user'));

export const saveUser = (user) => {
    saveItem('user', JSON.stringify(user));
};

export const loadJWT = () => getItem('token');

export const saveJWT = (token) => {
    saveItem('token', token);
};

export const loadClients = () => JSON.parse(getItem('clients'));

export const findClient = (clientId) =>
    loadClients().find(({id}) => id === clientId);

export const saveClients = (clients) => {
    saveItem('clients', JSON.stringify(clients));
};

export const addClient = (client) => {
    saveClients([...loadClients(), client]);
};

export const updateClient = (client) => {
    saveClients([...getFilteredClients(client.id), client]);
};

export const deleteClient = ({id}) => {
    saveClients(getFilteredClients(id));
};

export const clearState = () => {
    localStorage.clear();
};

Our application requires global state management for three key resources:

  • user : This is an object containing the details of the authenticated user. Two helper functions (saveUser and loadUser) are exported to aid in saving and loading the authenticated user.
  • token: This is a string corresponding to the JWT created for the authenticated user. Two helper functions (loadJWT and saveJWT) are exported to aid in loading and saving the JWT.
  • clients: This is an array corresponding to the array of clients retrieved from the API. Two helper functions (loadClients and saveClients) are made exported to aid in loading and saving the clients on the database. Additionally three helper functions (addClient, updateClient and deleteClient) are exported to help with modifying the saved array of clients.

The last exported function (clearState) is used to simulate the effect of logging out.

Creating Application Components

To make things easier, our components will be grouped into 5 categories which loosely relate to their intended use. These categories are as follows:

  • alert: This directory will contain components related to passing information to the user (for example notifications or ‘loading’ components).
  • authentication: This directory will contain components related to the authentication process.
  • form: This directory will hold custom form components.
  • restricted: This directory will contain components that are only available to authenticated users.
  • routing: This directory will contain components that are used to handle the Client-side-routing.

You can go ahead and create these directories:

// cd into components directory
$ cd react/src/components

// create directories
$ mkdir alert authentication form restricted routing

Creating the Alert Components

This directory will contain four components viz:

  • Failure.js : This will show an alert with a provided error message.
  • Loading.js: This will show a spinner to let the user know that the request is being processed.
  • PageNotFound.js: This will show the default view for an unregistered URL.
  • Success.js: This will show an alert to know that the user’s request was successfully handled.

Open the react/src/components/alert/Failure.js file and add the following:

import React from 'react';
import {UncontrolledAlert} from 'reactstrap';

const FailureAlert = ({errors}) => {
    return (
        <UncontrolledAlert color='danger'>
            <h4 className='alert-heading'>Request Failed</h4>
            <hr/>
            <ul className='plainList'>
                {Object.values(errors).map((error, index) => {
                    return <li key={index}>{error}</li>
                })}
            </ul>
        </UncontrolledAlert>
    )
}

export default FailureAlert;

Our API returns error messages as an object with (possibly) multiple error messages. Hence this component takes the object as a prop  and displays them as a list of errors.

Open the react/src/components/alert/Loading.js file and add the following:

import React from 'react';
import {Spinner} from 'reactstrap';

const LoadingAlert = () => {
    return (
        <div className='centredDiv'>
            <Spinner size='lg' type='grow' color='dark'/>
        </div>
    );
};

export default LoadingAlert;

Open the react/src/components/alert/PageNotFound.js file and add the following:

import React from 'react';
import {Link} from 'react-router-dom';

const PageNotFound = () => {
    return (
        <div className='wrap'>
            <h1>404 - Page Not Found</h1>
            <p>Could not find the page you were looking for.</p>
            <Link to={'/'}>Return to Dashboard</Link>
        </div>
    );
};

export default PageNotFound;

In addition to showing the message, a link is added to return the user back to the dashboard.

Open the react/src/components/alert/Success.js file and add the following:

import React from 'react';
import {UncontrolledAlert} from 'reactstrap';

const SuccessAlert = ({
                          message,
                          onTimeout
                      }) => {

    setTimeout(onTimeout, 4000);

    return (
        <div style={{margin: '20px'}}>
            <UncontrolledAlert color='success'>
                {message}
            </UncontrolledAlert>
        </div>
    )
}

export default SuccessAlert;

In addition to displaying a success message, the setTimeout function is used to close the success alert after 4 seconds.

Creating Form Components

Because we’re building a simple application, we have only one Form component named CustomInput.js.

In react/src/components/form/CustomInput.js add the following:

import React from 'react';
import {Input, Label} from 'reactstrap';
import {ErrorMessage, Field} from 'formik';

const getErrorDiv = message => {
    return (
        <div style={{color: '#dc3545'}}>
            {message}
        </div>
    );
};
const CustomInput = ({name, label, type = 'text'}) => {
    return (<>
        <Label for={name}>{label}</Label>
        <Field name={name}>
            {({field}) => {
                return (<>
                    <Input
                        type={type}
                        {...field}
                        placeholder={label}/>
                    <ErrorMessage
                        name={name}
                        render={getErrorDiv}
                    />
                </>)
            }}
        </Field>
    </>);
};

export default CustomInput;

This will create an input field of a specified type (text, number, email or password). If the input is invalid, an error message is displayed underneath.

Routing Components

React Router allows us to handle routing by declaring our routes in a component. Because we are building a small application, we will use just one of them. However, in larger applications you can break them into smaller components for easier maintenance. In the react/src/components/routing folder, create a file named Routes.js and add the following:

import React from 'react';
import {Route, Switch} from 'react-router-dom';
import UserProfile from '../restricted/user/Profile';
import ClientsTable from '../restricted/client/ViewAll';
import PageNotFound from '../alert/PageNotFound';
import ClientView from '../restricted/client/ViewOne';
import AddClientForm from '../restricted/client/form/AddClient';
import EditClientForm from '../restricted/client/form/EditClient';

const Routes = () => (
    <Switch>
        <Route path='/' exact component={ClientsTable}/>
        <Route path={'/profile'} component={UserProfile}/>
        <Route path={'/client/view/:id'} component={ClientView}/>
        <Route path={'/client/add'} component={AddClientForm}/>
        <Route path={'/client/edit/:id'} component={EditClientForm}/>
        <Route path={'*'} component={PageNotFound}/>
    </Switch>
);
export default Routes;

This switch contains multiple routes. A route is composed of the path and the component to be rendered for that path. The last route declared uses the * wildcard and the PageNotFound component to let the user know that the requested page could not be found.

Authentication Components

For authentication, we will have separate components for registering and logging in. A parent component will then be used to allow the user switch between both components and make the appropriate request upon form submission.

In the In the react/src/components/authentication directory, create the following files:

  • Authentication.js.
  • Login.js.
  • Register.js.

Open the  react/src/components/authentication/Authentication.js file and add the following:

import React, {useState} from 'react';
import Login from './Login';
import Register from './Register';
import {Button} from 'reactstrap';
import FailureAlert from '../alert/Failure';
import {makeRequest} from '../../utility/Api';
import successfulAuthenticationCallback from '../../utility/Authentication';

const Authentication = ({setIsAuthenticated}) => {
    const [isLogin, setIsLogin] = useState(false);
    const [errors, setErrors] = useState(null);

    const submitCallback = (values) => {
        makeRequest({
            url: `auth/${isLogin ? 'login' : 'register'}`,
            values,
            successCallback: (data) => {
                successfulAuthenticationCallback(data);
                setIsAuthenticated();
            },
            failureCallback: (errorResponse) => {
                setErrors(errorResponse)
            }
        });
    };

    return (
        <div className='centredDiv' style={{width: '60%'}}>
            {errors && <FailureAlert errors={errors}/>}
            {isLogin ?
                <Login submitCallback={submitCallback}/> :
                <Register submitCallback={submitCallback}/>
            }
            <Button
                style={{marginTop: '10px'}}
                block
                outline
                color={'primary'}
                onClick={() => {
                    setIsLogin(!isLogin)
                }}
            >
                {isLogin ? 'Register' : 'Login'}
            </Button>
        </div>
    );
};

export default Authentication;

The Authentication component is used to coordinate the activities of the Login and Register components. Because the isLogin state variable, the user can toggle between the registration and login form.

When the user successfully completes either the login or registration form, submitCallback is called to make a request to our API (using the makeRequest function declared in react/src/utility/Api.js. If the response is an error response, then the FailureAlert component is rendered to show the user what went wrong. If the request was successfully handled, the user details and token are saved using the successfulAuthenticationCallback component declared in react/src/utility/Authentication.js.

In  react/src/components/authentication/Login.js and add the following:

import React from 'react';
import {Form, Formik} from 'formik';
import * as Yup from 'yup';
import CustomInput from '../form/CustomInput';
import {Button, FormGroup} from 'reactstrap';

const Login = ({submitCallback}) => {
    const initialValues = {
        email: '',
        password: '',
    };

    const validationSchema = Yup.object({
        email: Yup.string()
            .email('Invalid email address')
            .min(6, 'Email must be at least 6 characters')
            .max(50, 'Email cannot exceed 50 characters')
            .required('Email address is required'),
        password: Yup.string()
            .min(8, 'Password must be at least 8 characters')
            .required('Please select a password')
    });

    return (
        <Formik
            initialValues={initialValues}
            validationSchema={validationSchema}
            onSubmit={submitCallback}>
            <Form>
                <FormGroup row>
                    <CustomInput
                        name={'email'}
                        label={'Email Address'}
                        type={'email'}
                    />
                </FormGroup>
                <FormGroup row>
                    <CustomInput
                        name={'password'}
                        label={'Password'}
                        type={'password'}
                    />
                </FormGroup>
                <Button
                    block
                    type='submit'
                    color={'danger'}>
                    Submit
                </Button>
            </Form>
        </Formik>
    );
};
export default Login;

In react/src/components/authentication/Register.js and add the following:

import React from 'react';
import {Form, Formik} from 'formik';
import * as Yup from 'yup';
import CustomInput from '../form/CustomInput';
import {Button, FormGroup} from 'reactstrap';

const Register = ({submitCallback}) => {
    const initialValues = {
        name: '',
        email: '',
        password: '',
        passwordConfirmation: ''
    };

    const validationSchema = Yup.object({
        name: Yup.string()
            .required('Name is required'),
        email: Yup.string()
            .email('Invalid email address')
            .min(6, 'Email must be at least 6 characters')
            .max(50, 'Email cannot exceed 50 characters')
            .required('Email address is required'),
        password: Yup.string()
            .min(8, 'Password must be at least 8 characters')
            .required('Please select a password'),
        passwordConfirmation: Yup.string()
            .required('Please confirm your password')
            .when('password', {
                is: password => (!!(password && password.length > 0)),
                then: Yup.string().oneOf(
                    [Yup.ref('password')],
                    'Invalid Password Confirmation'
                )
            })
    });

    return (
        <Formik
            initialValues={initialValues}
            validationSchema={validationSchema}
            onSubmit={submitCallback}>
            <Form>
                <FormGroup row>
                    <CustomInput
                        name={'name'}
                        label={'Name'}
                    />
                </FormGroup>
                <FormGroup row>
                    <CustomInput
                        name={'email'}
                        label={'Email Address'}
                        type={'email'}
                    />
                </FormGroup>
                <FormGroup row>
                    <CustomInput
                        name={'password'}
                        label={'Password'}
                        type={'password'}
                    />
                </FormGroup>
                <FormGroup row>
                    <CustomInput
                        name={'passwordConfirmation'}
                        label={'Confirm Password'}
                        type={'password'}
                    />
                </FormGroup>
                <Button
                    block
                    type='submit'
                    color={'danger'}>
                    Submit
                </Button>
            </Form>
        </Formik>
    );
};

export default Register;

The Login  and Register components are quite similar, we start off by declaring the initial values to be used in our form. All the values are empty because we want a clean slate every time a user is registering or logging in. We also declare a validation rule to be applied for each field in our forms. If the form is successfully validated, then the provided details are passed on to the API using  submitCallback which is passed as a prop from the Authentication component.

With authentication in place, we can build out the restricted area of our application which can only be accessed when the user has a valid JWT.

Restricted Components

In the react/src/components/restricted directory create three directories as follows:

  • client: This directory will contain components relevant for managing clients.
  • dashboard: This directory will contain components relevant for the rendering of the dashboard.
  • user: This directory will contain components relevant to the user.

In the react/src/components/restricted/user folder, create a file named Profile.js and add the following:

import React from 'react';
import { loadUser } from '../../../utility/LocalStorage';
import { Card, CardBody, CardImg, CardText, CardTitle } from 'reactstrap';
import { formatDate } from '../../../utility/Formatter';

const UserProfile = () => {
    const user = loadUser();
    return (
        <div className='centredDiv' style={{ marginTop: '50px' }}>
            <Card>
                <CardImg
                    top
                    width='50%'
                    src='https://bit.ly/3kBevZ0'
                    alt='Card image cap'
                />
                <CardBody>
                    <CardTitle>{user.name}</CardTitle>
                    <CardText>{user.email}</CardText>
                    <CardText>
                        <small className='text-muted'>
                            Account created on {formatDate(user.created_at)}
                        </small>
                    </CardText>
                </CardBody>
            </Card>
        </div>
    );
};
export default UserProfile;
 

This component renders a simple view of the authenticated user showing the user’s name, email address and date of creation (formatted with the formatDate function we declared in react/src/utility/Formatter.js). Because we didn’t store profile images for users on our database, placeholder images are used for the profile picture.

 Next we’ll build the components for the management of clients. In the react/src/components/restricted/client folder, create the following files:

  • ViewAll.js: This component displays the array of clients with an option to either view, edit or delete a client.
  • ViewOne.js: This component provides a detailed display of a single client.

Inside react/src/components/restricted/client/ViewAll.js add the following code:

import React, {useEffect, useState} from 'react';
import {DropdownItem, DropdownMenu, DropdownToggle, NavLink, Table, UncontrolledButtonDropdown,} from 'reactstrap';
import {formatCurrency, formatDate} from '../../../utility/Formatter';
import {makeRequest} from '../../../utility/Api';
import {loadJWT, saveClients} from '../../../utility/LocalStorage';
import SuccessAlert from '../../alert/Success';
import LoadingAlert from '../../alert/Loading';
import {Link} from 'react-router-dom';

const ClientsTable = () => {
    const [isLoading, setIsLoading] = useState(true);
    const [clients, setClients] = useState([]);
    const [responseMessage, setResponseMessage] = useState('');
    const [showSuccessAlert, setShowSuccessAlert] = useState(false);

    const onTimeout = () => {
        setShowSuccessAlert(false);
    };

    const updateClients = (clients) => {
        setClients(clients);
        saveClients(clients);
    };

    const deleteClient = (clientId) => {
        makeRequest({
            url: `client/${clientId}`,
            successCallback: (data) => {
                setResponseMessage(data.message);
                updateClients(clients.filter(({id}) => id !== clientId));
                setShowSuccessAlert(true);
            },
            failureCallback: (error) => {
                console.log(error);
            },
            requestType: 'DELETE',
            authorization: loadJWT(),
        });
    };

    useEffect(() => {
        makeRequest({
            url: 'client',
            successCallback: (data) => {
                const {message, clients} = data;
                updateClients(clients);
                setIsLoading(false);
                setShowSuccessAlert(true);
                setResponseMessage(message);
            },
            failureCallback: (error) => {
                console.log(error);
            },
            requestType: 'GET',
            authorization: loadJWT(),
        });
    }, []);

    return isLoading ? (
        <LoadingAlert/>
    ) : (
        <>
            {showSuccessAlert && (
                <SuccessAlert {...{message: responseMessage, onTimeout}} />
            )}
            <div style={{textAlign: 'center', margin: '20px'}}>
                <h1> All Clients</h1>
            </div>
            <Table responsive hover>
                <thead>
                <tr>
                    <th>#</th>
                    <th>Name</th>
                    <th>Email Address</th>
                    <th>Retainer Start</th>
                    <th>Retainer Fee</th>
                    <th>Actions</th>
                </tr>
                </thead>
                <tbody>
                {clients.map((client, index) => (
                    <tr key={client.id}>
                        <th scope='row'>{index + 1}</th>
                        <td>{client.name}</td>
                        <td>{client.email}</td>
                        <td>{formatDate(client.created_at)}</td>
                        <td>{formatCurrency(client.retainer_fee)}</td>
                        <td>
                            <UncontrolledButtonDropdown>
                                <DropdownToggle caret>Actions</DropdownToggle>
                                <DropdownMenu>
                                    <DropdownItem>
                                        <NavLink
                                            tag={Link}
                                            to={`/client/view/${client.id}`}>
                                            View Client
                                        </NavLink>
                                    </DropdownItem>
                                    <DropdownItem divider/>
                                    <DropdownItem>
                                        <NavLink
                                            tag={Link}
                                            to={`/client/edit/${client.id}`}>
                                            Edit Client
                                        </NavLink>
                                    </DropdownItem>
                                    <DropdownItem divider/>
                                    <DropdownItem
                                        onClick={() => {
                                            deleteClient(client.id);
                                        }}
                                    >
                                        Delete Client
                                    </DropdownItem>
                                </DropdownMenu>
                            </UncontrolledButtonDropdown>
                        </td>
                    </tr>
                ))}
                </tbody>
            </Table>
        </>
    );
};

export default ClientsTable;

The array of clients is displayed in a tabular format. The table of clients has columns for the name, email, retainer date and retainer fee for each client. An action column is also rendered with a dropdown of extra options.

The useEffect hook is used to request for the list of clients from the API. When a successful response is received, the local state and localStorage are updated with the clients and the table is rendered. While the application is waiting for a response, the Loading component is used to let the user know that the clients are being retrieved from the API.

The deleteClient function is used to DELETE requests to the API. On a successful response, the list of clients is updated and the table of clients is re-rendered accordingly.

In the react/src/components/restricted/client/ViewOne.js file, add the following code:

import React from 'react';
import { useParams } from 'react-router-dom';
import { findClient } from '../../../utility/LocalStorage';
import {
    Button,
    Card,
    CardBody,
    CardFooter,
    CardHeader,
    CardText,
    CardTitle,
} from 'reactstrap';
import { formatCurrency, formatDate } from '../../../utility/Formatter';

const ClientView = () => {
    const { id } = useParams();
    const client = findClient(id);

    return (
        <div className='centredDiv' style={{ marginTop: '50px' }}>
            <Card>
                <CardHeader>{client.name}</CardHeader>
                <CardBody>
                    <CardTitle>
                        Services retained at the price of{' '}
                        {formatCurrency(client.retainer_fee)}
                    </CardTitle>
                    <CardText>{client.email}</CardText>
                    <Button>Go somewhere</Button>
                </CardBody>
                <CardFooter>
                    <small className='text-muted'>
                        Services retained on {formatDate(client.created_at)}
                    </small>
                </CardFooter>
            </Card>
        </div>
    );
};

export default ClientView;

In this component, the useParams hook provided by React Router is used to determine the id of the client to be displayed. The id is then passed to the findClient function declared in react/src/utility/LocalStorage.js. The details of the retrieved client are then rendered accordingly.

While we can view all our clients or a single client, we cannot add or edit our clients yet. Let’s create some components to help us with that. In the react/src/components/restricted/client folder, create another folder called form.  This directory will have the following three (3) files:

  • AddClient.js
  • BaseClientForm.js
  • EditClient.js

Inside the  react/src/components/restricted/client/form/BaseClientForm.js file, add the following:

import React, { useState } from 'react';
import * as Yup from 'yup';
import { Form, Formik } from 'formik';
import { Button, FormGroup } from 'reactstrap';
import CustomInput from '../../../form/CustomInput';
import {
    addClient,
    loadJWT,
    updateClient,
} from '../../../../utility/LocalStorage';
import FailureAlert from '../../../alert/Failure';
import { makeRequest } from '../../../../utility/Api';
import SuccessAlert from '../../../alert/Success';
import { Redirect } from 'react-router-dom';

const BaseClientForm = ({ client }) => {
    const [errors, setErrors] = useState(null);
    const [shouldRedirect, setShouldRedirect] = useState(false);
    const [responseMessage, setResponseMessage] = useState('');
    const [showSuccessAlert, setShowSuccessAlert] = useState(false);

    const onTimeout = () => {
        setShouldRedirect(true);
    };

    const initialValues = {
        name: client?.name || '',
        email: client?.email || '',
        retainer_fee: client?.retainer_fee || '',
    };

    const validationSchema = Yup.object({
        name: Yup.string().required('Name is required'),
        email: Yup.string()
            .email('Invalid email address')
            .min(6, 'Email must be at least 6 characters')
            .max(50, 'Email cannot exceed 50 characters')
            .required('Email address is required'),
        retainer_fee: Yup.string()
            .required('Please specify retainer fee')
            .test('Digits Only', 'Retainer fee should only contain number', (value) =>
                /^\d+$/.test(value)
            ),
    });

    const successCallback = (data) => {
        const { message, client: clientDetails } = data;
        setResponseMessage(message);
        setShowSuccessAlert(true);
        if (client) {
            updateClient(clientDetails);
        } else {
            addClient(clientDetails);
        }
    };

    const submitCallback = (values) => {
        makeRequest({
            url: `client${client ? `/${client.id}` : ''}`,
            values,
            successCallback,
            failureCallback: (error) => {
                setErrors(error);
            },
            authorization: loadJWT(),
        });
    };

    return shouldRedirect ? (
        <Redirect to='/' />
    ) : (
        <>
            {errors && <FailureAlert errors={errors} />}
            {showSuccessAlert && (
                <SuccessAlert
                    {...{
                        message: responseMessage,
                        onTimeout,
                        shouldShow: showSuccessAlert,
                    }}
                />
            )}

            <div className='centredDiv' style={{ marginTop: '60px' }}>
                <Formik
                    initialValues={initialValues}
                    validationSchema={validationSchema}
                    onSubmit={submitCallback}
                >
                    <Form>
                        <FormGroup row>
                            <CustomInput name={'name'} label={'Name'} />
                        </FormGroup>
                        <FormGroup row>
                            <CustomInput
                                name={'email'}
                                label={'Email Address'}
                                type={'email'}
                            />
                        </FormGroup>
                        <FormGroup row>
                            <CustomInput
                                name={'retainer_fee'}
                                label={'Retainer Fee'}
                                type={'number'}
                            />
                        </FormGroup>
                        <Button block type='submit' color={'danger'}>
                            Submit
                        </Button>
                    </Form>
                </Formik>
            </div>
        </>
    );
};

export default BaseClientForm;

As with the Login and Register components we declare the initial values of the form and our validation schema. The initial values in this component aren’t as straightforward however. This is because when we are editing a client, we want the initial values to correspond with the client’s saved details.

There’s also a successCallback which is triggered if the API handled the request successfully. If triggered, the details from the API are saved and a success message is displayed. Additionally, after 4 seconds, the user is returned to the dashboard. This is done using the onTimeout callback prop passed to the SuccessAlert component.

In react/src/components/restricted/client/form/AddClient.js add the following:

import React from 'react';
import BaseClientForm from './BaseClientForm';

const AddClientForm = () => <BaseClientForm client={null} />;
export default AddClientForm;

As you can see this component just wraps the BaseClientForm component. But since we are creating a new client, we pass null to the component. By doing this the form is rendered with empty initial values.

In react/src/components/restricted/client/form/EditClient.js add the following:

import React from 'react';
import BaseClientForm from './BaseClientForm';
import { useParams } from 'react-router-dom';
import { findClient } from '../../../../utility/LocalStorage';

const EditClientForm = () => {
    const { id } = useParams();

    return <BaseClientForm client={findClient(id)} />;
};

export default EditClientForm;

This component uses the useParams hook to get the requested id and passes the appropriate client to the BaseClientForm.

With all the client components implemented, we can implement our dashboard. In the react/src/components/restricted/dashboard folder, create the following files:

  • Index.js: This is the component loaded immediately the user is successfully authenticated.
  • Menu.js: This component renders the menu for the dashboard.

In the react/src/components/restricted/dashboard/Menu.js file add the following:

import React, {useState} from 'react';
import {
    Collapse,
    DropdownItem,
    DropdownMenu,
    DropdownToggle,
    Nav,
    Navbar,
    NavbarBrand,
    NavbarToggler,
    NavLink,
    UncontrolledDropdown
} from 'reactstrap';
import {Link} from 'react-router-dom';

const DashboardMenu = ({logout}) => {
    const [isOpen, setIsOpen] = useState(false);

    const toggle = () => setIsOpen(!isOpen);

    return (
        <Navbar color='light' light expand='md'>
            <NavbarBrand href="/" className="mr-auto">Home</NavbarBrand>
            <NavbarToggler onClick={toggle}/>
            <Collapse isOpen={isOpen} navbar>
                <Nav className='ml-auto' navbar>
                    <UncontrolledDropdown nav inNavbar>
                        <DropdownToggle nav caret>
                            More Actions
                        </DropdownToggle>
                        <DropdownMenu right>
                            <DropdownItem>
                                <NavLink tag={Link} to={'/client/add'}>
                                    Add Client
                                </NavLink>
                            </DropdownItem>
                            <DropdownItem>
                                <NavLink tag={Link} to={'/profile'}>
                                    View Profile
                                </NavLink>
                            </DropdownItem>
                            <DropdownItem divider/>
                            <DropdownItem onClick={logout}>
                                Logout
                            </DropdownItem>
                        </DropdownMenu>
                    </UncontrolledDropdown>
                </Nav>
            </Collapse>
        </Navbar>
    )
};

export default DashboardMenu;

In the react/src/components/restricted/dashboard/Index.js file add the following:

import React from 'react';
import DashboardMenu from './Menu';
import {BrowserRouter as Router} from 'react-router-dom';
import Routes from '../../routing/Routes';

const Dashboard = ({logout}) => {

    return (
        <Router>
            <>
                <DashboardMenu logout={logout}/>
                <Routes/>
            </>
        </Router>
    )
};

export default Dashboard;

The last thing to do is add the styling for our React app and update our react/src/App.js file. In the react/src directory, create a file named App.css and add the following styles:

.centredDiv {
    position: absolute;
    top: 40%;
    left: 50%;
    transform: translate(-50%, -50%);
    text-align: center;
}

.plainList {
    list-style-type: none;
    margin: 0;
    padding: 0;
}

.wrap {
    max-width: 1024px;
    margin: 5rem auto;
    padding: 2rem;
    background: #fff;
    text-align: center;
    border: 1px solid #efefef;
    border-radius: 0.5rem;
    position: relative;
}

Finally update react/src/App.js to match the following:

import React, {useState} from 'react';
import ReactDOM from 'react-dom';
import {clearState, loadJWT} from './utility/LocalStorage';
import Authentication from './components/authentication/Authentication';
import Dashboard from './components/restricted/dashboard';
import 'bootstrap/dist/css/bootstrap.min.css';
import './App.css';

const Root = () => {
    const [isAuthenticated, setIsAuthenticated] = useState(!!loadJWT());

    const onLogin = () => {
        setIsAuthenticated(true);
    };

    const onLogout = () => {
        clearState();
        setIsAuthenticated(false);
    };

    return !isAuthenticated ?
        <Authentication
            setIsAuthenticated={onLogin}
        />
        :
        <Dashboard
            logout={onLogout}
        />;
};

let container = document.getElementById('app');
let component = <Root/>;
ReactDOM.render(component, container);

Our React app is ready for use. Bundle your React application and then start your project by running the following command:

$ webpack
$ php spark serve

Navigate tohttp://localhost:8080/ from your browser to view the new welcome page. Since we do not have any details in localStorage, we are met with the registration form. As you can see from the image below, our validation is also working as expected:
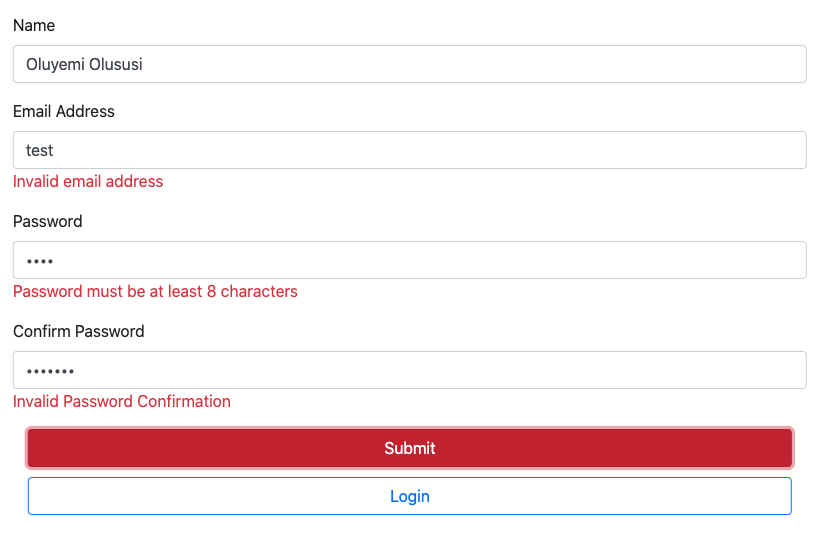
Registration Form

Complete the registration and you will be redirected to the dashboard.
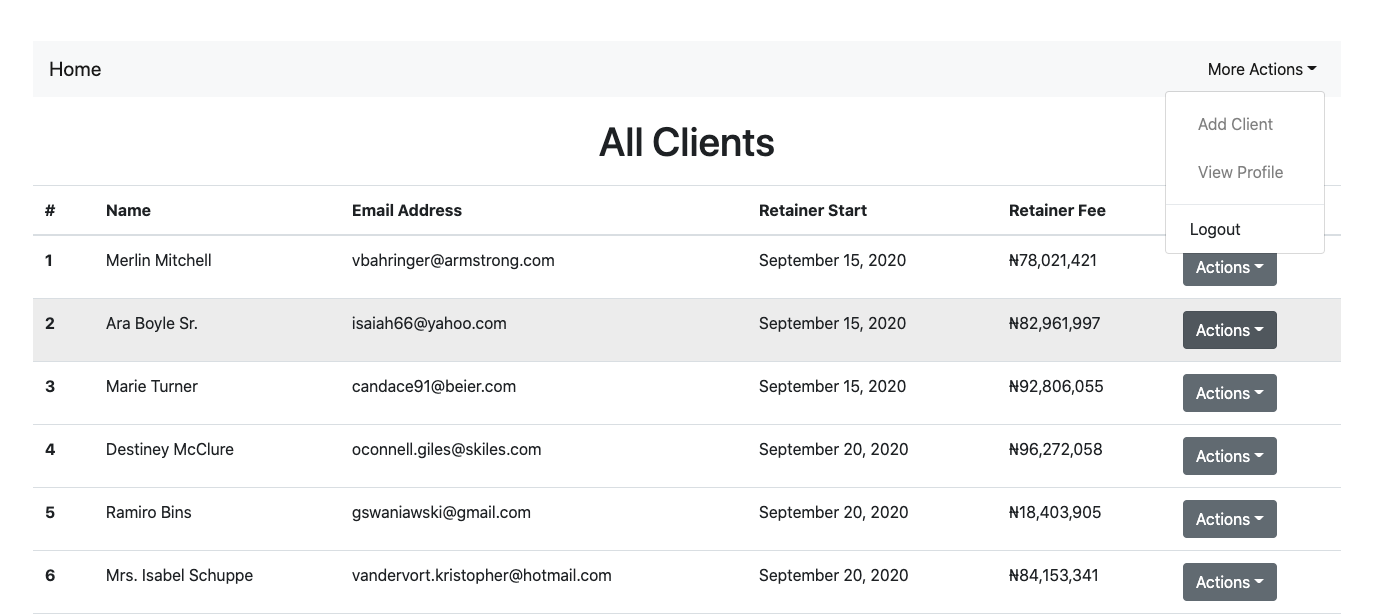
Dashboard

Conclusion

In this article, we built a React application that interacts with a CodeIgniter API. Using Webpack, we bundled the React application and served it in the index page returned by our API. This allowed us to maintain our client and server side applications in the same codebase. We also learned how to structure our project in a manner that separates concerns and makes our application loosely coupled.

The entire codebase for this tutorial is available on GitHub. Feel free to explore further. Happy coding!

Oluyemi is a tech enthusiast with a background in Telecommunication Engineering. With a keen interest to solve day to day problems encountered by users, he ventured into programming and has since directed his problem solving skills at building softwares for both web and mobile. As a full stack software engineer with a passion for sharing knowledge, Oluyemi has published a good number of technical articles and content on several blogs on the internet. Being tech savvy, his hobbies include trying out new programming languages and frameworks.