How to Build an Automated SMS Survey Using Twilio Studio and IBM Watson Tone Analyzer
Time to read:
This post is part of Twilio’s archive and may contain outdated information. We’re always building something new, so be sure to check out our latest posts for the most up-to-date insights.
Surveys are a great tool to receive feedback from your customers. Timely surveys to new and existing customers can provide enormous insight into how your product or service is performing, and highlight problems you may not know existed.
In this tutorial, we’ll build an automated SMS survey application that reacts empathetically to customer responses using Twilio Studio, IBM Watson Tone Analyser, and a little bit of JavaScript.
Upon completion, you will have learned about Twilio’s visual application builder, Twilio Studio, and how to utilize it to build an automated SMS survey workflow. You’ll also learn how to integrate external third-party APIs into the workflow to enhance the application’s functionality. By the end of this article, you will be on your way to building a fully-featured SMS survey that replies based on the customer’s feedback.
In the following examples, we’re going to tailor the questions towards the hotel industry. More specifically, our survey will be targeted towards customers who have recently checked out of their hotel.
Let’s get started!
Prerequisites
To complete this tutorial you will need the following:
- A free Twilio account
- A free IBM Cloud account
- Basic knowledge of JavaScript
You will also need an active Twilio phone number with SMS capabilities. If you don't already have a phone number you can find one here.
Create a new Flow
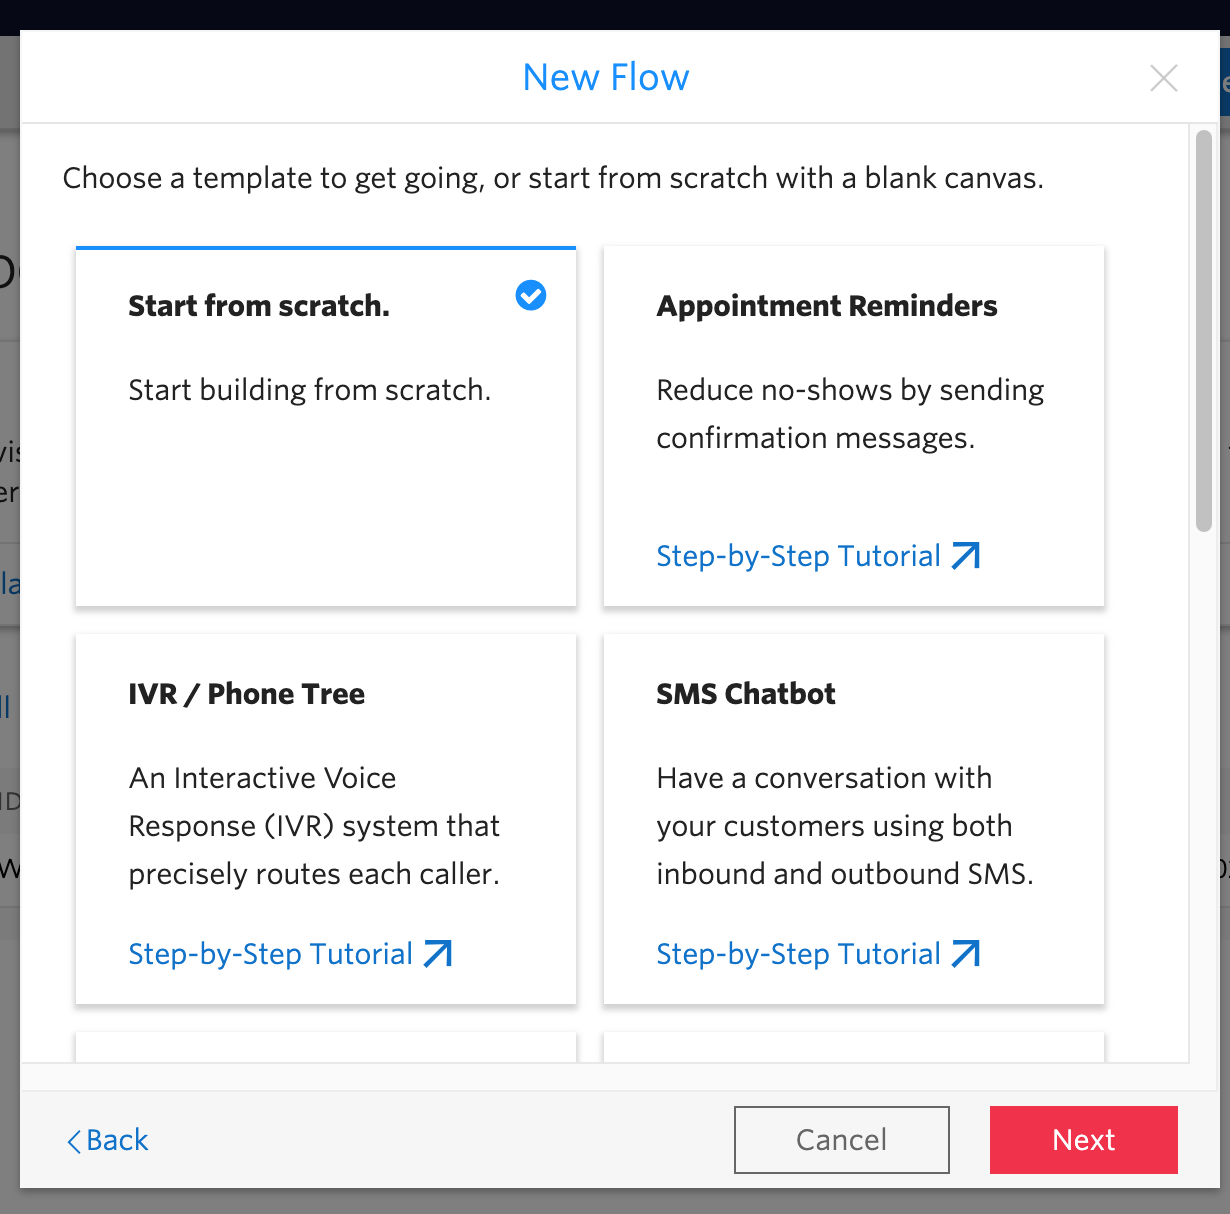
To begin, create a new Flow via the Twilio Studio user interface. Give your Flow a descriptive name. Something similar to the “Automated SMS Survey” will suffice. Twilio provides a collection of templates to help you get you started with your Flow. For now, select the “Start from scratch” option, but be sure to check out the templates if you need inspiration in the future.
Once created, you’ll be directed to the visual application builder.
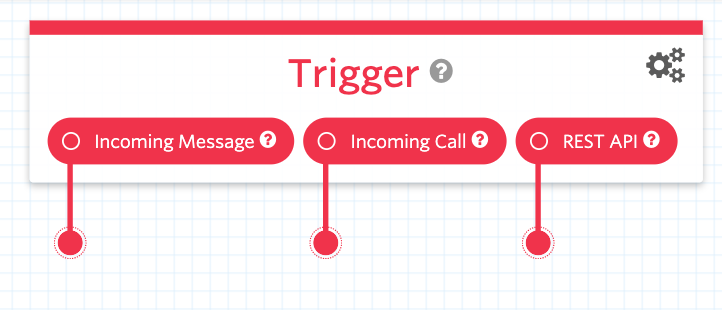
Every Flow starts with a Trigger widget. This is the entry point that kick starts your workflow. It can be initiated via an “Incoming Message”, “Incoming Call”, or “REST API”. For our case, we want to start the SMS survey when the customer checks out of the hotel. To do this we’ll use the REST API as the trigger, which means the hotel’s existing system can start the workflow with a simple HTTP request.
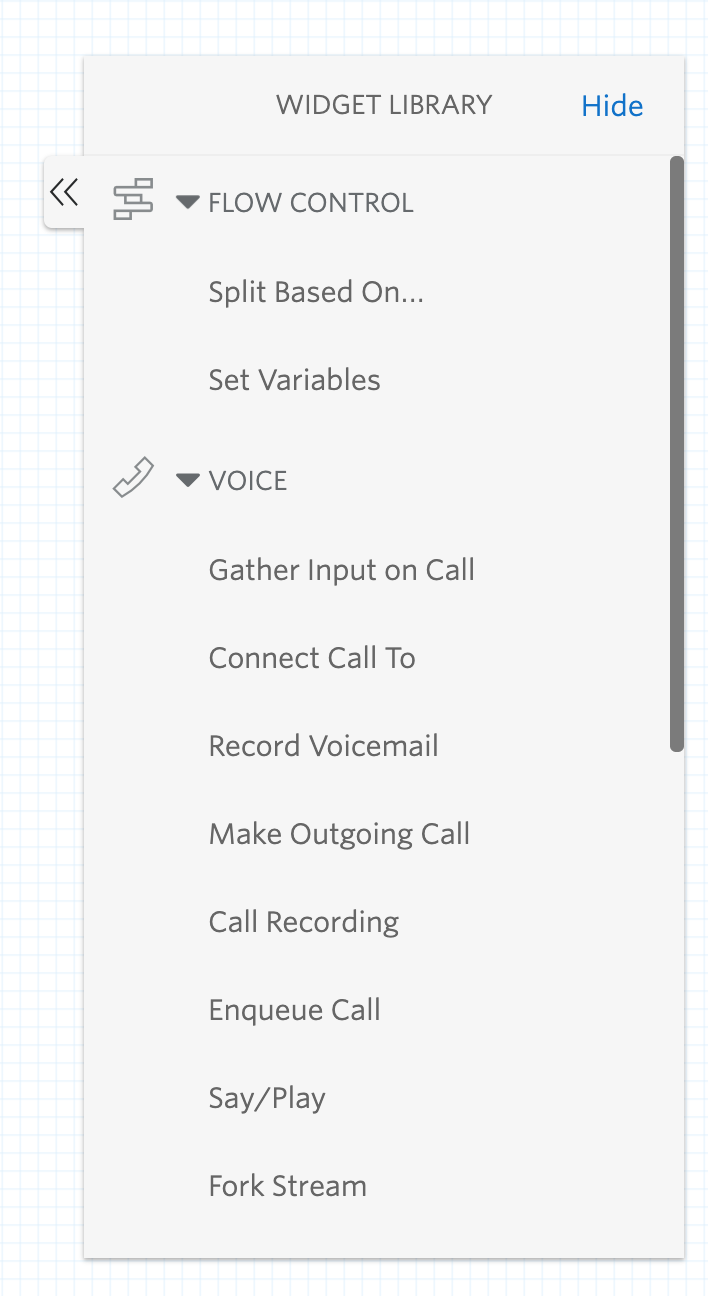
Before we continue, it’s worth talking about the amazing Widget Library. Twilio provides a set of existing functionality to assist you with interacting with other Twilio services. These powerful tools enable you to easily send messages, initiate outbound calls, run arbitrary functions via Twilio Functions (which we’ll be looking at later on), or set up control flows to name a few.
Sending the First Question
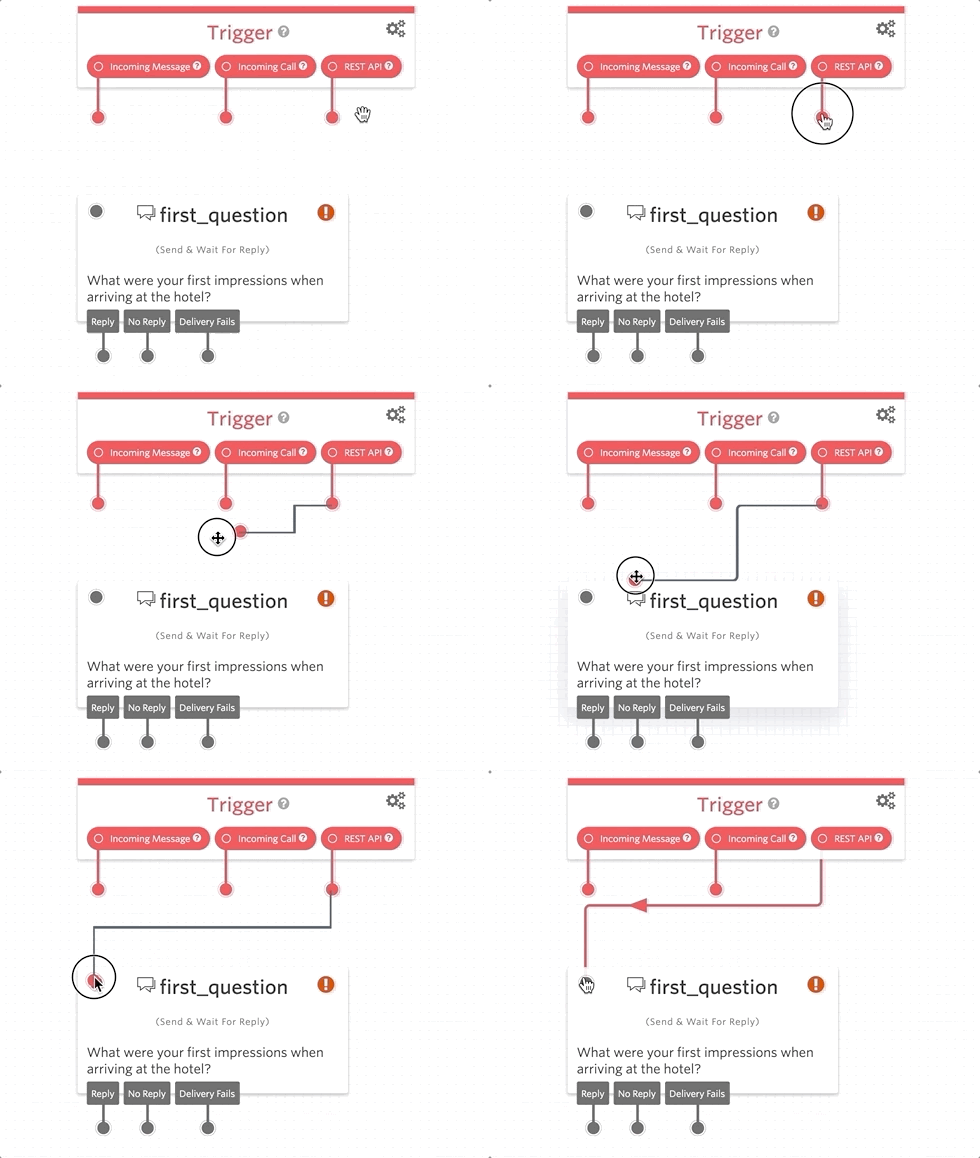
To begin, drag a “Send and Wait for Reply” widget on to the canvas. Remember to give the widget a descriptive name for when you refer back to it later. Finally, link the REST API trigger to the widget. You can do this in the widget configuration or by dragging the trigger to the widget like so:
Validating the Response
We’ll expect the customer to reply with an open-ended response based on their experience at the hotel. If the user replies with a blank message, then we should ask them the same question again. Twilio Studio makes this easy to do with the “Split Based On…” widget. This widget type enables you to control which path the flow follows based on a variable. In our case, we want a split based on the inbound response to the previous question.
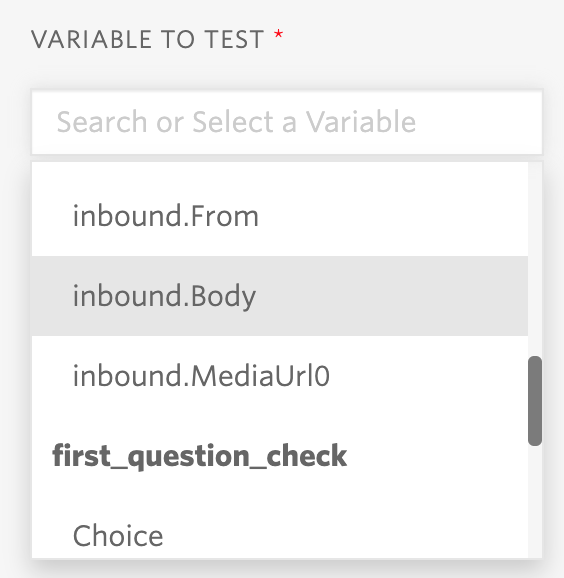
Drag a “Split Based On…” widget onto the canvas and give it a descriptive name. Open the widget options (this should open automatically when you add a new widget) and open the “Variable to Test” dropdown. Find the “Send and Wait for Reply” widget name we created earlier in the dropdown and select the Inbound.Body option from the list.
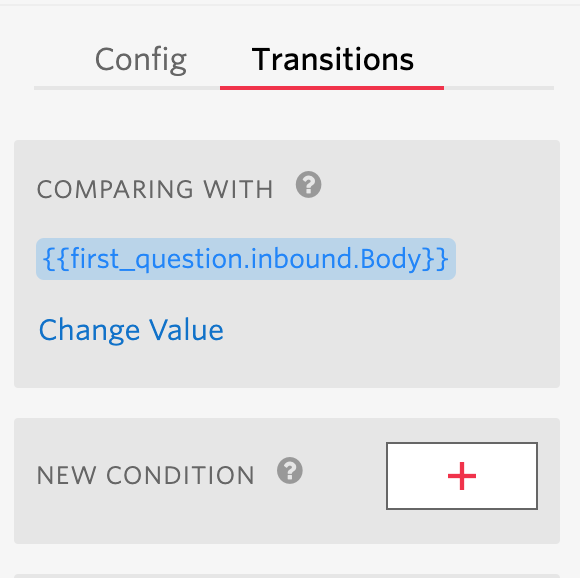
Next, you need to check the value for a blank response. To do this switch over to the “Transitions” tab and add a new condition.
Navigate to the new Transition and change the dropdown to Is Blank.
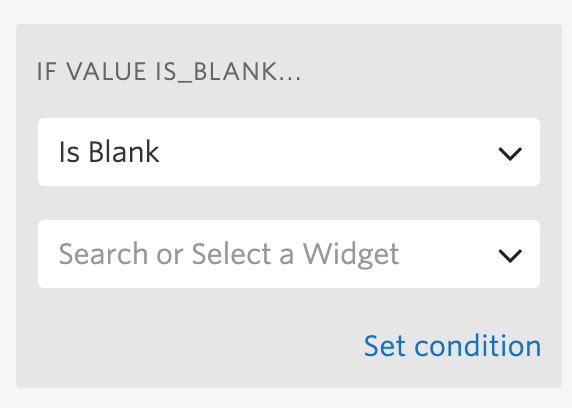
You should see a new Transition point appear on your widget.
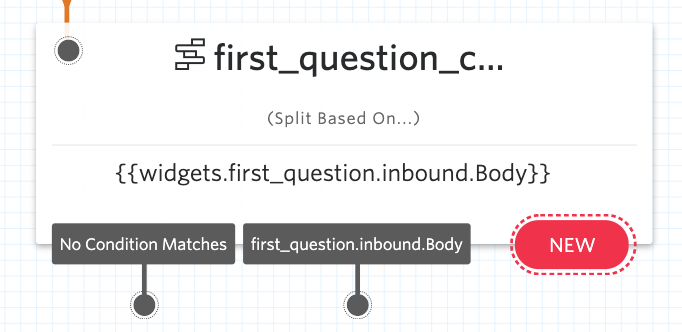
Connect this Transition to form a connection with the first_question widget
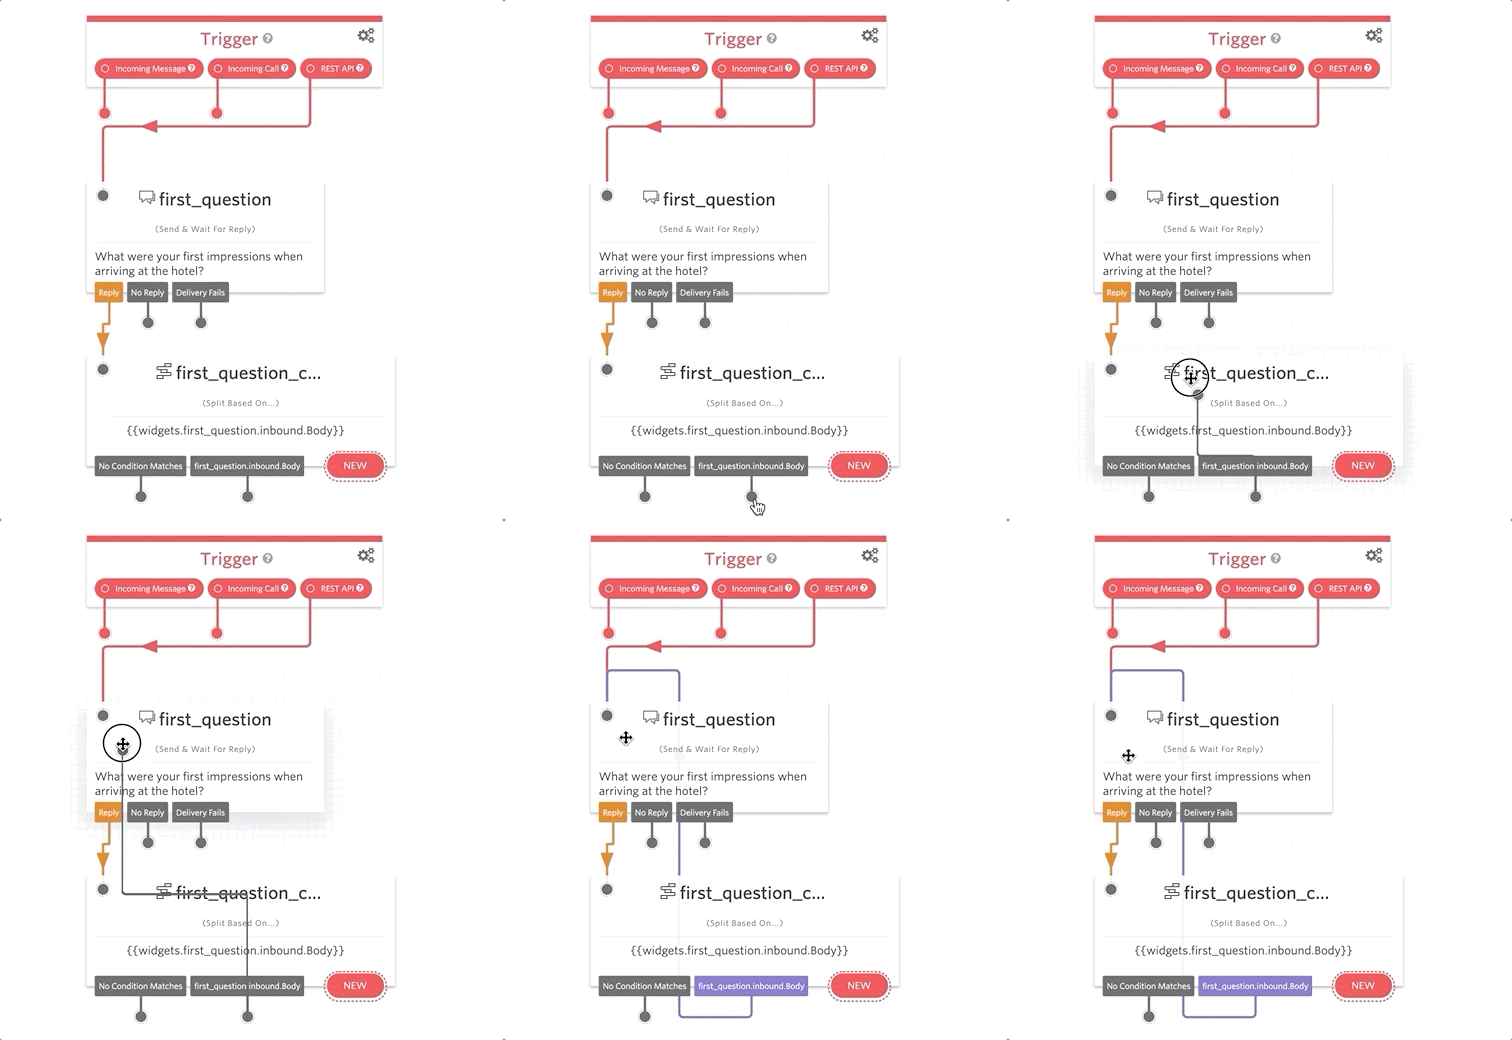
If you want to add more specific validation, take a look at the different options the “Split Based On…” widget provides. Twilio provides a collection of useful default matching functions, and also allows you to use Regex for more bespoke use cases.
Extracting Tone from the User’s Response
To add an extra dimension to our survey, we’re going to use AI to provide a more empathic touch.
There are many API services available to extract sentiment and tone from a sentence. Twilio also offers an entire product for AI-powered chatbots called Autopilot which you may find useful. For this tutorial, we’re going to use a third-party offering IBM Watson to demonstrate how we can use a little bit of JavaScript to enhance our Flow.
IBM Watson Tone Analyser provides a reasonable amount of API calls on the lite tier which means you can get started for free! Additionally, the tone analyzer provides two endpoints: a general-purpose service, and a more targeted customer engagement endpoint. The two endpoints return a different set of possible tones, so it’s worth checking them both out to see which one suits your needs the most. In our case, the customer engagement endpoint is more appropriate because we’re interacting directly with a customer.
You should already have an IBM Cloud account, if not head over there now to create one. Once your account is created (this can take a few minutes), navigate to the IBM Cloud catalog and search for Tone Analyzer.
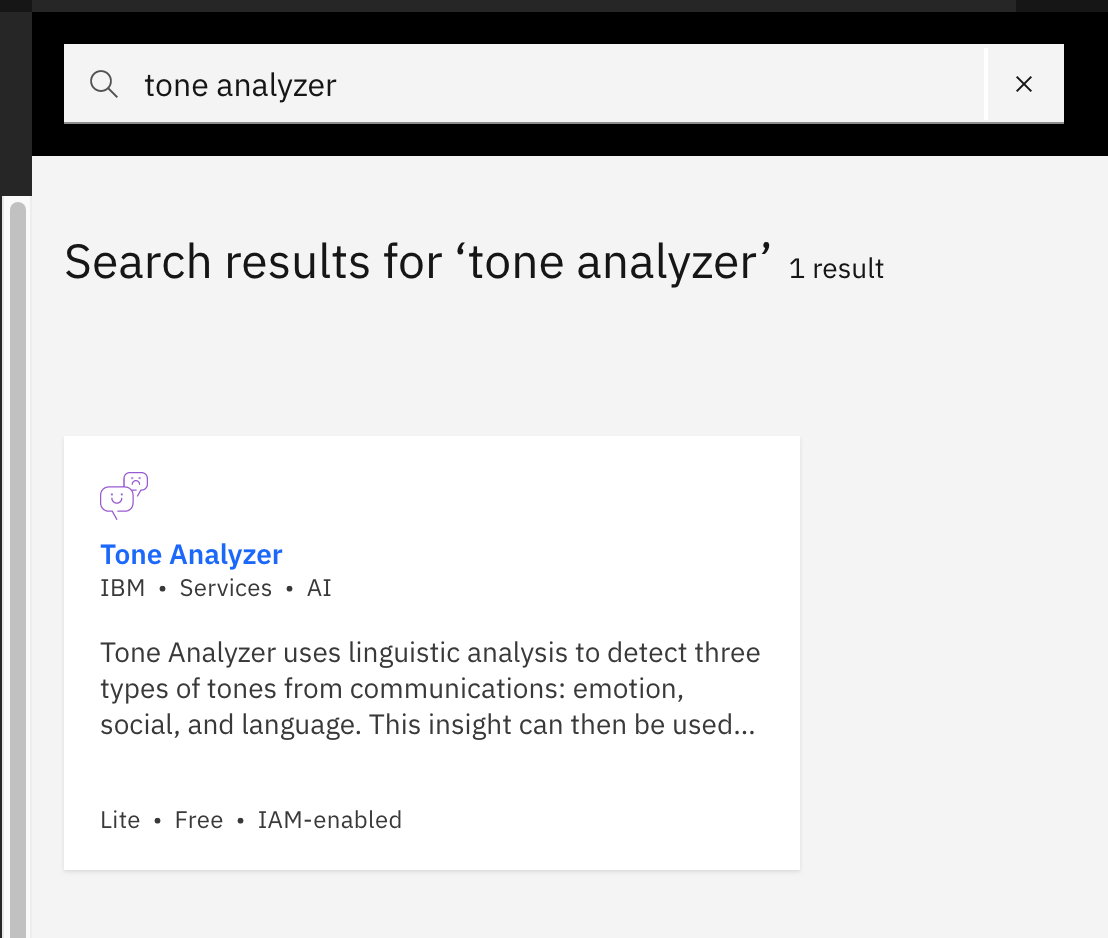
Select an appropriate region and give your service a descriptive name. This could take a few minutes to set up so hold tight. When your service has finished setting up, you’ll receive credentials to securely access your Tone Analyzer service instance.
Creating a Twilio Function
Twilio Functions is a serverless environment that enables you to create event-driven Twilio applications that scale.
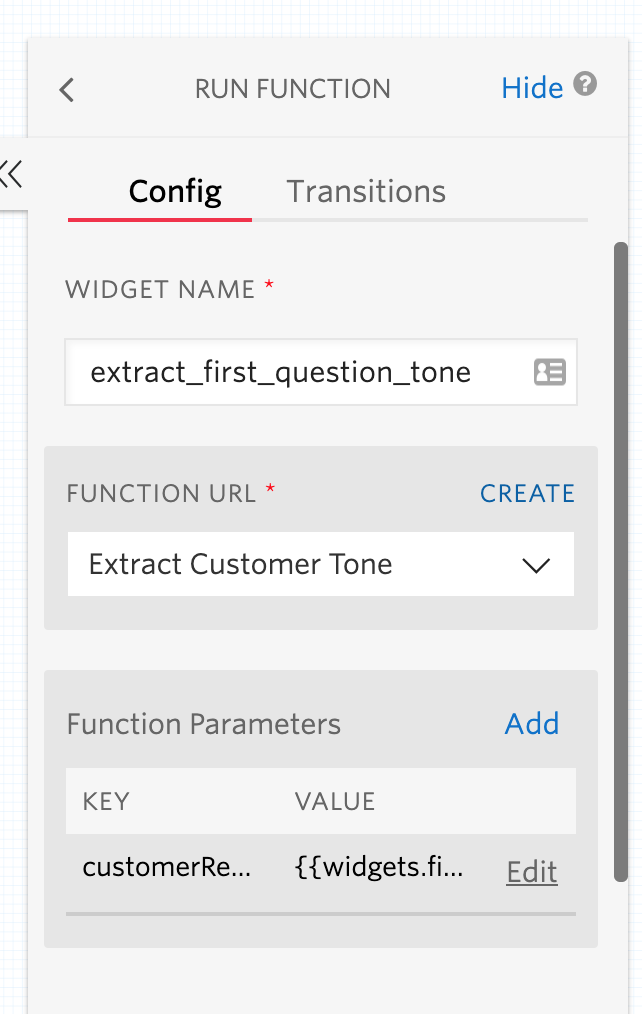
Head back over to Twilio Studio and drag over a new Run Function widget from the Widget Library. Give it a descriptive name (I’m calling mine extract_first_question_tone) and select the creation option above the dropdown to create a new Function.
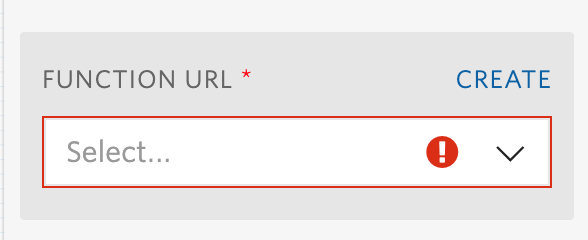
Create a new, blank Twilio Function and give it a name, something like “Extract Customer Tone”. Navigate to the Configure tab by selecting the navigation option on the left-hand side. Add the Tone Analyzer Credentials we created above as Environment Variables.

Whilst you’re here, also add axios to the Dependencies list like so:
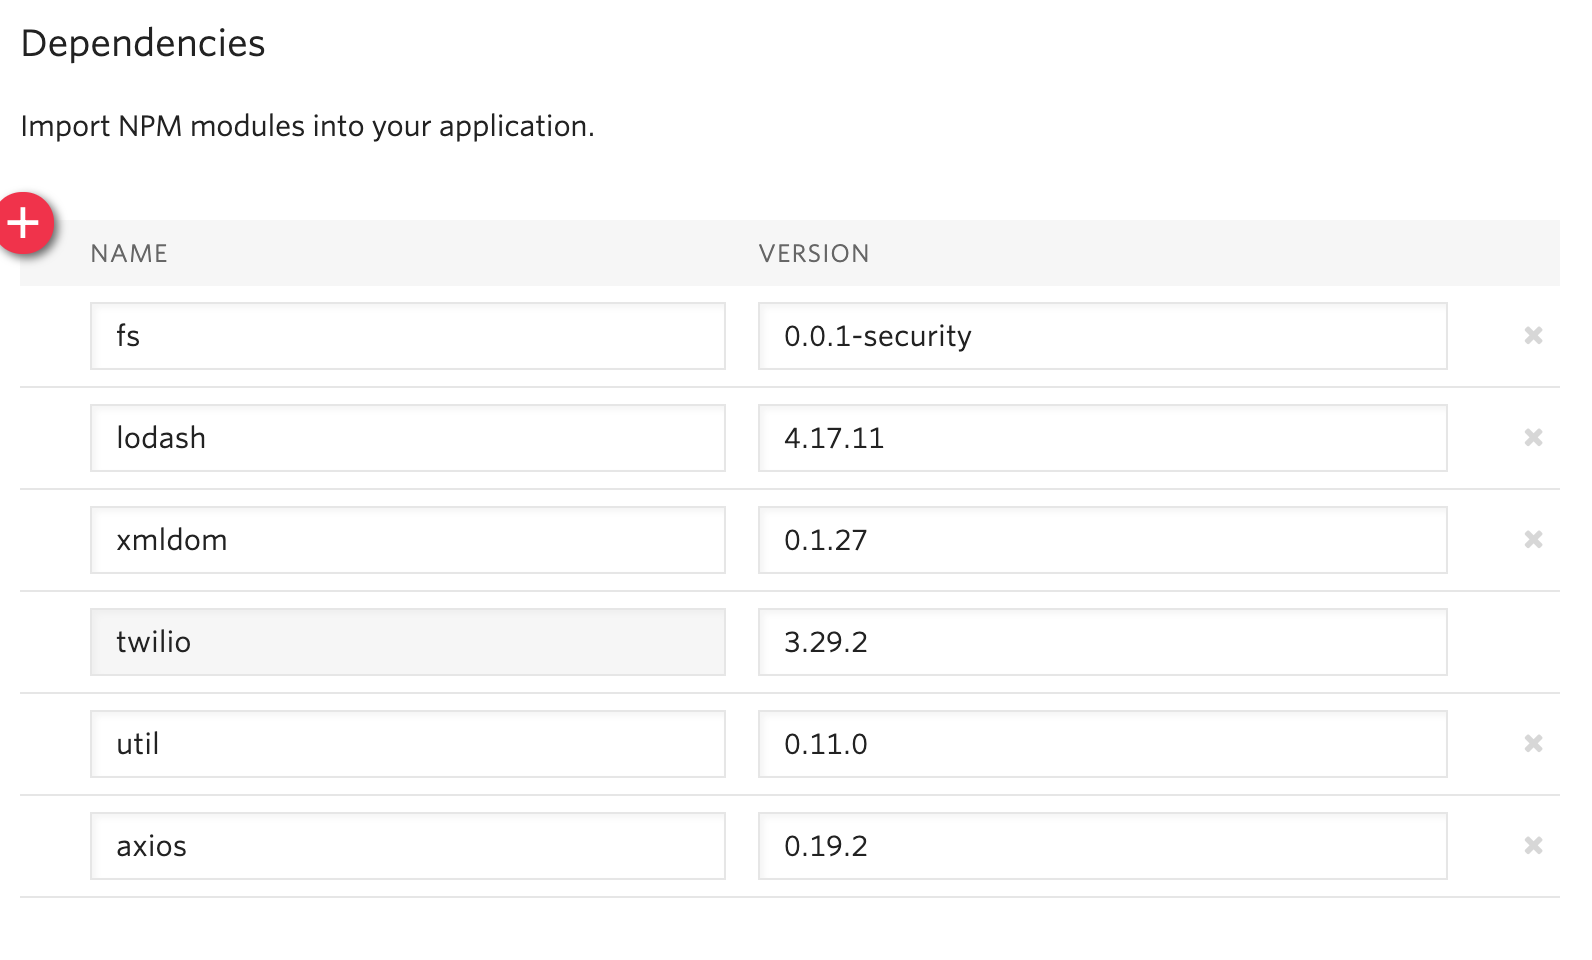
Save your configuration and head back over to your Function code editor. Replace the contents with the following code:
The code snippet above passes the customerResponse property of the provided event to the Tone Analyzer service and then extracts the main tone from the response.
Give your Function a URL (e.g. /extract-customer-tone) and save your changes.
Head back over to Twilio Studio and select the newly created Function from the dropdown in the Function widget configuration options. Also, be sure to add the customerResponse Function Parameter using the first_question.inbound.body value.
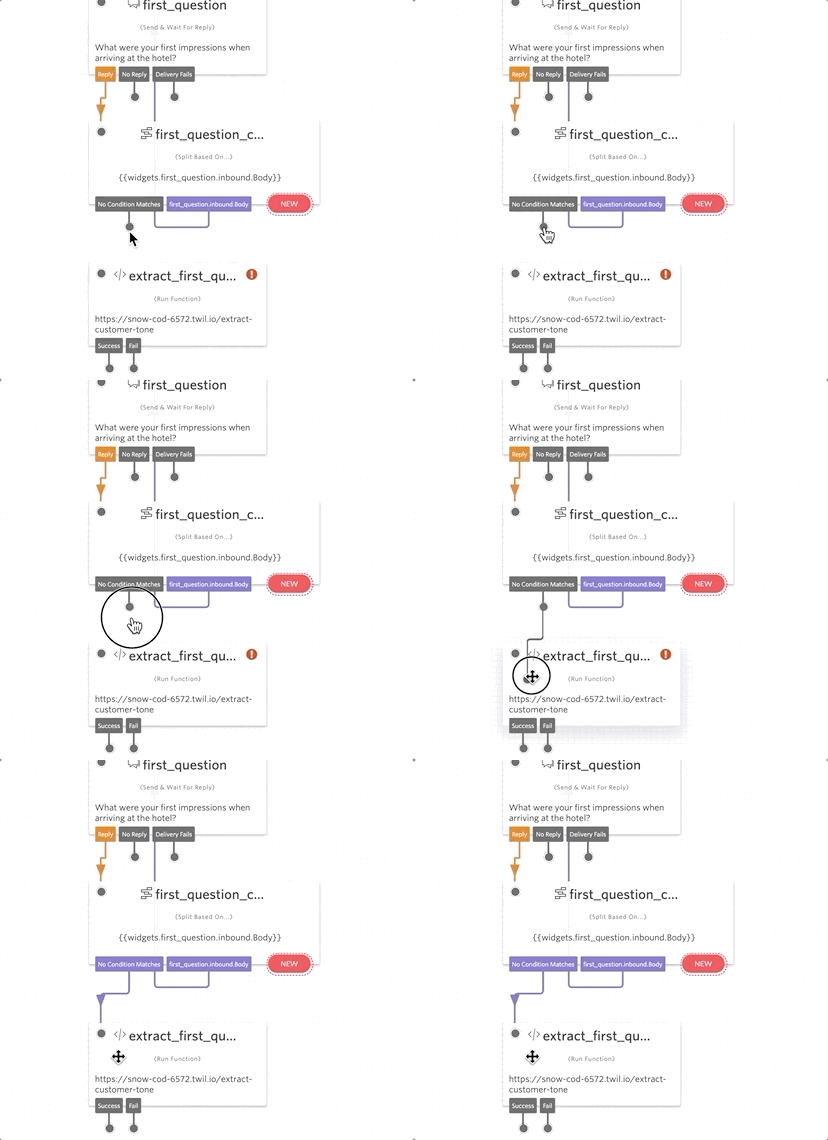
Hook up the “No Condition Match” transition from the “Split Based On..” widget you created earlier, to the Run Function widget. If you recall, this transition means the user replied with a non-empty response.
Reacting to the Customer’s Tone
Now that you’re extracting the customer’s tone from their response, we want to move on to reacting accordingly. If the customer’s tone is excited, polite, or satisfied, we’ll assume they responded positively, otherwise, we’ll assume it was negative. Depending on your questions, you may need to alter this if you anticipate the tones could be reflective of the opposite response type.
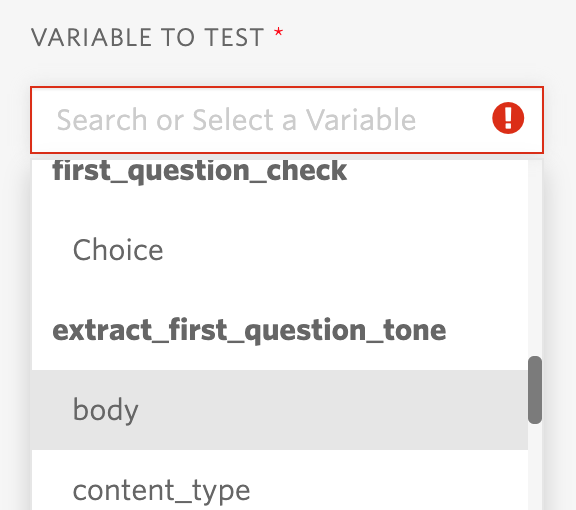
Drag another “Split Based On…” widget on to the canvas. Similar to what you did before, find the extract_first_question_body in the dropdown and select the body option.
Navigate to the “Transitions” tab and add a new condition to the widget. Select the “Matches Any Of” option, which allows us to provide a collection of values to match against. In this case, we want to match the happy path tone ids as mentioned above. Add excited, polite, satisfied to the value field.
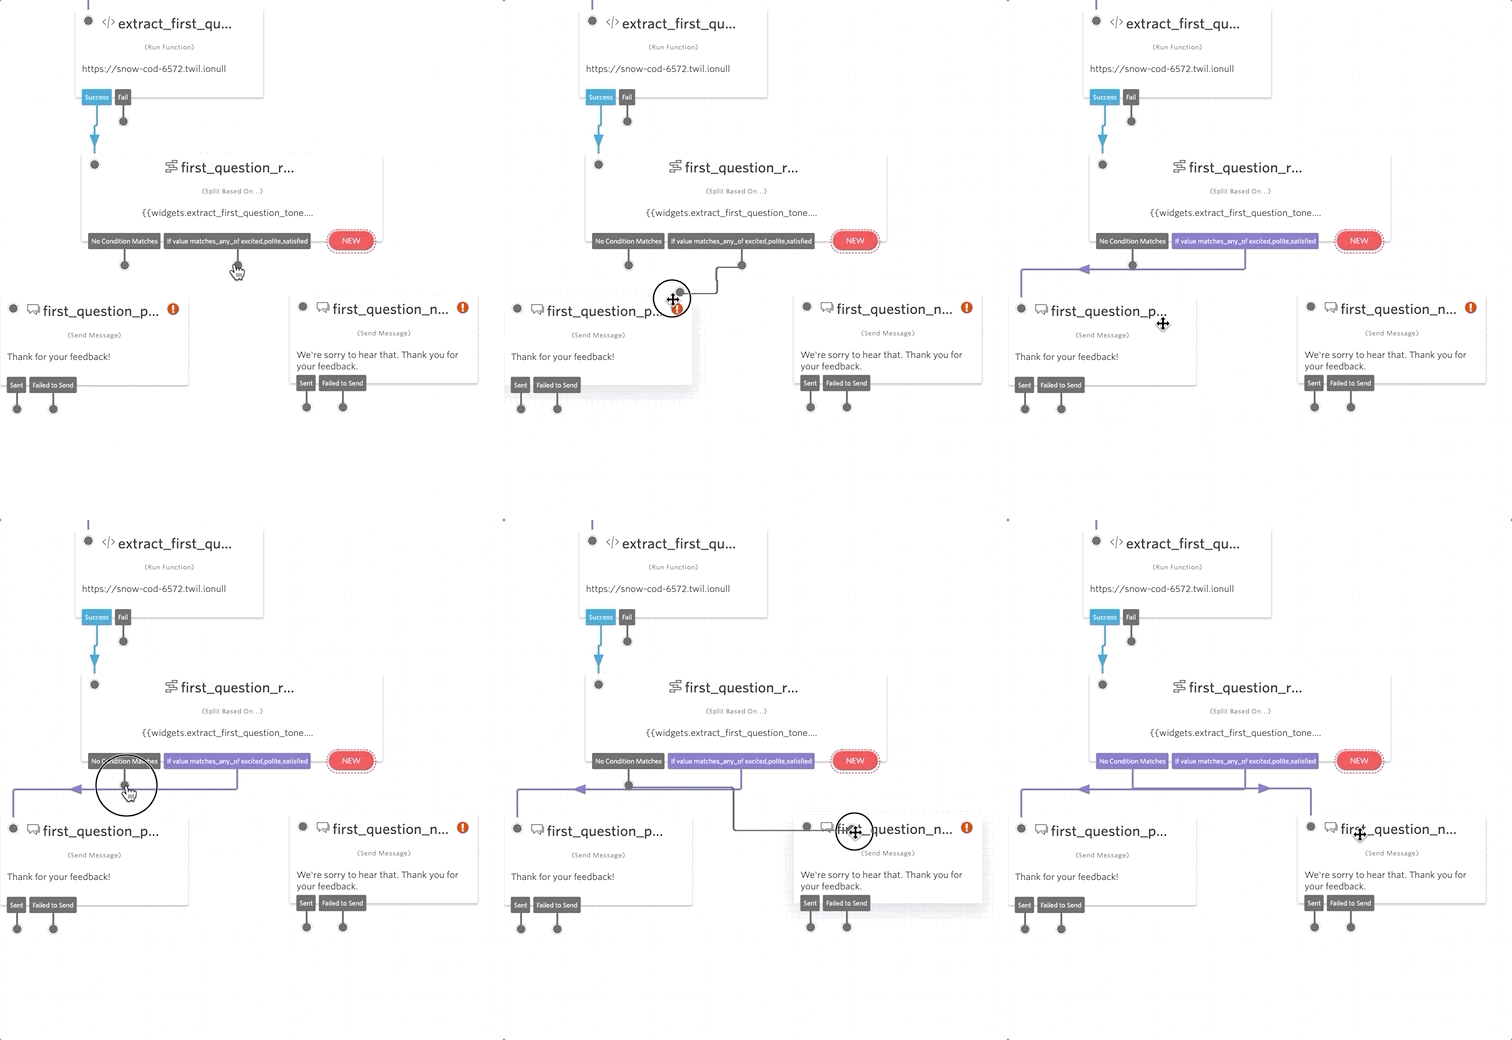
Now create two new Send Message widgets: one for a positive response and one for a negative response. Add the message content you want to send to the customer for each of these different widgets, ensuring you take into consideration the user’s tone. Once complete, connect the positive tone Transition to the positive send Message widget and the “No Condition Match” to the negative Send Message widget.
Testing
Now that the flow is complete, you need to Publish the changes. You will also need to do this every time you make a change to the flow. If you make a mistake or want to go back to a previous version you can use the Revision History tab on the left-hand side of the canvas. Once published successfully, the publish button will change into a “Flow is up-to-date” button.

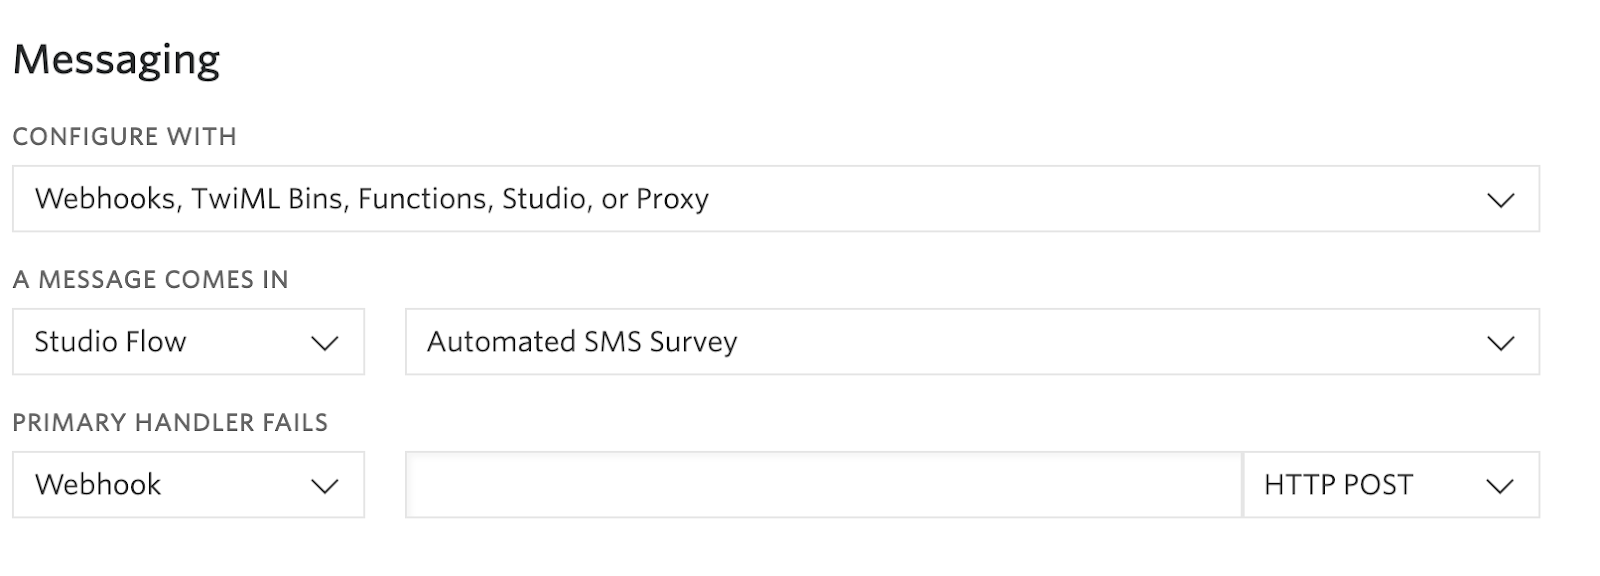
Before you begin testing your workflow, head over to your Twilio phone number and double-check the Messaging configuration is correct. Ensure the “A Message Comes in” is set to “Studio Flow” and select the Flow you just created.
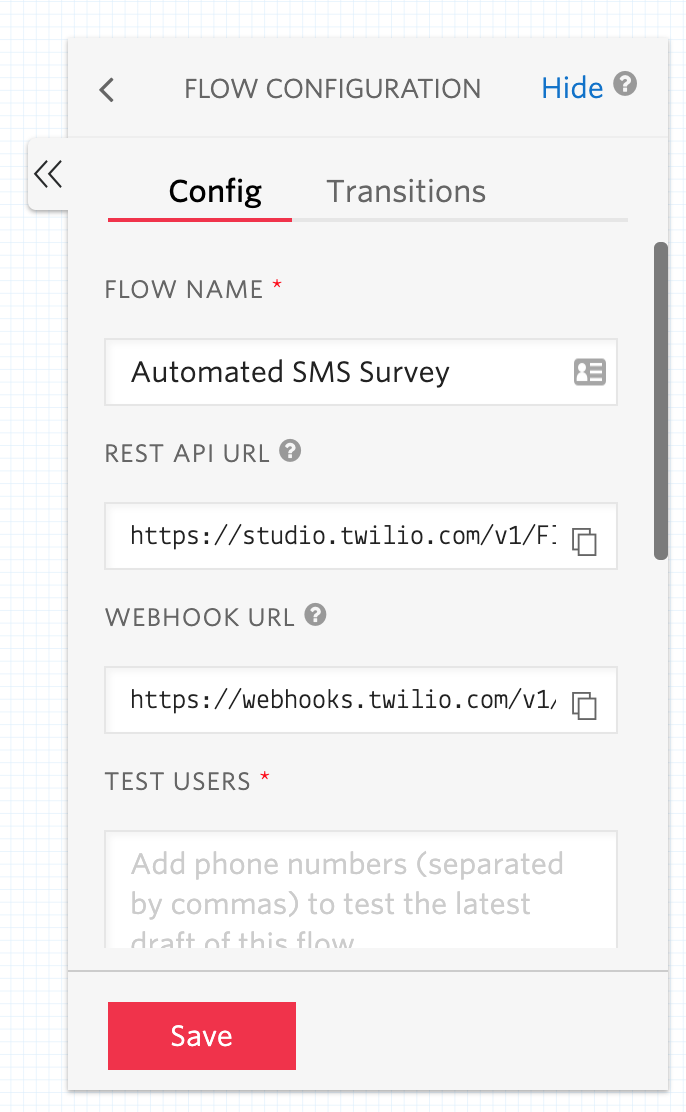
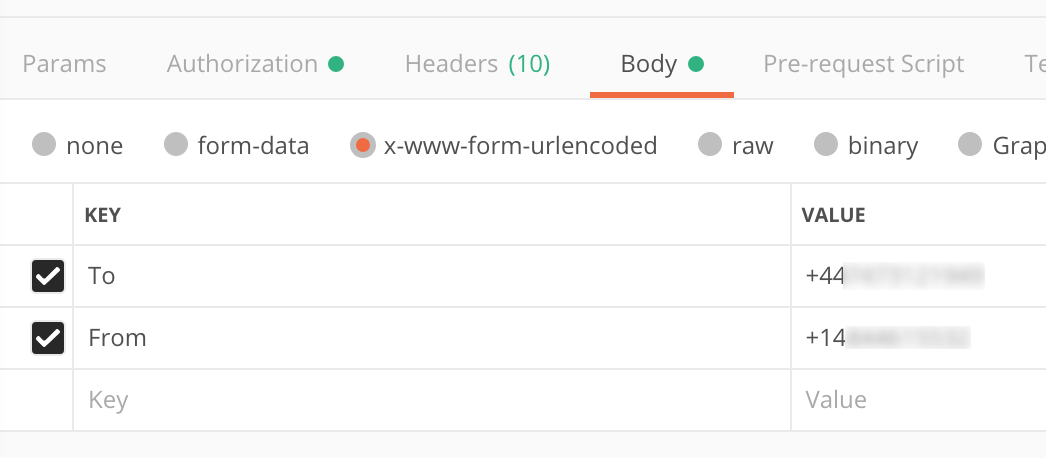
To ensure your workflow works correctly, you can send an HTTP POST request to the REST API URL, found in the Trigger configuration. Select the Trigger widget at the root of the flow and copy the REST API URL to your clipboard.
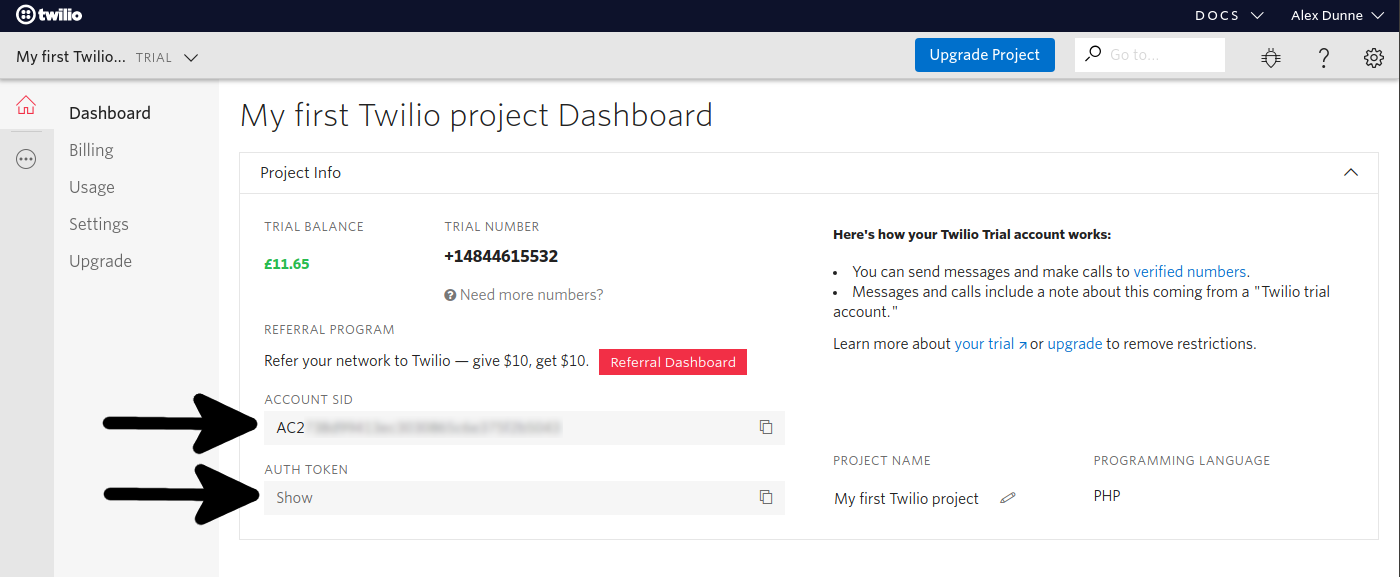
You’ll also need your Twilio Account SID and Auth Token. You can find these on the Console dashboard.

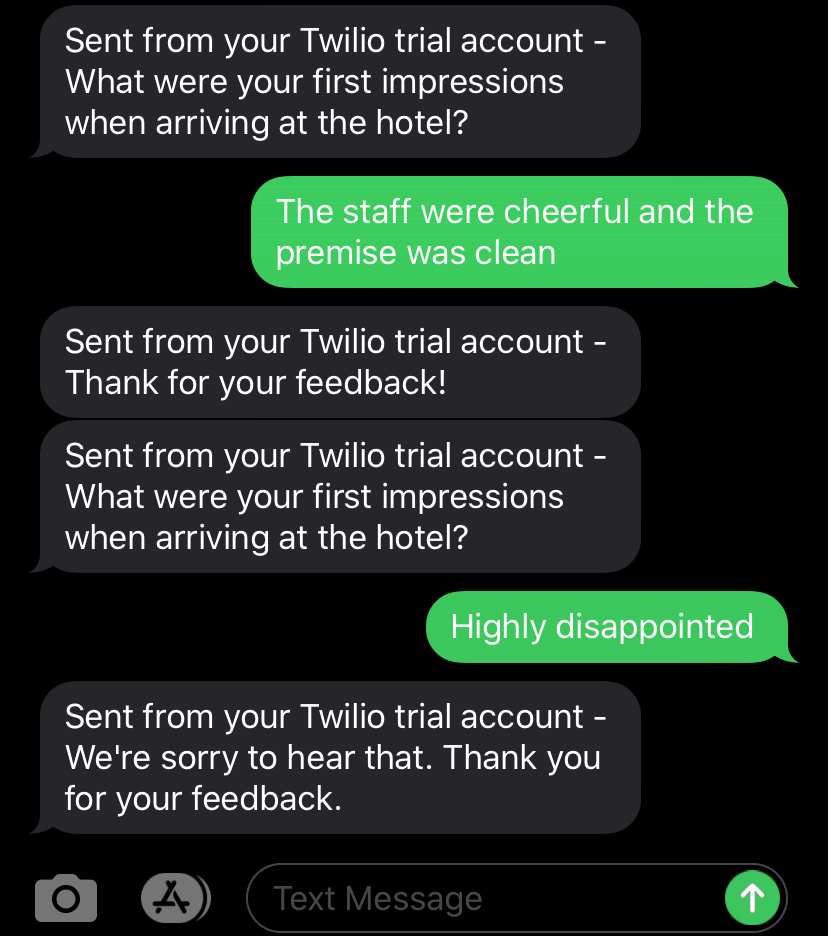
If everything worked correctly you should receive different messages depending on if you reply positively or negatively.
It’s possible that when you reply to the question nothing happens. This can happen when the Tone Analyzer is unable to extract a tone from the response with a high enough confidence. To double-check your flow, use the phrases “The staff was cheerful and the premise was clean” and “Highly disappointed” for a positive and negative response respectively.
Conclusion
Congratulations! You have successfully used Twilio Studio, Twilio Functions, IBM Watson, and a little bit of JavaScript to create an automated SMS survey that takes into account your users’ emotions. You should now understand the power and flexibility Twilio Studio provides and how it can assist you with creating a powerful workflow easily and quickly.
If you want to extend your survey, I recommend adding further questions to gauge the overall experience of the customer. You could also integrate with other APIs like Google Natural Language to extract further information from your customer’s responses. Also, don’t forget to check out Twilio’s AI-powered chatbot Autopilot.
Alex Dunne is a Software Engineer based in Birmingham, UK, often found experimenting with new technology to embrace into an existing well-rounded skill set.
- Twitter: @i_dunne_that
- Website: http://alexdunne.net/
- GitHub: https://github.com/alexdunne
Related Posts
Related Resources
Twilio Docs
From APIs to SDKs to sample apps
API reference documentation, SDKs, helper libraries, quickstarts, and tutorials for your language and platform.
Resource Center
The latest ebooks, industry reports, and webinars
Learn from customer engagement experts to improve your own communication.
Ahoy
Twilio's developer community hub
Best practices, code samples, and inspiration to build communications and digital engagement experiences.


