Build an S3 File Manager with Go
Time to read:
AWS S3 Cloud Object Storage is one of, if not the most popular cloud storage services globally. It's a highly available, highly scalable service that costs very little to store significant amounts of data.
In this tutorial, I'm going to show you how to interact with S3 Buckets with Go. Specifically, you're going to learn how to list objects in an S3 Bucket, and how to upload to and download files from an S3 Bucket.
If that sounds interesting, let's begin!
Prerequisites
To follow along with the tutorial, you don't need much, just the following things:
- Go (a recent version, or the latest, 1.20.5)
- Curl or Postman
- Your preferred text editor or IDE. I recommend Visual Studio Code with the Go extension
- An AWS account with a credentials file and a config file already stored locally
- An S3 Bucket, ideally with a handful of files in it
- A few files to store in the S3 Bucket
How will the application work?
The application that we're going to build is not too intense, having only the functionality to:
- Retrieve a list of files in an S3 Bucket
- Upload a file to an S3 Bucket
- Download a file from an S3 Bucket
The application will be a web-based application with three routes, one for each of the above-listed features.
I've not added any code that might distract from these three features; so I apologise if it feels a little simplistic. After you've built it, feel free to add all manner of extra functionality, such as validating files before uploading and after downloading.
Create the project directory
The first thing to do is to create the project directory. In your regular Go project directory, run the following commands to create the project directory structure, change into the project's top-level directory, and track the code's modules.
Add the required packages
The application will use two packages to reduce the amount of code you need to write. These are the AWS SDK for Go, which will simplify interacting with S3, and godotenv to load environment variables from a .env file.
Install them by running the following command. Skip the line continuation character (\) if you're using Microsoft Windows.
Store the environment variable
In the project's top-level directory, create a new file named .env, and in that file, add the configuration below.
This contributes to setting the duration of the request timeout period to one hour.
Write the code
Now, let's write some Go code. Using your text editor or IDE, create a new file named main.go. Then, in the new file, paste the following code.
How the code works
The code starts off by defining two custom types:
- s3Data: This will store the name (
Key) and size (Size) of an object retrieved from the S3 Bucket - App: This centralises the application's functionality, allowing for an
s3.s3and asession.Sessionobject to be shared by each of the three route handlers. These objects are required for interacting with the AWS API.
Then, newApp() is defined, initialising a new App object with the s3.s3 and session.Session objects.
Next up, the listFilesInBucket() method parses the form and retrieves the bucket parameter. This parameter stores the name of the bucket to retrieve the object listing from. After that, it retrieves the DURATION environment variable and uses that to determine a timeout period for the list request. This is then used to initialise a context object used with the request.
Finally, we get to the heart of the method where the ListObjectsPagesWithContext() method is called, which takes the context, a ListObjectsInput object, and an anonymous function. The context has already been covered, so I won't go over that again. The ListObjectsInput object provides options to the request, effectively providing a filter to the information returned.
The code only passes the Bucket parameter, setting which S3 Bucket to retrieve a listing of objects from. You could filter the returned objects to only those starting with a given prefix by using the Prefix parameter and limit the number of objects returned by using the MaxKeys parameter.
The anonymous function is called if the request is successful. For each object returned, it initialises an s3Data object with the object's name and size and adds the object to the objects array.
If the objects could not be listed, a message is returned to the client. Otherwise, the list of returned objects is returned in JSON form to the client.
Is the bucket not in your default region?
If the bucket you want to retrieve objects from is not in your default region, you'll need to initialise the session in newApp() differently. If so, update newApp() to match the following, replacing <THE BUCKET'S REGION> with the bucket's region.
You can find the default region in ~/.aws/config under the [default] key. For example:
Alternatively, you can set the AWS_REGION environment variable to the region name, as in the following examples.
See the AWS SDK Configuration documentation for further information.
You can find a bucket's region in the AWS Region column next to the bucket's name, under Services > Storage > S3 > Buckets, as in the screenshot below.

Test that the code works
With the initial functionality in place, let's check that it works. Launch the application by running the following command.
Then, in a new terminal window or tab, run the curl command below to retrieve and print a list of the files in your S3 Bucket.
You should see output similar to the below printed to the terminal.
You can see that an array of JSON objects, each one containing the files's name (Key) and size in bytes (Size) have been returned

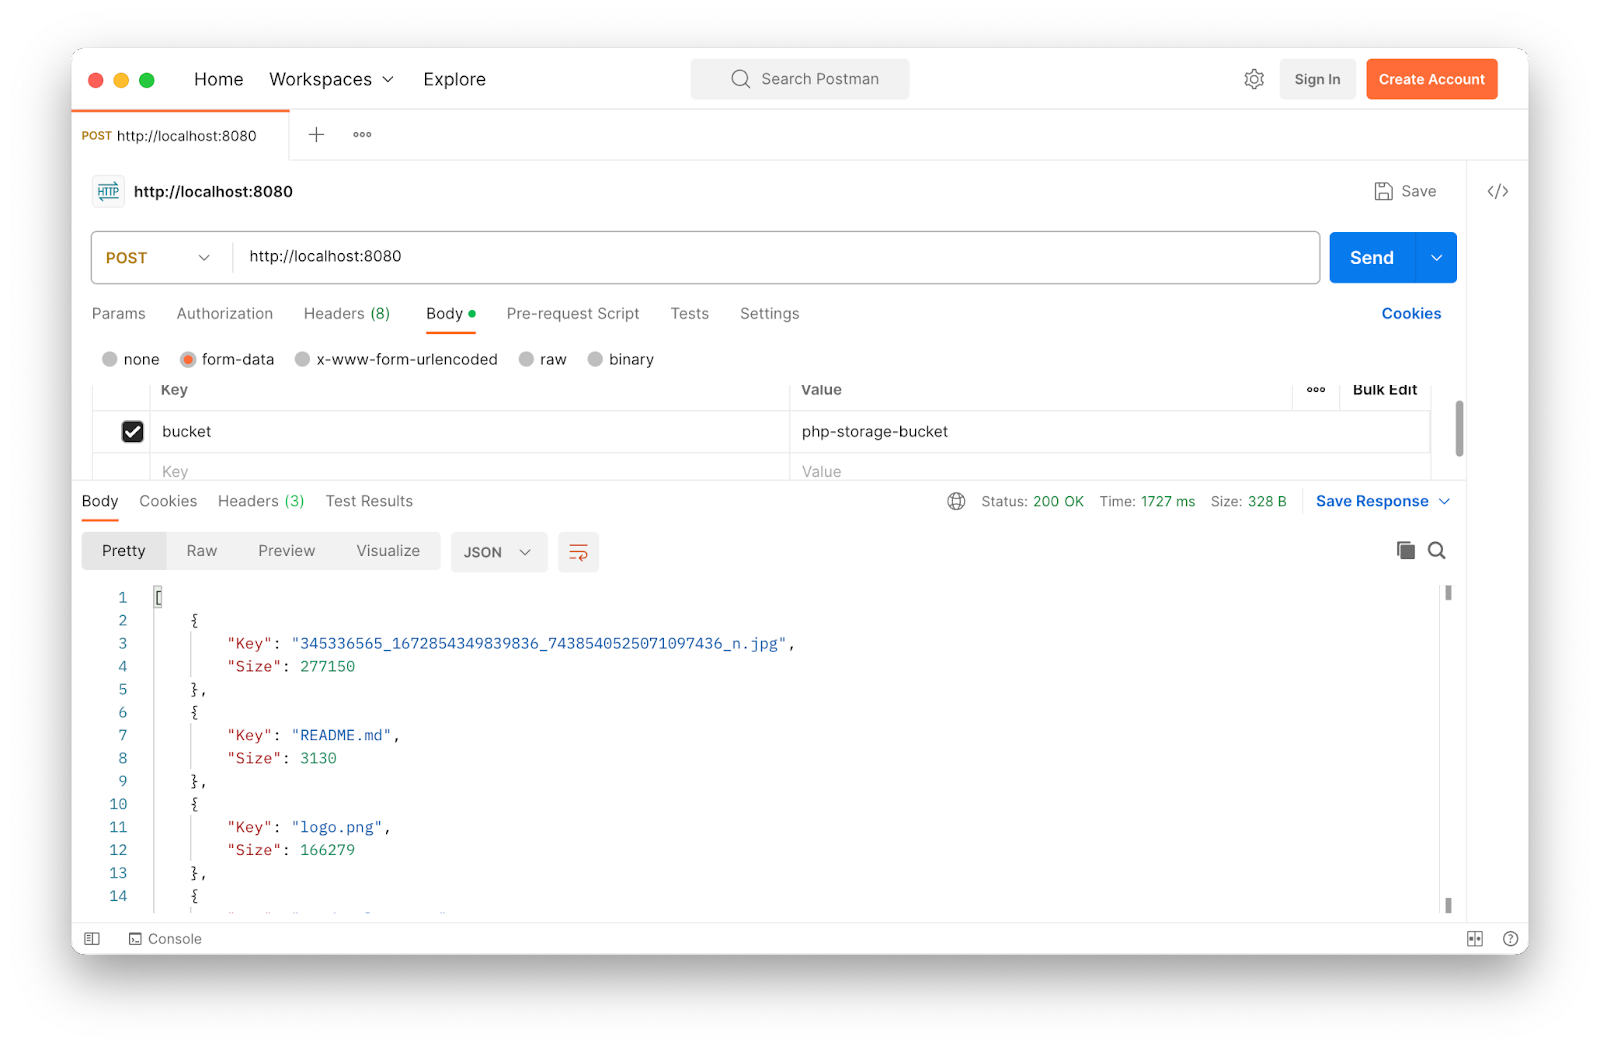
Alternatively, if you prefer a GUI, use Postman, as in the screenshot above. Then:
- Set the request type to POST and the request URL to
http://127.0.0.1:8080/ - Under the Body tab, click form-data. Add a request parameter named bucket with its value being the name of your S3 bucket.
- Click Send
You should see a response similar to the one in the screenshot above.
Add the ability to upload files
Next, let's add the ability to upload a file. The endpoint won't perform any filtering on the file, just accept whatever is provided to it. In main.go add the following code before the main() function.
These are two small utility functions. The first writes an uploaded file to an in-memory buffer. The second simplifies writing and returning error messages to the client with an HTTP 400 status code.
Now, update your import list, to match the following, if your text editor or IDE doesn't do it for you automatically.
Then, in main.go, add the following code after the uploadFile() function definition.
uploadFileToBucket creates a new s3manager.Uploader object, which simplifies uploading files to S3 Buckets. It retrieves the file from the POST data and writes it to an in-memory buffer using uploadFile(). If no file was in the POST data or it could not be written to memory, an error message is returned to the client.
Otherwise, the bucket to upload to is retrieved from the POST data, and uploader.Upload() is called to upload the provided file to the S3 Bucket. An s3manager.UploadInput object is passed to the method, which uses three parameters:
Bucket: the S3 bucket's nameKey: the name to give the file when it is uploadedBody: the file data to upload
If the upload request fails, an error message is returned. Otherwise, a success confirmation message is printed to the console and returned to the client.
Next, update the main() function to match the following code.
This adds a route to upload files with the path /upload, which is handled by uploadFileToBucket().
Test that the code works
Restart the application, then run the following command, replacing <BUCKET NAME> with your S3 Bucket's name and <FILE NAME> with the full path to the file that you want to upload.
You should see the following output printed to the terminal, where the two placeholders have been replaced with your S3 bucket name and file name, respectively.
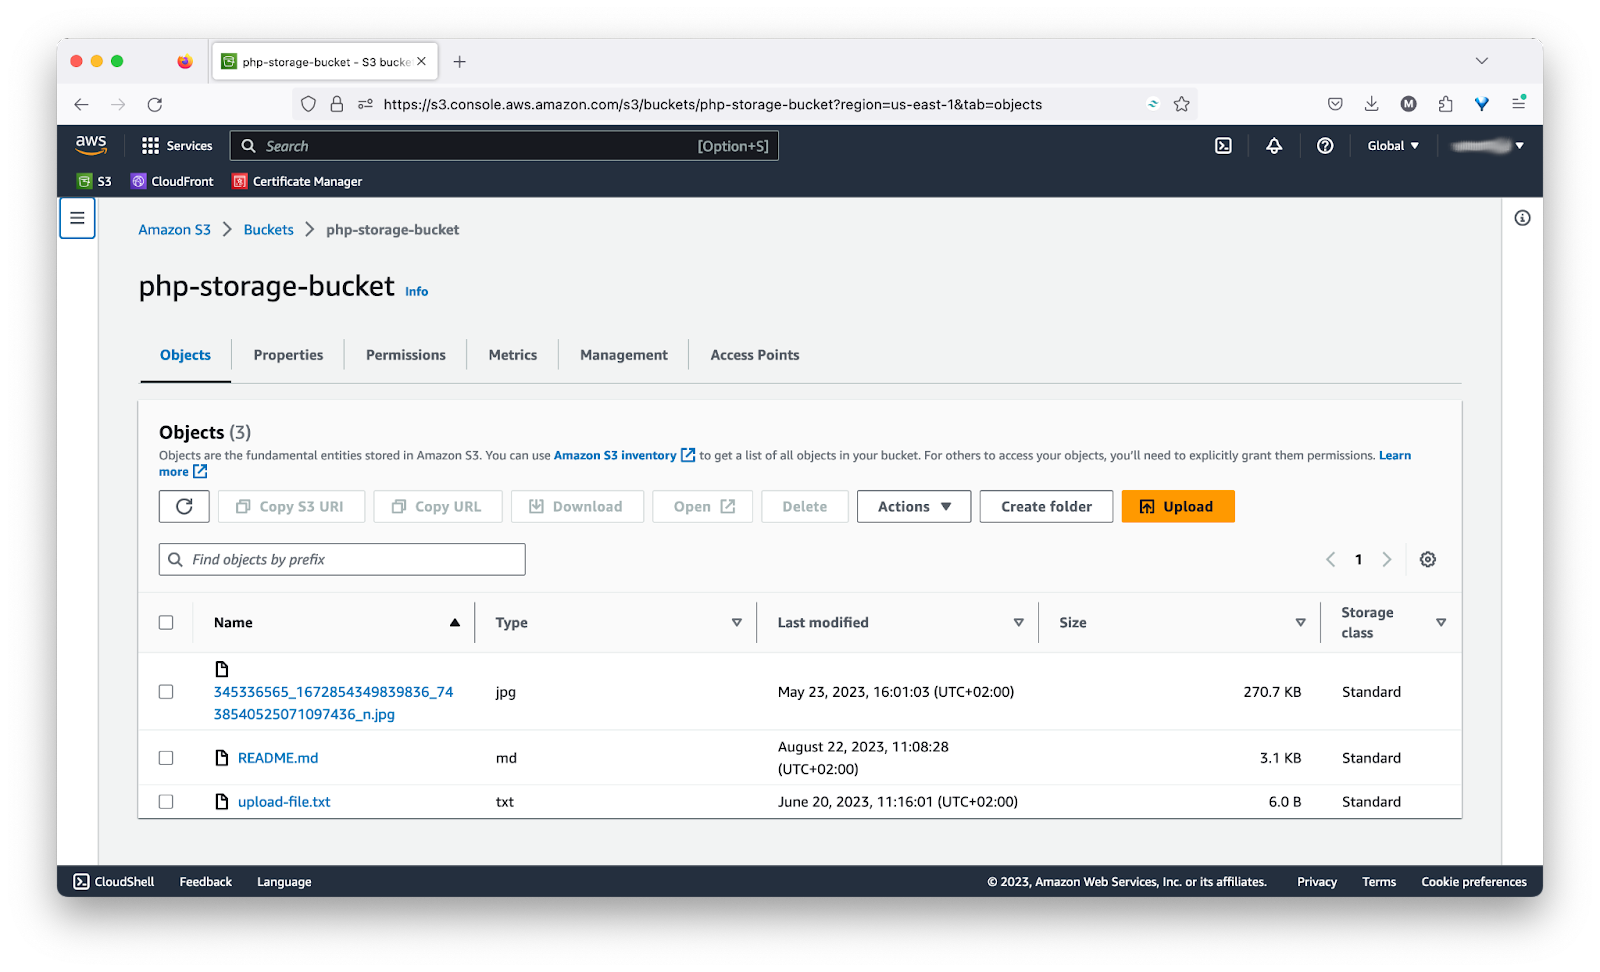
Then, if you look in the bucket using the AWS Console, you will see the new file in the bucket, as in the screenshot below.

Add the ability to download a file
Lastly, it's time to add the third and final feature: the ability to download a file. In main.go, add the following code before the main() function.
Then, update the import list to match the following if your code editor or IDE doesn't do it for you automatically.
This function is a little more involved than the previous two. Similar to them, it retrieves two values from the submitted POST data: the name of the bucket to use (bucket) and the file to download (file).
It then makes a call to the HeadObject() method to retrieve metadata from the object in an S3 Bucket without returning the object itself. This is necessary because the amount of memory to store the file is required to download it. An s3.HeadObjectInput object (input) is passed to the function call, containing the bucket and file names. If the file could not be downloaded, an error message is returned. Otherwise, the file's size is printed to the console.
With the file's size available, a byte array of that size is initialised to store the file's contents. Then, an s3manager.NewDownloader object is initialised to simplify downloading the file. The object's Download() method is called with two parameters:
- A call to
aws.NewWriteAtBuffer(buf): This will write the downloaded file's contents tobuf. - The
s3.HeadObjectInputobject (input): This tells the downloader what to download.
If the file could not be downloaded, then an error message is returned to the client. Otherwise, the file is sent to the client, and a confirmation message is printed to the terminal.
Add a download route
Finally, update main.go to match the following code.
This adds a new route with the path /download that will be handled by the new downloadFileFromBucket method.
Test that the code works
Test the final feature by restarting the application and running the following command. Similar to before, replace:
<BUCKET NAME>with your S3 Bucket's name<FILE NAME>with the full path to the file that you want to download<DOWNLOAD FILE PATH>with the absolute path to where you want to store the downloaded file, including the file's name
All being well, the file will have been downloaded and written to the path that you provided.
That's how to manage files on AWS S3 with Go
There you have it. You've just created a small Go application that can list files in an S3 Bucket, as well as upload files to and download files from it. And thanks to the AWS SDK for Go, you've not had to write much code either. Really, you’re mostly writing glue code to reap all the benefits.
How would you improve it? Would you have approached it differently? Tweet me your opinion.
If you had trouble with getting it working, check out the repository on GitHub for the complete code.
Matthew Setter is a PHP/Go Editor in the Twilio Voices team and a PHP and Go developer. He’s also the author of Mezzio Essentials and Deploy With Docker Compose. When he's not writing PHP code, he's editing great PHP articles here at Twilio. You can find him at msetter[at]twilio.com, on LinkedIn, and GitHub.
Related Posts
Related Resources
Twilio Docs
From APIs to SDKs to sample apps
API reference documentation, SDKs, helper libraries, quickstarts, and tutorials for your language and platform.
Resource Center
The latest ebooks, industry reports, and webinars
Learn from customer engagement experts to improve your own communication.
Ahoy
Twilio's developer community hub
Best practices, code samples, and inspiration to build communications and digital engagement experiences.


