No Hassle, No Stress, Go Serverless! Backend Development Explained for Beginners!
Time to read:

So you're new to backend development. You set up the Twilio video and have a sweet web page to host the video on with cute overlays, but how can you start using this with friends and making this official?
For some developers, the idea of building a backend server might seem daunting especially because there are so many tools to use and different methods of deployment. I get it - it seems a bit overwhelming.
Fortunately, Twilio has a Serverless Toolkit to save the day! In this article, we'll walk you through the wonders of Twilio's Serverless Toolkit so that you can deploy your awesome JavaScript Twilio Video project with no hassle and no stress.
Tutorial Requirements
- A free or paid Twilio account. If you are new to Twilio get your free account now. (If you sign up through this link, Twilio will give you $10 credit when you upgrade.)
- The Twilio CLI.
- Node version 12.18.4 or above at the time that this article is written.
- Some prior knowledge in JavaScript or a willingness to learn.
Set up the environment
If you are using a Unix or Mac OS system, open a terminal and enter the following commands to do the tasks described above:
For those of you following the tutorial on Windows, enter the following commands in a command prompt window:
If this is your first time installing the Twilio CLI, check out the Twilio CLI quickstart page for instructions on how to install it on your machine.
For Mac OS developers, it's very convenient and easy to install the CLI using Homebrew so make sure you check out how to install Homebrew on your machine. Then, you can run the command brew tap twilio/brew && brew install twilio.
For Windows developers, make sure you install npm first, as you will need it to install the CLI with the command npm install twilio-cli -g.
Once you have the Twilio CLI installed, type twilio login to log in to your account.
Install the Twilio Serverless Toolkit
The Twilio Serverless Toolkit is a nifty tool to have under your belt, especially if you're new to hosting a project on a server. It's also very convenient to use so that you don't have to worry about the muss and fuss of figuring out where to deploy your project.
There are two ways to use the serverless toolkit, but in this article, we'll be taking the Twilio CLI route.
Make sure that you have a node version of 12.18.4 or higher when you install the Twilio Serverless Toolkit. Copy and paste the following command in your terminal to install the plugin and check out the commands offered by the toolkit:
Great! Time to move on and start the project.
Create your first serverless project
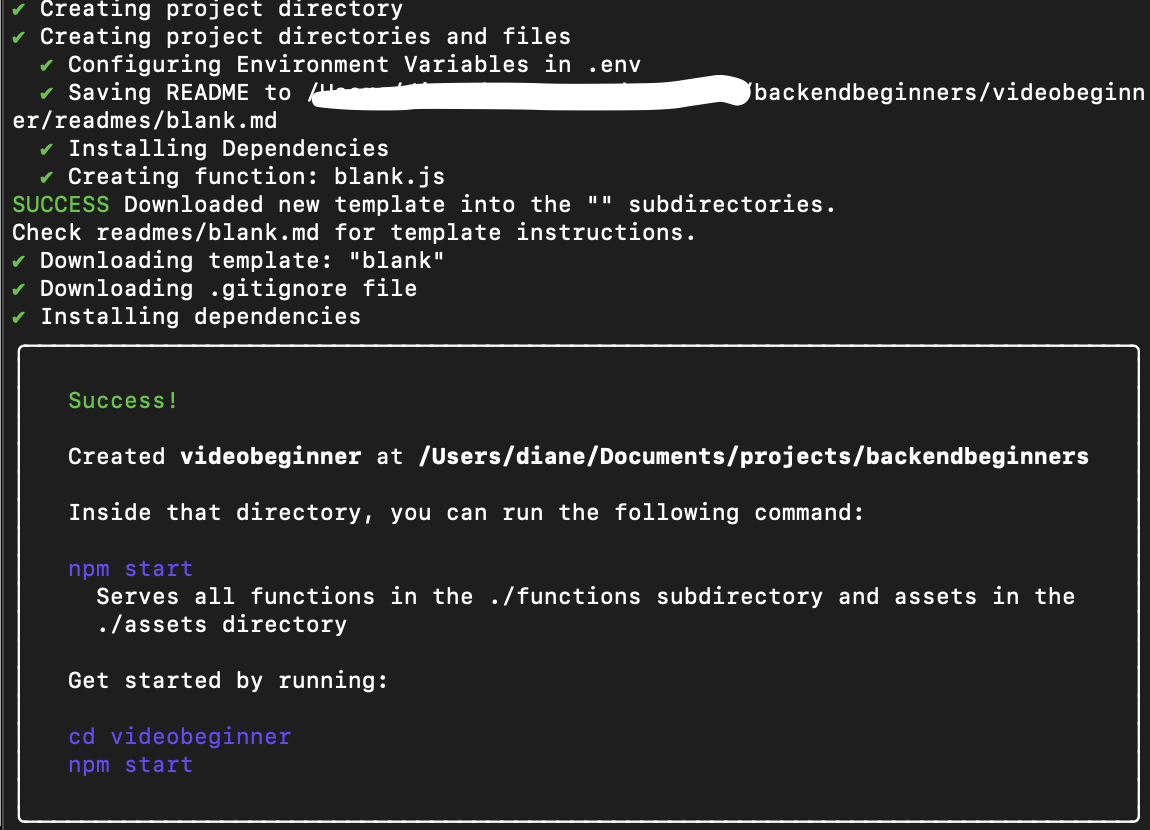
Hope you're not too nervous at this point - serverless project, what a concept right? Well it's going to become a reality here! Copy and paste this line to your terminal to create a serverless project using a blank template. The name of the project will be videobeginner.
Wait a few minutes and your should see this lovely success text on your terminal:

Navigate to your videobeginner folder and notice that some files and folders were already created for your convenience. Open the .env file and you'll see your Twilio Account SID and AUTH_TOKEN already set for you.
Go ahead and add three more lines to the .env file as seen below. They will be filled in later:
Please be careful and make sure that you do not expose these credentials to the public especially if you want to share your project on GitHub.
Generate the Twilio Programmable Video API Key
In order to use Twilio Programmable Video, an API key must be generated. Head to the Twilio Console dashboard and click on the (...) icon to look at All Products & Services. Click on Programmable Video to see the dashboard overview. On the left hand side, click on the Tools section and select API Keys.
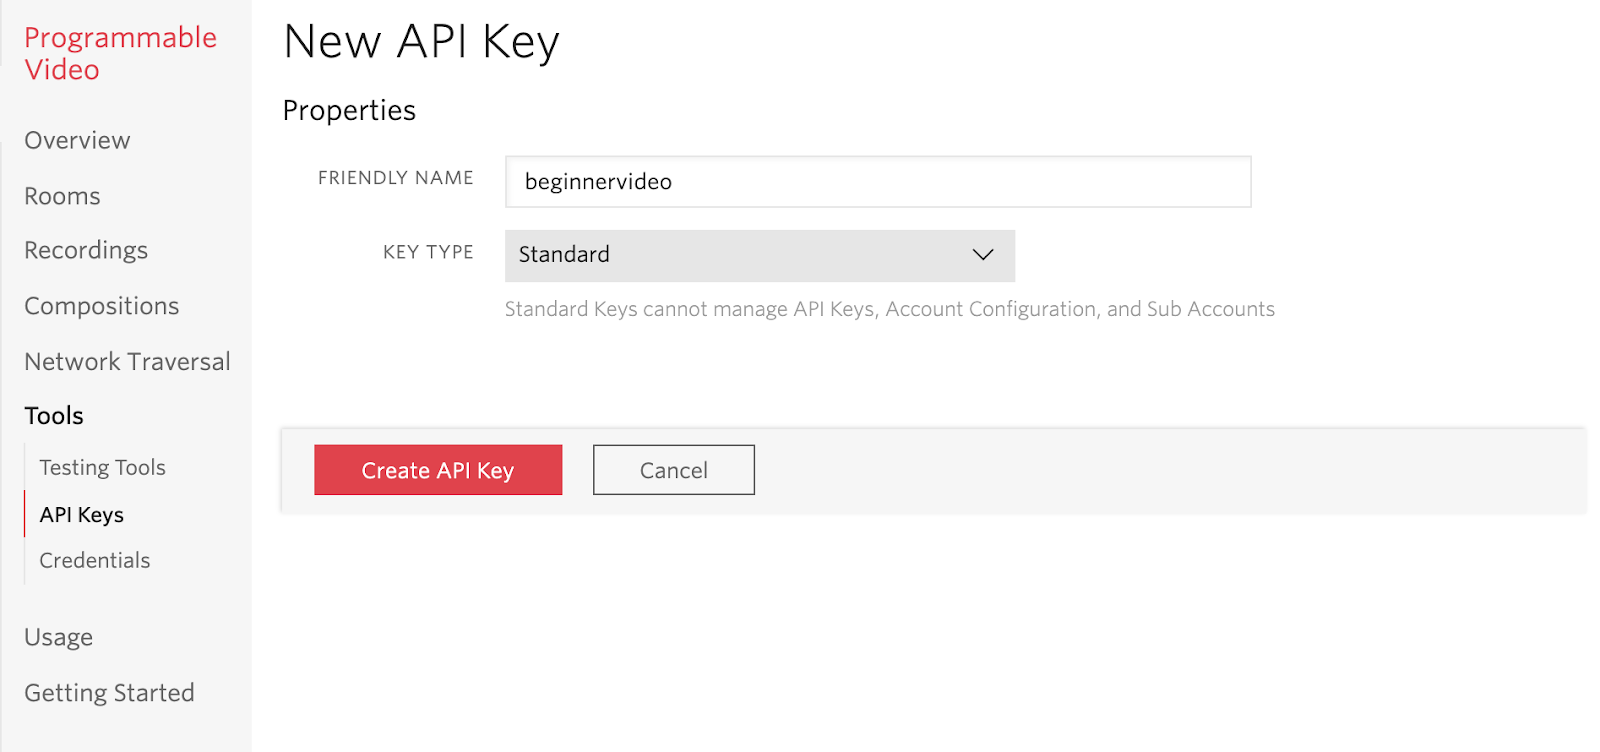
On the API Keys page, click on the red (+) button to generate a new API key. Set the friendly name to "beginnervideo" and click Create API Key.

You will be prompted to another page where the API key's properties are shown.
Open your favorite code editor and find the .env file again. Copy and paste the SID on the web page as the value for TWILIO_API_KEY_SID and copy and paste the SECRET as the value for TWILIO_API_KEY_SECRET. Make sure to save the file before checking the box and clicking Done because you will not be able to access the SECRET value again.
To complete the .env file, you can find the value for the TWILIO_ACCOUNT_SID on the Twilio Console as seen below:

Generate an Access Token
In order to send your video app web page to all your friends, your project needs to understand how to handle the amount of users that will go to the website. Every person you invite to the video call will need a ticket, in this case, an access token, in order to successfully join the call.
If you aren't already there, navigate to the videobeginner folder and open up your favorite IDE to start coding. Create a file named generatetoken.js inside of the functions folder. As the name suggests, this file will hold the function that generates access tokens for you and anyone else who joins the video call.
Since we want many people to join our video call, we have to write code that generates access tokens for everyone who logs in. We don't know who is going to log in, so we'll generate random tokens for people so that we don't have to worry about authentication for the time being.
Copy and paste the following code into the generatetoken.js file:
As you can see, your Twilio credentials are called in this file so that all of the generated access tokens are associated with a public identifier of the Twilio account.
A random string is created for the ACCESS_TOKEN_IDENTITY and assigned to every participant that will join the video call that you created. When you join the video call, a token will be generated for you as well using the same Twilio credentials, but a random string identifier.
Each accessToken created will be granted a videoGrant which is mandatory to access the Programmable Video services. You are allowing the user to turn on their video to the certain room by declaring a room within the grant. In this case, our room name is myfirstvideoapp but you can change it according to whatever you want.
At the end of the file, every individual's tokens are serialized to a JWT string, also known as a JSON web token. This token is sent to the HTTP request from the client side to the server in order to validate the authenticity of the client so that the user's video can be shown publicly. Serializing the tokens also allow developers to write safe code that works on other computers without having to worry about other objects that might be holding the same token.
Seems like a handful doesn't it? This just goes to show how much you can do on the backend side of a project - from restricting a user to a specific page, or figuring out how to handle many users at once. With that said, the difficult part is over! It's time to integrate the project altogether.
Create buttons to enter and leave the video call
Now this article breaks down the backend of the project, but I'll go ahead and give you the code for the frontend too in case you don't have something ready.
Create a new file called index.js inside the videobeginner/assets folder. In this file, we'll be using more JavaScript to make clickable buttons that allow the user to leave and enter the video call. These buttons will also have to generate the token for the client from the generatetoken.js file.
Copy the following chunk of code and paste it into the index.js file:
This code created two JavaScript DOM elements for us - button-join and button-leave. When the joinRoomButton is clicked, the code uses Axios, a JavaScript library to retrieve data from a GET request. In this case, the token is exported to the client side and is used to connect the participant's video to the chat room.
The booleans are changed according to the actions of the participant. Once that participant leaves the room, then the leaveRoomButton object is disabled accordingly so that they cannot try to leave the room again, since it's just not possible.
While the participant clicks the button to join the room, their video and audio are activated in the room and the other existing participants in the room appear on the screen as well.
To finish up this file, go ahead and copy and paste the code to the file:
Here, we declared some consts to help attach and display the participants' videos to the "myfirstvideoapp" room accordingly. When the user enters the room, the function addLocalParticipant will put the participant's media track to the set of tracks that are shown to the other people in the video room.
The tracks are appended as additional div elements on the DOM. A remoteParticipant class is also added for each person so that it is possible to alter the CSS of each user's video.
When they leave of course, their video track is "unsubscribed" or removed from the video room.
Customize the web page with HTML and CSS
If you enjoy building the frontend of a project then this might be your time to shine! Create a new file named video.html inside of the assets folder. Copy and paste the following code to that file:
In the same assets folder, create a file named styles.css where you can add some color to your project. Here's an example of what I did:
Go wild and make your project something you and your friends would enjoy!
Deploy within seconds
The moment is here - it's time to bring your first video app to life! Here's the entire project on GitHub if you need to make sure you have everything. If your terminal isn't already set to the videobeginner file, head there and run Twilio's deployment command below:
You will see something like this:
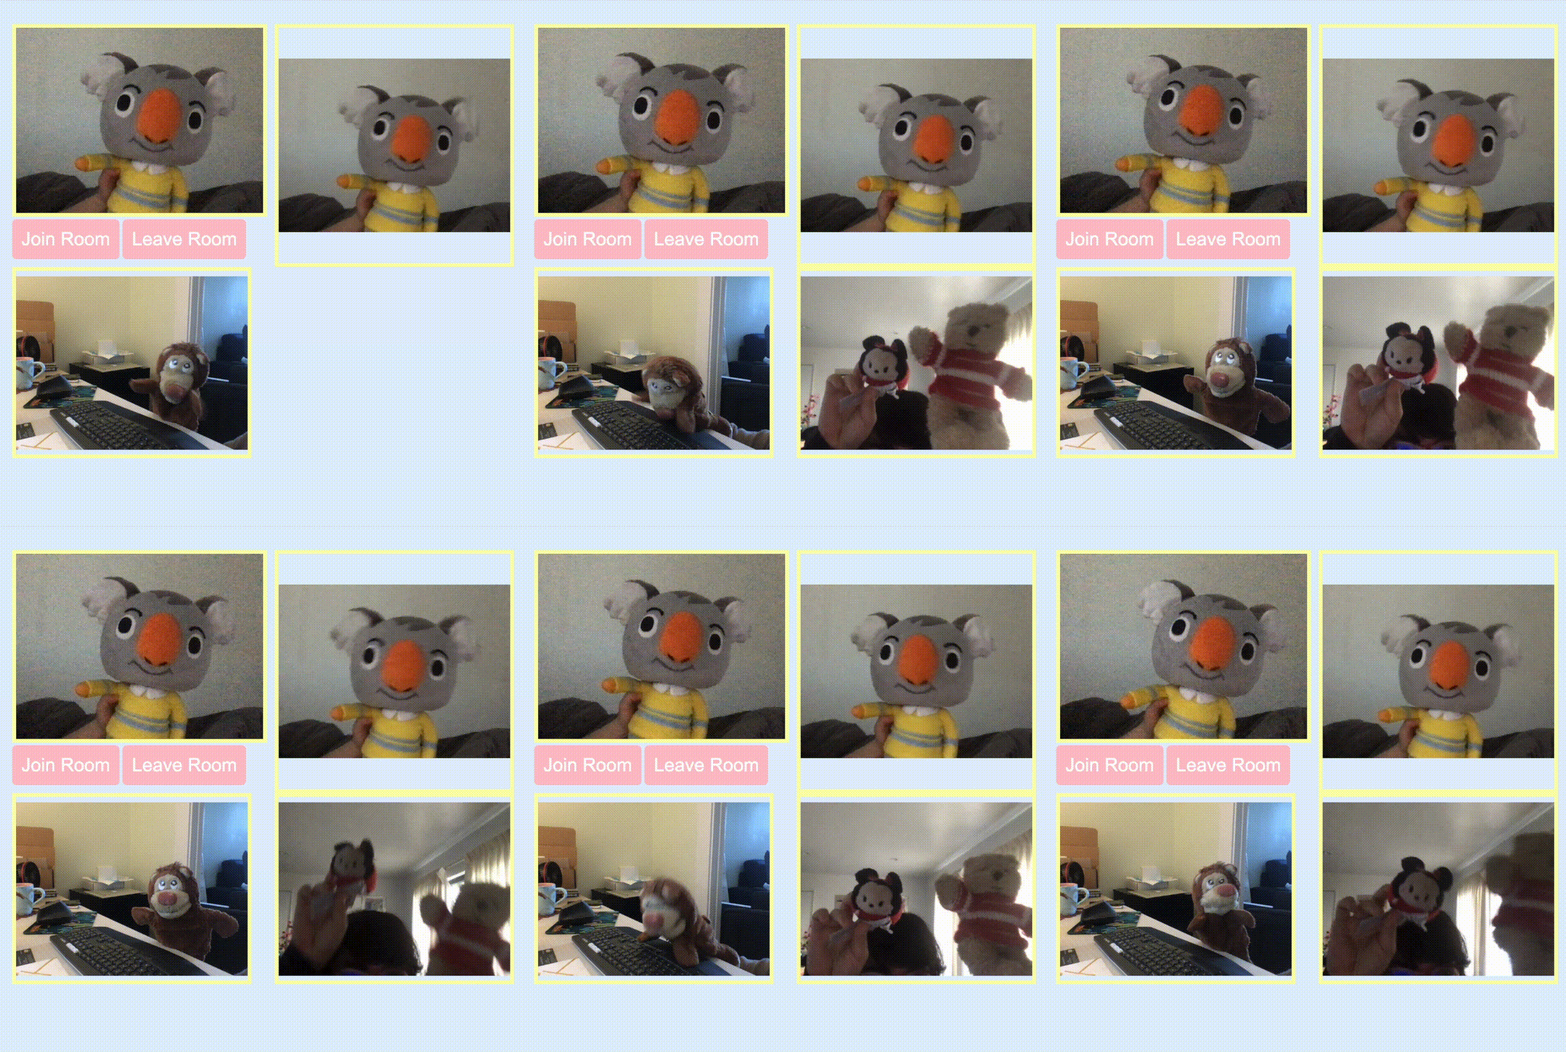
Use the video.html URL under the Assets and put that in your web browser. Send this link to people you want to invite too. Other participants will have a box in the same row as you or below, depending on how many people join.
Time to party with your friends and family - looks like Ozzie from Animal Crossing is having a nice time on the video call with Bumpkin Shenfield, Minnie Mouse, and Winnie!

If you want to go back and change the code at any point, just enter the command and re-deploy.
Conclusion: Building a Video app using serverless technology
Congratulations on building your first backend and deploying the project! Hopefully writing the code for the backend wasn't too daunting especially with Twilio's Serverless Toolkit. Now you have everything you need to know to expand on this video project and make it much cooler.
This fun programmable video API is one of Twilio's many products and services that you can use in your next project with no hassle and no stress.
What’s next for Twilio Video and serverless projects?
Looking to expand on this project? Check out these articles:
- Add Holiday Filters to a React Video App with Twilio's DataTrack API
- Generate an Access Token for Twilio Chat, Video, and Voice using Twilio Functions
- Learn about 6 things you didn't know you could do with Twilio Serverless Toolkit
Let me know if you made a cool video app for this holiday season by reaching out to me over email!
Diane Phan is a Developer on the Developer Voices team. She loves to help beginner programmers get started on creative projects that involve fun pop culture references. She can be reached at dphan [at] twilio.com or LinkedIn.
Related Posts
Related Resources
Twilio Docs
From APIs to SDKs to sample apps
API reference documentation, SDKs, helper libraries, quickstarts, and tutorials for your language and platform.
Resource Center
The latest ebooks, industry reports, and webinars
Learn from customer engagement experts to improve your own communication.
Ahoy
Twilio's developer community hub
Best practices, code samples, and inspiration to build communications and digital engagement experiences.


