Integrate Flex with Glance Cobrowse
Glance Cobrowse enables agents to instantly join customers in viewing your app or website. Agents can guide customer navigation, answer questions, and assist with completing transactions. You can launch a Glance Cobrowse session from the Twilio Flex platform with the click of a button — no need for the customer to download or install a screen sharing app.
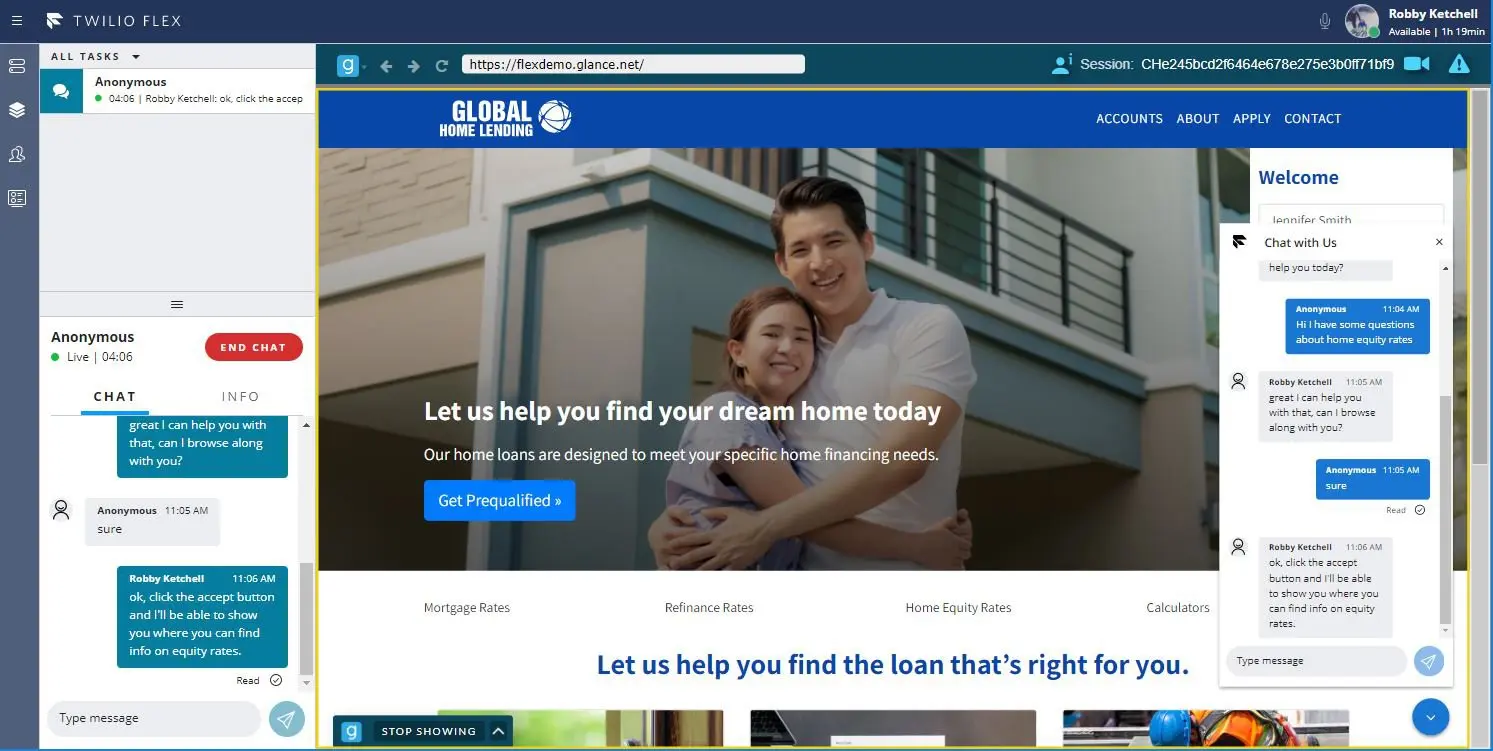
Glance lets agents know when customers are present on your website and makes it easy to launch a Cobrowse session with a single click. You can also enable video to personalize the Glance Cobrowse experience.
To integrate the Glance Cobrowse Component with Flex, you need the following:
-
Twilio Account and Flex Project
-
Glance Account that has the Flex domain added to the allowlist.
To add the Flex domain to the allowlist:- Log in to your Glance Account.
- Go to Settings > Cobrowse Settings > CRM and Chat Integration.
- Enter
flex.twilio.comto the domain and select Add.
-
Site that is configured with the Glance Cobrowse script tag.
Ensure that you:- Set
data-presencetoapi. - Set
data-cookiedomainto the URL for your website domain.
- Set
Example of the Glance Cobrowse script tag:
1<script id="glance-cobrowse" type="text/javascript"2src="https://www.glancecdn.net/cobrowse/CobrowseJS.ashx?group={groupid}&site={production|staging}"3data-groupid="{groupid}"4data-site="{production|staging}"5data-inputevents='{...}'6data-termsurl="{terms and conditions url}"7data-cookiedomain="{session cookie domain}"8data-cookietype="{normal|ls|dual|secure}"9charset="UTF-8"10data-presence="api">11</script>
To integrate the Glance Cobrowse Component with Flex, you must:
- Set up authentication.
- Install the Glance Cobrowse Component from NPM.
- Add the Glance Cobrowse Component to the Flex interface.
- Install Flex Webchat and add Glance.
In order to connect to Glance from Flex, you need to set up authentication. Glance uses the same user ID from the identity provider to call a Twilio Function to authenticate into Glance.
Before setting up authentication, ensure that:
- You have configured SSO with an identity provider (such as Okta) for Flex.
- You have a Glance Admin account.
- If you are setting up Glance Cobrowse for multiple agents, each agent has a Glance Account.
- You have set the Partner User ID (PUID) field in Glance to match the user ID in your identity provider. Refer to Glance's Manage Users page for instructions to set your user ID.
To set up authentication:
-
From the Twilio Console > Functions > Services, select Create Service.
-
Enter a Service Name then select Next.
For example:yourcompanyname-glance. Note: Remember this Service Name to use it later when adding the Glance Cobrowse Component to Flex. -
Select Add+ > Add Function.
A new field appears. -
Remove the default name
/path_1and inputgetloginkey. Click enter to generate the function. -
Click the drop-down next to Protected to set the visibility to Public.
-
In the text editor on the right, paste the code below then select Save.
1const TokenValidator = require('twilio-flex-token-validator').functionValidator;23exports.handler = TokenValidator(function(context, event, callback) {4const response = new Twilio.Response();56response.appendHeader('Access-Control-Allow-Origin', '*');7response.appendHeader('Access-Control-Allow-Methods', 'GET', 'POST');8response.appendHeader('Access-Control-Allow-Headers', 'Content-Type');9response.appendHeader('Content-Type', 'application/json');1011try {12const version = 1;13const expires = (Math.round((new Date()).valueOf() / 1000)) + parseInt(context.GLANCE_EXPIRATION, 10);14const keystring = context.GLANCE_GROUP_ID + event.partneruserid + version + expires;15const CryptoJS = require('crypto-js');16const hmac = CryptoJS.HmacSHA256(keystring, context.GLANCE_API_KEY);17const hmacb64 = hmac.toString(CryptoJS.enc.Base64)18const loginkey = "$" + version + "$" + expires + "$" + hmacb64.substr(0, 43).replace(/\+/g, '-').replace(/\//g, '_');1920response.setBody({21'loginKey': loginkey,22'groupId': context.GLANCE_GROUP_ID,23'expiration': expires,24'apiKey': context.GLANCE_API_KEY25});2627response.setStatusCode(200);28callback(null, response);29} catch(error) {30response.setStatusCode(404);31callback(null, response);32}3334}); -
In Settings > Environment Variables, add the following Environment Variables:
- Add
GLANCE_API_KEYand set the value to your Glance API Key. To find your Glance API Key, log in to your Glance account. Go to Settings > API Key. - Add
GLANCE_EXPIRATIONand set the value to a length of time (in seconds) when you want the session to expire. We recommend3600 - Add
GLANCE_GROUP_IDand set the value to the Glance group ID for your company. Note: The Glance group ID is a unique ID assigned to your company by Glance. You can find this in the Glance portal in the top-right corner of every page.
- Add
-
In Settings > Dependencies, add the following dependencies without a version number:
twilio-flex-token-validatorcrypto-js
-
Select Deploy All.
You must add the Glance Cobrowse Component to either an existing or a new Flex Plugin. In your terminal, run:
npm install @glance-networks/agent-plugin
If you're using Yarn, run the following instead:
yarn add @glance-networks/agent-plugin
For more information, see the ReadMe.
After installing the Glance Cobrowse Component, choose where you want the button to display inside Flex. Learn how to customize Flex UI Components.
Import the component inside your Flex project. In glanceplugin.js (note: the name of the plugin is autocreated when you make the file) or .jtx file, add the following to the first line:
import {Glance} from @glance-networks/agent-plugin
Example of the Glance Cobrowse Component inside the task canvas header:
1flex.TaskCanvasHeader.Content.add(2<Glance3key={"your-key-name"}4groupid={"your-group-id"}5puid={"your-puid"}6openlocation={"tab"}7presence={true}8glancebaseurl={"production"}9visitorid={"the-task-sid"}10debugmode={false}11gicon={true}12authmethod={"LOGINKEY"}13authurl={"auth-url"}14authheaders={{ 'Content-Type': 'application/x-www-form-urlencoded' }}15authbody={authBodyParams}16uiversion={2}17customopenwindow={false}18/>, {options}19);
Example of the Glance Component inside the CRM Container:
Note: If you are opening sessions inside the iframe, you must use the CRM Container. You should not use this option if you need this panel for other content, as it will fill the contents of the entire panel with the Glance Cobrowse session.
1flex.CRMContainer.Content.replace(2<Glance3key={"your-key-name"}4groupid={"your-group-id"}5puid={"your-puid"}6openlocation={"tab"}7presence={true}8glancebaseurl={"production"}9visitorid={"the-task-sid"}10debugmode={false}11gicon={true}12authmethod={"LOGINKEY"}13authurl={"auth-url"}14authheaders={{ 'Content-Type': 'application/x-www-form-urlencoded' }}15authbody={authBodyParams}16uiversion={2}17customopenwindow={false}18/>, {options}19);
Important: In the cases above, AgentDesktopView.Panel2 is open or closed depending on how you set the default properties.
The following table describes the properties inside the component:
| Property | Type | Definition |
|---|---|---|
authbody | function | Optional. If using authmethod=loginkey, you can optionally pass data to your function with the POST request body. |
authheaders | object | Optional. If using authmethod=loginkey, you can further customize your loginkey endpoint by passing headers to your function (for example, an Authorization header). |
authmethod | enumeration | Optional. Valid values are loginkey (default) and samlloginkey. To use this, you must have set up SAML with Glance. |
authurl | string | Required. Set the value to the URL for your login key service. |
custominvoke | object | Optional. A presence agent can invoke JavaScript functions defined on the visitor's web page by providing an object that defines the following parameters: func name of the function, args function arguments. See the ReadMe for an example. |
debugmode | boolean | Optional. true turns on console logs to assist in debugging. false (default) turns off console logs. |
gicon | Required. Set this property to true if you want to show the Glance logo next to the Join button. If you don't set this property, or if you set it to false, the logo doesn't appear. |
Flex Webchat provides an embeddable chat widget for integrating live chat into your website. To learn more about setting up Webchat and Glance, see Twilio Flex Webchat in the Glance developer documentation.
Learn more about Glance's other customer engagement features, like Remote Assist and Video, on their Features page.