Send SMS Notifications with CakePHP and Twilio Notify
Time to read:

Introduction
Ever wanted to engage your app users with SMS notifications? Look no further, I have a solution for you. In this tutorial, you will learn how to use Twilio’s Notify API to send SMS notifications in a CakePHP app. Specifically, we will add SMS notifications to the user registration process.
Requirements
For this tutorial you will need the following:
- A PHP 7 development environment via WAMP, LAMP, MAMP
- Global installation of Composer
- A Twilio account
- Basic knowledge of MySQL or PHPMyAdmin
Create a New App
Now let’s get started by creating our app with CakePHP 3. Check out the CakePHP official install guide for requirements and more install options.
Install CakePHP
Create a new CakePHP application with the following composer command:
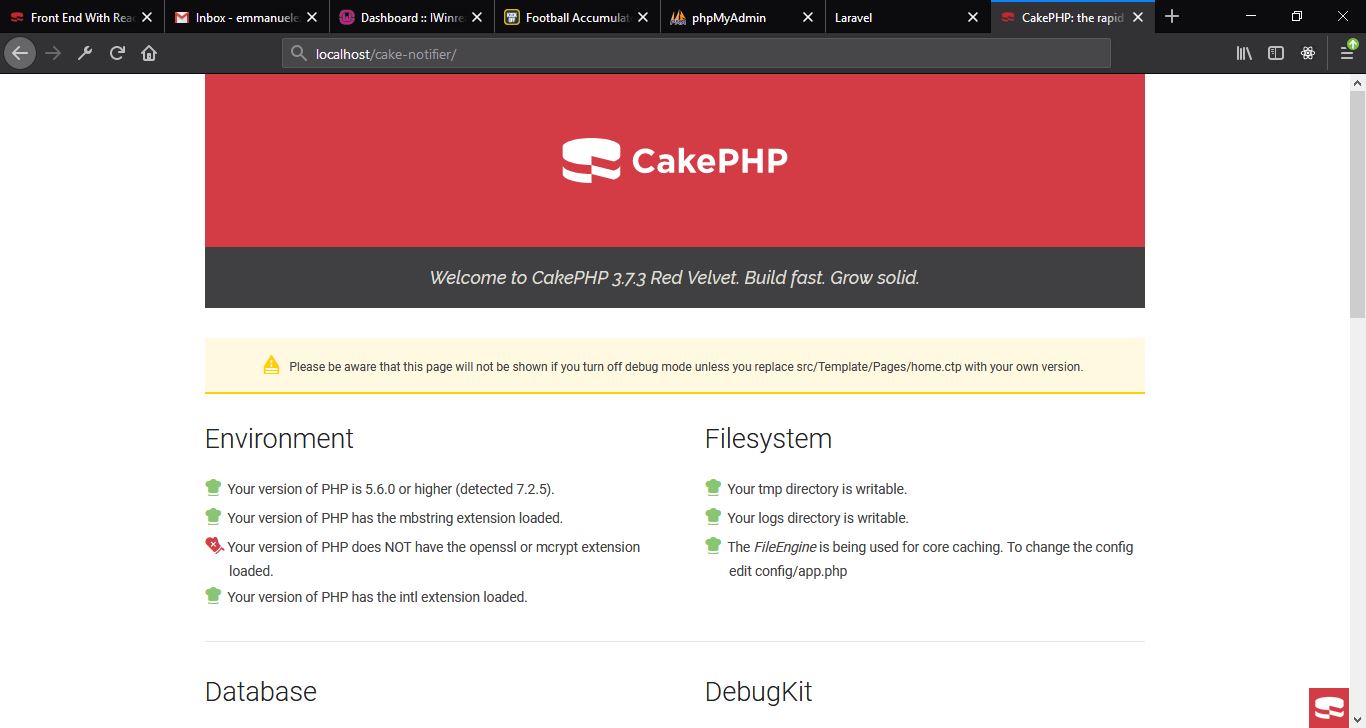
The above code will create a new folder named cake-notifier containing your CakePHP app. If you navigate your browser to localhost/cake-notifier you should see the default CakePHP homepage.

Configure the Database Connection
Now we want to create a database for our app to use. Using PHPMyAdmin or MySQL command line, let’s create a database named cake_users.
Open the config folder in your newly installed CakePHP app and edit the app.php file. Look out for the following code and set the username, password and database to your development database configuration and save.
Migrate the Users Table
Now we need a database table to hold the users records. Create a database table called users with the following fields:
- id (int, auto increment, primary key)
- firstname (varchar)
- lastname (varchar)
- username (varchar)
- password (varchar)
- phone (varchar)
- created (datetime)
- modified (datetime)
Add the Twilio PHP SDK
Now we have to add the Twilio PHP SDK. The Twilio PHP SDK makes it easy to interact with the Twilio API from within our PHP application. To add the PHP SDK run the following composer require command:
Setup User Registration
Because we will be adding SMS notifications to our registration process, we're ready to now create our registration system. To set up user registration we will use CakePHP’s bake console to generate our code skeleton. If this is your first CakePHP app, you will need to make sure that you require the bake console by running the following command if it’s not readily available:
Generate Code Skeleton
Now that the bake console is installed, run the following command (bin/cake for Mac users):
The above command will generate the User Model (Entity and Table), Controller, and Template code.
Now if you navigate your browser to the app URL localhost/cake-notifier/users/add you will be able to add users to the app. By default, the password will be plain so we need to set up password hashing for security.
Configure Password Hashing
To configure and secure user password hashing open the src\Model\Entity directory and edit the user.php file. Add the following code:
Now the users password will be hashed during the registration process and we can set up the registration route for easy access. When this step is completed, we will be able to access our registration at localhost/cake-notifier/register.
Setup User Registration Route
To setup app routes go to the config folder from the root of our app directory, and edit the routes.php file. Locate the Router::scope('/', function (RouteBuilder $routes) function and add the following code inside the function before the $routes->fallbacks(DashedRoute::class); function:
Now when we navigate to localhost/cake-notifier/register we will see the add user page we created earlier using bake console. Next, we will create the Twilio Service to use for user notification.
Create Twilio Service
Let's set up the Twilio services with our Twilio account. Login to the Twilio console and continue with the following steps.
Purchase a Twilio Phone Number
To use Twilio SMS notification, you need a Twilio-powered phone number. You can grab one to use in the console here by going to the "Numbers" tab to add a phone number. Make sure that it has SMS enabled.

To use this Phone number for SMS notification, we need to add it to a Messaging Service and associate it with Notify Service Instance.
Create a Twilio Messaging Service
Having purchased and added a phone number for the SMS notification, we will now create a messaging service. Messaging Services allow you to organize your messages and enable specific features for groups of messages. It has a lot of cool features that you can learn more about here, but for now we just need it to send SMS from your new Twilio Phone Number.
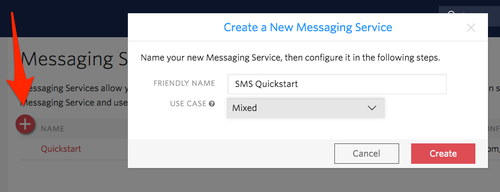
To create a Messaging Service, go to console Programmable SMS -> Messaging Service.

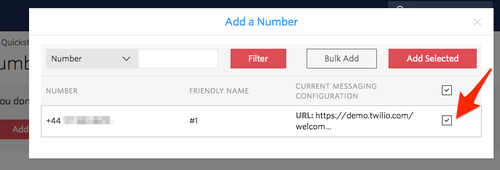
We will now add your new Twilio Phone Number to the Messaging Service. In the Messaging Service go to the Numbers menu and click "Add an Existing Number". Then tick the checkbox on the number as seen below and click the "Add Selected" button.

Now that we have a Phone Number and a Messaging Service enabled, we must create a Notify Service Instance that the new Twilio Phone Number will use to send SMS Notifications.
Set Up a Notify Service Instance
To set up the notify service, go to the notify menu from the console and create a Notify Service. Make note of the SID! You will use this later when you start writing code further down.

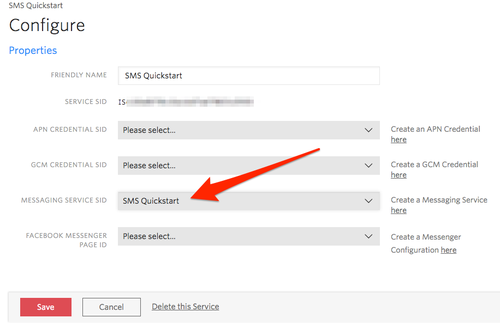
Now choose your new Messaging Service for this Notify Service Instance.

Initialize Twilio Notify In Our App
To initialize Twilio Notify in our app, we will create a behavior class within CakePHP. Behaviors are a way to organize and enable horizontal re-use of Model layer logic and provide a convenient way to package up behavior that is common across many models. To know more about behaviors in CakePHP, checkout the official docs here.
Create Notify Behavior
To create our behavior class, we will use the bake console to create the notify behavior. Run the following command:
Note: if you have a Mac, the command is bin/cake.
The above command will create the NotifyBehavior.php file in the directory src\Model\Behavior.
Add the Twilio PHP SDK
Now we will use the Twilio PHP SDK in the NotifyBehavior.php file. To include the SDK paste the following code before the class declaration under use lists:
Add Twilio Account Credentials
Now we will use class variables to hold our Twilio account credentials and initialize the Twilio SDK client instance. Your Twilio account credentials can be found in your console dashboard.
Add the following code to NotifyBehavior.php below the $_defaultConfig variable:
Create Binding Function
Next we will create the binding and send functions for our behavior. To create the binding, we will need the user’s id and phone number. Add the following code to the behavior.
Create Send SMS Function
Now that we have a binding function, we'll add the send SMS function. To send the SMS notification, we will need the user’s id, phone number, and the message to be sent. Add the following code to the behavior.
Now we are done with the Notify behavior. Next we need to connect it to the registration process and start sending SMS notifications when users register.
Implement Notification In The Registration Process.
Having created the notify behavior, to implement the SMS notification we need to add the notify behavior to our Users Model.
Add Notify Behavior to Users Table
To add the notify behavior to the Users table, open the directory src\Model\Table and edit the UsersTable.php file. Add the following code to the initialize() function:
Create Binding and Send Notification after successful registration
Now we will implement the notify behavior through the Users table on successful registration. Go to the src\Controller directory and edit the UsersController.php file. Edit the add() function to look as below:
Testing
To test, open up your app in a browser and navigate to /register. E.g: localhost/cake-notifier/register.
- Create a user account with your phone number included.
- On successful registration, you will receive a welcome message.
Conclusion
Congratulations! You have successfully added SMS notification to your user registration app. Now that you have completed this tutorial, you can send SMS notifications for different actions and events such as sending notifications for changes to user account details.
Github: igreatdev
Website: https://www.igreatdev.com/
Related Posts
Related Resources
Twilio Docs
From APIs to SDKs to sample apps
API reference documentation, SDKs, helper libraries, quickstarts, and tutorials for your language and platform.
Resource Center
The latest ebooks, industry reports, and webinars
Learn from customer engagement experts to improve your own communication.
Ahoy
Twilio's developer community hub
Best practices, code samples, and inspiration to build communications and digital engagement experiences.


