Integrate Twilio WhatsApp Business API with a Symfony Application
Time to read:
With a monthly active user base of over 2 billion people, WhatsApp has risen to one of the most popular messaging platforms in the world today. This has established it as a viable means of sending notifications to clients.
What's more, by using the WhatsApp Business API by Twilio, you can establish a two-way communication channel with your customer and improve your service offering, such as order processing and management for instance.
In this article, you will learn how to do this by integrating a PHP implementation of the Eliza program with the WhatsApp Business API, making it possible to chat with Eliza via WhatsApp.
Prerequisites
To follow this tutorial, you need the following things:
- A basic understanding of and familiarity with PHP and Symfony
- A Twilio account.
- PHP 8.0
- Git
- Composer globally installed
- The Symfony CLI
- Ngrok
Set up the WhatsApp Testing Sandbox
The first thing to do is to set up a Twilio Sandbox via the developer console, which you can find under "Explore Products > Messaging > Try it out > Send a WhatsApp message". To do this, send a message with the specified code to the displayed phone number, as shown in the screenshot below.
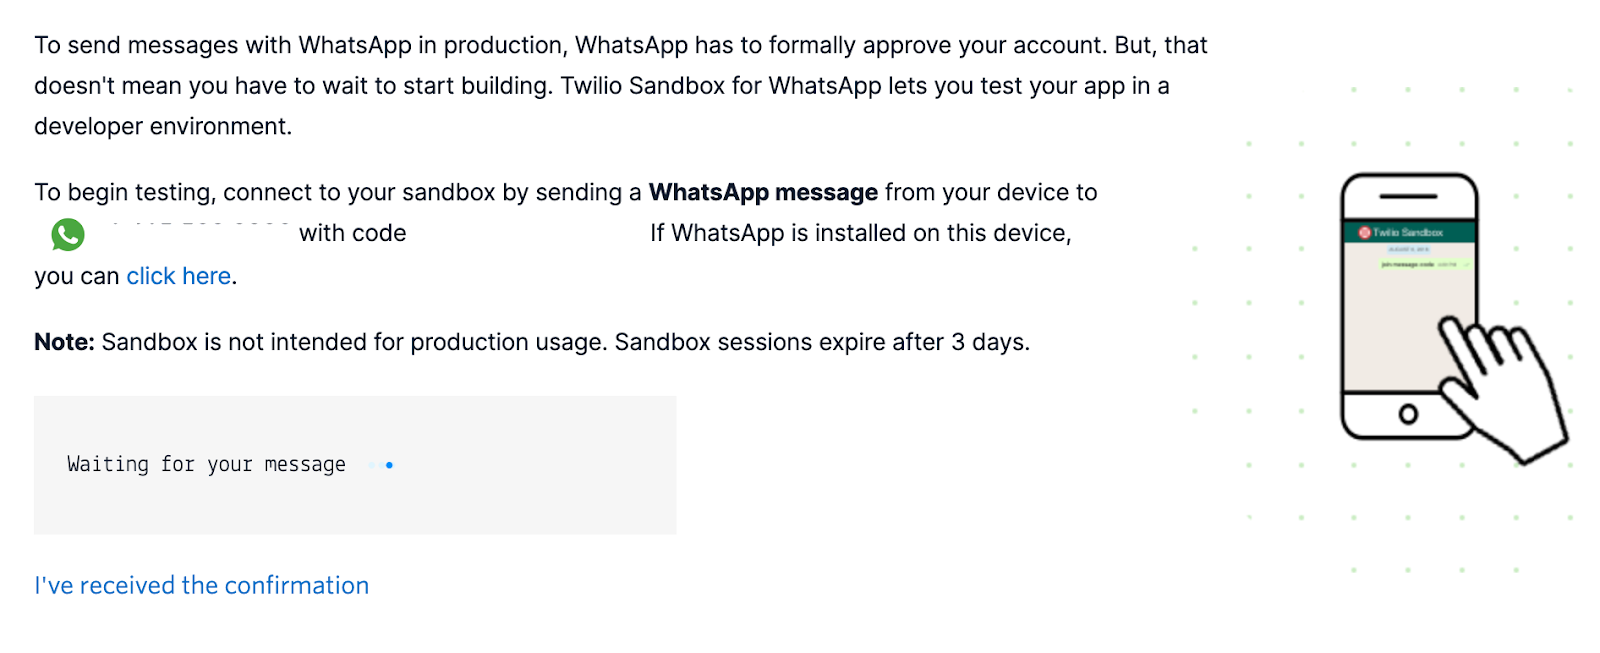
Once this is done, you will see a message similar to the one shown below:

Create a new Symfony application
In the terminal, create a new Symfony application and change into the newly created application directory by running the following commands.
Set the required environment variables
Next, make a local copy of .env, to later store the required environment variables file, by running the following command.
After that, add the following to the end of the newly created .env.local file
With that done, you need to retrieve three key parameters:
- The phone number provided for testing
- Your Twilio Account SID
- Your Twilio Auth Token
Copy the WhatsApp phone number, as shown in the earlier screenshot, and paste it in place of <TWILIO_WHATSAPP_NUMBER> in .env.
Next, retrieve your Twilio Account SID and Auth Token from your Twilio Console dashboard.
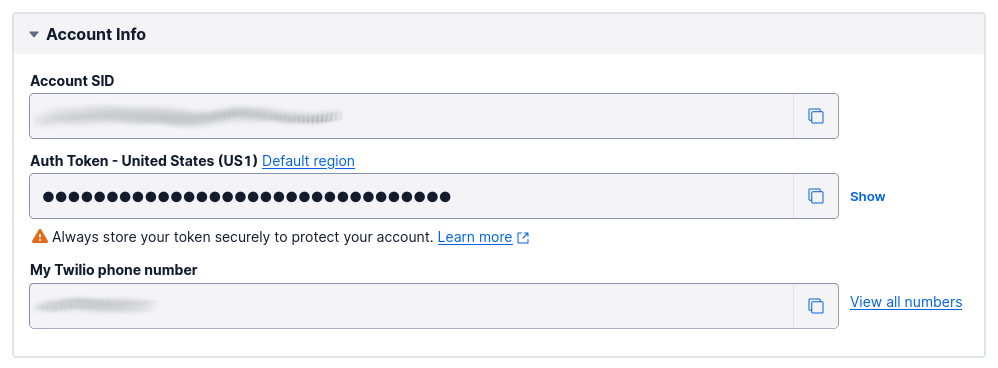
Login to the Twilio Console dashboard, which contains your Twilio Auth Token and Account SID. Copy them and paste them in place of <TWILIO_ACCOUNT_SID> and <TWILIO_AUTH_TOKEN> respectively, in .env.
Implement "Eliza"
Next, implement the Eliza model to process the user’s message and provide a response. Start by creating a new folder named Model in the src folder. Then, in src/Model, create a new file named Eliza.php and add the following code to it.
The class is declared abstract because it won’t be initialised. The constant declarations will be used by the class to generate a response to the input from the user. The algorithm for responding to the user is roughly as follows:
- Remove punctuation marks from user input.
- Find a string in the
MATCHconstant array which is present in the user input. - If a string in
MATCHis present, remove it and then change the remaining words of the input (if any) with the appropriate reflection (from theREFLECTIONSconstant array). - If no string in
MATCHis present in the user input, use the last array in theRESPONSESarray to generate a response.
To implement this algorithm, add the following function to src/Model/Eliza.php
Next, add a function to generate the opening ("hello") response when communication is initiated by the user, by adding the following function to Eliza.php
Finally, add a function to return a closing (goodbye) response when the appropriate text is sent from the user, by adding the following function to src/Model/Eliza.php.
Implement a service to send WhatsApp messages
Having established a model to respond to user input, the next thing to do is implement a service which will send messages to the user via the Twilio WhatsApp Business API. The first thing to do is install the Twilio PHP Helper Library by running the following command.
Next, in the src folder, create a new folder named Service. Then, in src/Service, create a new file named WhatsAppService.php and add the following code to it.
This service has a constructor that takes three parameters:
- The verified WhatsApp Twilio number (or that of the sandbox for development)
- The Account SID
- The Auth Token for the Twilio account
Using the SID and Auth Token, a Twilio Client is created.
In the send() function, the Twilio client and verified WhatsApp Twilio number are used to send a WhatsApp message using the message content and phone number (in E.164 format) provided as function arguments.
Next, bind the environment variables to variable names which can then be made available by Symfony throughout the application. To do that, add the following to the _defaults key in config/services.yaml
Add a controller
Having prepared a model to respond to user input, and a service to dispatch the response via WhatsApp, the next thing to do is provide an endpoint for the Symfony application to receive requests from Twilio and handle accordingly.
For this, we will create a controller which will receive a POST request, process it, and trigger a response via WhatsApp to the user.
To do that, first add the required dependencies by running the following commands.
The first dependency is Doctrine Annotations which provides support for implementing custom annotation functionality for PHP classes and functions. The second is Symfony's Maker bundle, which is used for creating controllers, entities, and the like.
Next, create a new controller by running the following command.
Then, open the newly created file (src/Controller/ElizaController.php) and update it to match the following.
Twilio’s request to your application contains two key parameters:
Fromwhich contains the phone number of the userBodywhich contains the message sent by the user
You can see the other parameters here.
Using these parameters, a message is sent via WhatsApp to the provided phone number. The content of the message is generated via the respondTo() function in the Eliza model.
Next, run the application using the following command.
By default, your application will run on port 8000. So next, expose port 8000 (or the revised port, if port 800 was already in use on your development machine) on ngrok by running the following command in a new terminal window (or tab).
A UI will be displayed in your terminal with the public URL of your tunnel and other status and metrics information about connections made over your tunnel as shown below.

Next, head to the Twilio Sandbox for WhatsApp, which you can find under "Explore Products > Messaging > Settings > WhatsApp sandbox settings", and provide the ngrok Forwarding URL plus /eliza as the URL for the "WHEN A MESSAGE COMES IN" field.
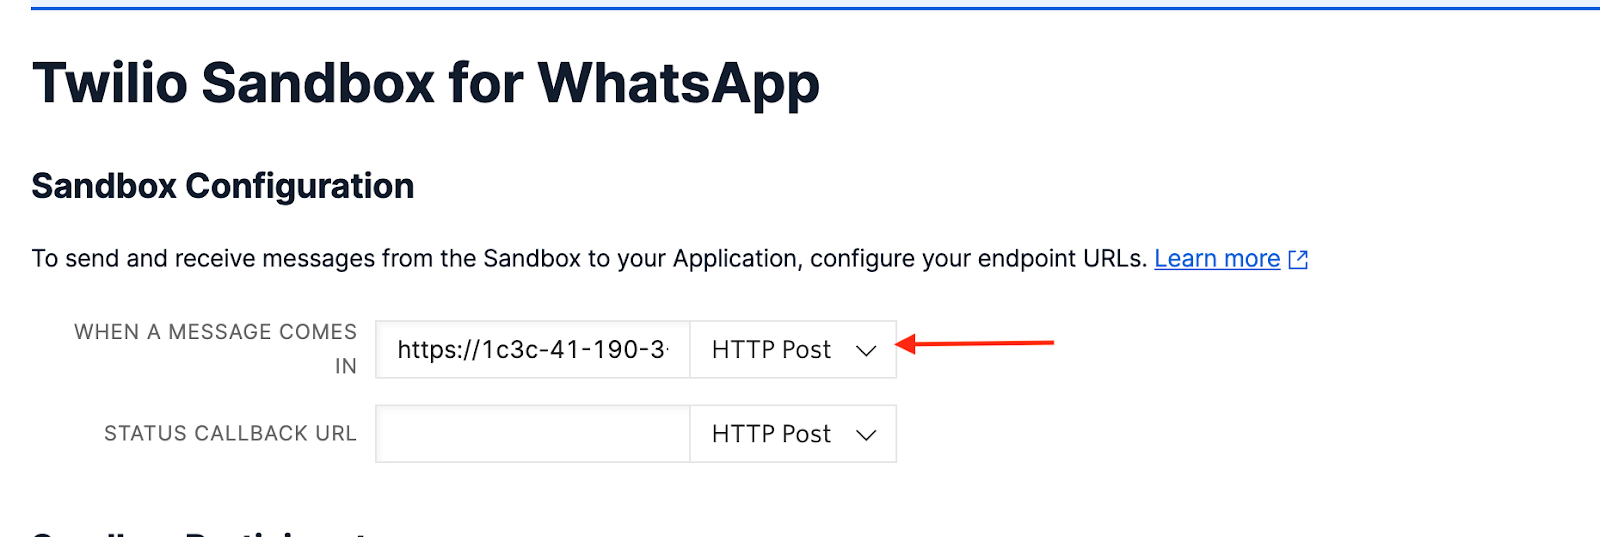
Scroll to the bottom of the page and click "Save".
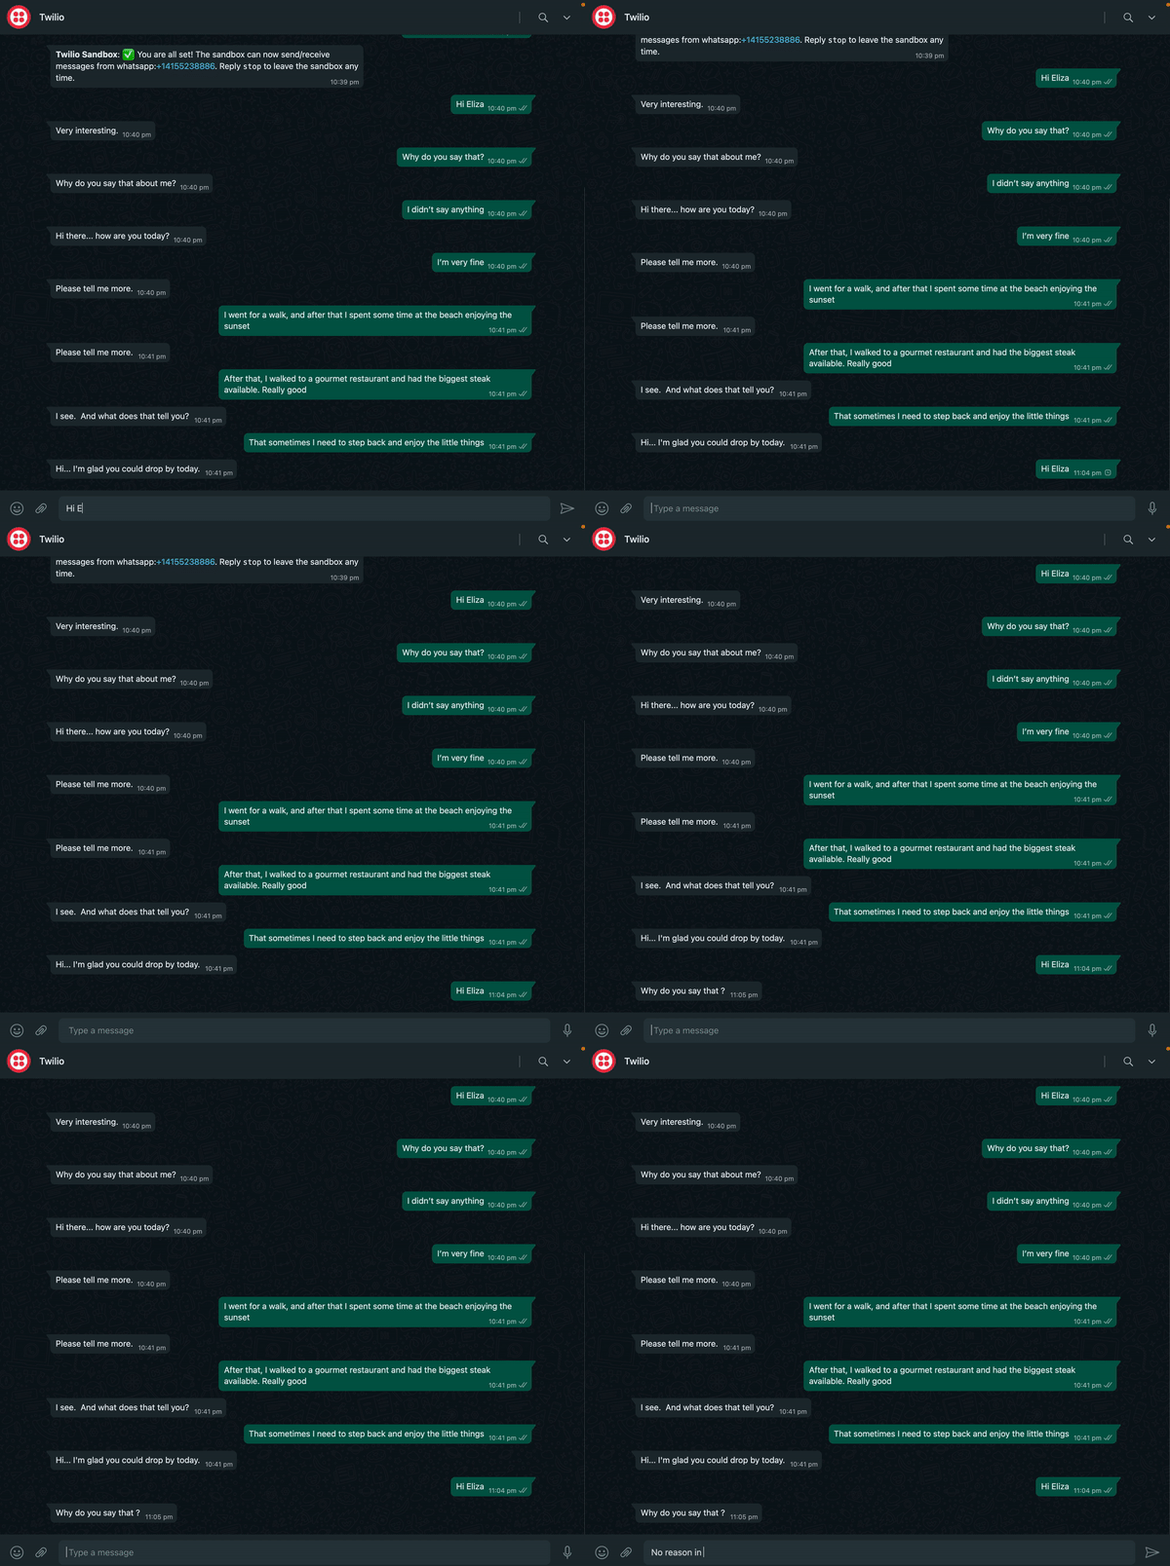
With this done, send a message to the earlier copied WhatsApp number to start a conversation with Eliza. A conversation with Eliza can be seen in the gif below.
That's how to integrate Twilio's WhatsApp Business API with a Symfony application
In this tutorial, you learned how to integrate the Twilio WhatsApp Business API into a Symfony application. This opens up a host of possibilities, as it makes it possible to not only send notifications but also to respond to messages from customers. This makes your product/service much more accessible and valuable.
While you used a sandbox environment for development, you can enable your Twilio number for WhatsApp here. You can review the final codebase on GitHub.
Until next time, bye for now.
Joseph Udonsak is a software engineer with a passion for solving challenges – be it building applications, or conquering new frontiers on Candy Crush. When he’s not staring at his screens, he enjoys a cold beer and laughs with his family and friends.
Related Posts
Related Resources
Twilio Docs
From APIs to SDKs to sample apps
API reference documentation, SDKs, helper libraries, quickstarts, and tutorials for your language and platform.
Resource Center
The latest ebooks, industry reports, and webinars
Learn from customer engagement experts to improve your own communication.
Ahoy
Twilio's developer community hub
Best practices, code samples, and inspiration to build communications and digital engagement experiences.


